Advertisement
- 1 Getting Started
- 2 View History
- 3 Follow Track
-
4
Settings
- 4.1 Data Page
- 4.2 Smart Lap
- 4.3 Set Alert
- 4.4 Smart Pause
- 4.5 Data Record
- 4.6 GPS System
- 4.7 Change System Settings
- 4.8 Bluetooth
- 4.9 Configure Auto Scroll
- 4.10 Enable File Saving Mode
- 4.11 Start Reminder
- 4.12 View Memory Usage
- 4.13 Reset Data
- 4.14 View Firmware Version
- 4.15 ANT+/BLE Sensors
- 4.16 Altitude
- 4.17 Personalize User Profile
- 4.18 Personalize Bike Profile
- 5 Bryton Active App Advanced Settings
- 6 Specifications
- 7 Battery Information
- 8 Install Rider 420
- 9 Install Speed/Cadence/Dual Sensor
- 10 Install Heart Rate Belt
- 11 Wheel Size and Circumference
- 12 Basic Care For Your Rider 420
- 13 Data Fields
- 14 Documents / Resources
Getting Started
This section will guide you through the basic preparations before you start using your Rider 420. Rider 420 is equipped with barometer which shows the real time altitude.
NOTE: To adjust the altitude settings on Rider 420, see the section "Altitude".
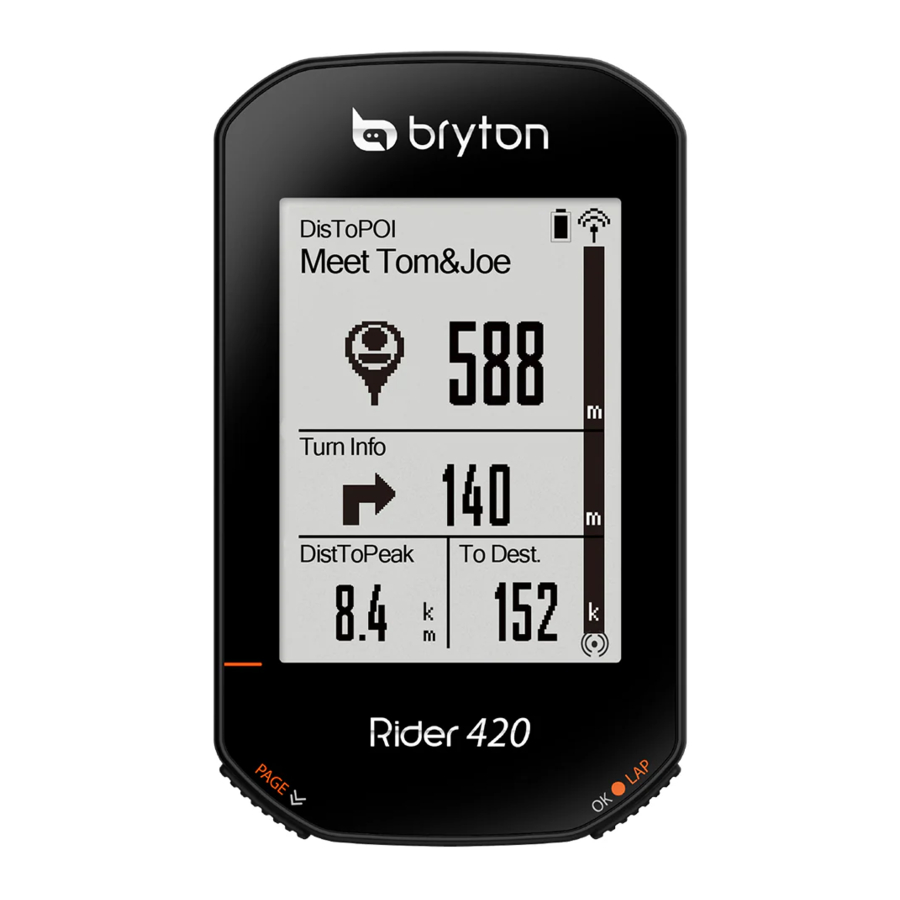
Your Rider 420

- Power/Backlight (
![]() )
) - Press to turn the device on.
- Press to turn on/off the backlight while the device is on.
- Long press to turn the device off.
- BACK (
![]() )
) - In Cycling mode, press to enter Menu page.
- In Menu, press to return to the previous page or cancel an operation.
- When recording, press to pause recording and enter the Menu.
- OK/LAP (
![]() )
) - In Menu, press to enter submenu or confirm a selection.
- In Cycling mode, press to start recording. When recording, press to mark the lap.
- PAGE (
![]() )
) - In Cycling mode, press to switch meter screen pages.
- In Menu, press to scroll through the menu options.
 )
)  )
)  )
)  )
) Accessories
The Rider 420 comes with the following accessories:
- USB cable
- Bike mount
Optional items:
- Smart Heart Rate Sensor
- Smart Cadence Sensor
- Race Mount
- Smart Speed Sensor
- Smart Speed/Cadence Dual Sensor
- Sport Mount
Status Icons
| Icon | Description |
| Bike Type | |
 | Bike 1 |
 | Bike 2 |
| GPS Signal Status | |
 | No signal (not fixed) |
 | Weak signal |
 | Strong signal |
| Power Status | |
 | Full battery |
 | Half battery |
 | Low battery |
 | Heart Rate Sensor is active |
 | Cadence Sensor is active |
 | Speed Sensor is active |
 | Dual Sensor is active |
 | Power Meter is active |
 | Log Record in progress |
 | Recording is paused |
 | Current speed is faster/slower than average speed. |
NOTE: Only the active icons are displayed on the screen.
Charge your Rider 420
Connect Rider 420 to a PC to charge the battery for at least 4 hours. Unplug the device when it is fully charged.

- You may see a white screen when the battery is really low. Keep the device plugged for several minutes, it will automatically turn-on after battery is properly charged.
- The temperature suitable for charging battery is 0°C ~ 40°C. Beyond this temperature range, charging will be terminated and the device will draw power from battery.
Turn On Rider 420
Press ![]() to turn on the device.
to turn on the device.
Initial Setup
When turning Rider 420 on for the first time, you will need to follow on screen instructions to complete setup.
- Select the display language.
- Select the unit of measurement.
NOTE: Only when you choose English for the display language, you will need to select the unit of measurement. Otherwise, default would be metric unit.
Acquire Satellite Signals
Once the Rider 420 is turned on, it will automatically search for satellite signals. It may take 30 to 60 seconds to acquire signals. Please make sure you acquire the satellite signal for the first time use.
The GPS signal icon ( ) appears when GPS is fixed.
- If the GPS signal is not fixed, an
![]() icon appears on the screen.
icon appears on the screen. - Please avoid the obstructed environments since they might affect the GPS reception.
![]()
 icon appears on the screen.
NOTE: To improve the GPS accuracy, you can set 1 sec mode as your recording frequency and update GPS regularly by using Bryton Update Tool to update GPS data.
Ride Your Bike with Rider 420
- Free ride:
In meter view, measurement starts and stops automatically in sync with the movement of the bicycle. - Start an exercise and record your data:
In meter view, press![]() to start recording, press
to start recording, press ![]() to pause recording and enter the Menu. Then, choose to save your workout data.
to pause recording and enter the Menu. Then, choose to save your workout data.
 to pause recording and enter the Menu. Then, choose to save your workout data.
NOTE: If you continue to proceed without pressing  to record, Rider 420 would pop up a reminder to ask you to record when motion of bike is detected. To set the frequency of start reminder, see the section "Start Reminder".
Reboot Rider 420
To reboot the Rider 420, press two keys ( ) at the same time.
Share Your Records
Upload Your Tracks to Brytonactive.com
- Sign up/log in Brytonactive.com
- Go to https://active.brytonsport.com.
- Register a new account or use your current account to log in.
- Connect to PC
Turn on your Rider 420 and connect it to your computer by USB cable. - Share Your Records
- Click "+" on the upper right corner.
- Drop FIT, BDX, GPX file(s) here or Click "Select files" to upload tracks.
- Click "Activities" to check uploaded tracks.
Share Your Tracks to Strava.com
- Sign up/log in on Strava.com
- Go to https://www.strava.com
- Register a new account or use your current Strava account to log in.
- Connect to PC
Turn on your Rider 420 and connect it to your computer by USB cable. - Share Your Records
- Click "+" on the top right corner of Strava page and then click "File".
- Click "Select Files" and select FIT files from Bryton device.
- Enter information about your activities and then click "Save & View".
Auto Sync Tracks to Bryton Active App
No more uploading tracks manually after riding. Bryton Active App automatically syncs your track after pairing with your GPS device.
- Scan QR code below to download Bryton Active App or go to Google Play/App Store to search Bryton Active App. Then, log in or create an account.
![]()
http://download.brytonsport.com/inst.html
![]()


- Go to Settings > Device Manager > + > Rider 420 to add your GPS device.
![]()
- Check if UUID shown on app is the same as your device. Add "Yes" to confirm adding. If it is wrong UUID, press NO to add it again.
![]()
Note: Each device has its own unique UUID. You can nd it on the back of the device. - Successfully added! Turn on Auto Now, new tracks will be automatically uploaded to Bryton Active App.
![]()


NOTE: Bryton Active App syncs with Brytonactive.com. If you already have brytonactive.com account, please use the same account to log in to Bryton Active App and vice versa.
Bryton Update Tool
Bryton Update Tool is the tool for you to update GPS data, firmware and download Bryton Test.
- Go to http://www.brytonsport.com/#/supportResult?tag=BrytonTool and download Bryton Update Tool.
- Follow the on-screen instructions to install Bryton Update Tool.
Update GPS Data
The newer GPS data can speed up the GPS acquisition. We highly recommend you to update GPS data for every 1-2 weeks.
Update Firmware
Bryton releases a new firmware version on irregular basis to add new functions or correct bugs for better and more stable performance. It is recommended that you update firmware once new firmware available. Firmware updates usually take longer to download and install. Do not remove USB cable during firmware updating.
View History
You can view exercise record on your device right after your ride, and delete any unwanted record to gain more storage.
View Exercise/Training Record
Rider 420 provides graphical track summary, detail workout data, lap data and graphical analysis for you to have a better idea of your workout performance.
To view your history:

- In the main screen, press
![]() to select View History and press
to select View History and press ![]() to enter.
to enter. - Press
![]() to enter View.
to enter View. - Press
![]() to select a record and press
to select a record and press ![]() to view more detail info.
to view more detail info.
 to select View History and press
  to enter.
NOTE: You can also upload your history to brytonactive.com or Bryton Active App to keep track of all your ride data.
Delete History
To delete your history:

- In the main screen, press
![]() to select View History and press
to select View History and press ![]() to enter.
to enter. - Press
![]() to select Delete and press
to select Delete and press ![]() to enter.
to enter. - Press
![]() to select a record and press
to select a record and press ![]() to delete the selected history.
to delete the selected history. - A "Backup data to web first. Delete?" message appears on the screen. To delete the data, press
![]() to select Yes and press
to select Yes and press ![]() to confirm.
to confirm.
 to select Yes and press
 History Flow

Follow Track
Rider 420 provides 3 ways for you to create tracks:
- Plan trips via Bryton Active App.
- Import trails (.GPX) from 3rd-party platforms.
- Auto sync trails from Strava, Komoot and RideWithGPS. With turn by turn guidance, the device off ers info for distance and direction before every turn.
Note: Turn by turn guidance function only supports trips planned by Bryton Active App and trips imported to Bryton Active App.
Create Track
Plan Trips via Bryton Active App

- On Bryton Active App, tap Plan Trip to enter. To plan trip, simply put Start point on desired locations by tapping on the map or tap
![]() and enter locations in the slide menu.
and enter locations in the slide menu. - Choose desired mode for the app to suggest appropriate trails for you.
- Put Way points and End point to complete planning the trip.
- Tap "
![]() " and edit the name of your trips.
" and edit the name of your trips. - Tap Upload to upload planned trips to server.
- Tap < to be back to Course menu. Enter your planned trip and tap
![]() to download the planned trips to the device.
to download the planned trips to the device. - In the device Main Menu, select Follow Track > View
Find the planed route and press![]() to start following the track.
to start following the track.
 and enter locations in the slide menu.
 " and edit the name of your trips.
 to download the planned trips to the device.
Import Trails (.GPX) from 3rd-Party Platforms

- Go to 3rd-Party websites/platforms.
- Select the route you would like to download.
- Select. GPX file and download.
- Click "Open in Active" (For IOS phone).
Open files with Bryton Active App (For Android phone). - Name your route and click "OK".
- Go to "My Routes".
- You can see the route that your imported to Bryton Active App.
- Click the route to see more details.
- Click right upper corner icon
![]() to download the route to your Bryton device.
to download the route to your Bryton device. - In the device Main Menu, select Follow Track > View
Find the planed route and press![]() to start following the track.
to start following the track.
Note: To view step by step tutorial video, please click Bryton Active | 3rd Party Routes Support - Import.gpx le to Bryton Active
Auto Sync Trails from Strava/Komoot/RideWithGPS

- Go to Strava/Komoot/RideWithGPS to create a route.
- Start to plan your route.
- Click Save and enter the route name.
- Go to Course in Bryton Active App.
- Enable STRAVA/Komoot/RideWithGPS to set up a link.
- Go to My Routes and select the route.
- Click right upper corner icon
![]() to download the route to your Bryton device.
to download the route to your Bryton device. - In the device Main Menu, select Follow Track > View
Find the planed route and press![]() to start following the track.
to start following the track.
Add POI
Before adding POI, please ensure that you have already imported a route or planned a trip and that it appears in Bryton Active App "My Route".

- Go to Course > My Routes in Bryton Active App.
- Select the route you would like to add POIs.
- Tap
![]() to expand POI menu.
to expand POI menu. - Tap
![]() and choose POI type.
and choose POI type. - Slide the icon on the bar below to place the POI anywhere along your route.
- Tap
![]() to confirm and save POI placement.
to confirm and save POI placement. - Click the
![]() icon in the upper right corner to download the route to your Bryton device.
icon in the upper right corner to download the route to your Bryton device. - In the device Main Menu, select Follow Track > View
Find the planed route and press![]() to start following the track.
to start following the track.
 to expand POI menu.

Note: To view on-device POI info, please add the related POI data fields to the device data pages [from the Follow Track category]. It is also recommended to place these data fields in larger grid areas to see more complete information.
To know more about how to add POI data fields to the device data pages, see "Data Page" and "Grid Setting".
View/Delete Track
You can veiw and delete your tracks.
View Tracks:

- In Main Menu, press
![]() to select Follow Track > View and press
to select Follow Track > View and press ![]() .
. - Press
![]() to select the track and press
to select the track and press ![]() to view the track.
to view the track.
 to select Follow Track > View and press
 Delete Your Tracks:

- In the Main Menu, press
![]() to select Follow Track > Delete and press
to select Follow Track > Delete and press ![]() .
. - Press
![]() to choose the track and press
to choose the track and press ![]() .
. - A message "Do you want to delete?" pops up. Press
![]() to select Yes and press
to select Yes and press ![]() to confirm section.
to confirm section.
Settings
In Settings, you can customize Exercises settings, GPS system, General settings, Sensor settings, Altitude, Bike and User profile. You can also customize most used device settings via Bryton Active App.

- In the main screen, press
![]() to select Settings.
to select Settings. - Press
![]() to enter the Settings menu.
to enter the Settings menu.
Data Page
You can set the display settings for the Meter and Lap or you can customize data page via Bryton Active App. See "Grid Setting".
Meter Display

- In the Settings menu, press
![]() to enter Exercises and press
to enter Exercises and press ![]() again to enter Data Page.
again to enter Data Page. - Press
![]() to enter Data Page and change Auto to Manual and press
to enter Data Page and change Auto to Manual and press ![]() to confirm selection.
to confirm selection. - Press
![]() to select Data Page and press
to select Data Page and press ![]() to enter.
to enter. - Press
![]() to select Data Page 1, Data Page 2, Data Page 3, Data Page 4 or Data Page 5 and press
to select Data Page 1, Data Page 2, Data Page 3, Data Page 4 or Data Page 5 and press ![]() to enter the selected page.
to enter the selected page. - Press
![]() to select the number of Data Fields you need and press
to select the number of Data Fields you need and press ![]() to confirm.
to confirm. - Press
![]() to select the data you would like to make change and press
to select the data you would like to make change and press ![]() to confirm.
to confirm. - Press
![]() to select the desired Category and press
to select the desired Category and press ![]() to confirm.
to confirm. - Press
![]() to select the desired data and press
to select the desired data and press ![]() to confirm.
to confirm. - Press
![]() to exit this menu.
to exit this menu.
 to exit this menu.
NOTE: The number of data fields shown on the screen depends on the "Data fields" selection.

NOTE: If Data Page is set to Auto, Rider 420 will automatically adjust its data field display when detecting the paired sensors.

Lap Display

- In the Settings menu, press
![]() to enter Exercises > Data Page.
to enter Exercises > Data Page. - Press
![]() and then
and then ![]() to enter Lap.
to enter Lap. - Press
![]() to enter Data Fields.
to enter Data Fields. - Press
![]() to select the number of Data Fields and press
to select the number of Data Fields and press ![]() to confirm selection.
to confirm selection. - Press
![]() to select the data you would like to make change and press
to select the data you would like to make change and press ![]() to confirm.
to confirm. - Press
![]() to select the desired Category and press
to select the desired Category and press ![]() to confirm.
to confirm. - Press
![]() to select the desired data and press
to select the desired data and press ![]() to confirm.
to confirm. - Press
![]() to exit this menu.
to exit this menu.
 and then
 Smart Lap
With Smart Lap feature, you can use your device to automatically mark the lap at a specific location or after you have traveled a specific distance.
Lap by Location

- In the Settings menu, press
![]() to enter Exercises. Press
to enter Exercises. Press ![]() and then
and then ![]() to select Samrt Lap.
to select Samrt Lap. - Press
![]() to enter editing menu. Press
to enter editing menu. Press ![]() to select Location and press
to select Location and press ![]() to confirm.
to confirm. - A "Use current location as Lap" message pops up on the screen. Press
![]() to con rm this setting.
to con rm this setting. - Press
![]() to exit this menu.
to exit this menu.
NOTE: If the GPS signal is not fixed, a "No GPS Signal. Searching GPS, please wait" message appears on the screen. Check if GPS is on and make sure you step outside to acquire signal.
Lap by Distance

- In the Settings menu, press
![]() to enter Exercises. Press
to enter Exercises. Press ![]() and then
and then ![]() to select Samrt Lap.
to select Samrt Lap. - Press
![]() to enter editing menu. Press
to enter editing menu. Press ![]() to select Distance and press
to select Distance and press ![]() to confirm.
to confirm. - Press
![]() to select your desired distance and press
to select your desired distance and press ![]() to confirm.
to confirm. - Press
![]() to exit this menu.
to exit this menu.
Set Alert
With the Alert feature, the device displays a message to notify you if:
- your heart rate exceeds or drops below a specific number of beats per minute (bpm).
- you exceed or drop below a custom speed setting during your ride.
- your cadence speed exceeds or drops below a specific number of revolutions of the crank arm per minute (rpm).
- you reach a certain amount of distance for the long workouts.
- you reach a certain amount of time for the long workouts.

- In the Settings menu, press
![]() to enter Exercises. Press
to enter Exercises. Press ![]() and then
and then ![]() to select Alert.
to select Alert. - Press
![]() to enter editing menu. Press
to enter editing menu. Press ![]() to select Time, Distance, Speed, HR or Cadence and press
to select Time, Distance, Speed, HR or Cadence and press ![]() to configure the necessary settings.
to configure the necessary settings. - Press
![]() to select your desired setting and press
to select your desired setting and press ![]() to confirm.
to confirm. - Press
![]() to exit this menu.
to exit this menu.
Smart Pause
When you have a lot of obstacles along your route such as traffic lights, crosswalk, etc., this can really impact your recorded data. When the function is activated, the time and distance will automatically pause once you stop moving and resume once you start riding to enhance your data efficiency.

- In the Settings menu, press
![]() to enter Exercises. Press
to enter Exercises. Press ![]() and then
and then ![]() to select Smart Pause.
to select Smart Pause. - Press
![]() to enter submenu and press
to enter submenu and press ![]() to select Yes and press
to select Yes and press ![]() to confirm.
to confirm. - Press
![]() to exit this menu.
to exit this menu.
Data Record
With Data Record function, you can set your odometer and activate 1 second mode to get more accurate data.
Set ODO

- In the Settings menu, press
![]() to enter Exercises. Press
to enter Exercises. Press ![]() and then press
and then press ![]() to select Data Record.
to select Data Record. - Press
![]() to enter ODO Setup and press
to enter ODO Setup and press ![]() to select desired setting and press
to select desired setting and press ![]() to confirm.
to confirm. - Press
![]() to exit this menu.
to exit this menu.
 to select desired setting and press
 NOTE: All means the odometer would show the cumulative distance of all trips; Recorded would only show the cumulative distance of recorded trips.
NOTE: If you would like to reset ODO, see "Reset ODO".
Enable 1sec Mode

- In the Settings menu, press
![]() to enter Exercises. Press
to enter Exercises. Press ![]() and then press
and then press ![]() to select Data Record.
to select Data Record. - Press
![]() and then press
and then press ![]() to enter Recording.
to enter Recording. - Press
![]() to select 1 sec mode and press
to select 1 sec mode and press ![]() to confirm.
to confirm. - Press
![]() to exit this menu.
to exit this menu.
GPS System
Rider 420 has full GNSS (Global Navigation Satellite System) support including GPS, GLONASS (Russia), BDS (China), QZSS (Japan) and Galileo (EU). You can select the suitable GPS Mode according to your location to enhance accuracy or suit your needs.
Choose Different Satellite Navigation System
This setting allows you to switch between different satellite navigation systems to suit you best.

- In the Settings menu, press
![]() and then press
and then press ![]() to select GPS System.
to select GPS System. - Press
![]() to enter GPS Mode.
to enter GPS Mode. - In the GPS Mode menu, press
![]() to select the desired GPS mode and press
to select the desired GPS mode and press ![]() to confirm.
to confirm. - GPS+Beidou: GPS + BeiDou Navigation Satellite System.
By April 2018, BeiDou is offering service in the Asia-Pacific region. Choose this combination if you're in this region for best accuracy. - GPS+ Glonass: GPS + GLONASS Navigation Satellite System.
Glonass is the second navigational system working with global coverage and of comparable precision. Choose this combination if you're in NON Asia-Paci c region for best accuracy. - GPS+Gal+QZ: GPS+Galileo+QZSS Navigation Satellite System.
Consume less power than the two selection above, with sufficient accuracy for normal use. - Power Save: Trade-o accuracy to achieve maximum battery life. Use this mode in open sky.
- Off: Turn-o GPS function. Choose this to save power when GPS signal is not available, or when GPS information is not required (such as indoor use).
- GPS+Beidou: GPS + BeiDou Navigation Satellite System.
- Press
![]() to exit this menu.
to exit this menu.
NOTE:
- Enabling either GLONASS or BDS also activates GPS, QZSS and Galileo satellite navigation system
Change System Settings
You can customize the device system settings such as backlight off, key tone, sound, time/unit, on-screen display language.
Backlight Off

- In the Settings menu, press
![]() and then press
and then press ![]() to select General.
to select General. - Press
![]() to enter System.
to enter System. - Press
![]() to enter Backlight Off.
to enter Backlight Off. - Press
![]() to select desired setting and press
to select desired setting and press ![]() to confirm.
to confirm. - Press
![]() to exit this menu.
to exit this menu.
Key Tone

- In the Settings menu, press
![]() and then press
and then press ![]() to select General.
to select General. - Press
![]() to enter System.
to enter System. - Press
![]() to select Key Tone and press
to select Key Tone and press ![]() to confirm.
to confirm. - Press
![]() to select desired setting and press
to select desired setting and press ![]() to confirm.
to confirm. - Press
![]() to exit this menu.
to exit this menu.
Sound

- In the Settings menu, press
![]() and then press
and then press ![]() to select General.
to select General. - Press
![]() to enter System.
to enter System. - Press
![]() to select Sound and press
to select Sound and press ![]() to confirm.
to confirm. - Press
![]() to select desired setting and press
to select desired setting and press ![]() to confirm.
to confirm. - Press
![]() to exit this menu.
to exit this menu.
Time/Unit


- In the Settings menu, press
![]() and then press
and then press ![]() to select General.
to select General. - Press
![]() to enter System.
to enter System. - Press
![]() to select Time/Unit and press
to select Time/Unit and press ![]() to confirm.
to confirm. - Press
![]() to select setting you would like to edit and press
to select setting you would like to edit and press ![]() to confirm.
to confirm. - Press
![]() to select the desired setting/format and press
to select the desired setting/format and press ![]() to confirm.
to confirm. - Press
![]() to exit this menu.
to exit this menu.
Contrast
You can adjust contrast on your device.

- In the Settings menu, press
![]() and then press
and then press ![]() to select General.
to select General. - Press
![]() to enter System.
to enter System. - Press
![]() to select Contrast and press
to select Contrast and press ![]() to confirm.
to confirm. - Press
![]() to adjust desired contrast.
to adjust desired contrast. - Press
![]() to exit this menu.
to exit this menu.
Language

- In the Settings menu, press
![]() and then press
and then press ![]() to select General.
to select General. - Press
![]() to enter System.
to enter System. - Press
![]() to select Language and press
to select Language and press ![]() to confirm.
to confirm. - Press
![]() to select desired language and press
to select desired language and press ![]() to confirm.
to confirm. - Press
![]() to exit this menu.
to exit this menu.
Bluetooth
Before pairing Rider 420 with your bluetooth enabled mobile phone, make sure the bluetooth function of your mobile phone and Rider 420 is turned on.
Enable Bluetooth

- In the Settings menu, press
![]() and then press
and then press ![]() to select General.
to select General. - Press
![]() to select Bluetooth and press
to select Bluetooth and press ![]() to confirm.
to confirm. - Press
![]() to turn on/off bluetooth.
to turn on/off bluetooth. - Press
![]() to exit this menu.
to exit this menu.
Configure Auto Scroll
When the feature is enabled, the device will automatically switch pages at the preset time.

- In the Settings menu, press
![]() and then press
and then press ![]() to select General.
to select General. - Press
![]() to select Auto Scroll and press
to select Auto Scroll and press ![]() to confirm.
to confirm. - Press
![]() to select the setting that you want to change and press
to select the setting that you want to change and press ![]() to enter its submenu.
to enter its submenu. - Auto scroll: enable/disable the auto switch.
- Interval: set the interval time.
- Press
![]() to exit this menu.
to exit this menu.
Enable File Saving Mode
When the feature is enabled, the device will automatically overwrite from your oldest records when memory storage is full.

- In the Settings menu, press
![]() and then press
and then press ![]() to select General.
to select General. - Press
![]() to select File Saving and press
to select File Saving and press ![]() to confirm.
to confirm. - Press
![]() to select "On" to enable device to overwrite history.
to select "On" to enable device to overwrite history. - Press
![]() to exit this menu.
to exit this menu.
Start Reminder
When Rider 420 detects the motion of your bike, it would pop up a reminder to ask you if you would like to record or not. You can set the frequency of start reminder.

- In the Settings menu, press
![]() and then press
and then press ![]() to select General.
to select General. - Press
![]() to select Start Remind and press
to select Start Remind and press ![]() to confirm.
to confirm. - Press
![]() to select the desired setting and press
to select the desired setting and press ![]() to confirm.
to confirm. - Press
![]() to exit this menu.
to exit this menu.
View Memory Usage
View the storage status of the device.

- In the Settings menu, press
![]() and then press
and then press ![]() to select General.
to select General. - Press
![]() to select Memory and press
to select Memory and press ![]() to confirm. The storage status is displayed on the screen.
to confirm. The storage status is displayed on the screen. - Press
![]() to exit this menu.
to exit this menu.
Reset Data
You can restore your Rider 420 to factory settings.

- In the Settings menu, press
![]() and then press
and then press ![]() to select General.
to select General. - Press
![]() to select Data Reset and press
to select Data Reset and press ![]() to confirm.
to confirm. - Press
![]() to select "YES" and press
to select "YES" and press ![]() to confirm factory reset.
to confirm factory reset. - Press
![]() to exit this menu.
to exit this menu.
NOTE: Factory reset operation will restore device to factory default settings. In addition to deleting all the tracks, it will also delete pre-paired sensors but will not remove UUID from the account you added in.
View Firmware Version
You can view your device current firmware version.
- In the Settings menu, press
![]() and then press
and then press ![]() to select General.
to select General. - Press
![]() to select About and press
to select About and press ![]() to confirm.
to confirm.
Current firmware version is displayed on the screen. - Press
![]() to exit this menu.
to exit this menu.
ANT+/BLE Sensors
Rider 420 is compatible with both ANT+ and BLE sensors. You can customize the respective sensor settings such as rescan the sensor to pair with your device or enable/disable the function.

- In the Settings menu, press
![]() to select Sensor and press
to select Sensor and press ![]() to confirm.
to confirm. - Press
![]() to select Heart Rate, Speed, Cadence, Speed/CAD or Power Meter and press
to select Heart Rate, Speed, Cadence, Speed/CAD or Power Meter and press ![]() to confirm selection.
to confirm selection. - To pair sensors with your device, please have the Bryton Smart sensors installed first, wearing the Heart Rate sensor or rotating the crank and wheel a few times to wake up the Bryton Smart Sensors.
- Press
![]() to enter submenu. Press
to enter submenu. Press ![]() to select desired setting and press
to select desired setting and press ![]() to confirm.
to confirm. - Rescan: rescan to detect the sensor for pairing with your device.
- Turn on/Turn off: enable/disable the sensor.
- Press
![]() to exit this menu.
to exit this menu.
NOTE:
- While pairing your speed/cadence sensor/the heart rate belt and power meter, please make sure there is no other cadence/speed sensor/power meter within 5m.
- Bryton smart sensors can only be paired when they are awake, or they would go back to sleep to preserve power.
- When the heart rate monitor is paired, the
![]() heart rate icon appears on the main screen. When cadence sensor is paired, the cadence sensor icon
heart rate icon appears on the main screen. When cadence sensor is paired, the cadence sensor icon ![]() appears on the main screen.
appears on the main screen. - After pairing, your Bryton devices automatically connect to Bryton Smart Sensors each time when the sensors are awake.
NOTE:
Rider 420 provides 2 bike profiles. Each profile has its respective sensor setting. Simply activate the bike you choose you ride in Bike Profile setting and you are ready to go.
Altitude
You can set the altitude setting for the current location and four other locations.
Current Altitude

- In the Settings menu, press
![]() and then press
and then press ![]() to select Altitude.
to select Altitude. - Press
![]() to enter Altitude.
to enter Altitude. - Press
![]() to adjust value of current altitude and press
to adjust value of current altitude and press ![]() to confirm.
to confirm. - Press
![]() to exit this menu.
to exit this menu.
Note: The value of altitude on the meter mode will be changed once current altitude is adjusted.
Note: Current Altitude can also be adjusted via Bryton Active App.
Other Location Altitude
With other locations altitude setting, you can save a value of altitude of your planned location, and do calibration once you are in the appointed position.

- In the Settings menu, press
![]() and then press
and then press ![]() to select Altitude.
to select Altitude. - Press
![]() to select Location 1, Location 2, Location 3, Location 4 or Location 5 and press
to select Location 1, Location 2, Location 3, Location 4 or Location 5 and press ![]() to enter.
to enter. - To set altitude of the location, press
![]() to enter Altitude.
to enter Altitude. - Press
![]() to adjust value of altitude and press
to adjust value of altitude and press ![]() to save.
to save. - To calibrate the set altitude, press
![]() to select Calibrate and press
to select Calibrate and press ![]() to confirm.
to confirm. - Press
![]() to exit this menu.
to exit this menu.
Personalize User Profile
You can change your personal information.

- In the Settings menu, press
![]() and then press
and then press ![]() to select Profile.
to select Profile. - Press
![]() to enter User Profile. A message of "Input correct profile as it might affect analysis." pops up. Press
to enter User Profile. A message of "Input correct profile as it might affect analysis." pops up. Press ![]() to confirm after reading message.
to confirm after reading message. - Press
![]() to select setting that you want to edit and press to enter its submenu.
to select setting that you want to edit and press to enter its submenu. - Gender: select your gender.
- Birthday: set your Birthday
- Height: set your height.
- Weight: set your weight.
- Max HR: set your maximum heart rate.
- LTHR: set your lactate threshold heart rate.
- FTP: set your functional threshold power.
- MAP: set your maximum aerobic power.
- Press
![]() to select the desired setting and press
to select the desired setting and press ![]() to confirm.
to confirm. - Press
![]() to exit this menu.
to exit this menu.
NOTE: Please enter correct personal information since it might affect analysis.
Personalize Bike Profile
You can customize and view your bicycle(s) profile.

- In the Settings menu, press
![]() and then press
and then press ![]() to select Profile.
to select Profile. - Press
![]() to select Bike Profile and then press
to select Bike Profile and then press ![]() to enter.
to enter. - Press
![]() to select setting that you want to edit and press
to select setting that you want to edit and press ![]() to enter its submenu.
to enter its submenu. - Spd Source: set the priority of the speed sources
- Weight: set the bike weight.
- Wheel: set the bike wheel size.
- Activate: select to activate the bike.
- Press
![]() to adjust the desired setting and press
to adjust the desired setting and press ![]() to confirm.
to confirm. - Press
![]() to exit this menu.
to exit this menu.
NOTE: For details on wheel size, see "Wheel Size and Circumference".
View Bike Profile

- In the Settings menu, press
![]() and then press
and then press ![]() to select Profile.
to select Profile. - Press
![]() to select Bike Profile and then press
to select Bike Profile and then press ![]() to enter.
to enter. - Press
![]() to select Overview and press
to select Overview and press ![]() to enter its submenu.
to enter its submenu. - Press
![]() to select your desired bike and press
to select your desired bike and press ![]() to confirm.
to confirm. - Press
![]() to view more data of the selected bike.
to view more data of the selected bike. - Press
![]() to exit this menu.
to exit this menu.
Adjust Odometer

- In the Settings menu, press
![]() and then press
and then press ![]() to select Profile.
to select Profile. - Press
![]() to select Bike Profile and then press
to select Bike Profile and then press ![]() to enter.
to enter. - Press
![]() to select Overview and press
to select Overview and press ![]() to enter its submenu.
to enter its submenu. - Press
![]() to select Bike 1+2 and press
to select Bike 1+2 and press ![]() to confirm.
to confirm. - Press
![]() enter into ODO setting page.
enter into ODO setting page. - Press
![]() to adjust ODO and press
to adjust ODO and press ![]() to confirm.
to confirm. - Press
![]() to exit this menu.
to exit this menu.
NOTE: To get to the number faster, you can long press  .
.
Reset ODO
You can reset the distance of Trip 1, Trip 2 and odometer.

- In the Settings menu, press
![]() and then press
and then press ![]() to select Profile.
to select Profile. - Press
![]() to select Bike Profile and then press
to select Bike Profile and then press ![]() to enter.
to enter. - Press
![]() to select Overview and press
to select Overview and press ![]() to enter its submenu.
to enter its submenu. - Press
![]() to select the desired bike and press
to select the desired bike and press ![]() to confirm.
to confirm. - Press
![]() to select trip 1 or trip 2 and press
to select trip 1 or trip 2 and press ![]() to confirm. If you select Bike 1+2, please select ODO.
to confirm. If you select Bike 1+2, please select ODO. - A message "Reset" pops up on the device. Press
![]() to select "YES" and press
to select "YES" and press ![]() to confirm or press
to confirm or press ![]() to set ODO to the desired number.
to set ODO to the desired number. - Press
![]() to exit this menu.
to exit this menu.
NOTE: Trip 1, Trip 2 means cumulative mileage recorded before you reset it. They are 2 separate distance measurements. You are free to use Trip 1 or Trip 2 to record, for example, weekly total distance and use another to record, for example, monthly total distance.
Bryton Active App Advanced Settings
After pairing your Rider 420 with Bryton Active App, you will have access to Grid Setting, Altitude Calibration and Notifications.
Grid Setting
You can customize your data page manually, turn on/off Smart Pause and set Data Recording.
- Pair Rider 420 with Bryton Active App
- Go to Settings > General > Bluetooth to turn on Bluetooth on Rider 420.
- Go to your phone "Settings > Bluetooth" and enable Bluetooth.
- Go to Bryton Mobile App and tap "Settings > Device Manager > +".
- Select and add your device by pressing "+".
- Tap "Pair" to pair your device with your phone. (For iOS phone only)
- Tap "Finish" to complete pairing.
- Customize Your Data Page
- Tap "Settings > Grid Setting" in Bryton Active App
- Turn on your prefered pages and enter the page.
- Tap < or > to change the number of grids.
- Tap data grid to change ride data.
Altitude Calibration
With connection to Internet, Bryton Active App provides altitude information for you to calibrate directly. You can also change altitude manually.
- Pair Rider 420 with Bryton Active App
- Go to Settings > General > Bluetooth to turn on Bluetooth on Rider 420.
- Go to your phone "Settings > Bluetooth" and enable Bluetooth.
- Go to Bryton Mobile App and tap "Settings > Device Manager > +".
- Select and add your device by pressing "+".
- Tap "Pair" to pair your device with your phone. (For iOS phone only)
- Tap "Finish" to complete pairing.
- Calibrate Your Altitude
- Tap "Alt. Cal" in Bryton Active App.
- Bryton Active App shows altitude of your current location. You can also make manual changes by pressing
![]() or tap on the number to input manually.
or tap on the number to input manually. - Tap "Calibrate" to make change as suggested.
- Tap "OK" to calibrate altitude data for your device.
 or tap on the number to input manually.
Notifications
After pairing your compatible smartphone using Bluetooth Smart wirelessly technology with Rider 420, you can receive phone call, text and email notifications on your Rider 420.
- IOS Phone Pairing
- Go to Settings > General > Bluetooth to turn on Bluetooth on Rider 420.
- Go to your phone "Settings > Bluetooth" and enable Bluetooth.
- Go to Bryton Mobile App and tap "Settings > Device Manager > +".
- Select and add your device by pressing "+".
- Tap "Pair" to pair your device with your phone. (For iOS phone only)
- Tap "Finish" to complete pairing.
NOTE:
- If notifications don't work, please go to your phone "Settings > Notifications" and check if you have allowed notifications in compatible messages and email apps or go to social applications and check if you have turned on notifications in your application settings.
- Android Phone Pairing
- Go to Settings > General > Bluetooth to turn on Bluetooth on Rider 420.
- Go to your phone "Settings > Bluetooth" and enable Bluetooth.
- Go to Bryton Mobile App and tap "Settings > Device Manager > +".
- Select and add your device by pressing "+".
- Tap "Finish" to complete pairing.
- Allow Notification Access
- Tap "Settings > Notification".
- Tap "OK" to enter setting to allow Notification Access for Bryton app.
- Tap "Active" and select "OK" to allow notification access for Bryton.
- Go back to Notification settings.
- Select and enable In-coming Calls, Text Messages and Emails by tapping each item.
Specifications
Rider 420
| Item | Description |
| Display | 2.3" FSTN positive transflective dot-matrix LCD |
| Physical Size | 49.9 X 83.9 X 16.9mm |
| Weight | 77g |
| Operating Temperature | -10°C ~ 60°C |
| Battery Charging Temperature | 0°C ~ 40°C |
| Battery | Li polymer rechargeable battery |
| Battery Life | 35 hours with open sky |
| ANT+™ | Featuring certified wireless ANT+"* connectivity. Visit www.thisisant.com/directory for compatible products. |
| GNSS | Integrated high-sensitivity GNSS receiver with embedded antenna |
| BLE Smart Water Resistant | Bluetooth smart wireless technology with embedded antenna; 2.4GHz band 0dBm |
| Barometer | Equipped with barometer |
Smart Speed Sensors
| Item | Description |
| Physical size | 36.9 x 34.8 x 8.1 mm |
| Weight | 6 g |
| Water Resistance | Incidental exposure to water of up to 1 meter for up to 30 minutes. |
| Transmission range | 3 m |
| Battery life | Up to 1 year |
| Operating temperature | -10°C ~ 60°C |
| Radio frequency/protocol | 2.4GHz/Bluetooth 4.0 and Dynastream ANT+ Sport wireless communications protocol |
NOTE:
Accuracy may be degraded by poor sensor contact, electrical, magnectic interference and distance from the transmitter.
To avoid magnetic interference, it is recommended that you change location, clean or replace chain.
Smart Cadence Sensor
| Item | Description |
| Physical size | 36.9 x 31.6 x 8.1 mm |
| Weight | 6 g |
| Water Resistance | Incidental exposure to water of up to 1 meter for up to 30 minutes. |
| Transmission range | 3 m |
| Battery life | Up to 1 year |
| Operating temperature | -10°C ~ 60°C |
| Radio frequency/protocol | 2.4GHz/Bluetooth 4.0 and Dynastream ANT+ Sport wireless communications protocol |
NOTE:
Accuracy may be degraded by poor sensor contact, electrical, magnectic interference and distance from the transmitter.
Smart Heart Rate Monitor
| Item | Description |
| Physical size | 63 x 34.3 x 15 mm |
| Weight | 14.5 g (sensor)/31.5g (strap) |
| Water Resistance | Incidental exposure to water of up to 1 meter for up to 30 minutes. |
| Transmission range | 3 m |
| Battery life | Up to 2 years |
| Operating temperature | 0°C ~ 50°C |
| Radio frequency/protocol | 2.4GHz/Bluetooth 4.0 and Dynastream ANT+ Sport wireless communications protocol |
NOTE:
Accuracy may be degraded by poor sensor contact, electrical, magnectic interference and distance from the transmitter.
Battery Information
Smart Speed Sensor and Smart Cadence Sensor
Both sensors contain a user-replaceable CR2032 battery.


Before using sensors:
- Locate the circular battery cover on the back of sensors.
- Use your finger to press and twist cover counter-clockwise so the indicator on the cover points to unlock icon (
![]() ).
). - Remove the cover and battery tab.
- Use your finger to press and twist cover clockwise so the indicator on the cover points to locked icon (
![]() ).
).
 ).
). ).
).To replace the battery:
- Locate the circular battery cover on the back of sensors.
- Use your finger to press and twist cover counter-clockwise so the indicator on the cover points to unlock icon (
![]() ).
). - Remove the battery and insert new battery with positive connector first into the battery chamber.
- Use your finger to press and twist cover clockwise so the indicator on the cover points to locked icon (
![]() ).
).
NOTE:
- When installing a new battery, if the battery is not placed with the positive connector first, the positive connector will easily deform and malfucntion.
- Be careful not to damage or lose the O-ring gasket on the cover.
- Contact your local waste disposal department to properly dispose of used batteries.
Smart Heart Rate Monitor
The heart rate monitor contains a user-replaceable CR2032 battery.

To replace the battery:
- Locate the circular battery cover on the back of the heart rate monitor.
- Use a coin to twist the cover counter-clockwise.
- Remove the cover and battery.
- Insert the new battery, with the positive connector facing upward and lightly press it.
- Use a coin to twist the cover clockwise.
NOTE:
- Be careful not to damage or lose the O-ring gasket.
- Contact your local waste disposal department to properly dispose of used batteries.
Install Rider 420
Use Bike Mount to Mount Rider 420

Install Speed/Cadence/Dual Sensor
(Optional)

NOTE:
- Once sensors waken, the LED blinks twice. The LED continues to blink when you continue to pedal for pairing. After around 15 blinks, it will stop blinking. If not used for 10 minutes, sensor would go into sleep mode to preserve power. Please complete the pairing during the time the sensor is awake.
Install Heart Rate Belt
(Optional)

NOTE:
- In cold weather, wear appropriate clothing to keep the heart rate belt warm.
- The belt should be worn directly on your body.
- Adjust the sensor position to the middle part of the body (wear it slightly below the chest). The Bryton logo shown on the sensor should be facing upward. Tighten the elastic belt firmly so that it will not turn loose during the exercise.
- If the sensor cannot be detected or the reading is abnormal, please warm up for about 5 minutes.
- If the heart rate belt is not used for a period of time, remove the sensor from the heart rate belt.
NOTE: Improper battery replacement may cause an explosion. When replacing a new battery, use only the original battery or a similar type of battery specified by the manufacturer. Disposal of the used batteries must be carried out in accordance to the regulations of your local authority.
Wheel Size and Circumference
The wheel size is marked on both sides of the tires.


Basic Care For Your Rider 420
Taking good care of your device will reduce the risk of damage to your device.
- Do not drop your device or subject it to severe shock.
- Do not expose your device to extreme temperatures and excessive moisture.
- The screen surface can easily be scratched. Use the non-adhesive generic screen protectors to help protect the screen from minor scratches.
- Use diluted neutral detergent on a soft cloth to clean your device.
- Do not attempt to disassemble, repair, or make any modifications to your device. Any attempt to do so will make the warranty invalid.
Data Fields
| Category | Data Fields | Description of Data Fields |
| Energy | Calorie | The number of total calories burned. |
| Kilojoules | The accumulated power output in kilojoules for the current activity. | |
| Altitude | Altitude | The height of your current location above or below sea level. |
| Max Altitude | The highest height of your current location above or below sea level which the rider achieved for the current activity. | |
| Alt. Gain | The total altitude distance gained during this current activity. | |
| Alt. Loss | The total altitude lost during this current activity. | |
| Gradient | The calculation of altitude over distance. | |
| Uphill | The total distance traveled while ascending. | |
| Downhill | The total distance traveled while descending. | |
| Distance | Distance | The distance travelled for current activity. |
| Odometer | The accumulated total distance until you reset it. | |
| LapDistance | The distance traveled for the current lap. | |
| LLapDist. | The distance traveled for the last finished lap. | |
| Trip 1/Trip 2 | Cumulative mileage recorded before you reset it. They are 2 separate trip measurements. You are free to use Trip 1 or Trip 2 to record, for example, weekly total distance and use another to record, for example, monthly total distance. | |
| Speed | Speed | The current rate of change in distance. |
| Avg Speed | The average speed for current activity. | |
| Max Speed | The maximum speed for current activity. | |
| LapAvgSpd | The average speed for the current lap. | |
| LapMaxSpd | The maximum speed for the current lap. | |
| LLapAvgSpd | The average speed for the last finished lap. | |
| Time | Time | Current GPS Time. |
| Ride Time | The time spent on riding for current activity. | |
| Trip Time | Total time spent for current activity. | |
| Sunrise | The time of sunrise based on your GPS location. | |
| Sunset | The time of sunset based on your GPS location. | |
| LapTime | The stopwatch time for the current lap. | |
| LLapTime | The stopwatch time for the last finished lap. | |
| Lap Count | The number of laps finished for the current activity. | |
| Cadence | Cadence | The current rate at which rider is pedalling the pedals |
| Avg CAD | The average cadence for current activity. | |
| Max CAD | The maximum cadence for current activity. | |
| LapAvgCad | The average cadence for the current lap. | |
| LLapAvCad | The average cadence for the last finished lap. | |
| HR | Heart Rate | The number of times your heart beats per minute. It requires compatible HR sensor pairing connection to your device. |
| Avg HR | The average heart rate for current activity. | |
| Max HR | The maximum heart rate for current activity. | |
| MHR % | Your current heart rate divided by Maximum Heart Rate. MHR means that the maximum number of beats made by your heart in 1 minute of effort. (MHR is different from Max HR. You will need to set MHR in User Profile) | |
| LTHR% | Your current heart rate divided by Lactate Threshold Heart Rate. LTHR means that the average heart rate while in the intense exercise at which the blood concentration of lactate begins to exponentially increase. (You will need to set LTHR in User Profile) | |
| MHR Zone | The current range of your Maximum Heart Rate Pecentage heart rate (Zone 1 to Zone 75). | |
| LTHR Zone | The current range of your Lactate Threshold Heart Rate Percentage (Zone 1 to Zone 7). | |
| LapAvgHR | The average heart rate for the current lap. | |
| LLapAvgHR | The average heart rate for the last finished lap. | |
| Lap MHR% | The average of MHR% for the current lap. | |
| Lap LTHR% | The average of LTHR% for the current lap. | |
| Temp | Temp. | The current temperature. |
| Power | Power | Current Power in Watt. |
| Avg Power | The average power for the current activity. | |
| Max Power | The maximum power for the current activity. | |
| LapAvgPw | The average power for the current lap. | |
| LapMaxPw | The maximum power for the current lap. | |
| 3s power | 3 seconds average of power | |
| 10s power | 10 seconds average of power | |
| 30s power | 30 seconds average of power | |
| NP (Normalized Power) | An estimate of the power that you could have maintained for the same physiological "cost" if your power had been perfectly constant, such as on an ergometer, instead of variable power output. | |
| TSS (Training Stress Score) | Training Stress Score is calculated by taking into account both the intensity such as IF and the duration of the ride. A way of measuring how much stress is put on the body from a ride. | |
| IF (Intensity Factor) | Intensity Factor is the ratio of the normalized power (NP) to your Functional Threshold Power (FTP). An indication of how hard or difficult a ride was in relation to your overall fitness. | |
| SP (Specific Power) | Power-to-weight ratio | |
| FTP Zone | The current range of your Functional Threshold Power Percentage (Zone1 to Zone 7). | |
| MAP Zone | The current range of your Maximum Aerobic Power Pecentage (Zone 1 to Zone 7). | |
| MAP% | The current power divided by your Maximum Aerobic Power. | |
| The current power divided by your functional threshold power. | ||
| Lap NP | Normalized power of the current lap | |
| Last Lap NP | Normalized power of the last lap | |
| LLapAvgPw | The average power output for the last finished lap. | |
| LlapMaxPw | The maximum power for the last finished lap. | |
| Left Power | Current left leg power | |
| Right Power | Current right leg power | |
| 3s Left Power | 3 seconds average of left leg power | |
| 10s Left Power | 10 seconds average of left leg power | |
| 30s Left Power | 30 seconds average of left leg power | |
| 3s Right Power | 3 seconds average of right leg power | |
| 10s Right Power | 10 seconds average of right leg power | |
| 30s Right Power | 30 seconds average of right leg power | |
| Pedal Analysis | 3s Avg PB | 3 seconds average power balance. |
| CurPB-LR | The current left/right power balance. | |
| AvgPB-LR | The average left/right power balance for the current activity. | |
| CurTE-LR | The current left/right percentage of how efficiently a rider is pedaling. | |
| MaxTE-LR | The maximum left/right percentage of how efficiently a rider is pedaling. | |
| AvgTE-LR | The average left/right percentage of how efficiently a rider is pedaling. | |
| CurPS-LR | The current left/right percentage of how evenly a rider is applying force to the pedals throughout each pedal stroke. | |
| MaxPS-LR | The maximum left/right percentage of how evenly a rider is applying force to the pedals throughout each pedal stroke. | |
| AvgPS-LR | The average left/right percentage of how evenly a rider is applying force to the pedals throughout each pedal stroke. | |
| POI | Dist to POI | Distance to next point of interest. |
| Ascent to POI | Ascent to next point of interest. | |
| Dist to Peak | Distance to next peak. | |
| Ascent to Peak | Ascent to next peak. |
Video Tutorial
For a step-by-step demonstration of device and Bryton Active App, please scan QR code below to check Bryton Video Tutorials.
https://www.youtube.com/brytonactive

Documents / Resources
References
Fernwartung - Login
![active.brytonsport.com]() Bryton Active
Bryton Active![strava.com]() Strava | Running, Cycling & Hiking App - Train, Track & Share
Strava | Running, Cycling & Hiking App - Train, Track & Share![www.strava.com]() Strava | Running, Cycling & Hiking App - Train, Track & Share
Strava | Running, Cycling & Hiking App - Train, Track & Share![download.brytonsport.com]() http://download.brytonsport.com/inst.html
http://download.brytonsport.com/inst.html![www.apple.com]() App Store - Apple
App Store - Apple![play.google.com]() Google Play
Google PlayDirectory - THIS IS ANT
![www.youtube.com]() Bryton Sport - YouTube
Bryton Sport - YouTube
Download manual
Here you can download full pdf version of manual, it may contain additional safety instructions, warranty information, FCC rules, etc.
Advertisement


Need help?
Do you have a question about the Rider 420 and is the answer not in the manual?
Questions and answers