Advertisement
Available languages
Available languages
Advertisement
Table of Contents

Subscribe to Our Youtube Channel
Related Manuals for Helios AIR1 AAD Series


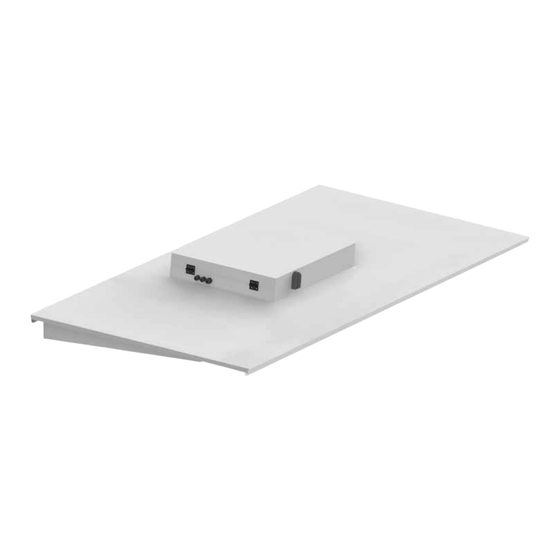
Summary of Contents for Helios AIR1 AAD Series
- Page 1 Helios Ventilatoren MONTAGE- UND BETRIEBSVORSCHRIFT INSTALLATION AND OPERATING INSTRUCTIONS NOTICE DE MONTAGE ET D’ENTRETIEN Wetterschutzdach Weather protection cover Toiture pare-pluie AIR1-AAD für AIR1 Lüftungsgeräte for AIR1 ventilation units pour les centrales AIR1...
-
Page 2: Allgemeine Hinweise
Wenn die nachfolgenden Ausführungen nicht beachtet werden, entfällt die Gewährleistung. Gleiches gilt für Haftungs- ansprüche an den Hersteller. Der Gebrauch von Zubehörteilen, die nicht von Helios empfohlen oder angeboten werden, ist nicht statthaft. Even tuell auftretende Schäden unterliegen nicht der Gewährleistung. - Page 3 Montage- und Betriebsvorschrift Wetterschutzdach AIR1-AAD Type teilbar Abmessungen (mm) 2005 2105 – AIR1-AAD XH 1000 2085 2187 – AIR1-AAD XH 1500 2346 1035 2448 – AIR1-AAD XH 2500 2970 1137 3072 AIR1-AAD XH 3500 – Wetterschutzdach AIR1-AAD (XH 4500-8500) Abb.2 Type teilbar Abmessungen (mm)
- Page 4 Montage- und Betriebsvorschrift Wetterschutzdach AIR1-AAD – Wetterschutzdach AIR1-AAD (RH 5000-15000) Abb.5 Type teilbar Abmessungen (mm) AIR1-AAD RH 5000 1842 1280 1448 1946 Art.-Nr. Type Teilbar AIR1-AAD RH 6000 2012 1400 1568 2116 AIR1-AAD RH 8000 2182 1650 1818 2288 AIR1-AAD RH 9500 2312 1750 1918 2412...
-
Page 5: Montage
Montage- und Betriebsvorschrift Wetterschutzdach AIR1-AAD KAPITEL 2 2.1 Montage MONTAGE Lebensgefahr durch Stromschlag! Alle Arbeiten am/im Gerät dürfen nur von Fachkräften laut Kapitel „3.1 Personalqualifikation“ auf Seite 8 GEFAHR durchgeführt werden Vor allen Wartungs- und Installationsarbeiten sowie vor Öffnen des Klemmenkastens ist das AIR1-Gerät all- polig vom Netz zu trennen! Gefährdung durch elektrischen Schlag, bewegliche Teile (Gebläse) und heiße Oberflächen. - Page 6 Montage- und Betriebsvorschrift Wetterschutzdach AIR1-AAD 4. Die Kante des Klemmenkasten-Überdeckels mit Silikon abdichten, s. Abb.10. Abb.10 2.1.2 Montage Wetterschutzdach AIR1-AAD XH 3500-8500 und AIR1-AAD RH 5000-15000 1. Sicherstellen, dass die Moduleinheiten ordnungsgemäß zusammengebaut sind. 2. Schraubenabdeckungen oben am Gerät entfernen, bevor das Wetterschutzdach montiert wird, s. Abb.11. Abb.11 3.
- Page 7 Montage- und Betriebsvorschrift Wetterschutzdach AIR1-AAD 5. Wetterschutzdach an den Seiten und der Rückseite des Gerätes ausrichten, s. Abb.14. Abb.14 6. Auf den Wetterschutzdächern der AIR1-Lüftungsgeräten XH 4500-8500 und RH 5000-15000 befindet sich eine Aussparung für die Hauptschalterleitung. Diese Aussparung für den Schutzschlauch der Hauptschalterleitung ver- wenden, s.
- Page 8 Montage- und Betriebsvorschrift Wetterschutzdach AIR1-AAD 9. Die Kante des Klemmenkasten-Überdeckels sowie die Stöße der Ablaufrinne mit Silikon abdichten, s. Abb.18. Abb.18 2.1.3 Montage Wetterschutzdach AIR1-AAD XHP 1. Schraubenabdeckungen oben am Gerät entfernen, bevor das Wetterschutzdach montiert wird, s. Abb.19. Abb.19 2.
-
Page 9: Instandhaltung Und Wartung
Montage- und Betriebsvorschrift Wetterschutzdach AIR1-AAD KAPITEL 3 Personalqualifikation INSTANDHALTUNG Installation, Instandhaltungs-, Wartungsarbeiten, Demontage, Montage, Reparatur, sowie der Einbau von Ersatztei- UND WARTUNG len, mit Ausnahme der elektrischen Arbeiten dürfen nur von eingewiesenen Fachkräften (Bsp.: Industriemechaniker, Mechatroniker, Schlosser oder vergleichbar) ausgeführt werden. Alle elektrischen Arbeiten dürfen nur von Elektrofachkräften ausgeführt werden. -
Page 10: General Information
If the preceding instructions are not observed, all warranty claims shall be excluded. This also applies for liability claims against the manufacturer. The use of accessories, which are not recommended or offered by Helios, is not permitted. Any possible damages are not covered by the warranty. - Page 11 Installation and Operating Instructions Weather protection cover AIR1-AAD Type Separable Dimensions (mm) AIR1-AAD XH 1000 2005 2105 – 2085 2187 – AIR1-AAD XH 1500 AIR1-AAD XH 2500 2346 1035 2448 – 2970 1137 3072 AIR1-AAD XH 3500 – Weather protection cover AIR1-AAD (XH 4500-8500) Fig.2 Type Separable...
- Page 12 Installation and Operating Instructions Weather protection cover AIR1-AAD – Weather protection cover AIR1-AAD (RH 5000-15000) Fig.5 Type Separable Dimensions (mm) AIR1-AAD RH 5000 1842 1280 1448 1946 Art.-Nr. Type Teilbar AIR1-AAD RH 6000 2012 1400 1568 2116 AIR1-AAD RH 8000 2182 1650 1818 2288...
-
Page 13: Installation
Installation and Operating Instructions Weather protection cover AIR1-AAD CHAPTER 2 2.1 Installation INSTALLATION Danger to life! All work on/in the unit may only be carried out by qualified personnel in accordance with chapter „3.1 Person- DANGER nel qualification“ auf Seite 8. The AIR1 unit must be fully isolated from the mains power supply before all maintenance and installation work and opening the terminal compartment... - Page 14 Installation and Operating Instructions Weather protection cover AIR1-AAD 2.1.2 Installation Weather protection cover AIR1-AAD XH 3500-8500 and AIR1-AAD RH 5000-15000 1. Ensure that the module units are properly fixed together. 2. Remove screw covers at top of unit before installing the weather protection cover, see Fig.11. Fig.11 3.
- Page 15 Installation and Operating Instructions Weather protection cover AIR1-AAD 5. Align the weather protection cover with the sides and back of the unit, see Fig.14. Fig.14 6. There is a recess in the weather protection covers for the AIR1 ventilation units XH 4500-8500 and RH 5000-15000 for the main switch cable.
- Page 16 Installation and Operating Instructions Weather protection cover AIR1-AAD 9. Seal the edge of the terminal box cover and the joints of the drain channel with silicone, see Fig.18. Fig.18 2.1.3 Installation Weather protection cover AIR1-AAD XHP 1. Remove screw covers at top of unit before installing the weather protection cover, see Fig.19. Fig.19 2.
-
Page 17: Servicing And Maintenance
Installation and Operating Instructions Weather protection cover AIR1-AAD CHAPTER 3 3.1 Personnel qualification Installation, servicing, maintenance, removal, assembly, repairs and the installation of spare parts may be carried out SERVICING AND by qualified personnel (e.g.: industrial mechanics, mechatronics engineers, metal workers or persons with compatible MAINTENANCE training) with the exception of electrical work. -
Page 18: Informations Générales
Si les consignes figurant dans cette notice ne sont pas correctement respectées, la garantie s’annule. Il en est de même pour toute implication de responsabilité du fabricant. L’utilisation d’accessoires non conseillés ou proposés par Helios n’est pas permise. Les dégâts causés par cette mau- vaise utilisation ne sont pas couverts par la garantie. - Page 19 Notice de montage et d’utilisation Toiture pare-pluie AIR1-AAD Type divisible Dimensions (mm) AIR1-AAD XH 1000 2005 2105 – AIR1-AAD XH 1500 2085 2187 – AIR1-AAD XH 2500 2346 1035 2448 – 2970 1137 3072 AIR1-AAD XH 3500 – Toiture pare-pluie AIR1-AAD (XH 4500-8500) Fig.2 Type divisible...
- Page 20 Notice de montage et d’utilisation Toiture pare-pluie AIR1-AAD – Toiture pare-pluie AIR1-AAD (RH 5000-15000) Fig.5 Type divisible Dimensions (mm) AIR1-AAD RH 5000 1842 1280 1448 1946 Art.-Nr. Type Teilbar AIR1-AAD RH 6000 2012 1400 1568 2116 AIR1-AAD RH 8000 2182 1650 1818 2288 AIR1-AAD RH 9500...
- Page 21 Notice de montage et d’utilisation Toiture pare-pluie AIR1-AAD CHAPITRE 2 2.1 Montage Danger de mort par choc électrique ! MONTAGE Tous les travaux sur/dans l‘appareil doivent être effectués par des professionnels conformément au chapitre « 3.1 Qualification du personnel » page 8. DANGER Mettre impérativement la centrale AIR1 hors tension avant tous travaux d’entretien, d’installation et avant l’ouverture du coffret électronique ! Risques de choc électrique, pièces mobiles (ventilateur) et surfaces chaudes.
- Page 22 Notice de montage et d’utilisation Toiture pare-pluie AIR1-AAD 2.1.2 Montage des toitures pare-pluie AIR1-AAD XH 3500-8500 et AIR1-AAD RH 5000-15000 1. S’assurer que les composants du module sont correctement assemblés. 2. Retirer les cache-vis situés sur le dessus de la centrale avant de monter la toiture pare-pluie (voir Fig.11). Fig.11 3.
- Page 23 Notice de montage et d’utilisation Toiture pare-pluie AIR1-AAD 5. Aligner la toiture pare-pluie sur les côtés et l’arrière de la centrale (voir Fig.14). Fig.14 6. Les toitures pare-pluie des centrales AIR1 XH 4500-8500 et RH 5000-15000 comportent une ouverture pour le câble de l’interrupteur de proximité.
- Page 24 Notice de montage et d’utilisation Toiture pare-pluie AIR1-AAD 9. Étanchéifier les bords du couvercle du coffret électrique et les soudures de la gouttière avec de la silicone (voir Fig.18). Fig.18 2.1.3 Montage des toitures pare-pluie AIR1-AAD XHP 1. Retirer les cache-vis situés sur le dessus de la centrale avant de monter la toiture pare-pluie, voir Fig.19. Fig.19 2.
-
Page 25: Maintenance Et Entretien
Notice de montage et d’utilisation Toiture pare-pluie AIR1-AAD CHAPITRE 3 Qualification du personnel MAINTENANCE ET Les travaux d‘installation, d’entretien, de maintenance, démontage, montage, réparation, ainsi que l‘installation des ENTRETIEN pièces détachées, à l’exception des travaux d’électricité, doivent être effectués par du personnel qualifié (par ex. - Page 26 Notice de montage et d’utilisation Toiture pare-pluie AIR1-AAD...
- Page 27 Notice de montage et d’utilisation Toiture pare-pluie AIR1-AAD...
- Page 28 HELIOS Ventilatoren GmbH + Co KG · Lupfenstraße 8 · 78056 VS-Schwenningen HELIOS Ventilateurs · Le Carré des Aviateurs · 157 avenue Charles Floquet · 93155 Le Blanc Mesnil Cedex CH HELIOS Ventilatoren AG · Tannstrasse 4 · 8112 Otelfingen GB HELIOS Ventilation Systems Ltd.
Need help?
Do you have a question about the AIR1 AAD Series and is the answer not in the manual?
Questions and answers