Helios AIR1-AAD XH 1000 Installation And Operating Instructions Manual
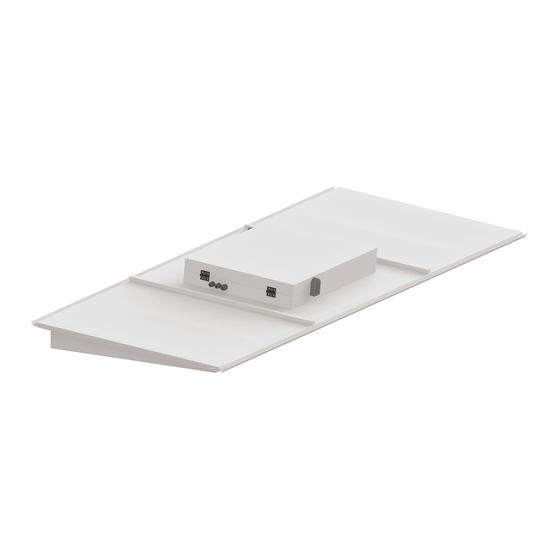
Weather protection cover
Hide thumbs
Also See for AIR1-AAD XH 1000:
Table of Contents
Advertisement
Available languages
Available languages
Quick Links
Advertisement
Table of Contents

Related Manuals for Helios AIR1-AAD XH 1000


Summary of Contents for Helios AIR1-AAD XH 1000
- Page 1 Helios Ventilatoren MONTAGE- UND BETRIEBSVORSCHRIFT INSTALLATION AND OPERATING INSTRUCTIONS NOTICE DE MONTAGE ET D’ENTRETIEN Wetterschutzdach Weather protection cover Toiture pare-pluie AIR1-AAD für AIR1 Lüftungsgeräte for AIR1 ventilation units pour les centrales AIR1...
-
Page 2: Allgemeine Hinweise
Wenn die nachfolgenden Ausführungen nicht beachtet werden, entfällt die Gewährleistung. Gleiches gilt für Haftungs- ansprüche an den Hersteller. Der Gebrauch von Zubehörteilen, die nicht von Helios empfohlen oder angeboten werden, ist nicht statthaft. Even tuell auftretende Schäden unterliegen nicht der Gewährleistung. - Page 3 Montage- und Betriebsvorschrift Wetterschutzdach AIR1-AAD – Wetterschutzdach AIR1-AAD (XH 4500-8500) Abb.2 1170 Type teilbar Maße (mm) AIR1-AAD XH 4500 3515 1050 1090 2395 3620 Art.-Nr. Type Teilbar AIR1-AAD XH 5500 3555 1260 1435 2415 3660 06347 AIR1-AAD XH 4500 3515 142 1050 1090 230 2395 3620 AIR1-AAD XH 7000 3605 1560 1730...
-
Page 4: Montage
Um eine leichte Zugänglichkeit des Klemmenkastens zu gewährleisten, muss die Neigung des Wetterschutzdachs in HINWEIS Richtung der Serviceseite des AIR1-Lüftungsgeräts ausgerichtet sein. – Montage Wetterschutzdach AIR1-AAD XH 1000-2500 und AIR1-AAD RH 1500-3000 1. Schraubenabdeckungen oben am Gerät entfernen, bevor das Wetterschutzdach montiert wird, s. Abb. 6. Abb.6... - Page 5 Montage- und Betriebsvorschrift Wetterschutzdach AIR1-AAD Abb.7 Dichtband 3. Wetterschutzdach auf das Gerät auf dem Dichtband aufsetzen und mit den Blechteilen an das Gerät montieren (mit Blechtreibschrauben am Geräteprofil verschrauben), s. Abb. 8. Abb.8 4. Die Kante des Klemmenkasten-Überdeckels mit Silikon abdichten, s. Abb. 9. Abb.9 –...
- Page 6 Montage- und Betriebsvorschrift Wetterschutzdach AIR1-AAD 4. Die Teile des Wetterschutzdachs auf dem Gerät platzieren, s. Abb. 12. Abb.12 5. Wetterschutzdach an den Seiten und der Rückseite des Gerätes ausrichten, s. Abb 13. Abb.13 6. Auf den Wetterschutzdächern der AIR1-Lüftungsgeräten XH 4500-8500 und RH 5000-15000 befindet sich eine Aussparung für die Hauptschalterleitung.
-
Page 7: Instandhaltung Und Wartung
Montage- und Betriebsvorschrift Wetterschutzdach AIR1-AAD Abb.15 8. Wetterdachdichtprofile auf die Kanten der Dachteile aufsetzen und verschrauben, s. Abb. 16. Abb.16 9. Die Kante des Klemmenkasten-Überdeckels sowie die Stöße der Ablaufrinne mit Silikon abdichten, s. Abb. 17. Abb.17 KAPITEL 3 Instandhaltung und Wartung Es wird empfohlen das Wetterschutzdach alle 6 Monate auf Schäden zu überprüfen. -
Page 8: General Information
If the preceding instructions are not observed, all warranty claims shall be excluded. This also applies for liability claims against the manufacturer. The use of accessories, which are not recommended or offered by Helios, is not permitted. Any possible damages are not covered by the warranty. - Page 9 Installation and Operating Instructions Weather protection cover AIR1-AAD – Weather protection cover AIR1-AAD (XH 4500-8500) Fig.2 1170 Type Separable Maße (mm) AIR1-AAD XH 4500 3515 1050 1090 2395 3620 Art.-Nr. Type Teilbar AIR1-AAD XH 5500 3555 1260 1435 2415 3660 06347 AIR1-AAD XH 4500 3515 142 1050 1090 230 2395 3620 AIR1-AAD XH 7000...
-
Page 10: Installation
In order to ensure easy access to the terminal box, the weather protection cover must be sloped in the direction of the NOTE service side of the AIR1 ventilation unit. – Installation Weather protection cover AIR1-AAD XH 1000-2500 and AIR1-AAD RH 1500-3000 1. Remove screw covers at top of unit before installing the weather protection cover, see Fig. 6. Fig.6... - Page 11 Installation and Operating Instructions Weather protection cover AIR1-AAD Fig.7 Sealing tape 3. Place weather protection cover on the unit on the sealing tape and attach to the unit with the sheet metal parts (screw to unit profile with selftapping screws), see Fig. 8. Fig.8 4.
- Page 12 Installation and Operating Instructions Weather protection cover AIR1-AAD 4. Place the parts of the weather protection cover on the unit, see Fig. 12. Fig.12 5. Align the weather protection cover with the sides and back of the unit, see Fig. 13. Fig.13 6.
-
Page 13: Servicing And Maintenance
Installation and Operating Instructions Weather protection cover AIR1-AAD Fig.15 8. Place weather cover seal profile on the edges of the cover parts and screw together, see Fig. 16. Fig.16 9. Seal the edge of the terminal box cover and the joints of the drain channel with silicone, see Fig 17. Fig.17 CHAPTER 3 Servicing and maintenance... -
Page 14: Informations Générales
Si les consignes figurant dans cette notice ne sont pas correctement respectées, la garantie s’annule. Il en est de même pour toute implication de responsabilité du fabricant. L’utilisation d’accessoires non conseillés ou proposés par Helios n’est pas permise. Les dégâts causés par cette mau- vaise utilisation ne sont pas couverts par la garantie. - Page 15 Notice de montage et d’utilisation Toiture pare-pluie AIR1-AAD – Toiture pare-pluie AIR1-AAD (XH 4500-8500) Fig. 2 1170 Type divisible Maße (mm) AIR1-AAD XH 4500 3 515 1 050 1 090 2 395 3 620 Art.-Nr. Type Teilbar AIR1-AAD XH 5500 3 555 1 260 1 435 2 415 3 660...
- Page 16 Afin de faciliter l’accès au coffret électrique, la pente de la toiture pare-pluie doit être orientée vers le côté dédié à l’en- tretien de la centrale AIR1. – Montage des toitures pare-pluie AIR1-AAD XH 1000-2500 et AIR1-AAD RH 1500-3000 1. Retirer les cache-vis situés sur le dessus de la centrale avant de monter la toiture pare-pluie (voir fig. 6).
- Page 17 Notice de montage et d’utilisation Toiture pare-pluie AIR1-AAD Fig. 7 Ruban isolant 3. Placer la toiture pare-pluie sur le ruban isolant au-dessus de la centrale et la monter sur la centrale à l’aide des pièces en tôle (la visser sur le profil de la centrale à l’aide de vis Parker, voir la fig. 8). Fig.
- Page 18 Notice de montage et d’utilisation Toiture pare-pluie AIR1-AAD 4. Placer les pièces de la toiture pare-pluie sur la centrale (voir fig. 12). Fig. 12 5. Aligner la toiture pare-pluie sur les côtés et l’arrière de la centrale (voir fig. 13). Fig.
-
Page 19: Maintenance Et Entretien
Notice de montage et d’utilisation Toiture pare-pluie AIR1-AAD Fig. 15 8. Placer et visser les profils d’étanchéité de la toiture pare-pluie sur les bords des pièces de la toiture (voir fig. 16). Fig. 16 9. Étanchéifier les bords du couvercle du coffret électrique et les soudures de la gouttière avec de la silicone (voir fig. - Page 20 HELIOS Ventilatoren GmbH + Co KG · Lupfenstraße 8 · 78056 VS-Schwenningen HELIOS Ventilateurs · Le Carré des Aviateurs · 157 avenue Charles Floquet · 93155 Le Blanc Mesnil Cedex CH HELIOS Ventilatoren AG · Tannstrasse 4 · 8112 Otelfingen GB HELIOS Ventilation Systems Ltd.
Need help?
Do you have a question about the AIR1-AAD XH 1000 and is the answer not in the manual?
Questions and answers