Helios AIR1-KR DX Series Installation And Operating Instructions Manual
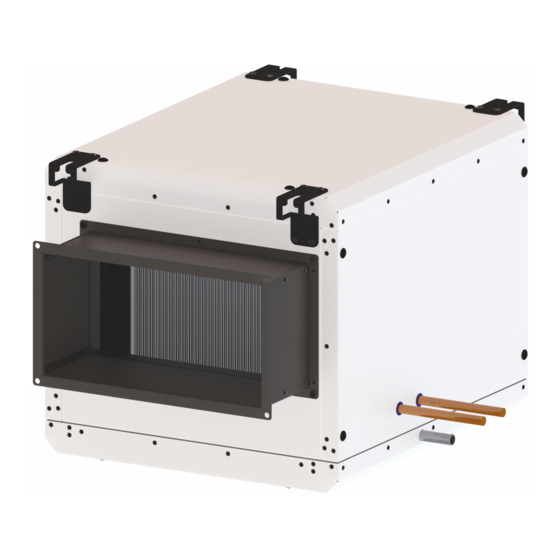
Cooling register for air1 ventilation units
Hide thumbs
Also See for AIR1-KR DX Series:
Table of Contents
Advertisement
Available languages
Available languages
Quick Links
Advertisement
Chapters
Table of Contents

Related Manuals for Helios AIR1-KR DX Series


Summary of Contents for Helios AIR1-KR DX Series
- Page 1 Helios Ventilatoren MONTAGE- UND BETRIEBSVORSCHRIFT INSTALLATION AND OPERATING INSTRUCTIONS NOTICE DE MONTAGE ET D’ENTRETIEN Kühlregister DX Cooling register DX Batterie de refroidissement DX AIR1-KR DX für AIR1 Lüftungsgeräte for AIR1 ventilation units pour les centrales AIR1...
-
Page 2: Table Of Contents
Montage- und Betriebsvorschrift Kühlregister AIR1-KR DX DEUTSCH Inhaltsverzeichnis KAPITEL 1 ALLGEMEINE HINWEISE ������������������������������������������������������������������������������������������� SEITE 2 Wichtige Informationen ..................Seite 2 Warn- und Sicherheitshinweise ................Seite 2 Garantieansprüche – Haftungsausschluss ............. Seite 2 Einsatzbereich – Bestimmungsgemäße Verwendung ..........Seite 2 Funktionsbeschreibung ..................Seite 2 Technische Daten .................... -
Page 3: Wichtige Informationen
Wenn die nachfolgenden Ausführungen nicht beachtet werden, entfällt die Gewährleistung. Gleiches gilt für Haftungs- ansprüche an den Hersteller. Der Gebrauch von Zubehörteilen, die nicht von Helios empfohlen oder angeboten werden, ist nicht statthaft. Even tuell auftretende Schäden unterliegen nicht der Gewährleistung. - Page 4 Montage- und Betriebsvorschrift Kühlregister AIR1-KR DX Produktbezeichnung Gewicht Füllmenge max� Be- Schutzart IP Schutzart IP Spannung Netz- Elektrische (ohne Flüs- triebsdruck (ohne (mit Dach) frequenz Leistung (W) sigkeit) (bar) Dach) (Hz) AIR1-KR DX XC 3200 R AIR1-KR DX XC 3200 L AIR1-KR DX XH 1000 R AIR1-KR DX XH 1000 L AIR1-KR DX XH 1500 R...
- Page 5 Montage- und Betriebsvorschrift Kühlregister AIR1-KR DX Die Kühlleistungen der einzelnen Register in Abhängigkeit von Volumenstrom und Kühlmittel sind den folgenden Graphen zu entnehmen (bei Eintrittstemperatur und -feuchte: 30 °C, 40 % rF): AIR1-KR DX XC 500 AIR1-KR DX XC 700 AIR1-KR DX XC 500 AIR1-KR DX XC 500 AIR1-KR DX XC 500...
- Page 6 Montage- und Betriebsvorschrift Kühlregister AIR1-KR DX AIR1-KR DX XH 1500 AIR1-KR DX XH 2500 AIR1-KR DX XH 2500 R/L AIR1-KR DX XC 500 AIR1-KR DX XC 500 AIR1-KR DX XH 1500 R/L 2500 1600 1400 2000 1200 1000 1500 1000 9 10 11 Kühlleistung (kW) Kühlleistung (kW)
- Page 7 Montage- und Betriebsvorschrift Kühlregister AIR1-KR DX AIR1-KR DX XH 8500 AIR1-KR DX RH 1500 AIR1-KR DX XH 8500 R/L AIR1-KR DX RH 1500 R/L AIR1-KR DX XC 500 9000 1800 8000 1600 7000 1400 6000 1200 5000 1000 4000 3000 2000 1000 4 8 12 16 20 24 28 32 36 40 44 48...
-
Page 8: Maßbilder
Montage- und Betriebsvorschrift Kühlregister AIR1-KR DX AIR1-KR DX RH 8000 AIR1-KR DX RH 9500 AIR1-KR DX RH 8000 R/L AIR1-KR DX RH 9500 R/L AIR1-KR DX XC 500 9000 12000 8000 10000 7000 6000 8000 5000 6000 4000 3000 4000 2000 2000 1000... - Page 9 Montage- und Betriebsvorschrift Kühlregister AIR1-KR DX Type AIR1-KR DX XC 500 L – AIR1-KR DX XC 700 L – AIR1-KR DX XC 1400 L 542 – AIR1-KR DX XC 2200 L 592 – AIR1-KR DX XC 3200 L 692 Abmessungen Kühlregister AIR1-KR DX XC 500-3200 R Abb�2 Bottom view Ansicht von unten...
- Page 10 Montage- und Betriebsvorschrift Kühlregister AIR1-KR DX Abb�4 ø 32 Maße (mm) Rechte Ausführung Art.-Nr. Type 04872 AIR1-KR DX XH 1000 R 1000 490 Type 04873 AIR1-KR DX XH 1500 R 1000 570 04877 AIR1-KR DX XH 2500 R 1000 620 AIR1-KR DX XH 1000 1000 490 635 715 370 350 318 215 343 238 315 210 –...
-
Page 11: Allgemeine Montagehinweise
Montage- und Betriebsvorschrift Kühlregister AIR1-KR DX Type AIR1-KR DX RH 1500 1000 520 760 745 306 425 380 265 378 338 350 310 – – – 130 170 858 712 AIR1-KR DX RH 2000 1000 580 860 805 306 425 430 295 498 338 470 310 –... -
Page 12: Mechanische Montage
Montage- und Betriebsvorschrift Kühlregister AIR1-KR DX Ein autorisierter Fachbetrieb für die Abfallbehandlung muss das Gerät oder die einzelnen Komponenten entsorgen. Der beauftragte Auftragnehmer muss sicherstellen dass: – die Komponenten nach Materialarten getrennt werden. – die verwendeten Betriebsstoffe nach ihren jeweiligen Eigenschaften sortiert und getrennt werden. Kühlmittel enthalten Substanzen die möglicherweise gefährlich und umweltschädlich sind. - Page 13 Montage- und Betriebsvorschrift Kühlregister AIR1-KR DX Bei Verwendung der unten aufgeführten Kühlregister muss das entsprechende AIR1 XC Gerät niedriger von der Decke abgehängt werden (s. Tabelle, Abb.9). Abb�9 Type H (mm) AIR1-KR DX XC 700 AIR1-KR DX XC 1400 –...
-
Page 14: Kühlregister Dx Für Air1 Xc Geräte
Montage- und Betriebsvorschrift Kühlregister AIR1-KR DX 2�7�1 Kühlregister DX für AIR1 XC Geräte 1. Das Kühlregister hat 4 Befestigungshalter für die Montage (s. Abb.11). Das Kühlregister mit diesen Befestigungs- haltern unter zu Hilfenahme der Gummidämpfer aufhängen. Vor dem Aufhängen Dichtungsstreifen dort auftragen, wo das Kühlregister mit dem AIR1-Gerät aneinandergefügt wird. - Page 15 Montage- und Betriebsvorschrift Kühlregister AIR1-KR DX 4. Das Kühlregister mit dem Gerät zusammenführen. Den freien Temperatursensor-Stecker des Geräts mit dem Kühl- register verbinden (s. Abb.14). Abb�14 5. Das Kühlregister und das Gerät miteinander verschrauben (Schraube: M8 x 16; s. Abb.15). Abb�15 6.
- Page 16 Montage- und Betriebsvorschrift Kühlregister AIR1-KR DX 3. Temperatursensor von der Zuluftseite des AIR1-Geräts bzw. der externen Nachheizung entfernen. Anschließend Kühlregister und AIR1-Gerät bzw. externe Nachheizung nahe zusammen stellen (s. Abb.18). Temperatursensor Abb�18 4. Den elektrischen Anschluss zwischen AIR1-Gerät und Kühlregister herstellen. –...
- Page 17 Montage- und Betriebsvorschrift Kühlregister AIR1-KR DX 6. Die Modulverbindungsteile an das AIR1-Gerät bzw. die externe Nachheizung und das Kühlregister montieren. Die Schrauben anziehen (s. Abb.22). Die16x20 mm langen Schrauben müssen seitlich angebracht werden, die 6x16 mm langen Schrauben sind für den HINWEIS Winkel oben gedacht�...
-
Page 18: Anschluss Und Inbetriebnahme
Montage- und Betriebsvorschrift Kühlregister AIR1-KR DX 10. Das Kühlregister mit dem Vor- und Rücklauf gemäß den örtlichen Vorschriften anschließen. 2�8 Anschluss und Inbetriebnahme 2�8�1 Verdrahtung DX-Register und AIR1-Gerät Den Klemmenkastendeckel öffnen und den Querschnitt der Leitung überprüfen, der für den Signalanschluss verwen- den wird. -
Page 19: Anschlussplan Air1-Kr Dx
Montage- und Betriebsvorschrift Kühlregister AIR1-KR DX ändert nicht nur die Kühl-, sondern auch die Heizungsregelung. 2�8�5 Anschlussplan AIR1-KR DX SS-1353... -
Page 20: Service Und Wartung
Montage- und Betriebsvorschrift Kühlregister AIR1-KR DX KAPITEL 3 3�1 Service und Wartung Reinigungs- und Wartungsarbeiten dürfen nur von einer Elektrofachkraft durchgeführt werden. SERVICE UND WARTUNG Lebensgefahr! Vor allen Wartungs- und Installationsarbeiten sowie vor Öffnen des Klemmenkastens ist das Gerät allpolig vom GEFAHR Netz zu trennen! Gefährdung durch elektrischen Schlag, bewegliche Teile (Ventilatoren) und ggf�... -
Page 21: Reinigung Des Registers
Montage- und Betriebsvorschrift Kühlregister AIR1-KR DX 2. Kondensatwanne mit einem Tuch reinigen (s. Abb.28). Abb�28 3�3 Reinigung des Registers – Es wird empfohlen das DX Kühlregister alle 6 Monate auf Kontamination zu überprüfen. – Das Kühlregister muss regelmäßig auf Schmutz und Staubablagerungen überprüft werden. Wenn sich Schmutz und Staub auf dem Kühlregister befinden, können diese mit Wasser entfernt werden. - Page 22 Installation and Operating Instructions Cooling register AIR1-KR DX ENGLISH Table of Contents CHAPTER 1 GENERAL INFORMATION ������������������������������������������������������������������������������������������� PAGE 2 Important information .................... Page 2 Warning and safety instructions ................Page 2 Warranty claims – Exclusion of liability ..............Page 2 Area of application –...
-
Page 23: Important Information
If the preceding instructions are not observed, all warranty claims shall be excluded. This also applies for liability claims against the manufacturer. The use of accessories, which are not recommended or offered by Helios, is not permitted. Any possible damages are not covered by the warranty. - Page 24 Installation and Operating Instructions Cooling register AIR1-KR DX Product name Weight (w/o Filling max� opera- Protection Protection Voltage (V) Mains Electrical liquid) capacity ting pressure category IP category IP frequency power (W) (bar) (without (with (Hz) cover) cover) AIR1-KR DX XC 3200 R AIR1-KR DX XC 3200 L AIR1-KR DX XH 1000 R AIR1-KR DX XH 1000 L...
- Page 25 Installation and Operating Instructions Cooling register AIR1-KR DX The cooling capacities of the individual elements depending on volume flow and coolant can be found on the following graphs (with inlet temperature and humidity: 30 °C, 40 % RH): AIR1-KR DX XC 700 AIR1-KR DX XC 500 AIR1-KR DX XC 500 AIR1-KR DX XC 500...
- Page 26 Installation and Operating Instructions Cooling register AIR1-KR DX AIR1-KR DX XH 1500 AIR1-KR DX XH 2500 AIR1-KR DX XH 2500 R/L AIR1-KR DX XC 500 AIR1-KR DX XC 500 AIR1-KR DX XH 1500 R/L 2500 1600 1400 2000 1200 1000 1500 1000 9 10 11...
- Page 27 Installation and Operating Instructions Cooling register AIR1-KR DX AIR1-KR DX XH 8500 AIR1-KR DX RH 1500 AIR1-KR DX XH 8500 R/L AIR1-KR DX RH 1500 R/L AIR1-KR DX XC 500 9000 1800 8000 1600 7000 1400 6000 1200 5000 1000 4000 3000 2000...
- Page 28 Installation and Operating Instructions Cooling register AIR1-KR DX AIR1-KR DX RH 8000 AIR1-KR DX RH 9500 AIR1-KR DX RH 8000 R/L AIR1-KR DX RH 9500 R/L AIR1-KR DX XC 500 9000 12000 8000 10000 7000 6000 8000 5000 6000 4000 3000 4000 2000...
- Page 29 Installation and Operating Instructions Cooling register AIR1-KR DX Type AIR1-KR DX XC 500 L – AIR1-KR DX XC 700 L – AIR1-KR DX XC 1400 L 542 – AIR1-KR DX XC 2200 L 592 – AIR1-KR DX XC 3200 L 692 Dimensions Cooling register AIR1-KR DX XC 500-3200 R Fig�2 Bottom view...
- Page 30 Installation and Operating Instructions Cooling register AIR1-KR DX Fig�4 ø 32 Maße (mm) Right version Art.-Nr. Type 04872 AIR1-KR DX XH 1000 R 1000 490 04873 AIR1-KR DX XH 1500 R 1000 570 04877 AIR1-KR DX XH 2500 R 1000 620 Type 04878 AIR1-KR DX XH 3500 R 1100 670 AIR1-KR DX XH 1000 1000 490 635 715 370 350 318 215 343 238 315 210...
-
Page 31: General Installation Instructions
Installation and Operating Instructions Cooling register AIR1-KR DX Type AIR1-KR DX RH 1500 1000 520 760 745 306 425 380 265 378 338 350 310 – – – 130 170 858 712 AIR1-KR DX RH 2000 1000 580 860 805 306 425 430 295 498 338 470 310 –... -
Page 32: Mechanical Assembly
Installation and Operating Instructions Cooling register AIR1-KR DX Dispose of all components and disused operating materials in an environmentally-friendly manner in accordance with the local codes, practices and environmental regulations. An authorised specialist waste processing company must dispose of the unit or the individual components. The appo- inted contractor must ensure that: –... - Page 33 Installation and Operating Instructions Cooling register AIR1-KR DX When using the cooling register below, the corresponding AIR1 XC unit must be suspended lower from the ceiling (see table,Fig.9). Fig�9 Type H (mm) AIR1-KR DX XC 700 AIR1-KR DX XC 1400 –...
- Page 34 Installation and Operating Instructions Cooling register AIR1-KR DX 2�7�1 Cooling register DX for AIR1 XC units 1. The cooling register has 4 mounting brackets for installation (see Fig.11). Suspend the cooling register with these mounting brackets using the rubber dampers. Before suspension, apply sealing strips where the cooling register is joined together with the AIR1 unit.
- Page 35 Installation and Operating Instructions Cooling register AIR1-KR DX 4. Attach the cooling register to the unit. Connect the free temperature sensor plug from the unit to the cooling register (see Fig.14). Fig�14 5. Screw the cooling register and the unit together (Screw: M8 x 16; s. Fig.15). Fig�15 6.
- Page 36 Installation and Operating Instructions Cooling register AIR1-KR DX the cooling register and the AIR1 unit or external auxiliary heater (see Fig.18). Temperature sensor Fig�18 4. Establish the electrical connection between the AIR1 unit and the cooling register. – If there an external auxiliary heater is not used: Use the depicted connection cable (see Fig.19) to connect the cooling register and the AIR1 unit.
- Page 37 Installation and Operating Instructions Cooling register AIR1-KR DX The 16x20 mm long screws must be mounted on the side, the 6x16 mm long screws are intended for the bracket NOTE above� Fig�22 7. Mount the mounting bracket to the cooling register. Connect AIR1 unit to cooling register as follows (see Fig.23). Fig�23 8.
-
Page 38: Connection And Commissioning
Installation and Operating Instructions Cooling register AIR1-KR DX the siphon. ATTENTION Ensure condensate outlet is frost-proof if necessary. 10. Connect the cooling register to the flow and return pursuant to local regulations. 2�8 Connection and commissioning 2�8�1 Wiring DX element and AIR1 unit Open the terminal box cover and check the thickness of the wire used for the signal connection. - Page 39 Installation and Operating Instructions Cooling register AIR1-KR DX 2�8�5 Wiring diagram AIR1-KR DX SS-1353...
-
Page 40: Service And Maintenance
Installation and Operating Instructions Cooling register AIR1-KR DX CHAPTER 3 3�1 Service and maintenance SERVICE AND Cleaning and maintenance work may only be carried out by an electrician. MAINTENANCE Danger to life! The AIR1 unit must be fully isolated from the mains power supply before all maintenance and installation work! Danger of electric shock, moving parts (fans) and potentially hot surfaces of optional auxiliary heating registers�... - Page 41 Installation and Operating Instructions Cooling register AIR1-KR DX 2. Clean the condensate tray with a cloth (see Fig.28 Fig�28 3�3 Cleaning the register for contamination every 6 months – It is recommended to check the DX cooling register The cooling register must be regularly checked for dirt and dust deposits. If there is dirt and dust on the cooling –...
- Page 42 Notice de montage et d’utilisation Batterie de refroidissement AIR1-KR DX FRANÇAIS Sommaire CHAPITRE 1 INFORMATIONS GÉNÉRALES ������������������������������������������������������������������������������������� PAGE 2 Informations importantes ..................Page 2 Précautions et consignes de sécurité ..............Page 2 Demandes de garantie – Réserves du constructeur ..........Page 2 Domaines d’utilisation –...
-
Page 43: Informations Importantes
Si les consignes figurant dans cette notice ne sont pas correctement respectées, la garantie s’annule. Il en est de même pour toute implication de responsabilité du fabricant. L’utilisation d’accessoires non conseillés ou proposés par Helios n’est pas permise. Les dégâts causés par cette mau- vaise utilisation ne sont pas inclus dans la garantie. - Page 44 Notice de montage et d’utilisation Batterie de refroidissement AIR1-KR DX Désignation du produit Poids Capacité de Pression de Indice de Indice de Tension (V) Fréquence Puissance (sans fluide) remplissage fonctionne- protection protection électrique ment max� IP (sans IP (avec réseau (bar) toiture) toiture)
- Page 45 Notice de montage et d’utilisation Batterie de refroidissement AIR1-KR DX Les puissances de refroidissement de chaque batterie, selon le débit et le liquide de refroidissement, sont illustrées dans les graphiques suivants (à la température et à l’humidité d’entrée : 30 °C, 40 % HR) : AIR1-KR DX XC 700 AIR1-KR DX XC 500 AIR1-KR DX XC 500...
- Page 46 Notice de montage et d’utilisation Batterie de refroidissement AIR1-KR DX AIR1-KR DX XH 1500 AIR1-KR DX XH 2500 AIR1-KR DX XH 2500 R/L AIR1-KR DX XC 500 AIR1-KR DX XC 500 AIR1-KR DX XH 1500 R/L 2500 1600 1400 2000 1200 1000 1500...
- Page 47 Notice de montage et d’utilisation Batterie de refroidissement AIR1-KR DX AIR1-KR DX XH 8500 AIR1-KR DX RH 1500 AIR1-KR DX XH 8500 R/L AIR1-KR DX RH 1500 R/L AIR1-KR DX XC 500 9000 1800 8000 1600 7000 1400 6000 1200 5000 1000 4000...
-
Page 48: Dessins Dimensions
Notice de montage et d’utilisation Batterie de refroidissement AIR1-KR DX AIR1-KR DX RH 8000 AIR1-KR DX RH 9500 AIR1-KR DX RH 8000 R/L AIR1-KR DX RH 9500 R/L AIR1-KR DX XC 500 9000 12000 8000 10000 7000 6000 8000 5000 6000 4000 3000... - Page 49 Notice de montage et d’utilisation Batterie de refroidissement AIR1-KR DX Type AIR1-KR DX XC 500 L – AIR1-KR DX XC 700 L – AIR1-KR DX XC 1400 L 542 – AIR1-KR DX XC 2200 L 592 – AIR1-KR DX XC 3200 L 692 Dimensions de la batterie de refroidissement AIR1-KR DX XC 500-3200 R Fig�2 Bottom view...
- Page 50 Notice de montage et d’utilisation Batterie de refroidissement AIR1-KR DX Fig�4 ø 32 Maße (mm) Version droite Art.-Nr. Type 04872 AIR1-KR DX XH 1000 R 1000 490 04873 AIR1-KR DX XH 1500 R 1000 570 Type 04877 AIR1-KR DX XH 2500 R 1000 620 AIR1-KR DX XH 1000 1000 490 635 715 370 350 318 215 343 238 315 210 –...
-
Page 51: Consignes De Montage Générales
Notice de montage et d’utilisation Batterie de refroidissement AIR1-KR DX Type AIR1-KR DX RH 1500 1000 520 760 745 306 425 380 265 378 338 350 310 – – – 130 170 858 712 AIR1-KR DX RH 2000 1000 580 860 805 306 425 430 295 498 338 470 310 –... -
Page 52: Montage Mécanique
Notice de montage et d’utilisation Batterie de refroidissement AIR1-KR DX l’environnement et conformément aux règles, aux pratiques et aux réglementations environnementales locales. L’élimination de l’appareil ou des différents composants doit être confiée à une entreprise agréée spécialisée dans le traitement des déchets. L’entreprise mandatée doit garantir : –... - Page 53 Notice de montage et d’utilisation Batterie de refroidissement AIR1-KR DX Pour l’utilisation des batteries de refroidissement mentionnées ci-après, la centrale AIR1 XC concernée doit être accro- chée plus bas par rapport au plafond (voir le tableau de la Fig.9). Fig�9 ...
-
Page 54: Batterie De Refroidissement Dx Pour Les Centrales Air1 Xc
Notice de montage et d’utilisation Batterie de refroidissement AIR1-KR DX 2�7�1 Batterie de refroidissement DX pour les centrales AIR1 XC 1. La batterie de refroidissement est équipée de 4 supports de fixation pour le montage (voir Fig.11). Accrocher la batterie de refroidissement avec ces supports de fixation à l’aide des amortisseurs en caoutchouc. Avant de l’ac- crocher, appliquer des bandes d’étanchéité... - Page 55 Notice de montage et d’utilisation Batterie de refroidissement AIR1-KR DX 4. Réunir la batterie de refroidissement et la centrale. Raccorder le connecteur libre de la sonde de température de la centrale avec la batterie de refroidissement (voir Fig.14). Fig�14 5. Visser la batterie de refroidissement avec la centrale (vis M8 x 16 ; voir Fig.15). Fig�15 6.
- Page 56 Notice de montage et d’utilisation Batterie de refroidissement AIR1-KR DX 3. Retirer la sonde de température du côté de l’air soufflé de la centrale AIR1 ou du chauffage externe. Rapprocher ensuite la batterie de refroidissement et la centrale AIR1 ou le chauffage externe (voir Fig.18). Sonde de température Fig�18 4.
- Page 57 Notice de montage et d’utilisation Batterie de refroidissement AIR1-KR DX Les vis de 16x20 mm doivent être placées sur le côté, les vis de 6x16 mm sont pour l’angle sur le dessus� REMARQUE Fig�22 7. Monter les équerres de montage sur la batterie de refroidissement. Relier la centrale AIR1 à la batterie de refroidis- sement comme indiqué...
-
Page 58: Raccordement Et Mise En Service
Notice de montage et d’utilisation Batterie de refroidissement AIR1-KR DX 2�8 Raccordement et mise en service 2�8�1 Câblage de la batterie de refroidissement DX et de la centrale AIR1 Ouvrir le couvercle de la boîte à bornes et vérifier la section du câble qui sera utilisée pour la connexion du signal. –... -
Page 59: Schéma De Raccordement Air1-Kr Dx
Notice de montage et d’utilisation Batterie de refroidissement AIR1-KR DX 2�8�5 Schéma de raccordement AIR1-KR DX SS-1353... -
Page 60: Entretien Et Maintenance
Notice de montage et d’utilisation Batterie de refroidissement AIR1-KR DX CHAPITRE 3 3�1 Entretien et maintenance ENTRETIEN ET Les travaux de nettoyage et de maintenance doivent être effectués exclusivement par un électricien qualifié. MAINTENANCE Danger de mort ! Mettre impérativement l’appareil hors tension avant tous travaux d’entretien, d’installation et avant l’ouverture DANGER du coffret électrique ! Risque de choc électrique, risque lié... -
Page 61: Nettoyage De La Batterie
Notice de montage et d’utilisation Batterie de refroidissement AIR1-KR DX 2. Nettoyer le bac à condensat avec un chiffon (voir Fig.28). Fig�28 3�3 Nettoyage de la batterie – Il est recommandé de contrôler l’absence de contamination au niveau de la batterie de refroidissement DX tous les 6 mois. - Page 62 Notice de montage et d’utilisation Batterie de refroidissement AIR1-KR DX...
- Page 63 Notice de montage et d’utilisation Batterie de refroidissement AIR1-KR DX...
- Page 64 HELIOS Ventilatoren GmbH + Co KG · Lupfenstraße 8 · 78056 VS-Schwenningen HELIOS Ventilateurs · Le Carré des Aviateurs · 157 avenue Charles Floquet · 93155 Le Blanc Mesnil Cedex CH HELIOS Ventilatoren AG · Tannstrasse 4 · 8112 Otelfingen GB HELIOS Ventilation Systems Ltd.
Need help?
Do you have a question about the AIR1-KR DX Series and is the answer not in the manual?
Questions and answers