Helios AIR1-KR KW Series Installation And Operating Instructions Manual
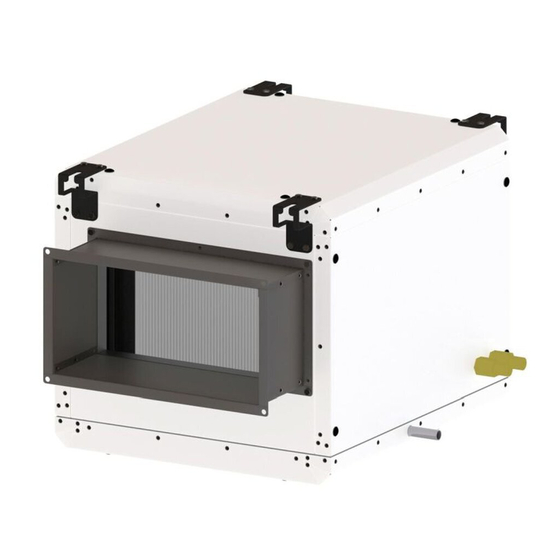
Cold water cooling register for air1 ventilation units
Hide thumbs
Also See for AIR1-KR KW Series:
Table of Contents
Advertisement
Available languages
Available languages
Advertisement
Chapters
Table of Contents

Subscribe to Our Youtube Channel
Related Manuals for Helios AIR1-KR KW Series


Summary of Contents for Helios AIR1-KR KW Series
- Page 1 Helios Ventilatoren MONTAGE- UND BETRIEBSVORSCHRIFT INSTALLATION AND OPERATING INSTRUCTIONS NOTICE DE MONTAGE ET D’ENTRETIEN Kaltwasser-Kühlregister Cold Water Cooling Register Batterie eau glaçée AIR1-KR KW für AIR1 Lüftungsgeräte for AIR1 ventilation units pour les centrales AIR1...
-
Page 2: Table Of Contents
Montage- und Betriebsvorschrift Kühlregister AIR1-KR KW DEUTSCH Inhaltsverzeichnis KAPITEL 1 ALLGEMEINE HINWEISE ������������������������������������������������������������������������������������������������������������� SEITE 2 Wichtige Informationen ......................Seite 2 Warn- und Sicherheitshinweise ..................... Seite 2 Garantieansprüche – Haftungsausschluss ................Seite 2 Einsatzbereich – Bestimmungsgemäße Verwendung .............. Seite 2 Funktionsbeschreibung ......................Seite 2 KAPITEL 2 INSTALLATION UNDINBETRIEBNAHME �������������������������������������������������������������������������������������... -
Page 3: Wichtige Informationen
Wenn die nachfolgenden Ausführungen nicht beachtet werden, entfällt die Gewährleistung. Gleiches gilt für Haftungs- ansprüche an den Hersteller. Der Gebrauch von Zubehörteilen, die nicht von Helios empfohlen oder angeboten werden, ist nicht statthaft. Even tuell auftretende Schäden unterliegen nicht der Gewährleistung. - Page 4 Montage- und Betriebsvorschrift Kaltwasser-Kühlregister AIR1-KR KW AIR1 XH Kaltwasser-Kühlregister Gerätetype Kühlleistung (kW) Gewicht (kg) 7/12 °C (Flüssigkeitseinlass-/ auslass-Temperatur AIR1-KR KW XH 1000 L AIR1-KR KW XH 1000 R AIR1-KR KW XH 1500 L AIR1-KR KW XH 1500 R AIR1-KR KW XH 2500 L AIR1-KR KW XH 2500 R AIR1-KR KW XH 3500 L 13,1...
- Page 5 Montage- und Betriebsvorschrift Kaltwasser-Kühlregister AIR1-KR KW Abmessungen Kaltwasser-Kühlregister AIR1-KR KW L für AIR1 XC Lüftungsgeräte Abb�1 Bottom view Ansicht von unten Vue de dessous ø 17,5 302,5 Maße (mm) Abmessungen Kaltwasser-Kühlregister AIR1-KR KW R für AIR1 XC Lüftungsgeräte Art.-Nr. Type 04185 AIR1-KR KW XC 500 L 437 437 317 234 320 170 300 150 192 467...
- Page 6 Montage- und Betriebsvorschrift Kaltwasser-Kühlregister AIR1-KR KW Abmessungen Kaltwasser-Kühlregister AIR1-KR KW für AIR1 XH Lüftungsgeräte Abb�3 ø 32 Maße (mm) Linke Ausführung Art.-Nr. Type 03834 AIR1-KR KW XH 1000 L 1000 490 G 1/2 Abb�4 03842 AIR1-KR KW XH 1500 L 1000 570 G 3/4 03844 AIR1-KR KW XH 2500 L 1000 620 G 3/4...
- Page 7 Montage- und Betriebsvorschrift Kaltwasser-Kühlregister AIR1-KR KW Abmessungen Kaltwasser-Kühlregister AIR1-KR KW für AIR1 RH Lüftungsgeräte Abb�5 ø 32 Maße (mm) Linke Ausführung Art.-Nr. Type 03958 AIR1-KR KW RH 1500 L 1000 520 G 1/2 03959 AIR1-KR KW RH 2000 L 1000 580 G 3/4 Abb�6 03967 AIR1-KR KW RH 3000 L...
-
Page 8: Transport
Montage- und Betriebsvorschrift Kaltwasser-Kühlregister AIR1-KR KW 2�1�3 Transport Der Transport muss sorgfältig durchgeführt werden. Es wird empfohlen das Gerät bis zur Aufstellung in der Original- verpackung zu belassen, um mögliche Beschädigungen und Verschmutzungen zu vermeiden. Der Transport muss von geschultem und erfahrenem Personal durchgeführt werden und es müssen die notwendigen Sicherheitsvorkehrungen getroffen werden, um ein Umkippen und Verrutschen des Geräts zu verhindern. - Page 9 Montage- und Betriebsvorschrift Kaltwasser-Kühlregister AIR1-KR KW reduziert werden. Das Mischungsverhältnis des Ethylenglykols ist in der folgenden Darstellung ersichtlich (Abb.7). Abb�7 Einbauort – für Lüftungsgeräte AIR1 XC Bei der Geräteinstallation müssen folgende Kriterien beachtet werden, um eine leichte Zugänglichkeit für Wartungs- und Instandhaltungsarbeiten zu gewährleisten (Abb.8, Abb.9).
- Page 10 Montage- und Betriebsvorschrift Kaltwasser-Kühlregister AIR1-KR KW Bei Verwendung der unten aufgeführten Kühlregister muss das entsprechende AIR1 XC Gerät niedriger von der Decke abgehängt werden (s. Tabelle, Abb.10). Abb�10 Type H (mm) AIR1-KR KW XC 700 AIR1-KR KW XC 1400 –...
- Page 11 Montage- und Betriebsvorschrift Kaltwasser-Kühlregister AIR1-KR KW 2. Den Temperatursensor von der markierten Stelle im Zuluftkanal des AIR1-Geräts entfernen (s. Abb.13). Abb�13 AIR1-KR KW L AIR1-KR KW R 3. Den Temperatursensor auf der Zuluftseite des Kühlregisters einstecken und mit einem Kabelbinder am Blechhalter verbinden (s.
-
Page 12: Kaltwasser-Kühlregister Für Air1 Xh Und Rh Lüftungsgeräte
Montage- und Betriebsvorschrift Kaltwasser-Kühlregister AIR1-KR KW 5. Das Kühlregister und das Gerät miteinander verschrauben (Schraube: M8 x 16; s. Abb.16). Abb�16 6. Das Kühlregister mit dem Kaltwasser Vor- und Rücklauf anschließen. 7. Durch das Kühlen kann Kondensat anfallen. Vor Inbetriebnahme muss der korrekte Kondensatanschlus an das Abwassersystem gewährleistet sein. - Page 13 Montage- und Betriebsvorschrift Kaltwasser-Kühlregister AIR1-KR KW 4. Den elektrischen Anschluss zwischen AIR1-Gerät und Kühlregister herstellen. – Falls keine externe Nachheizung zum Einsatz kommt: Das abgebildete Verbindungskabel verwenden (s. Abb.20), um das Kühlregister und das AIR1-Gerät miteinander zu verbinden. Es wird empfohlen, des Kühlmodul vom Kühlregister zu entfernen, um einen einfachen Zugriff auf die Anschlüsse HINWEIS zu ermöglichen.
- Page 14 Montage- und Betriebsvorschrift Kaltwasser-Kühlregister AIR1-KR KW 6. Das Modulverbindungsteil an das AIR1-Gerät bzw. die externe Nachheizung und das Kühlregister montieren. Die Schraube anziehen (s. Abb.23). Abb�23 7. Montagewinkel auf dem Kühlregister montieren. AIR1-Gerät wie folgt mit dem Kühlregister verbinden (s. Abb.24). Abb�24 8.
-
Page 15: Service Und Wartung
Montage- und Betriebsvorschrift Kaltwasser-Kühlregister AIR1-KR KW KAPITEL 3 3�1 Service und Wartung Reinigungs- und Wartungsarbeiten dürfen nur von einer Elektrofachkraft durchgeführt werden. SERVICE UND WARTUNG Lebensgefahr! Vor allen Wartungs- und Installationsarbeiten ist das AIR1-Gerät allpolig vom Netz zu trennen! GEFAHR Gefährdung durch elektrischen Schlag, bewegliche Teile (Ventilatoren) und ggf�... -
Page 16: Reinigung Register
Montage- und Betriebsvorschrift Kaltwasser-Kühlregister AIR1-KR KW 3�3 Reinigung Register – Es wird empfohlen das Kaltwasser-Kühlregister alle 6 Monate auf Kontamination zu überprüfen. – Das Kühlregister muss regelmäßig auf Schmutz und Staubablagerungen überprüft werden. Wenn sich Schmutz und Staub auf dem Kühlregister befinden, können diese mit Wasser entfernt werden. –... - Page 17 Installation and Operating Instructions Cooling Register AIR1-KR KW ENGLISH Table of Contents CHAPTER 1 GENERAL INFORMATION ������������������������������������������������������������������������������������������������������������������������������� PAGE 2 Important information ..........................Page 2 Warning and safety instructions ......................Page 2 Warranty claims – Exclusion of liability ..................... Page 2 Area of application –...
-
Page 18: Important Information
If the preceding instructions are not observed, all warranty claims shall be excluded. This also applies for liability claims against the manufacturer. The use of accessories, which are not recommended or offered by Helios, is not permitted. Any possible damages are not covered by the warranty. - Page 19 Installation and Operating Instructions Cold Water Cooling Register AIR1-KR KW AIR1 XH cold water cooling register Unit type Cooling capacity (kW) Weight (kg) 7/12 °C (liquid inlet/outlet temperature) AIR1-KR KW XH 1000 L AIR1-KR KW XH 1000 R AIR1-KR KW XH 1500 L AIR1-KR KW XH 1500 R AIR1-KR KW XH 2500 L AIR1-KR KW XH 2500 R...
- Page 20 Installation and Operating Instructions Cold Water Cooling Register AIR1-KR KW Dimensions Cold water cooling register AIR1-KR KW L for AIR1 XC ventilation units Fig�1 Bottom view Ansicht von unten Vue de dessous ø 17,5 302,5 Maße (mm) Dimensions Cold water cooling register AIR1-KR KW R for AIR1 XC ventilation units Art.-Nr.
- Page 21 Installation and Operating Instructions Cold Water Cooling Register AIR1-KR KW Dimensions Cold water cooling register AIR1-KR KW for AIR1 XH ventilation units Fig�3 ø 32 Maße (mm) Left version Art.-Nr. Type 03834 AIR1-KR KW XH 1000 L 1000 490 G 1/2 03842 AIR1-KR KW XH 1500 L 1000 570 G 3/4 Fig�4...
- Page 22 Installation and Operating Instructions Cold Water Cooling Register AIR1-KR KW Dimensions Cold water cooling register AIR1-KR KW for AIR1 RH ventilation units Fig�5 ø 32 Maße (mm) Left version Art.-Nr. Type 03958 AIR1-KR KW RH 1500 L 1000 520 G 1/2 03959 AIR1-KR KW RH 2000 L 1000 580 G 3/4...
-
Page 23: Shipping
Installation and Operating Instructions Cold Water Cooling Register AIR1-KR KW 2�1�3 Shipping The shipping must be carried out carefully. It is recommended to leave the unit in the original packaging until installation to avoid possible damages and contamination. The shipping must be carried out by trained and experienced personnel and the necessary safety precautions should be taken to prevent overturning and slipping of the device. - Page 24 Installation and Operating Instructions Cold Water Cooling Register AIR1-KR KW glycol. The mixing ratio of ethylene glycol is shown in the illustration below (Fig.7). Fig�7 Freezing point Assembly area – for ventilation units AIR1 XC The following criteria must be observed when installing the unit to ensure easy accessibility for maintenance and main- tenance work (Fig.8, Fig.9).
- Page 25 Installation and Operating Instructions Cold Water Cooling Register AIR1-KR KW When using the cooling register below, the corresponding AIR1 XC unit must be suspended lower from the ceiling (see table,Fig.10). Fig�10 Type H (mm) AIR1-KR KW XC 700 AIR1-KR KW XC 1400 –...
- Page 26 Installation and Operating Instructions Cold Water Cooling Register AIR1-KR KW 2. Remove the temperature sensor from the marked position in the supply air duct of the AIR1 unit (see Fig.13). Fig�13 AIR1-KR KW L AIR1-KR KW R 3. Insert the temperature sensor on the supply air side of the cooling register and fasten to the metal bracket with a cable tie (see Fig.14).
-
Page 27: Cold Water Cooling Register For Air1 Xh And Rh Ventilation Units
Installation and Operating Instructions Cold Water Cooling Register AIR1-KR KW 5. Screw the cooling register and the unit together (Screw: M8 x 16; s. Fig.16). Fig�16 6. Connect the cooling register to the cold water flow and return. 7. Cooling can produce condensate. The correct condensate connection to the sewage system must be ensured before commissioning. - Page 28 Installation and Operating Instructions Cold Water Cooling Register AIR1-KR KW 4. Establish the electrical connection between the AIR1 unit and the cooling register. – If there an external auxiliary heater is not used: Use the depicted connection cable (see Fig.20) to connect the cooling register and the AIR1 unit. It is recommended to remove the cooling module from the cooling register to enable easy access to the con- nections.
- Page 29 Installation and Operating Instructions Cold Water Cooling Register AIR1-KR KW 6. Mount the module connector to the AIR1 unit or external auxiliary heater and the cooling register. Tighten the screws (see Fig.23). Fig�23 7. Mount the mounting bracket to the cooling register. Connect AIR1 unit to cooling register as follows (see Fig.24). Fig�24 8.
-
Page 30: Service And Maintenance
Installation and Operating Instructions Cold Water Cooling Register AIR1-KR KW 10. Connect the cooling register to the cold water flow and return. 11. After installation of the cooling register, adjust the settings in the commissioning assistant. In this respect, observe the corresponding chapter in the installation and operating instructions for the respective AIR1 ventilation unit. -
Page 31: Cleaning The Register
Installation and Operating Instructions Cold Water Cooling Register AIR1-KR KW 2. Clean the condensate tray with a cloth (see Fig.29). Fig�29 3�3 Cleaning the register – It is recommended to check the cold water cooling register for contamination every 6 months. –... - Page 32 Notice de montage et d’utilisation Batterie de refroidissement AIR1-KR KW FRANÇAIS Sommaire CHAPITRE 1 INFORMATIONS GÉNÉRALES �������������������������������������������������������������������������������������������������������������������������������������� PAGE 2 Informations importantes ............................Page 2 Précautions et consignes de sécurité ........................Page 2 Demandes de garantie – Réserves du constructeur ..................... Page 2 Domaines d’utilisation –...
-
Page 33: Informations Importantes
Si les consignes figurant dans cette notice ne sont pas correctement respectées, la garantie s’annule. Il en est de même pour toute implication de responsabilité du fabricant. L’utilisation d’accessoires non conseillés ou proposés par Helios n’est pas permise. Les dégâts causés par cette mau- vaise utilisation ne sont pas couverts par la garantie. - Page 34 Notice de montage et d’utilisation Batterie de refroidissement à eau glacée AIR1-KR KW Batterie de refroidissement à eau glacée AIR1 XH Type Puissance de refroidissement (kW) Poids (kg) 7 / 12 °C (Température du liquide à l’entrée / la sortie) AIR1-KR KW XH 1000 L AIR1-KR KW XH 1000 R AIR1-KR KW XH 1500 L...
- Page 35 Notice de montage et d’utilisation Batterie de refroidissement à eau glacée AIR1-KR KW Dimensions de la batterie de refroidissement à eau glacée AIR1-KR KW L pour les centrales AIR1 XC Fig�1 Bottom view Ansicht von unten Vue de dessous ø 17,5 302,5 Maße (mm) Dimensions de la batterie de refroidissement à...
- Page 36 Notice de montage et d’utilisation Batterie de refroidissement à eau glacée AIR1-KR KW Dimensions de la batterie de refroidissement à eau glacée AIR1-KR KW pour les centrales AIR1 XH Fig�3 ø 32 Maße (mm) Version gauche Art.-Nr. Type 03834 AIR1-KR KW XH 1000 L 1000 490 G 1/2 Fig�4 03842 AIR1-KR KW XH 1500 L 1000 570...
- Page 37 Notice de montage et d’utilisation Batterie de refroidissement à eau glacée AIR1-KR KW Dimensions de la batterie de refroidissement à eau glacée AIR1-KR KW pour les centrales AIR1 RH Fig�5 ø 32 Version gauche Maße (mm) Art.-Nr. Type 03958 AIR1-KR KW RH 1500 L 1000 520 G 1/2 Fig�6...
-
Page 38: Transport
Notice de montage et d’utilisation Batterie de refroidissement à eau glacée AIR1-KR KW 2�1�3 Transport Le transport doit être effectué avec soin. Il est préférable de laisser l’appareil dans son emballage d’origine jusqu’au moment du montage afin d’éviter d’éventuels dommages et salissures. Le transport doit être effectué... - Page 39 Notice de montage et d’utilisation Batterie de refroidissement à eau glacée AIR1-KR KW de l’éthylène glycol. Le rapport de mélange de l’éthylène glycol est présenté dans le graphique suivant (Fig.7). Fig�7 Lieu de montage – pour les centrales AIR1 XC Lors de l’installation de l’appareil, les critères suivants doivent être respectés afin de garantir un accès facile pour les travaux d’entretien et de maintenance (voir Fig.8, Fig.9).
- Page 40 Notice de montage et d’utilisation Batterie de refroidissement à eau glacée AIR1-KR KW Pour l’utilisation des batteries de refroidissement mentionnées ci-après, la centrale AIR1 XC concernée doit être accro- chée plus bas par rapport au plafond (voir le tableau de la Fig.10). Fig�10 ...
- Page 41 Notice de montage et d’utilisation Batterie de refroidissement à eau glacée AIR1-KR KW 2. Retirer la sonde de température de la zone entourée située dans la gaine d’air soufflé de la centrale AIR1 (voir Fig.13). Fig�13 AIR1-KR KW L AIR1-KR KW R 3.
-
Page 42: Batterie De Refroidissement À Eau Glacée Pour Les Centrales Air1 Xh Et Rh
Notice de montage et d’utilisation Batterie de refroidissement à eau glacée AIR1-KR KW 5. Visser la batterie de refroidissement avec la centrale (vis M8 x 16 ; voir Fig.16). Fig�16 6. Raccorder la batterie de refroidissement avec le départ et le retour d’eau glacée. 7. - Page 43 Notice de montage et d’utilisation Batterie de refroidissement à eau glacée AIR1-KR KW 4. Procéder au raccordement électrique entre la centrale AIR1 et la batterie de refroidissement. – En l’absence de chauffage externe : Utiliser le câble de raccordement illustré (voir Fig.20) pour raccorder la batterie de refroidissement et la centrale AIR1.
- Page 44 Notice de montage et d’utilisation Batterie de refroidissement à eau glacée AIR1-KR KW 6. Monter les éléments d’assemblage du module sur la centrale AIR1 ou le chauffage externe et la batterie de refroi- dissement. Serrer les vis (voir Fig.23). Fig�23 7.
-
Page 45: Entretien Et Maintenance
Notice de montage et d’utilisation Batterie de refroidissement à eau glacée AIR1-KR KW 9. Le refroidissement peut générer des condensats. Avant la mise en service, s’assurer que l’évacuation des conden- sats est correctement raccordée au système des eaux usées. Pour ce faire, un siphon ou une pompe à condensat doivent être utilisés. -
Page 46: Nettoyage De La Batterie
Notice de montage et d’utilisation Batterie de refroidissement à eau glacée AIR1-KR KW 2. Nettoyer le bac à condensat avec un chiffon (voir Fig.29). Fig�29 3�3 Nettoyage de la batterie – Il est recommandé de contrôler l’absence de contamination au niveau de la batterie de refroidissement à eau glacée tous les 6 mois. - Page 47 Notice de montage et d’utilisation Batterie de refroidissement à eau glacée AIR1-KR KW...
- Page 48 HELIOS Ventilatoren GmbH + Co KG · Lupfenstraße 8 · 78056 VS-Schwenningen HELIOS Ventilateurs · Le Carré des Aviateurs · 157 avenue Charles Floquet · 93155 Le Blanc Mesnil Cedex CH HELIOS Ventilatoren AG · Tannstrasse 4 · 8112 Otelfingen GB HELIOS Ventilation Systems Ltd.
Need help?
Do you have a question about the AIR1-KR KW Series and is the answer not in the manual?
Questions and answers