Chapters
Table of Contents

Subscribe to Our Youtube Channel
Related Manuals for SMART Board QX Pro Series


Summary of Contents for SMART Board QX Pro Series
- Page 1 SMART Board ® QX Pro series interactive displays User guide SBID-QX265-P SBID-QX275-P SBID-QX286-P SBID-QX075-P SBID-QX086-P SBID-QX065-P IDQX65-1 IDQX75-1 IDQX86-1 Was this document helpful? smarttech.com/docfeedback/171875...
- Page 2 Trademark notice SMART Board, SMART Notebook, SMART TeamWorks, SMART Meeting Pro, Pen ID, HyPr Touch, Object Awareness, Silktouch, Tool Explorer, smarttech, the SMART logo and all SMART taglines are trademarks or registered trademarks of SMART Technologies ULC in the U.S. and/or other countries. The Bluetooth word mark is owned by the Bluetooth SIG, Inc.
-
Page 3: Important Information
Important information Note Refer to the SMART Board QX Pro series interactive displays installation and maintenance guide (smarttech.com/kb/171874) for important information about installing and maintaining the display. Warning Do not open or disassemble the display. You risk electrical shock from the high voltage inside the casing. -
Page 4: Table Of Contents
Contents Important information Chapter 1 Welcome About this guide About the display Identifying your specific model More information Chapter 2 Using basic features Waking up the display and putting it back into energy saving mode Using the convenience panel Using the remote control Using touch Using the pens and erasers Adjusting the volume... - Page 5 Contents Contacting your reseller for additional support Certification and compliance docs.smarttech.com/kb/171875...
-
Page 6: Chapter 1 Welcome
More information ® The SMART Board QX Pro series interactive display with iQ is the hub of your classroom or meeting room. This chapter introduces the SMART Board QX Pro series interactive displays. About this guide This guide is for people who use SMART Board interactive displays. Documentation and resources for those who install and maintain displays is also available (see More information on page ... -
Page 7: About The Display
Chapter 1 Welcome About the display Note The following features are available on the SMART Board QX Pro models. Touch You can do everything on the display that you can do at your computer—open and close applications, meet with others, create new documents or edit existing ones, visit websites, play and manipulate videos, and so on—by touching the display’s surface. - Page 8 SMART-authorized pens and tools in addition to those supplied with the display. Users can manipulate real-world objects to interact intuitively with on-screen objects, increasing engagement and knowledge retention. The SMART Board QX Pro is Tool Explorer (v2) ready.
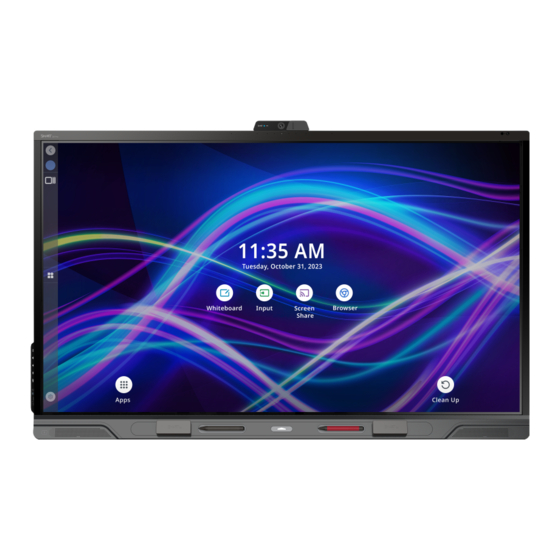
- Page 9 Chapter 1 Welcome Press the Home button on the display (pictured) or the remote control to open the Home screen. From the Home screen, you can open the iQ apps, switch inputs, and adjust settings. For more information about the Home button and the Home screen, see Using the Home button.
- Page 10 Chapter 1 Welcome The display comes with SMART software that you can install on connected computers to take full advantage of the display’s features while using the connected computers. For more information, see Connecting room computers and guest laptops on page 34. Accessory slot You can install an OPS-compatible device, such as a SMART OPS PC module, in the accessory slot.
- Page 11 Chapter 1 Welcome Notes For more information about energy saving modes, see the SMART Board QX Pro series interactive displays installation and maintenance guide (smarttech.com/kb/171874). The proximity sensor responds when the display is the standby and networked standby power states.
- Page 12 Chapter 1 Welcome Remote control IR sensor The IR sensor is located in the top-right corner of the display’s frame. It’s the sensor on the left. You can use the remote control to turn the display on and off, adjust display settings, and so on. For more information about the remote control, see Using the remote control on page ...
- Page 13 Chapter 1 Welcome Notes Information from the display’s environmental sensors is available only when iQ is enabled. The display’s environmental sensors are not life safety rated sensors: they provide general information only. The typical lifespan of the display’s environmental sensors is five years. This will vary based on usage and environmental factors.
-
Page 14: Identifying Your Specific Model
The display features M4 mounting points located at the top-center (for the camera), and under the frame on the left and right sides for SMART-approved accessories. Identifying your specific model SMART offers a variety of models of the SMART Board QX Pro series interactive display: Model/SKUs Frame style... -
Page 15: More Information
SMART provides a variety of other documents for this display in the Support section of the SMART website (smarttech.com/support). Scan the QR code on the cover of this guide to view links to SMART Board QX Pro series interactive display documents and other support resources. docs.smarttech.com/kb/171875... -
Page 16: Chapter 2 Using Basic Features
Chapter 2 Using basic features Waking up the display and putting it back into energy saving mode Using the convenience panel Using the remote control Using touch Using the pens and erasers Writing and drawing in digital ink Using pressure-sensitivity Using the SMART Ink dynamic (floating) toolbar Changing a pen’s color, thickness, and other properties Erasing digital ink... - Page 17 After entering Ready mode, the display enters an energy saving mode when the sensor detects no movement in the room for the length of time configured in the display’s settings. For information about turning off the display, see the SMART Board QX Pro series interactive displays installation and maintenance guide (smarttech.com/kb/17874).
-
Page 18: Using The Convenience Panel
Chapter 2 Using basic features Using the convenience panel The convenience panel contains buttons for turning the display on and off, controlling the volume, freezing and unfreezing the screen, and showing and hiding a screen shade. It also includes connectors for USB peripherals and a computer or other input. -
Page 19: Using The Remote Control
Chapter 2 Using basic features Power button Display status Not receiving power Amber In an energy saving mode White In normal operating mode Using the remote control The display comes with an infrared remote control. Use the infrared remote control to turn the display on or off, switch inputs, control the volume, access the display’s iQ apps, and more. - Page 20 Chapter 2 Using basic features Name Procedure Press to wake the display or Power put it back in an energy saving mode (see Waking up the display and putting it back into energy saving mode on page 16). Press and hold for four seconds to turn off the display.
-
Page 21: Using Touch
You can use a variety of gestures within applications, including panning, scaling, rotating, and zooming. SMART Board QX Pro series displays support up to 40 simultaneous interaction points, enabling you and others to interact with objects on the screen at the same time. - Page 22 Chapter 2 Using basic features Pan (one finger) Pan (two fingers) / scroll Pinch to zoom in / scale (enlarge) Pinch to zoom out / scale (reduce) Rotate Flick Erase with palm Erase with fist docs.smarttech.com/kb/171875...
-
Page 23: Using The Pens And Erasers
Important Use only pens designed for SMART Board QX Pro series interactive displays (see smarttech.com/kb/171230). Note When a pen is introduced to a display for the first time, it may take a few moments for the pen to pair with the display. -
Page 24: Using Pressure-Sensitivity
Chapter 2 Using basic features The QX Pro display features palm rejection: you can rest your hand on the screen while writing and it’s not interpreted as input. You can disable this feature by selecting Settings > System > Disable palm erase. Using pressure-sensitivity The pressure-sensitive tips on SMART QX Pro pens provide versatility in presentations and note-taking. -
Page 25: Changing A Pen's Color, Thickness, And Other Properties
Chapter 2 Using basic features Closing (hiding) the toolbar Using presentation tools Changing a pen’s color, thickness, and other properties You can change a pen’s color, thickness, and other properties temporarily using the SMART Ink dynamic (floating) toolbar when you’re viewing a connected computer’s input. See Using the SMART Ink dynamic (floating) toolbar on the previous page. -
Page 26: Adjusting The Volume
Chapter 2 Using basic features Adjusting the volume Use the buttons on the convenience panel or the remote control to increase, decrease, or mute the display’s volume. To turn the volume up or down Press the Volume Up button or Volume Down button on the convenience panel or the remote control. -
Page 27: Microphone Status
Chapter 2 Using basic features The microphone mute button is located on the display’s convenience panel (see Convenience panel). Note To learn more about installing third-party apps, see Adding and managing apps in the iQ experience. Microphone status The LED on the microphone array and the color of the mute button indicate the status of the microphone. -
Page 28: Using The Video Camera
Chapter 2 Using basic features Using the microphone array with a connected computer 1. Connect the computer to the display and select the computer as the display’s input. (see Viewing a connected computer’s input on page 34). 2. Open the sound controls on the connected computer. Windows computer: Select Start >... -
Page 29: Enabling And Using The Video Camera
Chapter 2 Using basic features Tip The video camera is located at the top-center of the display’s frame and a blue LED status light illuminates when the camera is active. Enabling and using the video camera 1. Ensure your display is turned on. ... -
Page 30: Freezing Or Hiding The Screen
Chapter 2 Using basic features Freezing or hiding the screen You can use the display’s freeze and screen shade features to temporarily freeze or hide the screen contents. Freezing the screen You can temporarily freeze the screen by pressing the Freeze button on the convenience panel or remote control. -
Page 31: Learn About Iq Pro
Learn about iQ Pro For more information about iQ Pro, including the collaborative tools, whiteboard, wireless screen sharing, and web browser, refer to the iQ Pro support site. docs.smarttech.com/kb/171875... -
Page 32: Chapter 4 Connecting Computers And Other Devices
Notes SMART Notebook Free software designed for use with a See About SMART Notebook. SMART Board interactive display. SMART Notebook software comes with many features that you can use to create, edit, and deliver engaging lessons for your students. SMART Meeting Pro Software that enables you to capture ideas Pro models only. - Page 33 Chapter 4 Connecting computers and other devices Software Description Notes SMART Ink Software that enables you to write and draw in digital ink over applications, files, folders, websites, and any other open window. SMART Remote Cloud-based mobile device management See SMART Remote Management software for remotely maintaining, Management.
-
Page 34: Connecting Room Computers And Guest Laptops
Chapter 4 Connecting computers and other devices Connecting room computers and guest laptops You can connect room computers and guest laptops to the display to view and interact with them. Rear connector panel Front convenience panel Notes Install SMART software on computers you connect to the display (see Installing and using SMART software on page ... - Page 35 Chapter 4 Connecting computers and other devices To view a connected computer’s input 1. Connect the computer to the display. 2. Select one of the following: If iQ is enabled If iQ is disabled Tap Input on the Home screen. Press the Home button or the Input button on the remote control.
- Page 36 Chapter 4 Connecting computers and other devices Using recommended cables SMART recommends the following varieties of cable: Cable type Maximum length Recommendation HDMI 23' (7 m) Use only certified Premium High-Speed HDMI (18 Gpbs) cables that have been tested to support the performance standard you require.
-
Page 37: Connecting A Smart Ops Pc Module
Chapter 4 Connecting computers and other devices Connecting USB drives, peripherals, and other devices You can use USB drives, peripherals, and other devices with a computer connected to the display using the display’s USB connectors. For more information, see Connecting USB drives, peripherals, and other devices below. Troubleshooting connected computers For troubleshooting information for connected computers, see Chapter 5 Troubleshooting on page ... - Page 38 Chapter 4 Connecting computers and other devices docs.smarttech.com/kb/171875...
-
Page 39: Chapter 5 Troubleshooting
Chapter 5 Troubleshooting The display isn’t turning on The display is turning on when it shouldn’t The screen is blank or there’s a problem with the image on the screen There’s no sound or there’s a problem with the sound Touch isn’t working as expected The pens and erasers aren’t working as expected iQ apps aren’t working as expected... -
Page 40: The Display Is Turning On When It Shouldn't
The image is flickering or flashing. The image is dim. (For SMART Board 6000S (V3) and Make sure that the computer supports Display Port Alternate Mode video via USB 6000S (C) models) Type-C. Look for the Display Port logo beside the USB Type-C receptacle on the computer. - Page 41 Chapter 5 Troubleshooting Symptom Troubleshooting steps There are bright spots on the screen. Colors don’t appear correctly. Be aware that if two or more displays are mounted side-by-side, there could be minor differences in colors across the displays. This issue is not unique to SMART products.
-
Page 42: There's No Sound Or There's A Problem With The Sound
Connect all devices to the same power outlet or power bar. For SMART Board (V3) models Ensure that the microphone array is enabled in the Settings menu. The microphone array is not picking If you’re using an external computer, ensure that the computer’s audio settings are up sound, and the green indicator configured to use the SMART IFP Mic as the input device. -
Page 43: Touch Isn't Working As Expected
Make sure SMART Product Drivers are installed and running on connected computers. (SMART Board 6000S (V3) models displays require SMART Product Drivers 12.18 or later, and SMART Board 6000S (C) and 6000S model displays require SMART Product Drivers 12.14 or later). -
Page 44: Iq Apps Aren't Working As Expected
Chapter 5 Troubleshooting Symptom Troubleshooting steps When you write on the screen, the ink Restart the display. appears in the wrong place. Confirm with the installers that the computer is connected to the display with only a single cable. ... -
Page 45: The Smart Ops Pc Module Isn't Working As Expected
The serial number is on a label located on the left side of the display (pictured). Tips Scan the QR code on the label to view the SMART Board QX Pro series interactive display support pages on the SMART website. docs.smarttech.com/kb/171875... - Page 46 Chapter 5 Troubleshooting The label features the display’s base model number (for example, SBID-QX065). Please note this number is different from the actual model/SKU number (for example SBID-QX265). You can also find the serial number in the iQ settings. Refer to the SMART Board QX and QX Pro series interactive displays installation and maintenance guide (smarttech.com/kb/XXXXXX) for more information.
- Page 47 Certification and compliance Caution NoteYou can access additional certification Any changes or modifications not expressly approved by and compliance information for the display in the party responsible for compliance could void the user’s Settings. From the Home screen, select the authority to operate this equipment.
- Page 48 Certification and compliance (iv) Users should also be advised that high-power radars EU Declaration of Conformity are allocated as primary users (i.e., priority users) of the Hereby, SMART Technologies ULC declares that the radio bands 5250-5350 MHz and 5650-5850 MHz and that these equipment type Interactive Display IDQX65-1, IDQX75-1, radars could cause interference and/or damage to LE-LAN IDQX86-1, and the OPS PCM11, are in compliance with...
- Page 49 Certification and compliance Japan VCCI Class A statement – applicable only to models certified for sale in Japan こ の装 置は、 ク ラ スA情報 技術 装置です。 こ の装 置を家庭 環境 で 使用 すると 電 波妨 害を引き起 こ すこ と があり ます。 こ の場 合には使 用者...
- Page 50 SMART Technologies smarttech.com/support smarttech.com/contactsupport docs.smarttech.com/kb/171875...
Need help?
Do you have a question about the QX Pro Series and is the answer not in the manual?
Questions and answers