SMART Board 6000S Series User Manual
Hide thumbs
Also See for 6000S Series:
- Installation and maintenance manual (98 pages) ,
- User manual (56 pages) ,
- User manual (56 pages)
Table of Contents
Advertisement
Quick Links
6000S
SBID-6265S-V3
|
SBID-6275S-V3
SBID-6065S-V3
|
SBID-6075S-V3
SBID-6265S-C
|
SBID-6275S-C
SBID-6065S-C
|
SBID-6075S-C
SBID-6265S
|
SBID-6065S
|
Was this document helpful?
smarttech.com/docfeedback/171415
SMART Board
|
6000S Pro
series interactive displays
User guide
|
SBID-6286S-V3
|
SBID-6265S-V3-PW
SBID-6265S-V3-P
|
SBID-6275S-V3-P
|
SBID-6086S-V3
|
SBID-6065S-V3-PW
SBID-6065S-V3-P
|
SBID-6075S-V3-P
SBID-6465S-V3-P
|
SBID-6475S-V3-P
|
SBID-6286S-C
|
SBID-6265S-CPW
|
SBID-6086S-C
|
SBID-6065S-CPW
SBID-6275S
|
SBID-6286S
|
SBID-6265S-PW
SBID-6075S
|
SBID-6086S
|
SBID-6065S-PW
IDS665-3
|
IDS675-3
IDS665-1
|
IDS675-1
®
|
SBID-6275S-V3-PW
|
|
SBID-6286S-V3-P
|
SBID-6075S-V3-PW
|
|
SBID-6086S-V3-P
|
SBID-6486S-V3-P
|
SBID-6275S-CPW
|
SBID-6286S-CPW
|
SBID-6075S-CPW
|
SBID-6086S-CPW
|
SBID-6275S-PW
|
SBID-6286S-PW
|
SBID-6075S-PW
|
SBID-6086S-PW
|
IDS686-3
|
IDS686-1
SBID-6286S-V3-PW
SBID-6086S-V3-PW
Advertisement
Chapters
Table of Contents

Related Manuals for SMART Board 6000S Series


Summary of Contents for SMART Board 6000S Series
- Page 1 SMART Board ® 6000S 6000S Pro series interactive displays User guide SBID-6265S-V3 SBID-6275S-V3 SBID-6286S-V3 SBID-6265S-V3-PW SBID-6275S-V3-PW SBID-6286S-V3-PW SBID-6265S-V3-P SBID-6275S-V3-P SBID-6286S-V3-P SBID-6065S-V3 SBID-6075S-V3 SBID-6086S-V3 SBID-6065S-V3-PW SBID-6075S-V3-PW SBID-6086S-V3-PW SBID-6065S-V3-P SBID-6075S-V3-P SBID-6086S-V3-P SBID-6465S-V3-P SBID-6475S-V3-P SBID-6486S-V3-P SBID-6265S-C SBID-6275S-C SBID-6286S-C SBID-6265S-CPW SBID-6275S-CPW SBID-6286S-CPW SBID-6065S-C SBID-6075S-C SBID-6086S-C SBID-6065S-CPW SBID-6075S-CPW...
- Page 2 Trademark notice SMART Board, SMART Notebook, SMART TeamWorks, SMART Meeting Pro, Pen ID, HyPr Touch, Object Awareness, Silktouch, Tool Explorer, smarttech, the SMART logo and all SMART taglines are trademarks or registered trademarks of SMART Technologies ULC in the U.S. and/or other countries. The Bluetooth word mark is owned by the Bluetooth SIG, Inc.
-
Page 3: Important Information
Important information Note Refer to the SMART Board 6000S and 6000S Pro series interactive displays installation and maintenance guide (smarttech.com/kb/171414) for important information about installing and maintaining the display. Warning Do not open or disassemble the display. You risk electrical shock from the high voltage inside the casing. -
Page 4: Table Of Contents
Contents Important information Chapter 1 Welcome About this guide About the display Identifying your specific model Accessories More information Chapter 2 Using basic features Waking up the display and putting it back in to an energy saving mode Using the Home button Using the convenience panel Using the remote control Using touch... - Page 5 Contents Connecting room computers and guest laptops Connecting a SMART OPS PC module Connecting USB drives, peripherals, and other devices Chapter 5 Troubleshooting The display isn’t turning on The display is turning on when it shouldn’t The screen is blank or there’s a problem with the image on the screen There’s no sound or there’s a problem with the sound Touch isn’t working as expected The pens and erasers aren’t working as expected...
-
Page 6: Chapter 1 Welcome
Chapter 1 Welcome About this guide About the display Touch Writing, drawing and erasing Support for additional pens and tools iQ experience Display Audio Network connectivity Room computers and guest laptops Accessory slot Convenience panel Proximity sensor Ambient light sensor Remote control and IR sensor Temperature and humidity sensors Microphone array... -
Page 7: About The Display
(see More information on page 17). About the display The SMART Board 6000S or 6000S Pro series interactive display with iQ is the hub of your classroom or meeting room. Note ... -
Page 8: Writing, Drawing And Erasing
Support for additional pens and tools ™ The SMART Board 6000S features the Tool Explorer platform, which enables you to use other SMART- authorized pens and tools in addition to those supplied with the display. The Tool Explorer platform lets teachers and students manipulate real-world objects to interact intuitively with on-screen objects and digital content, increasing engagement and knowledge retention. -
Page 9: Display
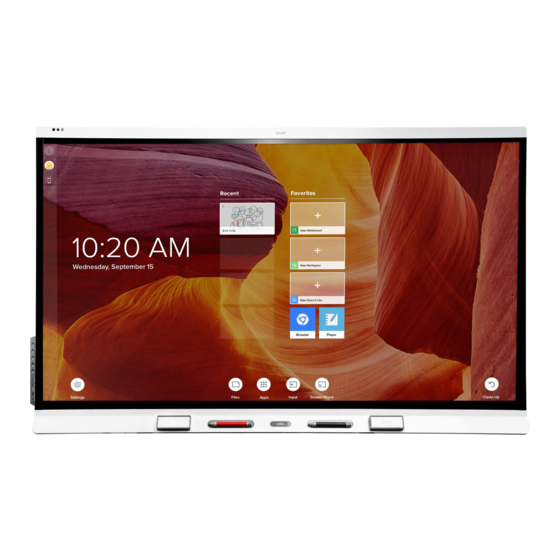
Chapter 1 Welcome Press the Home button on the display (pictured) or the remote control to open the Home screen. From the Home screen, you can open the iQ apps, switch inputs, and adjust settings. For more information about the Home button and the Home screen, see Using the Home button on page ... -
Page 10: Room Computers And Guest Laptops
(see iQ experience on page 8). For this reason, SMART doesn’t support installing iQ appliances in these displays’ accessory slots. However, the AM50 appliance allows the use of an Intel Compute Card on the 6000S and SMART Board 6000S (C) models. Convenience panel... -
Page 11: Proximity Sensor
The ambient light sensor detects the room’s brightness and adjusts the brightness of the screen accordingly. You can enable, disable, and adjust this feature. Refer to the SMART Board 6000S and 6000S Pro series interactive displays installation and maintenance guide (smarttech.com/kb/171414) for more information. -
Page 12: Remote Control And Ir Sensor
Temperature and humidity sensors are available only when iQ is enabled. For more information, see Using the SMART Sensors app on page 42. Microphone array This feature is available only on the SMART Board 6000S (V3) and SMART Board 6000S (V3) Pro models. Note ... -
Page 13: Identifying Your Specific Model
Note NFC sign in is available only on SMART Board 6000S series displays with iQ. Only SMART ID cards are supported. For more information, see Using the SMART ID card on your display on page 38. - Page 14 Chapter 1 Welcome Model/SKUs Frame style Screen size iQ embedded Microphone array (approximate) computing SBID-6275S-V3-PW White 75" SBID-6286S-V3-PW White 86" SBID-6065S-V3-PW White 65" SBID-6075S-V3-PW White 75" SBID-6086S-V3-PW White 86" SBID-6265S-V3-P Black 65" SBID-6275S-V3-P Black 75" SBID-6286S-V3-P Black 86" SBID-6065S-V3-P Black 65"...
-
Page 15: Accessories
Chapter 1 Welcome Model/SKUs Frame style Screen size iQ embedded Microphone array (approximate) computing 6000S SBID-6265S White 65" SBID-6275S White 75" SBID-6286S White 86" SBID-6065S White 65" SBID-6075S White 75" SBID-6086S White 86" 6000S Pro SBID-6265S-PW White 65" SBID-6275S-PW White 75"... -
Page 16: Pen Accessory Kit
Chapter 1 Welcome Note For more information about these and other accessories, see smarttech.com/accessories. Pen accessory kit The pen accessory kit includes blue, green, purple, and orange pens and a holder that you can mount on the side of the display. Tool Explorer-enabled objects and manipulatives The display’s Tool Explorer platform enables you to use a range of different pens, objects, and manipulatives that are automatically recognized the moment they contact the display’s screen. -
Page 17: More Information
Chapter 1 Welcome USB extenders As noted in the display’s specifications, there is a maximum length for USB cable connections between the display and computer. When using USB 2.0, the cable should be no longer than 16' (5 m). When using USB 3.0, the cable should be no longer than 9' (3 m). If you need a longer USB connection, use a USB extender. -
Page 18: Chapter 2 Using Basic Features
Chapter 2 Using basic features Waking up the display and putting it back in to an energy saving mode Using the Home button Using the convenience panel Using the remote control Using touch Using the pens and erasers Writing and drawing in digital ink Using the SMART Ink dynamic (floating) toolbar Changing a pen’s default color, thickness, and other properties Erasing digital ink... -
Page 19: Waking Up The Display And Putting It Back In To An Energy Saving Mode
Connect a video cable from a computer to a video input receptacle on the display. The display also turns on when it receives a video signal. The SMART Board 6000S (V3) model returns to Ready mode and 6000S and 6000S (C) models return to an energy saving mode when one of the following occurs: ... -
Page 20: Using The Home Button
Chapter 2 Using basic features Using the Home button You can use the Home screen to open and use iQ apps, view the input of connected computers, and more. You can also change the background and personalize other features of the Home screen. To learn more about the Home screen, see Understanding the Home screen. -
Page 21: Using The Convenience Panel
The convenience panel contains buttons for turning the display on and off, controlling the volume, freezing and unfreezing the screen, and showing and hiding a screen shade. It also includes connectors for USB peripherals and a computer or other input source. SMART Board 6000S SMART Board 6000S (C) and 6000S (V3) Name Procedure ... -
Page 22: Using The Remote Control
Chapter 2 Using basic features Name Procedure Connect a computer or other input source to use with the display HDMI 3 input connectors (see page 49). Connect a computer or mobile device, with a single connection for USB Type-C connector touch, video, and audio. - Page 23 Chapter 2 Using basic features Name Procedure Press to wake the display or put it back in to an energy saving Power mode (see Waking up the display and putting it back in to an energy saving mode on page 19). ...
-
Page 24: Using Touch
You can use a variety of gestures within applications, including panning, scaling, rotating, and zooming in and out. SMART Board 6000S (V3) models support up to 40 simultaneous interaction points. The 6000S and 6000S (C) models support up to 20 simultaneous interaction points, enabling you and others to interact with objects on the screen at the same time. - Page 25 Chapter 2 Using basic features Pan (one finger) Pan (two fingers) / scroll Pinch to zoom in / scale (enlarge) Pinch to zoom out / scale (reduce) Rotate Flick Erase with palm Erase with fist smarttech.com/kb/171415...
-
Page 26: Using The Pens And Erasers
Chapter 2 Using basic features Using the pens and erasers The display comes with a black pen, a red pen, and two erasers. You can use the pens to write and draw in digital ink on the display, and you can use the erasers—or your palm or fist—to erase digital ink. The display has magnetic holders for the pens and erasers at the bottom of the display’s frame. -
Page 27: Using The Smart Ink Dynamic (Floating) Toolbar
Chapter 2 Using basic features Using the SMART Ink dynamic (floating) toolbar If you pick up a pen while viewing a connected computer’s input, the SMART ® dynamic (floating) toolbar for SMART Ink appears on the screen. You can use this toolbar to temporarily change the pen’s color, thickness, or other properties, and you can also access SMART Ink’s tools, such as screen capture, spotlight, screen shade, and so on. -
Page 28: Adjusting The Volume
Chapter 2 Using basic features Move a pen’s eraser over digital ink to erase. Move the eraser over digital ink to erase. Move your palm or fist over digital ink to erase. Adjusting the volume Use the buttons on the convenience panel or the remote control to increase, decrease, or mute the display’s volume. -
Page 29: Using The Microphone Array
Using the microphone array This feature is available only on the SMART Board 6000S (V3) and SMART Board 6000S (V3) Pro models. You can use the microphone array to capture audio while using a conferencing app on your display. You can also connect a room computer or guest laptop to the display and use the display’s built-in... -
Page 30: Freezing Or Hiding The Screen
Chapter 2 Using basic features 2. Open the sound controls on the connected computer. Windows computer: Select Start > Settings > System > Sound > Input > Choose your input device. Mac computer: Select Apple menu > System Preferences, click Sound, then click Input. ... -
Page 31: Showing And Hiding The Screen Shade
Chapter 2 Using basic features Tip You can write or draw over the screen while it is frozen (see Writing and drawing in digital ink on page 26). If the iQ experience is enabled, you can then save the screenshot of your writing or drawing to the Files Library (see Using the iQ experience Files Library). -
Page 32: Using Additional Tools And Manipulatives
Chapter 2 Using basic features Using additional tools and manipulatives The SMART Board 6000S or 6000S Pro series interactive display’s Tool Explorer platform enables you to use a range of different pens, objects, and manipulatives that are automatically recognized the moment they contact the display’s screen. -
Page 33: System Requirements And Smart Software Compatibility
Chapter 2 Using basic features System requirements and SMART software compatibility This table shows the version of iQ system software or SMART software required for each Tool Explorer tool. Tool iQ system software version SMART Product SMART Notebook Drivers Tool Explorer multicolor 4-pen bundle 3.6 or later 20.0 or later 12.16 or later... - Page 34 Chapter 2 Using basic features To use the magic pen to spotlight or magnify screen content 1. Pick up the magic pen. 2. Use the gesture end of the pen to draw a circle or rectangle around the portion of the screen you want to spotlight or magnify.
-
Page 35: Using The Highlighter Pen
Chapter 2 Using basic features Using the highlighter pen Use the highlighter pen to emphasize text in supported applications, such as the iQ whiteboard, SMART Notebook Player, and SMART Notebook desktop. Note For information about the iQ system software or SMART software version required for each Tool Explorer tool, see System requirements and SMART software compatibility on page ... - Page 36 Chapter 2 Using basic features To insert an object using a Tool Explore cube 1. Pick up a cube. 2. Tap the cube face that features the image you want on the display’s screen. The image is inserted as an object. Tip ...
-
Page 37: Using Tool Explorer Stamps
Chapter 2 Using basic features To delete an object 1. Tap the object. A selection rectangle appears around the object. 2. Press the object’s menu arrow, and then select Delete. Using Tool Explorer stamps Tool Explorer stamps feature a single shape, number, image, and more, that is inserted as an object when you tap the stamp’s face on the display’s screen. -
Page 38: Using The Smart Id Card On Your Display
Chapter 2 Using basic features To move, resize, rotate, or delete an object See To move, resize, and rotate an object on page 36 and To delete an object on the previous page. Using the SMART ID card on your display The display’s integrated RFID NFC reader/writer technology enables you to sign in to your SMART Account by tapping a SMART ID card on the display’s screen and then typing your PIN. -
Page 39: Setting Up A Smart Id Card
Chapter 2 Using basic features Tip After signing into your SMART Account, be sure to sign out at the end of the session to keep your account secure. For extra security, admins can enable the Automatic inactivity log out setting within Settings >... -
Page 40: Signing In To Your Smart Account Using Your Smart Id Card
Chapter 2 Using basic features Signing in to your SMART account using your SMART ID card To sign in to your SMART account using your SMART ID card 1. Tap and hold your SMART ID card in the middle of the screen for 1 or 2 seconds. ... - Page 41 Chapter 2 Using basic features 2. Tap your profile avatar to open the Notification Center . 3. At the bottom of the notification center, tap your profile avatar 4. Tap Remove ID card, and then tap Remove. Your SMART ID card has now been removed from your SMART Account.
-
Page 42: Chapter 3 Using The Iq Apps
Chapter 3 Using the iQ apps The display comes with the following iQ apps: SMART Whiteboard Browser Input Screen Share kapp Whiteboard You can use these apps along with the Files Library and Apps Library to deliver lessons in a classroom or coordinate meetings and other collaborative activities. -
Page 43: Using The Files Library
To learn more about Browser, see Browsing the internet on your display. Using Screen Share This feature is available only on the SMART Board 6000S, SMART Board 6000S Pro, SMART Board 6000S (C), and SMART Board 6000S (C) Pro models. -
Page 44: Using Smart Mirror
To learn how to use the other features of Screen Share, see Sharing your device’s screen to the display. Using SMART Mirror This feature is available only on the SMART Board 6000S (V3) and SMART Board 6000S (V3) Pro models. -
Page 45: Installing Third-Party Apps
To learn more, see About the iQ experience and navigating the Home screen. Using kapp Whiteboard This feature is available only on the SMART Board 6000S, SMART Board 6000S Pro, SMART Board 6000S (C), and SMART Board 6000S (C) Pro models. -
Page 46: Chapter 4 Connecting Computers And Other Devices
SMART Notebook basic Free software designed for use with a See Find out more about the version SMART Board interactive display. The basic basic version of SMART version of SMART Notebook software comes Notebook. with many features that you can use to create, edit, and deliver engaging lessons for your students. - Page 47 Chapter 4 Connecting computers and other devices Software Description Notes SMART Product Drivers Software that enables the computer to Included with detect input from the display. SMART Notebook basic and SMART Meeting Pro software SMART Ink Software that enables you to write and draw Included with in digital ink over applications, files, folders, SMART ...
- Page 48 Chapter 4 Connecting computers and other devices Using SMART software For information about using SMART software, see the following pages in the Support section of the SMART website: SMART Notebook Lumio by SMART SMART Learning Suite SMART TeamWorks ...
-
Page 49: Connecting Room Computers And Guest Laptops
You can connect room computers and guest laptops to the display to view and interact with them. Connector panel Convenience panel SMART Board 6000S (C) and 6000S (V3) SMART Board 6000S (V3) SMART Board 6000S SMART Board 6000S and 6000S (C) - Page 50 You can charge devices connected to the USB Type-C receptacles. SMART Board 6000S (V3) models can provide up to 65 W to connected devices (the USB Type-C receptacle labeled USB-C 2 on the rear connector panel provides 30 W when an OPS PC module is installed).
- Page 51 Chapter 4 Connecting computers and other devices Setting a connected computer’s resolution and refresh rate This table presents the recommend resolutions and refresh rates for the display’s inputs: Input source Resolution Refresh rate HDMI 1 3840 × 2160 60 Hz HDMI 2 3840 ...
-
Page 52: Connecting A Smart Ops Pc Module
A receptacle on the convenience panel, or two USB 3.0 Type-A receptacles on the convenience panel (see images below). The SMART Board 6000S (V3) models also include a USB Type-C receptacle on the connector panel. All models include one USB 3.0 Type-A receptacle on the connector panel. - Page 53 You can connect USB drives, peripherals (such as keyboards), and other devices to these connectors and use the devices with the iQ experience, connected computers, and devices installed in the accessory slot, such as the SMART OPS PC. SMART Board 6000S (V3) SMART Board 6000S (C) SMART Board 6000S smarttech.com/kb/171415...
-
Page 54: Chapter 5 Troubleshooting
Chapter 5 Troubleshooting The display isn’t turning on The display is turning on when it shouldn’t The screen is blank or there’s a problem with the image on the screen There’s no sound or there’s a problem with the sound Touch isn’t working as expected The pens and erasers aren’t working as expected iQ apps aren’t working as expected... -
Page 55: The Display Is Turning On When It Shouldn't
Chapter 5 Troubleshooting The display is turning on when it shouldn’t Symptom Troubleshooting steps The display turns on or enters Ready Check for and, if possible, move the display away from the following: mode when it shouldn’t. Direct sunlight ... - Page 56 Replace the video cables that connect any computers to the display to determine if the issue is with the cables. (For SMART Board 6000S (V3) and Make sure that the computer supports Display Port Alternate Mode video via USB 6000S (C) models) Type-C.
-
Page 57: There's No Sound Or There's A Problem With The Sound
Connecting an audio cable to the display’s stereo 3.5 mm out connector disables the internal speakers. If you’re using the display’s S/PDIF out connector to connect a sound bar or receiver for external speakers, see the SMART Board 6000S series interactive displays installation and maintenance guide (smarttech.com/kb/171414). ... -
Page 58: Touch Isn't Working As Expected
Make sure SMART Product Drivers are installed and running on connected touch. computers. (SMART Board 6000S (V3) models displays require SMART Product Drivers 12.18 or later, and SMART Board 6000S (C) and 6000S model displays require SMART Product Drivers 12.14 or later). ... -
Page 59: Iq Apps Aren't Working As Expected
Chapter 5 Troubleshooting Symptom Troubleshooting steps When you write on the screen, the ink Restart the display. appears in the wrong place. Confirm with the installers that the computer is connected to the display with only a single cable. ... -
Page 60: The Smart Ops Pc Module Isn't Working As Expected
Chapter 5 Troubleshooting The SMART OPS PC module isn’t working as expected Symptom Troubleshooting steps See the SMART OPS PC modules user guide (smarttech.com/kb/171747). The SMART OPS PC module isn’t working as expected. Contacting your reseller for additional support If an issue you’re experiencing with the display persists or isn’t covered in this chapter or the knowledge base, contact your authorized SMART reseller (smarttech.com/where) for support. -
Page 61: Certification And Compliance
Certification and compliance Radiation exposure statement Federal Communication Commission This equipment complies with FCC radiation exposure limits set interference statement forth for an uncontrolled environment. This equipment should be installed and operated with minimum distance of 20 cm between the antenna of this device and all nearby persons. Supplier’s Declaration of Conformity This transmitter must not be co-located or operated in 47 CFR §... - Page 62 Certification and compliance The frequency band and the maximum transmitted power in Innovation, Science et Développement EU are listed below: économique Déclaration du Canada Regulatory models: IDS665-3, IDS675-3, IDS686-3, IDS665-1, Cet appareil est conforme à la norme ISED CNR-210 pour les IDS675-1, IDS686-1 appareils radio agréés.
- Page 63 Certification and compliance United Arab Emirates – TRA registration details Panel 65" Regulatory models IDS665-3 REGISTERED No: ER02349/21 DEALER No: DA0076339/11 Regulatory models IDS665-1 REGISTERED No: ER78098/20 DEALER No: DA0076339/11 Panel 75" Regulatory models IDS675-3 REGISTERED No: ER02350/21 DEALER No: DA0076339/11 Regulatory models IDS675-1 REGISTERED No: ER78099/20 DEALER No: DA0076339/11...
- Page 64 SMART Technologies smarttech.com/support smarttech.com/contactsupport smarttech.com/kb/171415...
Need help?
Do you have a question about the 6000S Series and is the answer not in the manual?
Questions and answers