Advertisement
Before Installation
Inspect the Package
Open the box and take out the system housing, all the components and quick connect fittings. Inspect them according to the parts list to ensure nothing is eft out or damaged during shipping. If there are any parts cracked or broken, please do no proceed with the installation and contact Waterdrop customer service by hotline +1-888-352-3558 (PST) or by email: service@waterdropfilter.com. Identify and get familiar with all components for quick installation.
Required Tools
- Variable speed drill
- Utility knife or scissors
- Drill bit: 1/4" (for drainpipe), 1" (for faucet hole)
- Adjustable wrench, pliers
- Flashlight
- Towel
- Screwdriver
Specifications
To achieve the optimal performance, it is high y recommended to use the system within the operational parameters.
| Model | WD-G2-B / WD-G2-W / WD-G2P600 B / WD G2P600-W |
| RO System Size | 17.3" * 5.9" * 14.0" |
| Feed Water Pressure | 14.5-87 PSI / 0.1-0.6 MPa |
| Feed Water Temperature | 41 -100 ºF/ 5-38 ºC |
| Feed Water Requirement | Municipal Tap Water |
| Max Daily Production Rate | 400 GPD / 600 GPD |
| Power Specification | Input 110-240V AC Output 24V DC |
| Rated Frequency | 50 / 60 HZ |
| Rated Current | 2.5A |
 NOTE:
NOTE:
- The Daily Production Rate is measured under 30 PSI dynamic feed water pressure and 77 OF water temperature.
- If you are using well water as the source, please ensure that the feed water has been through a pre-filtration system.
Parts List

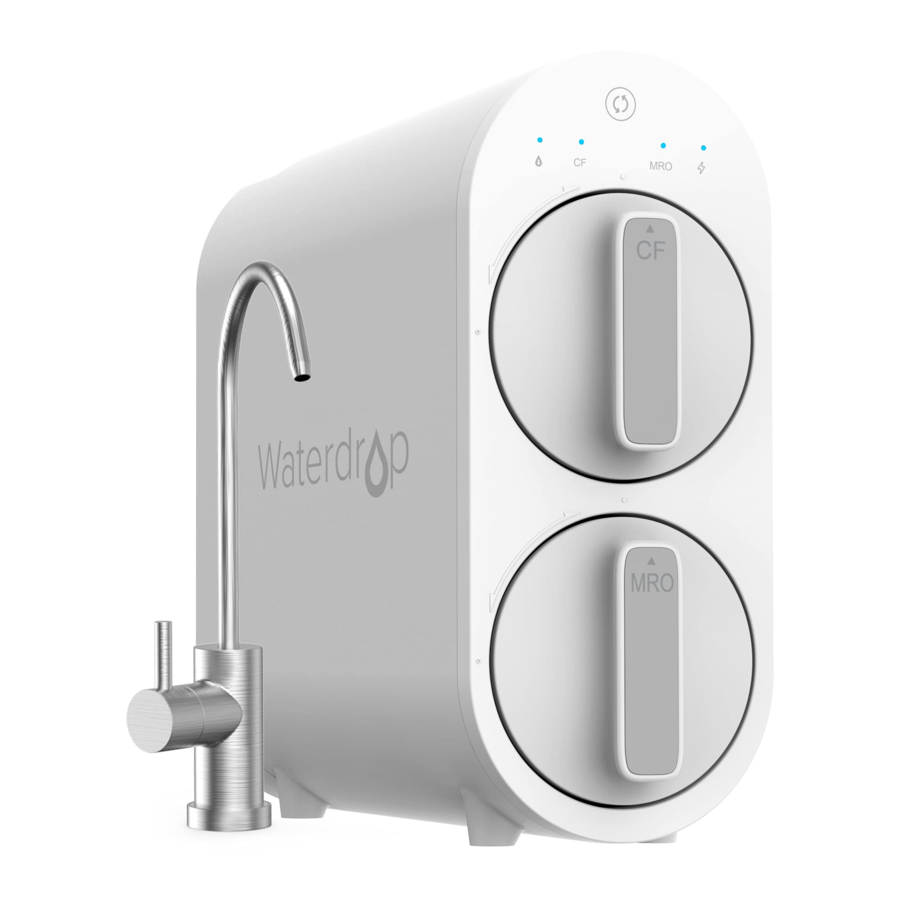
Product Introduction
The brief introduction of various parts and sample connections are presented as follows. Please Identify and get familiar with these parts and connection points for a smooth installation.

Installation Tips
How to Use the Quick-connect Fittings

To connect
- Push the tubing into the fitting until it is inserted to the mark for full insert.
![warning]() NOTE: If the tubing is not fully inserted, it will cause leakage.
NOTE: If the tubing is not fully inserted, it will cause leakage. - When the tubing is fully inserted, put the blue lock clip on the fitting. It will lock the tubing in place and prevent it from falling off.
NOTE: If the tubing is too long, cut it to a suitable length with a sharp utility knife or scissors. Cut the tubing squarely and cleanly (Figure 1).

Fig.1
Make sure the tubing is fully inserted ( about 0.8" ).
To disconnect
- Remove the blue lock clip from the fitting;
- Use your thumb and index finger to press down on the lock sleeve.
- Use your other hand to pull out the tubing from the fitting (Figure 2).

Fig.2

NOTE: Please do not pull out the tubing directly, otherwise, it may damage the fitting and cause leakage.
How to Drill a Hole into Your Sink or Countertop (Optional)
NOTE: Please confirm if there is an existing hole available to install the RO faucet. If not, please drill a hole in accordance with the following steps.
There is also a sticker for your reference to drill the hole. Remember to wear safely glasses to protect your eyes while drilling the faucet hole.
- Choose a diamond core bit for granite, and a carbide drill bit for stainless steel. Do not use a hammer drill on natural stone, g ass or ceramic;
- Glue the sticker on your sink or countertop, and drill a hole referring to the size shown on the sticker (1");
- Make an indent with a center punch on a stainless steel sink before drilling to help guide the bit;
- Be careful when drilling on a porcelain sink, as it can be easily chipped. Apply downward pressure firmly to the bit until breaking through the surface;
- Starting at the lowest speed, hold the drill straight with firm pressure to prevent the bit from walking on the counter.
- Once breaking through the surface, swirl the drill a little to apply pressure in a circle evenly.
Installation Steps
NOTE:
- The RO system must be connected to the COLD water supply ONLY.
- Do not install the system in exposure to direct sunlight or harmful chemicals, nor any place where it may be damaged.
- Do not install the system near any heat source.
- Do not install the system outdoors.
Step 1: Install the Feed Water Adapter (3/8" or 1/2")
NOTE: The "INPUT" water tubing has been attached to the feed water adapter for easy installation.
- Shutoff the water supply. Turn on the kitchen faucet to release the water pressure;
![warning]() NOTE: Make sure the water has stopped before proceeding to the next step. Get a towel or bucket to catch water.
NOTE: Make sure the water has stopped before proceeding to the next step. Get a towel or bucket to catch water. - Disconnect the cold water pipe from the cold water supply valve;
- Twist the feed water adapter onto the cold water supply va ve (with its washer) and tighten it with an adjustable wrench (Figure 3);

![warning]() NOTE: If the cold water pipe is 1/2", unscrew the two converters from the feed water adapter firstly (Figure 4), then implement Step 3.
NOTE: If the cold water pipe is 1/2", unscrew the two converters from the feed water adapter firstly (Figure 4), then implement Step 3.

- Twist the cold water pipe (with its washer) onto the feed water adapter and tighten with an adjustable wrench.


Step 2: Install the RO Faucet (Non-Air Gap Faucet)
NOTE: If there is no hole in your kitchen sink or countertop, you have to drill one (1") or use the hole in the soap dispense rю
- Insert the faucet spout into the faucet body;
- Insert the faucet stem into the hole on the countertop;
- Under the sink, slip on other parts in the order shown in the picture (Figure 5);
")
- Insert the quick-connect fitting onto the faucet stem fully and firmly.
")
Step 3: Install the Drain Saddle
- Paste the foam seal onto the front plate of drain saddle. Make sure the hole of foam seal is aligned with the hole of front panel (Figure 6);

Fig.6 - Choose a spot on the drainpipe that is convenient for installing the drain saddle and drill a 1/4"hole. Be sure not to penetrate the opposite side of the pipe;
![warning]() NOTE: It's recommended to install the drain saddle on the vertical drainpipe.
NOTE: It's recommended to install the drain saddle on the vertical drainpipe. - Slip the front plate on one end of the tubing (without mark), and insert the tubing into the drilled hole up to about 0.6" (Figure 7);
![]()
Fig.7 - Fix the drain saddle with screw sand install the lock clip on the fitting to secure the connection (Figure 8);
![]()
Fig.8


NOTE: In some areas, the "WASTE" water tubing needs to be connected to the drainpipe through the air gap. Consumers need to purchase additional air gap accessories.
Step 4: Position the RO System Housing
Check and ensure there is sufficient space under the countertop to install the system (Figure 9).

NOTE: Make sure that there is a power outlet in the kitchen cabinet or on the wall connected to the lower cabinet space before installation.
It is not recommended to place the housing against the cabinet, as there may be vibrations when the system works.
Step 5: Connect Tubing
NOTE: Confirm the tubing length you need and cut the tubing if it's too long, referring to "How to Use the Quick-connect Fittings".
- Install the "INPUT" Water Tubing.
- Connect the INPUT" Water Tubing from the feed water adapter to the "IN" input water port;
![warning]() NOTE: Make sure it is fully inserted to the mark.
NOTE: Make sure it is fully inserted to the mark.

- Connect the INPUT" Water Tubing from the feed water adapter to the "IN" input water port;

- Install the "FILTERED" Water Tubing
Connect the "FILTERED" Water Tubing from the RO faucet to the "F" filtered water port;
![warning]() NOTE: Make sure it is fully inserted to the mark.
NOTE: Make sure it is fully inserted to the mark.


- Install the "WASTE" Water Tubing
Connect the "WASTE" Water Tubing from the drain saddle to the "W "waste water port;
![warning]() NOTE: Make sure it is fully inserted to the mark.
NOTE: Make sure it is fully inserted to the mark.


Step 6: Start up the System
- Turn on the cold water supp y valve. Check for leaks;
- Insert the power plug into the socket;
![warning]() NOTE: If the system can't be powered on after you insert the power plug, check the power under the sink, as this mostly occurs when the power under the sink is powered off. Also, check the connection between the power plug and the power outlet, and ensure that the system has been plugged correctly into the power outlet, as this may occur in a few cases. To test if there is a prob em with the system itself, just pick up the system and try another power outlet. Please contact us if the system can't be powered on. We will help you figure it out.
NOTE: If the system can't be powered on after you insert the power plug, check the power under the sink, as this mostly occurs when the power under the sink is powered off. Also, check the connection between the power plug and the power outlet, and ensure that the system has been plugged correctly into the power outlet, as this may occur in a few cases. To test if there is a prob em with the system itself, just pick up the system and try another power outlet. Please contact us if the system can't be powered on. We will help you figure it out.
![warning]() NOTE: The system will beep. The filter life indicators will flash blue, purple and red in turn and then stay on blue for 3 seconds (Figure 10).
NOTE: The system will beep. The filter life indicators will flash blue, purple and red in turn and then stay on blue for 3 seconds (Figure 10).

Fig.10
- Turn on the faucet to let water run for 30 minutes until the filtering indicator on the front panel changes from flashing to permanent blue;
![warning]() NOTE: Be sure to carefully check the tightness of each part of the system while flushing. Check and ensure all tubing is installed correctly and completely. Make sure there is no leaking at joints, fittings, valves and tubing connections.
NOTE: Be sure to carefully check the tightness of each part of the system while flushing. Check and ensure all tubing is installed correctly and completely. Make sure there is no leaking at joints, fittings, valves and tubing connections.
![warning]() NOTE: The water is undrinkable during flushing for consecutive 30 minutes. If the system stops flushing in advance, it will continue flushing for 30 minutes when you turn on the RO faucet again.
NOTE: The water is undrinkable during flushing for consecutive 30 minutes. If the system stops flushing in advance, it will continue flushing for 30 minutes when you turn on the RO faucet again. - Make sure the faucet does not leak.
Confirm the 30 minute flushing is completed before turning off the RO faucet. - Please fix the power adapter with the cable tie so that it does not move by impact. To avoid failure, stay away from any water sources, including pipe fittings, the bottom of the basement, and wet floors.

Display and Operation
Section 1: Working Mode Display
When making water, the filter and power indicators are permanent blue (Figure 11).

Fig.11
Filter life indicators display 'n real time and their color depends on their life span. Filtering indicator is off when the system stops making water, and the rest of the indicators are still on (Figure 12).

Fig.12
Section 2: Filter Life Reminder

NOTE: Filter life may vary depending on source water quality and water usage. Please rep ace the filter according to the reminder of the filter life indicators.
There are helpful electronic filter indicators (CF/ MRO)on the front panel that will notify you to perform routine filter replacement by color change. Be sure to reset the filter life indicator every time you replace your filter.
Display Status:
| Status | Remaining Life (Day) | Remaining Capacity (G) | Indication | Status | |
| Light | Buzzer | ||||
| Normal | > 15 | > 40 | Permanent blue | N/A | Good |
| Pre-warning | ≤15 | ≤ 40 | Permanent purple | Beeps 2 times when dispensing Water | Replace Soon |
| Warning | ≤ 0 | ≤ 0 | Permanent red | Keeps beeping when dispensing Water | Replace Now |
Note: If the indicators are flashing instead of being permanent on, please refer to "Malfunction Display" Section for more information.
The indicators will notify you according to the usage time or processing capacity of the filters, whichever comes first.

Section 3: Filter Replacement Guide
NOTE: If the filter expires, please purchase and replace the filter immediately. Otherwise, the filtration efficiency will decrease significantly and affect the performance.
How to Replace Filters
The filters could be replaced directly without cutting off the power and water, and there will be no water and electric leakage.
- Twist the filter that needs to be replaced counterclockwise (Figure 13).

Fig. 13
![warning]() NOTE: The CF filter is relative y short. When removing the filter, it is recommended to hold the filter with one hand, while rotating and removing the filter with the other hand, in order to prevent the filter from falling out of the system.
NOTE: The CF filter is relative y short. When removing the filter, it is recommended to hold the filter with one hand, while rotating and removing the filter with the other hand, in order to prevent the filter from falling out of the system. - Remove wrappings and protective cap from the new filter;
- Insert the filter into its corresponding hole, aligning the arrow with the empty circle on the housing;
- Twist the filter with a little force forward in a clockwise direction for 90 degrees, until the arrow is aligned with the solid circle on the housing. You may hear a click when the filter is fitted into the place properly;
![warning]() Note: Repeat the above steps to install the other filter.
Note: Repeat the above steps to install the other filter. - Reset the filter life indicator and flush the filter after replacement (please refer to the following steps)

How to Reset the Filter Life Indicator
- Dry your hands.
- Hold the filter life reset button for 5 seconds (Figure 14). Release the button when you hear a beep. Now the filters are ready to be reset.

Fig. 14
- Press the reset button to choose the CF filter or MRO filter; the corresponding filter life indicator will flash when that filter is selected. If only one filter is expired, skip this step.
- Hold the reset button for 5 seconds again. The reset is completed when you hear a beep. The filter life indicator will be permanent blue.

NOTE: Please do NOT wait longer than 3 seconds between each steps, otherwise the unit may exit the reset mode before it's complete. If that happens, start again from Step 1.
How to Flush the Filter after Replacement
For the CF filter: Turn on the RO faucet to flush for 5 minutes;
For the MRO filter: Turn on the RO faucet to flush for 30 minutes.
NOTE: If you rep ace the CF filter and MRO filter at the sometime, turn on the faucet to flush for 30 minutes. The filtering indicator is flashing during flushing. You can stop flushing until the filtering indicator changes from flashing to permanent blue.
Section 4: Malfunction Display
Overworked Reminder:
When the system continuously makes water for more than 30 minutes, the overworked reminder will be executed and the buzzer will beep for 3 minutes. The system stops making water when working for over 33 minutes, and the filtering indicator and power indicator are off. Meanwhile, the CF and MRO filter life indicators flash red. The system needs to be powered on again to recover itself.
Starting and Stopping Frequently Reminder:
The RO system will perform a starting and stopping frequently reminder when the booster pump is frequently started and stopped in 20 minutes. The system will stop making water, while the filtering indicator and power indicator are off and the CF and MRO filter life indicators flash purple. The system needs to be powered on again to recover itself.
System Maintenance
- If you don't use the system for more than one week, turn on the RO faucet, shut off the cold water valve, and disconnect the power. Seal the filters and store it in the refrigerator (not the freezer). Y ou need to open the RO faucet and allow it to run for 10 minutes first before using the system again. Otherwise, you need to rep ace the filters, as bacteria may grow when the system is not used for a long time.
- Please replace the filter regularly according to the filter life indicator.
![warning]() NOTE: While the testing was performed under standard laboratory conditions, actual performance may vary depending on the source water quality and water usage. In case of early blockage and failure of the filters, it's recommended to replace the filter in accordance with the actual usage.
NOTE: While the testing was performed under standard laboratory conditions, actual performance may vary depending on the source water quality and water usage. In case of early blockage and failure of the filters, it's recommended to replace the filter in accordance with the actual usage. - Clean the system with clear water. Do not spray the water directly. Do not use steel wool, an abrasive cleaner or corrosive liquid such as gasoline or acetone.
- When cleaning, do not pour other liquids into the filter to avoid damage to the filter system.
- Keep the waste water pipe unobstructed to avoid damage to the filter or internal components.
- When the drainpipe is blocked, do not use the system (please turn off the power) to avoid waste water from soaking the floor.
- Check the system and water pipe fittings regularly for water leakage to avoid any property damage.
- Regularly check whether the power supply and wires are damaged or loose to avoid major accidents caused by electric leakage.
- If you are using well water as the source, please ensure that the feed water has been through a pre-filtration system. Otherwise, large particles in the well water will easily clog the filter and shorten the filter life.
Troubleshooting
- If the System Cannot Be Powered on After You Insert the Plug of Power Adapter
- Check the power under the sink, as this most y occurs when the power under the sink is off. Also, check the connection between the plug and the power outlet, and ensure that the system has been plugged correctly into the power outlet, as this may occur in a few cases. To test if there is a problem with the system itself, just pick up the system and try another power outlet. Please contact us if the system can't be powered on. We will help you figure it out.
- No Output Water from RO Faucet
- Filter Expires. Check the filter life indicators to confirm which filter needs to be replaced and replace it immediately.
- Low water pressure. Check and confirm the water pressure is between 14.5 PSI and 87 PSI.
- Water supply is off. Turn on the feed water adapter or water supply valve.
- Incorrect filter installation. Re-install the three filters, and make sure they are fitted properly.
- Tubing is crimped. Check all tubing and remove any crimps.
- Water Leakage
- Check all joints, fittings and tubing connections to locate the leakage. Make sure the filters are well installed.
- Filtered Water from the RO Faucet Tastes Like Tap Water
- Incorrect tubing install ation. Make sure the waste water tubing is not connected with RO faucet.
- Filter expires: Check the filter life indicators to confirm which filter needs to be replaced and rep ace immediately.
- Booster Pump Overworked Reminder
Buzzer keeps beeping for 3 minutes and then the filter life indicators on the front panel flash red.- Continuously dispensing water for more than 30 minutes. Power on the system again to recover.
- There is a leak at the tubing connection between the system and the RO faucet. Turn off the power. Check the tubing connection, make sure the tubing is inserted into the quick connect fitting properly and firmly, and power on the system again.
- Booster Pump Starting and Stopping Frequently Reminder
Buzzer beeps 5 times and then the filter life indicators on the front panel flash purple. There is an internal pressure imbalance: Disconnect the power. Turn on or turn off the RO faucet completely, remove all tubing crimps. Make sure the faucet is not blocked and power on the system again. - Loud Sound of RO System
The sound will not exceed 55 dB, which makes no difference to everyday lives (55 dB is tested under standard laboratory conditions, where the feed water pressure is between 14.5 PSI and 87 PSI). A loud sound may be caused by the following reasons:- The system is not positioned in a flat area. Make sure the system is placed smoothly without shaking.
- The system is placed against the cabinet. Do not p ace the system against the cabinet. The system may vibrate when it works.
- The water pressure is unstable. Check and confirm the water pressure is between 145 PSI and 87 PSI.The sound will decrease when the water pressure becomes stable.
Technical Support
Tel: 1-888-352-3558 (U.s.)
E-mail: service@waterdropfilter.com

- This appliance can be used by children aged from 8 years and above and persons with reduced physical, sensory or mental capabilities or lack of experience and knowledge if they have been given supervision or instruction concerning use of the appliance in a safe way and understand the hazards involved.
- Children shall not play with the appliance.
- Cleaning and user maintenance shall not be made by children without supervision.
- The appliance is only to be used with the unit provided.
- If the supply cord is damaged, it must be replaced by the manufacturer or its service agent or a similarly qualified person in order to avoid a hazard.
Documents / ResourcesDownload manual
Here you can download full pdf version of manual, it may contain additional safety instructions, warranty information, FCC rules, etc.
Advertisement


Need help?
Do you have a question about the G2 and is the answer not in the manual?
Questions and answers