Advertisement
PACKING LIST
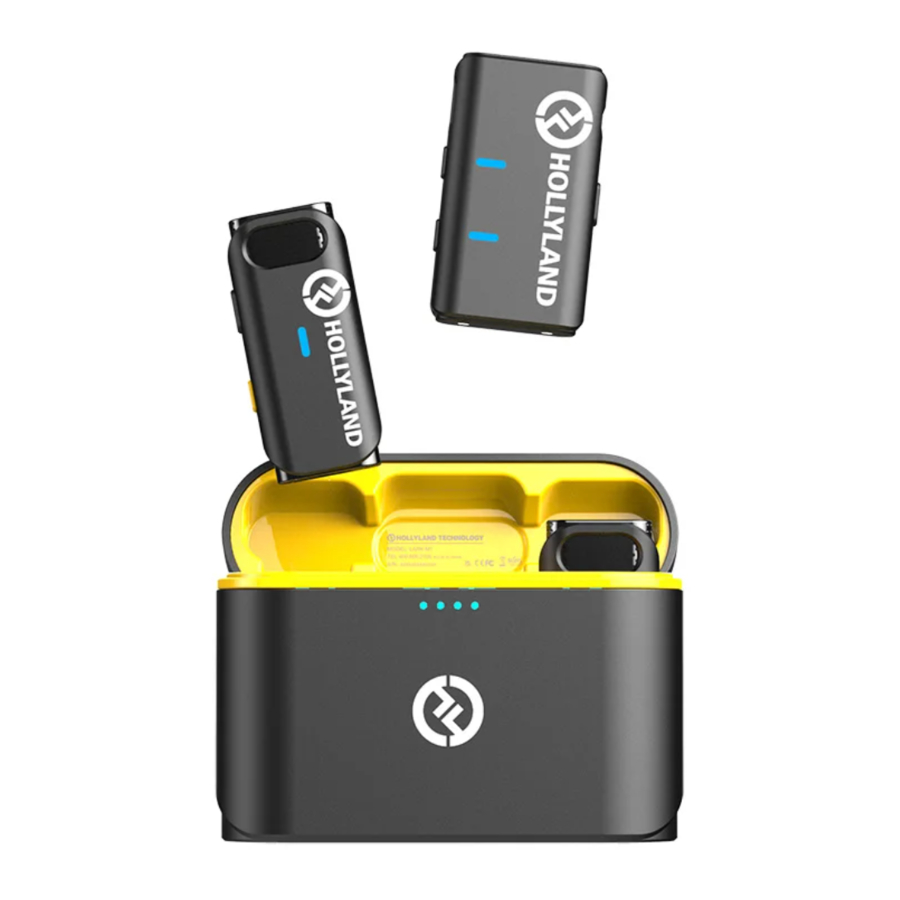
2-person Wireless Microphone System

 Note: The amount of the items listed above are subject to the package edition.
PRODUCT INTRODUCTION
TX: Transmitter

- Status Indicator
- Built-in Microphone
- Power button
- Pair/Hear Clear Noise
- Canceling Button
- Mounting Clip
- Charging Contact & Type-C port
RX: Receiver

- Pair/VoIume Up Button
- Mode Switch/VoIume Down Button
- Power Button
- 3.5mm Phone/Camera Interface Port
- Power Indicator
- Mounting Clip
- Charging Contact
Charging Case for 2-person Wireless Microphone System

- Indicator Inside the Case
- Indicator Outside the Case
- USB Type-C Port
PRODUCT INSTALLATION
The TX and RX automatically turn on and pair with each other out of the box.

Clip the TX to a shirt collar.

iPhone connection

Connect the RX to iPhone with the 3.5mrn TRS to Lightning Cable.
Android phone connection

Connect the RX to the Phone with the 3.5rnm TRS to USB Type-C Cable.
Camera Connection

Install the RX on the camera, Connect the RX and the camera with the 3.5mm TRS Patch Cable.
Connection with TRRS Compatible Devices

Connect the RX to a TRRS compatible device with the a. 5mm TRS to TRRS Patch Cable.
CAMERA SETTINGS
To ensure optimal use with the camera, please follow the settings as recommended below.
SONY camera Camera recording volume set to 1

Canon camera Recording level set to 1 block

Fujifilm camera External microphone volume set to - 26dB

INDICATOR LIGHTS GUIDE

Indicator Lights Guide - RX & TX
| Indicator Light Status | Device Status |
| Blue indicator light stays on | Device connected |
| Blue indicator light flashing | Device disconnected |
| Red indicator lights on TX RX stay on | Low-battery TX |
| 2 red indicator lights flashing on RX | Low- battery RX |
| Orange indicator light flashing | Device in charging (charging when powered Off) |
| Orange indicator light stays on | Device fully charged (charging when powered off) |
| Green static light on TX | Noise-cancelling function ON |
| Green static light on RX | Camera mono mode |
| Blue static light on RX | Phone mode/Camera stereo mode |
Indicator Lights Guide - Charging Case
| Indicator Light Status | Device Status |
| One indicator light outside the case flashing when connected via USB | Charging case in charging (refer to the number of shining indicator lights for charging progress) |
| Four indicator lights outside the case stay on | Charging case fully charged |
| Indicator lights inside the case breathing | TX,/RX in charging |
| Indicator lights inside the case stay on | TX/RX fulIy charged |
Indicator Lights Outside the Case Guide
| Number Of Shining Indicator Lights | Charging Case Battery Level |
| One flashing indicator light | Low battery, output charging discontinued |
| One shining indicator light | 25% |
| Two shining indicator lights | 50% |
| Three shining indicator lights | 75% |
| Four shining indicator lights | 100% |
OPERATING GUIDE
Auto power On/Off
Remove TX/RX from the charging case, it will automatically turn on. Put TX/RX back in the charging case, it will automatically turn off.
Manually Power On/Off
Hold Power Button of TX/RX for as seconds to power on/off the device manually. (Figure 1)

Auto Pairing
Remove TX/RX from the charging case, they will automatically pair with each other- Put TX/RX back in the charging case, they will automatically disconnect with each other.
Manually Pairing
Hold Pair/HearCIear Noise-Cancelling Button of TX for 3s seconds and then hold Pair Button of RX for 3s seconds to pair. (Figure 2)

Auto Charging
Put the devices back to the charging case, the auto-charging starts.
Manually Charging
Charge the TX, RX, and Charging Case separately via the Type-C port of each unit.
Turn On/Off HearClear Noise-Cancelling Function on TX
Press the Pair/HearCIear Noise-Cancelling Button on TX to turn on/off the noise-cancelling function. (Figure 3)

Volume Gain Adjustment
There are three volume level settings on the RX: Low, Middle, and High.
The volume level of the device is set to Middle by default.
Press the Pair/Volume Up Button on the RX to increase volume and Mode Switch/Volume Down Button to decrease volume. (Figure 4)

Mode Switch
Lang press the Made Switch/VoIume Down Button for 5 seconds to switch modes:
Green static light indicates Camera Mono Mode
Blue static light indicates Phone Mode or Camera Stereo Mode (depending on the device connected) (Figure 5)

PARAMETERS
| Wireless Transmission | 24GHz Adaptive Frequency Hopping (AFH) |
| Transmission Range | 40M(free movement). 200M (LOS) |
| ln-built Microphone | Polar Pattern: Omnidirectional Frequency Range: 20Hz-20KHz |
| Maximum SPL | 110dB SPL |
| Input Dynamic Range | 86 dB |
| Battery Type | TX: 140mAh (O,518Wh) RX: 200mAh Charging Case: 1400mAh (5.18VVh) |
| Runtime | TX: 8H RX: 8H Charging Case: Maximum 2 times charging for 2TX and 1RX. |
| Charging Time | TX: 1.5H RX: 1.5H Charging Case: 1.5H |
| Dimensions | TX: 48x21.5x10 mm RX: 48.3x27.6x11 mm Charging Case 83x60x30 mm |
| Weight | TX: 11.8 g RX: 17.5g Charging Case: 80g |
Note: The frequency range and wireless transmit power of the device vary based on the regulations of different countries and regions.
Safety precautions
Do not place the product near or inside heating devices (including but not limited to microwave ovens, induction cookers, electric ovens, electric heaters, pressure cookers, water heaters, gas stoves) to prevent the battery from overheating and exploding.
Never use non-original charging cases, cables, and batteries with the product.
The use of non-original spare parts may cause electric shock, fire, explosion, or other dangers.
Documents / ResourcesDownload manual
Here you can download full pdf version of manual, it may contain additional safety instructions, warranty information, FCC rules, etc.
Download Hollyland LARK M1 - Wireless Microphone System Manual
Advertisement


Need help?
Do you have a question about the LARK M1 and is the answer not in the manual?
Questions and answers