Advertisement
Advertisement
Table of Contents

Subscribe to Our Youtube Channel
Related Manuals for Hollyland MARS 400S PRO


Summary of Contents for Hollyland MARS 400S PRO
- Page 1 MARS 400S PRO User Manual V1.0.0...
-
Page 3: Key Features
FOREWORD Thank you for purchasing Hollyland Mars 400S PRO Wireless HD Video Transmission system. Please kindly read this manual carefully before using it. Hope you have a pleasant experience. KEY FEATURES 400ft Transmission Range between TX and RX(LOS) 300ft Transmission Range between TX and APP(LOS) ... -
Page 4: Packing List
PACKING LIST ① ② ③ ④ ⑤ 1 TX WITH 1 RX PACKING ① Transmitter ② Receiver ③ Antenna ④ DC Adapter ⑤ User Guide... - Page 5 PACKING LIST ① ② ③ ④ SINGLE RECEIVER PACKING ① Receiver ② Antenna ③ DC Adapter ④ User Guide...
-
Page 6: Typical Setup
TYPICAL SETUP P H O N E M O N I T P A D 1 TX-1 RX SETUP... - Page 7 TYPICAL SETUP M O N I T M O N I T 1 TX-2 RX SETUP...
-
Page 8: Product Interfaces
PRODUCT INTERFACES ① ④ ⑨ ⑤ ⑩ ② ⑥ ⑪ ⑦ ③ ⑫ ⑧ ① ④ ⑨ ⑤ ⑩ ② ⑪ ⑥ ⑦ ③ ⑫ ⑧... - Page 9 PRODUCT INTERFACES TRANSMITTER RECEIVER ① ① Antenna Interface Antenna Interface ② ② Fan Air Outlet Fan Air Outlet ③ ③ SDI Input SDI Output ④ ④ OLED Display Screen OLED Display Screen ⑤ ⑤ ⑥ ⑥ ⑦ ⑦ DOWN DOWN ⑧...
-
Page 10: Installation
INSTALLATION ① ④ ② ⑤ ③... - Page 11 INSTALLATION ① Install the antennas as demonstrated. ② Secure the cold shoe with 1/4 screw hole at the bottom of the transmitter and mount it to the camera. ③ Connect the HDMI input or SDI input of the transmitter with camera's by HDMI or SDI cable.
-
Page 12: Oled Display
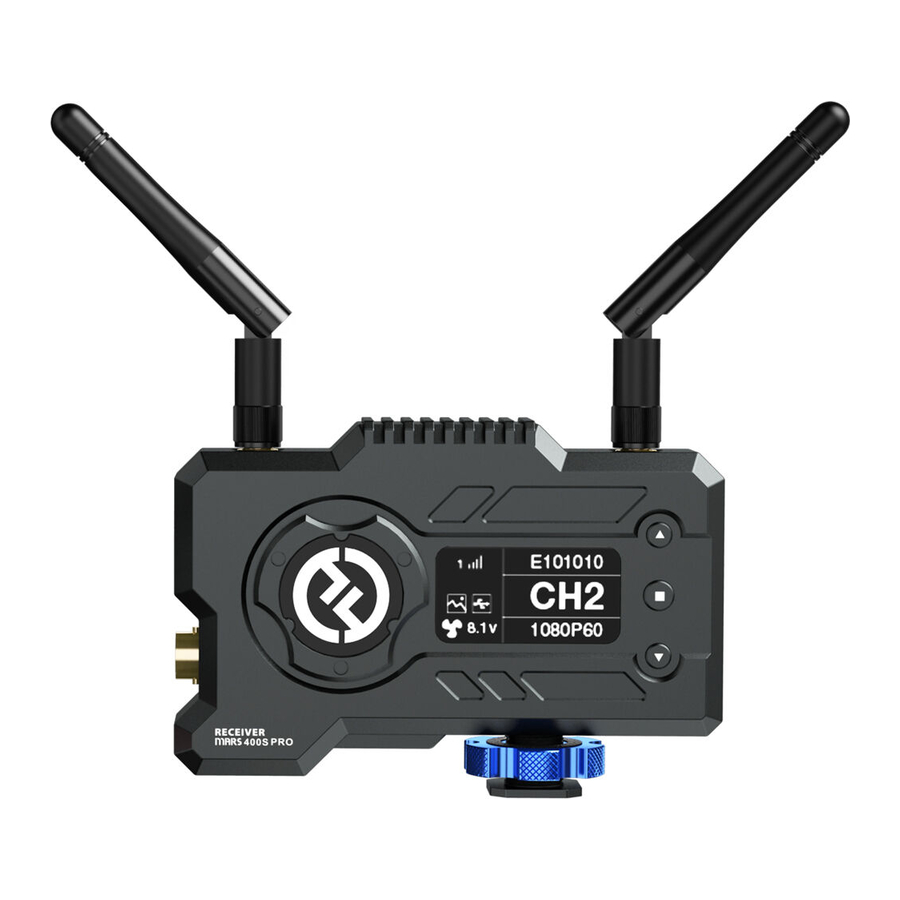
OLED DISPLAY ① ② ① ② ⑤ ⑤ E101010 ⑥ ⑥ ③ ③ ④ ④ ⑦ ⑦ 8.1v 8.1v 1080P60 ⑧ ⑨ ⑧ ⑨ TRANSMITTER RECEIVER ① ① Device Number Device Number ② ② WIFI Signal Strength WIFI Signal Strength ③... - Page 13 OLED DISPLAY E101010 E101010 1080P60 1080P60 CAUTION 1.This device supports several power methods, and the device will be charged by the method which has a higher voltage. * The picture on the left shows the symbol of Type-C power supply, the picture on the right shows the symbol of DC power supply.
-
Page 14: Enter Menu
QUICK GUIDE ENTER MENU Long press the “OK” button for 3 seconds to enter the root menu interface. Click “UP” and “DOWN” button to switch menu options, click “OK” to confirm. CHANNEL CHANGE Press the button “ UP/DOWN” on the transmitter or the receiver to change the current channel. - Page 15 QUICK GUIDE APP DOWNLOAD AND CONNECTION 1.“HollyView” APP Download 2.Connecting Method: Enter the WiFi connection interface of mobile phone and find out the WiFi named as "HLD + DEVICE ID", and input the WiFi password to connect (Factory Defult Password is: 12345678).
-
Page 16: Product Parameters
PRODUCT PARAMETERS Transmitter Receiver HDMI Input(Type A Female) HDMI Output(Type A Female) SDI Input SDI Output Interfaces 2* Antenna Interfaces (RP-SMA Male) 2* Antenna Interfaces (RP-SMA Male) DC Input DC Input USB Type-C USB Type-C DC Power Input:6-16V DC Power Input:6-16V Supply Interfaces USB Type-C Power Supply:5V/2A USB Type-C Power Supply:5V/2A... - Page 17 If encounter any problems in using the product or need any help,please follow these ways to get more technical support: support@hollyland-tech.com...
- Page 18 support@hollyland-tech.com...
Need help?
Do you have a question about the MARS 400S PRO and is the answer not in the manual?
Questions and answers