Mircom TX3 Series - TELEPHONE ACCESS SYSTEM Manual
- Quick start manual ,
- Installation manual (161 pages) ,
- Installation and operation manual (119 pages)
Advertisement
- 1 Introduction
-
2
Configuration
- 2.1 Using the TX3 Telephone Access System
- 2.2 Frequently Used Functions
- 2.3 Viewing Configuration Information
- 2.4 Entering Configuration Mode
- 2.5 Keypad Navigation
- 2.6 Exiting Configuration Mode
- 2.7 Main Door DTMF Setup
- 2.8 Auxiliary Door DTMF Setup
- 2.9 DTMF Sensitivity setup
- 2.10 Setting the Talk and Door Timers
- 2.11 Talk Timer setup
- 2.12 Main Door Timer Setup
- 2.13 Auxiliary Door Timer Setup
- 2.14 Changing Your Passcode
-
2.15
Configuration Menu using the Entry Panel Keypad
- 2.15.1 Adding and Editing New Records
- 2.15.2 Entering resident names
- 2.15.3 Using keyless entry codes
- 2.15.4 Selecting a ring pattern (NSL System only)
- 2.15.5 Editing Records
- 2.15.6 Deleting Records
- 2.15.7 Sorting by Name
- 2.15.8 Sorting by d-code
- 2.15.9 Auto configuration
- 2.15.10 Deleting All Records
- 2.16 Glossary
- 3 TX3 ADC Frequently Asked Questions
- 4 Warning Information
- 5 Documents / Resources
Introduction
This manual provides information on the most common features of the TX3 Telephone Access System and provides you with instructions to configure the TX3 Telephone Access System from the main entry panel keypad.
Note:
Mircom periodically updates panel firmware and Configurator Software to add features and correct any minor inconsistencies. For information about the latest firmware or software visit the Mircom website at www.mircom.com.
This manual explains how to
- Operate the TX3 Telephone Access Panel
- View Configuration Info
- Add, delete, and edit records
- Set the Main and Auxiliary doors' DTMF (the touch tone key to press to open the doors)
- Set the talk timer and door timers
- Change your password
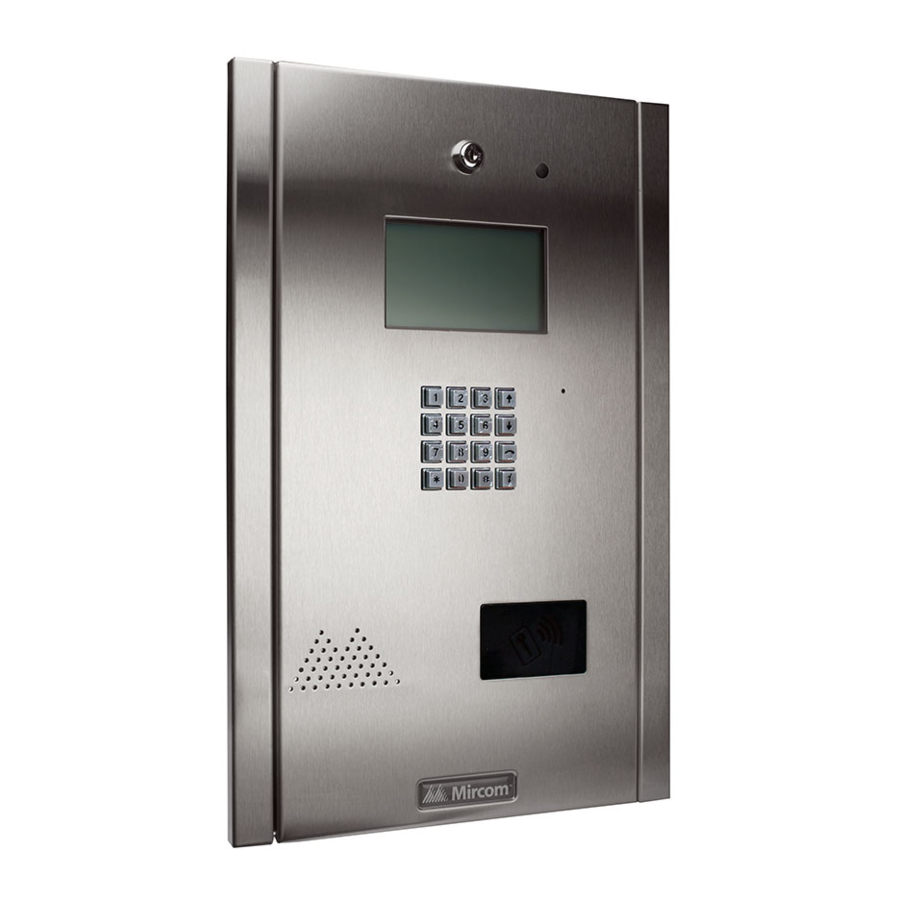
Introducing the TX3 Telephone Access System
The TX3 Telephone Access System is part of the Mircom suite of products that provide building ready monitoring, control and integrated security solutions for use in the high end multi-tenant residential market.
The TX3 Telephone Access System addresses the need within today's high end multi-tenant residential market for an easy-to-use tenant access system and an easy-to-use configuration utility. The TX3 Telephone Access System creates an aesthetically pleasing high quality entry system for residents and their visitors in a multi-unit dwelling establishment.
This manual provides the technician with information about the keypad configuration of the TX3 Telephone Access System and explains how to configure various components for a new system, including the modification of an existing system.
Version Control
The version number appears on the front cover and changes whenever there is a major or minor update to any part of the system regarding operation or configuration.
The following convention indicates major or minor changes:
Initial release. Version 1.00.0
Major change. Version 2.00.0
Minor change. Version 2.01.0
Pre-release changes. Version 2.01.1
Additional Documentation
For additional documentation, see the following Mircom literature:
- LT-995 TX3 Touch Screen Administrators Guide
- LT-969 TX3 Telephone/Card Access System Installation and Operation Manual
- LT-979 TX3 Telephone Access System Programming Manual
Configuration
This chapter provides information on how to configure the most commonly used functions of the TX3 Telephone Access System.
This chapter explains
- How to access the TX3 Telephone Access System
- Frequently Used Functions
- Viewing Configuration Information
- Keypad Navigation
- Entering Configuration Mode
- Exiting Configuration Mode
- Main Door DTMF Setup
- Auxiliary (Aux) Door DTMF setup
- DTMF Sensitivity Setup
- Setting the Talk and Door Timers
- Talk Timer setup
- Main Door Timer setup
- Auxiliary (Aux) Door Timer setup
- Changing Your Passcode
- Configuration Menu using the Entry Panel Keypad
- Glossary
- TX3 ADC Frequently Asked Questions
- Resident Directory Worksheet
Using the TX3 Telephone Access System
The TX3 Entry Panel LCD shows a scrollable view of the resident names and dial codes. The LCD also comes in an 8 line LCD handset version and a paper version of the resident list is available.
To use the TX3 Telephone Access System
- To view the resident list press the up or down arrow keys to scroll the list line by line.
or
To view the resident list page by page use the star key to scroll page up and number key to scroll page down. - Key in the dial code associated with the resident you wish to speak to or press the Telephone Key when the cursor is on the resident's name. For the handset version, first pick up the phone and then key in the dial code or press the Telephone Key.
- Once the resident grants entry permission, the door unlocks. For the handset version, hang up the phone and proceed through the door.
Frequently Used Functions
The following instructions are for the more commonly used features of the TX3 Telephone Access System.
Features include:
- Entering and exiting configuration mode
- Adding residents
- Edit and delete functions
- Timer settings
- Changing the password.
Viewing Configuration Information
To view configuration information, you must first enter the configuration mode.
To enter configuration mode

Entering Configuration Mode
To make changes to the resident list at the panel, you must first enter the configuration mode.
To enter configuration mode

Keypad Navigation
The diagram below shows how to use the keypad when in CONFIGURATION MODE.

Exiting Configuration Mode

To exit configuration mode
- Press
![]() info key to "Exit".
info key to "Exit".
Main Door DTMF Setup
The main door DTMF setup feature allows the resident to use their telephone touch tone keypad to open the main door.
To set up the main door DTMF

You have successfully set the main door DTMF. The display now returns to the configuration menu.
Auxiliary Door DTMF Setup
The auxiliary door DTMF setup feature allows the resident to use their telephone touch tone keypad to open the auxiliary door.
To set up the auxiliary door DTMF

You have successfully set the auxiliary door DTMF. The display now returns to the configuration menu.
DTMF Sensitivity setup
The DTMF sensitivity feature allows the resident to change how sensitive the TX3 unit is to receiving DTMF signals. DTMF sensitivity can be set from 1 to 8. A sensitivity of 1 indicates the lowest sensitivity while 8 is the highest sensitivity. The default sensitivity is 5.
To set the DTMF sensitivity

You have successfully set the DTMF sensitivity. The display now returns to the configuration menu.
Setting the Talk and Door Timers
To set the talk time and door timers, you must be in Configuration Mode. Refer to Entering Configuration Mode.
Talk Timer setup
The talk timer defines the maximum length of time that a visitor speaks with a resident.
To set up the talk timer

You have successfully set up the on-line timer. The display now returns to the configuration menu.
Main Door Timer Setup
The main door timer defines the length of time the main (lobby) door release stays unlocked.
To set up the main door

You have successfully set up the main door timer. The display now returns to the configuration menu.
Auxiliary Door Timer Setup
The auxiliary door timer defines the length of time the auxiliary door stays unlocked.
To set up the auxiliary door

You have successfully set up the auxiliary door timer. The display now returns to the configuration menu.
Changing Your Passcode
To change your passcode, you must be in configuration Mode. Refer to Entering configuration Mode.
Note:
The default passcode for level 3 is 3333. The default passcode for level 2 is 2222. Passcode level 1 is not used currently.
To change your passcode

You have successfully changed your passcode for one access level. The display now returns to the configuration menu.
Configuration Menu using the Entry Panel Keypad
The Configuration Menu contains the database menu. The Database Menu lets you add, edit and delete resident records, and consists of the following options:
- Add Record
- Edit Record
- Delete Record
- Sort by name
- Sort by d-code (sort by dial code)
- Auto program
- Delete all record
Adding and Editing New Records
Once you have entered the configuration menu, select the database menu, and then press the telephone key to enter the Add Record menu. The following screens will appear as shown in Table 1.
Note:
The items marked Edit mode only in Table 1 do not appear when you add a new record. They appear only when you edit an existing record. See paragraph Editing Records for instructions on editing records.
Table 1: List of Screens
| Database Menu | NSL System | ADC System | Explanation/Description |
| Enter Apt# [_ _ _ _] | YES | YES | Enter the resident's apartment number (up to 8 digits). |
| Enter Dial Code _ _ _ _ | YES | YES | Enter the resident's dial code (up to 4 digits). |
| Main Door sec. code [_ _ _ _] | YES | YES | Edit mode only Enter a series of up to 4 digits from 0 to 9 to replace the main door DTMF key (see section Main Door DTMF Setup) for the specific resident. To open the Main Door, the resident enters the Main Door Security code followed by the # key. DO NOT select "4". This is used to refuse entry or disconnect. Do not use the same number for the main door, auxiliary door, and call waiting (call waiting works on NSL systems only). If the Telephone Access System Panel has controller board model MD-1245, do not select 1, 7, or *. |
| Aux Door sec. code [_ _ _ _] | YES | YES | Edit mode only Enter a series of up to 4 digits from 0 to 9 to replace the auxiliary door DTMF key (see section Auxiliary Door DTMF Setup) for the specific resident. To open the Auxiliary Door, the resident enters the Auxiliary Door Security code followed by the # key. DO NOT select "4". This is used to refuse entry or disconnect. Do not use the same number for the main door, auxiliary door, and call waiting (call waiting works on NSL systems only). If the Telephone Access System Panel has controller board model MD-1245, do not select 1, 7, or *. |
| Enter Resident Name | YES | YES | Enter the resident's name. The name must be unique and a maximum of 15 characters. See section Entering resident names for an example of how to add a name. |
| Line In Use [x] Line 1 - 5 | YES | YES | Enter the speech path for resident to communicate to the ADC line or to a relay control unit. Line 1 is default. |
| Enter Phone number [____________] | N/A | YES | This option is for ADC only. Enter the resident's telephone number (up to 18 digits including a comma that is used as 1 second delay). Use the up arrow key for a comma and the down arrow key for a dash which is optional. Press the Enter (telephone key) to accept the telephone number. |
| Enter Relay Code [_ _ _ _] | YES | N/A | Enter the resident's assigned relay code (NSL only). Note: Relay codes start at 1 for the first relay, up to 1535. |
| Enter Keyless Code [_ _ _ _] | YES | YES | Edit mode only Enter the assigned keyless code, up to 6 digits (if used). See below for using keyless entry codes. |
| Keyless Code Corr [x] Main door relay [ ] Aux door relay | YES | YES | Edit mode only Select which door (main, auxiliary or both) can be opened by the resident using a keyless code. |
| Enter Elev Rest Addr [_ _] | YES | YES | Edit mode only Enter the ID (or address) of the Elevator Restriction controller for the resident. |
| Enter Elev Rest Code [_ _] | YES | YES | Edit mode only Enter the elevator restriction relay number for the resident. |
| Hide Res Name [x] Display | YES | YES | Edit mode only This feature turns the resident information display ON or OFF. When OFF the resident's information is only displayed in configuration mode. |
| Enter Ring Pattern [x] Ring Pattern 1-5 | YES | N/A | Enter the ring pattern for the resident (NSL only). See Table 2 for available ring patterns. The default is 1. |
Entering resident names
Once you have entered the configuration menu, select the database menu and then press the telephone key to enter the Add Record menu. After Apt no and Dial code, the following screen appears:

To enter a resident name
- Use the number keys to select the appropriate character. See Figure 11 for the characters that correspond to each number.

- Press any number key once, twice, three or more times to cycle through the characters associated with that key. When you reach the character you want, stop pressing the key and the character will remain in the display.
Note:
If you accidentally enter the wrong character while configuring a name, press * once to backspace or press 0 to delete the letter.
For example, to enter the last name "Doe",- Press "3" four times for the upper case letter "D".
- Press "6" three times for the letter "o".
- Press "3" two times for the letter "e".
- Press the telephone key to save and continue.
- Once you have entered the name, press the telephone key to accept.
- When you are finished adding the new record, press Enter (the telephone key) the display shows "New Record Added". The display returns to the configuration menu.

Using keyless entry codes
To enter the premises with a keyless entry code, you must first be in normal mode. While in normal mode, press 0, after which point you are prompted with "Enter keyless code". The keyless code is a numeric value from 1 to 999999.
To enter your keyless code
- Press 0. The keyless enter code appears.
- Enter your keyless code.
Selecting a ring pattern (NSL System only)
The ring pattern selection is part of the Database Menu.
Table 2: Available Ring Pattern
| Ring Pattern | Available Ring Pattern | ||||||
| 1 | 2s ON | 4s OFF | standard ring A | ||||
| 2 | 800ms ON | 400ms OFF | 800ms ON | 4s OFF | distinct ring B | ||
| 3 | 200ms ON | 400ms OFF | 200ms ON | 400ms OFF | 800ms ON | 4s OFF | distinct ring C |
| 4 | 200ms ON | 400ms OFF | 800ms ON | 400ms OFF | 200ms ON | 4s OFF | distinct ring D |
| 5 | One single ringing burst | ||||||
Editing Records
To edit a record
- Select "Edit Record" and use the up/down key to scroll through the residents.
- Press the telephone button to select the resident's name for editing.
![]()
- Use the down arrow key to scroll down the list of fields, such as Apartment number, Resident name, Dial code Keyless code, relay code, telephone number, etc. See Table 1 for details.
- Once the arrow is pointing to the field that requires a change, press the telephone key to edit.
- Re-enter the correct information. See paragraph Entering resident names for instructions on entering data.
- When you are finished editing the record, press the info key. The display returns to the record list. At this point you may edit another record or press the information key to return to the record list.

Deleting Records
Select this feature if you want to delete a resident's name. This function deletes one record at a time.
To delete a record
- Scroll the arrow to "Delete Record" and press the telephone button to enter the delete menu. The dial code and resident name appear:
![]()
- Scroll the resident names with the up/down arrow keys to the record you wish to delete.
- Press the telephone (enter) key to delete the entire record for the particular resident. A warning message appears.
- When the warning appears "Delete Record?". Press the telephone key to accept or the info key to cancel.
- Once the record has been deleted, the screen will return to the Delete Record function. At this point you may delete other records or press the info key to return to the Configuration menu.

Sorting by Name
Select this feature if you want the list of residents to be sorted alphabetically by name.
To sort by name
- Scroll the arrow to "Sort by Name" and press the enter (telephone) key.
Selecting this feature during database downloaded displays the following message:
![]()
The display now returns to the configuration menu.

Sorting by d-code
To sort by d-code
Select this feature if you want the list of residents to be sorted numerically by dial code. Scroll the arrow to "Sort by d-code" and press enter (telephone) key. The following message appears:

The display now returns to the database menu.
Auto configuration
This selection allows you to add a group of residents from a minimum of 10 to a maximum of 200 names.
To chose the auto program
- Scroll the arrow to "Auto Program" in the main Configuration menu and press the enter (telephone) key to select. The display will now show the following message:
![]()
- Use the up arrow to move from number of residents in increments of 5 to the desired number. The maximum depends on the TX3 Model (it can be 200, 1000 or 2000).
Note:
Only 200 names can be added at a time. - Press the telephone (enter) key to accept. The next screen will ask for resident name. Enter one of the resident names using the alphanumeric keypad.
![]()
- Press the telephone (enter) key to accept. The next screen will ask for the resident's dial code. All the rest of the dial codes increase by one.
![]()
- Use the number keypad to enter the start dial code. The next screen asks for the resident's keyless code. All the rest of the keyless code increase by one.
![]()
- Use the number keypad to enter the start keyless code. The next screen asks which audio line to use.
![]()
- Use the up arrow to enter the line number. Press the enter (telephone) key to enter.
- Use the up arrow to enter the line number. Press the enter (telephone) key to enter. The next screen asks for the relay code.
![]()
- Press info key to return to previous menu. View the residents entered by scrolling page up and down using the * and # keys. To enter the proper resident names, use the edit feature.


Deleting All Records
Select this feature if you want to delete all the resident data (all names, dial codes, everything).
To delete all the resident data
- Scroll the arrow to "Delete all Records" and press the enter (telephone) key. The following message appears:
![]()
- Press the enter (telephone) key to accept or the info key to cancel. The display now returns to the database menu.

Glossary
| Add Record | This function is used to add a new resident to the system. Part of the Database Menu. |
| Aux Door | When this function is set, the resident can press a number on his or her telephone pad to unlock the auxiliary door. |
| Delete Record | This function is used to delete the an entire resident record from the system. Part of the Database Menu. |
| Dial Code | A one- to four-digit code that a visitor enters into the lobby unit to call a resident. |
| DTMF | "Dual Tone Modulated Frequency" is a technical term for "touch tone". |
| Edit Record | This function is used to change a resident's existing record. |
| Keyless Code | This feature allows you to enter a 1 to 6 digit code to let residents to open the main door without a key. |
| Keypad Navigation | Instructions on how to use the keypad. |
| Talk Timer | This operation controls the maximum length of time that a visitor can speak with a resident at the entry panel. |
| Configuration Mode | This operation consists of multiple functions that allow you to customize your Telephone Access System. |
| Potentiometer | A technical term for a variable resistor which functions as a contrast control. |
| Scrolling Directory | An electronic directory that lists the residents of the building, line by line or page by page. |
TX3 ADC Frequently Asked Questions
Q. What is the ADC feature?
A. The telephone access system is an auto-dialer that is connected to a public telephone line. When a visitor enters a resident's dial code number, the system dials the resident's home or cell telephone number (Note: as a security precaution, the visitor cannot see the resident's home or cell telephone number). When the resident answers the call, he or she can press "9" (or whatever number is selected as the Main Door DTMF) to unlock the main door and automatically end the telephone call.
Q. Visitors cannot place calls to residents. Why?
A. If the problem is consistent with every resident, there may be a problem with the telephone line. Check the telephone line with a regular telephone for a dial tone. If the dial tone is not present contact your local telephone company. If the problem is consistent for one resident only, the resident's telephone number may be programmed incorrectly. Check the configuration to confirm that the resident's telephone number and area code are entered correctly.
Q. Why does the system hang up as soon as a visitor begins to talk with a resident?
A. The talk timer may be set for too short a duration. While in configuration mode, check that the talk timer is set to more than 30 seconds (factory default is 60 seconds).
Q. Why can't residents unlock the door/gate from their units by pressing "9" on their telephones?
A. This may be caused by one of the following:
- Incorrect Main Door DTMF setup.
Solution: While in configuration mode, check that the "Main Door" (DTMF) is programmed to digit "9". - Improper voltage on the door strike power supply.
Solution: Check for the correct voltage on the door strike power supply. - The door strike and system (main board) wires may be damaged or loose.
Solution: Check and verify that the door strike and system wires are intact.
Q. When a visitor places a call and begins to talk, he or she cannot hear the resident. Why?
A. The speaker may not be working correctly. Unlock the entry panel and perform a visual inspection of the speaker:
Look for loose wires as well as damaged components.
Check that the volume in the panel speaker is set properly, by entering the configuration mode and reviewing the speaker volume setting.
If there are no loose wires and the volume in the panel speaker is set properly, then adjust the potentiometer marked "SPEAKER" located on the back of the front entry panel display (must open the front entry panel door).
Q. The LCD display has no display or the display has dark blocks on it. Why?
A. There may be a problem with the contrast level. The potentiometer (contrast control) is located on the back of the keypad/display board. Unlock the front door and adjust the potentiometer for a darker or light contrast display.
Q. I misplaced the key for the telephone access system. How do I obtain a replacement?
A. The Mircom key part number is LK-304. Contact your local distributor or Mircom Head Office for a replacement.
Q. What happens when the visitor gets an answering machine when trying to contact a resident?
A. The system will allow the visitor to leave a voice message on the answering machine.
TX3 NSL Frequently Asked Questions
Q. What is the NSL feature?
A. The NSL (No Subscriber Line) operation does not use a dedicated public subscribed telephone line; rather the TX3-NSL-8M NSL Units (and TX3-8EC, TX3-16EC NSL Expanders) in your electrical/telephone room intercept all resident telephone lines coming into the building and communicate directly to them.
Q. Why can't residents unlock the door/gate by pressing the digit "9"on their telephones?
A. This may be caused by one of the following:
- Incorrect Main Door DTMF setup.
Solution: While in configuration mode, check that the "Main Door" (DTMF) is programmed to digit "9". - Improper voltage on the door strike power supply.
Solution: Check for the correct voltage on the door strike power supply. - The door strike and system (main board) wires may be damaged or loose.
Solution: Check and verify that the door strike and system wires are intact.
Q. Why does the system hang up as soon as a visitor begins to communicate with a resident?
A. This may be caused by the following: the talk timer may be set for too short a duration. While in configuration mode, check that the talk timer is set to more than 30 seconds (factory default is set to 60 seconds).
Q. When a visitor places a call and begins to talk, he or she cannot hear the resident. Why?
A. The speaker may not be working correctly. Unlock the panel and perform a visual inspection of the speaker:
Look for loose wires or loose solders as well as damaged components.
Check that the volume in the panel speaker is set properly, by entering the configuration mode and review the speaker volume setting.
If there are no loose wires and the volume in the panel speaker is set properly, there may be a problem with the speaker, then adjust the potentiometer marked "SPEAKER" located on the back of the front entry panel display (must open the front entry panel door).
Q. The LCD display has no display or the display has dark blocks on it. Why?
A. There may be a problem with the contrast level. The potentiometer (contrast control) is located on the back of the keypad/display board. Unlock the front door and adjust the potentiometer for a darker or light contrast display.
Q. Why is there no dial tone when a visitor calls a resident?
A. The NSL system does not utilize an independent telephone line, and therefore does not require a dial tone. The system works with the TX3-NSL-8M Relay unit to ring/call your apartment.
Q. I misplaced the key for the telephone access system. How do I obtain a replacement?
A. The Mircom key part number is LK-304. Contact your local distributor or Mircom Head Office for a replacement.
Q. What happens when the visitor gets an answering machine when trying to contact a resident?
A. The system will allow the visitor to leave a voice message on the answering machine.
Q. Is the ring pattern programmable?
The ring pattern selection is a standard NSL system feature. The system provides up to five ring patterns to choose from for every resident.
Q. How do I adjust the volume during a call?
Press the up and down arrow keys to turn the volume up or down during a call.
Resident Directory Worksheet
For your records, photocopy this sheet and fill in the resident information.

Warning Information

Please read this document CAREFULLY, as it contains important warnings, life-safety, and practical information about all products manufactured by the Mircom Group of Companies, including Mircom and Secutron branded products, which shall include without limitation all fire alarm, nurse call, building automation and access control and card access products (hereinafter individually or collectively, as applicable, referred to as "Mircom System").
NOTE TO ALL READERS:
- Nature of Warnings. The within warnings are communicated to the reader out of an abundance of caution and create no legal obligation for Mircom Group of Companies, whatsoever. Without limiting the generality of the foregoing, this document shall NOT be construed as in any way altering the rights and obligations of the parties, governed by the legal documents that apply in any given circumstance.
- Application. The warnings contained in this document apply to all Mircom System and shall be read in conjunction with:
- the product manual for the specific Mircom System that applies in given circumstances;
- legal documents that apply to the purchase and sale of a Mircom System, which may include the company's standard terms and conditions and warranty statements;
- other information about the Mircom System or the parties' rights and obligations as may be application to a given circumstance.
- Security and Insurance. Regardless of its capabilities, no Mircom System is a substitute for property or life insurance. Nor is the system a substitute for property owners, renters, or other occupants to act prudently to prevent or minimize the harmful effects of an emergency situation. Building automation systems produced by the Mircom Group of Companies are not to be used as a fire, alarm, or life-safety system.
NOTE TO INSTALLERS:
All Mircom Systems have been carefully designed to be as effective as possible. However, there are circumstances where they may not provide protection. Some reasons for system failure include the following. As the only individual in contact with system users, please bring each item in this warning to the attention of the users of this Mircom System. Failure to properly inform system end-users of the circumstances in which the system might fail may result in over-reliance upon the system. As a result, it is imperative that you properly inform each customer for whom you install the system of the possible forms of failure:
- Inadequate Installation. All Mircom Systems must be installed in accordance with all the applicable codes and standards in order to provide adequate protection. National standards require an inspection and approval to be conducted by the local authority having jurisdiction following the initial installation of the system and following any changes to the system. Such inspections ensure installation has been carried out properly.
- Inadequate Testing. Most problems that would prevent an alarm a Mircom System from operating as intended can be discovered by regular testing and maintenance. The complete system should be tested by the local authority having jurisdiction immediately after a fire, storm, earthquake, accident, or any kind of construction activity inside or outside the premises. The testing should include all sensing devices, keypads, consoles, alarm indicating devices and any other operational devices that are part of the system.
NOTE TO USERS:
All Mircom Systems have been carefully designed to be as effective as possible. However, there are circumstances where they may not provide protection. Some reasons for system failure include the following. The end user can minimize the occurrence of any of the following by proper training, testing and maintenance of the Mircom Systems:
- Inadequate Testing and Maintenance. It is imperative that the systems be periodically tested and subjected to preventative maintenance. Best practices and local authority having jurisdiction determine the frequency and type of testing that is required at a minimum. Mircom System may not function properly, and the occurrence of other system failures identified below may not be minimized, if the periodic testing and maintenance of Mircom Systems is not completed with diligence and as required.
- Improper Operation. It is important that all system users be trained in the correct operation of the alarm system and that they know how to respond when the system indicates an alarm. A Mircom System may not function as intended during an emergency situation where the user is unable to operate a panic or emergency switch by reason of permanent or temporary physical disability, inability to reach the device in time, unfamiliarity with the correct operation, or related circumstances.
- Insufficient Time. There may be circumstances when a Mircom System will operate as intended, yet the occupants will not be protected from the emergency due to their inability to respond to the warnings in a timely manner. If the system is monitored, the response may not occur in time enough to protect the occupants or their belongings.
- Carelessness or Safety Hazards. Moreover, smoke detectors may not provide timely warning of fires caused by carelessness or safety hazards such as smoking in bed, violent explosions, escaping gas, improper storage of flammable materials, overloaded electrical circuits or children playing with matches or arson.
- Power Failure. Some Mircom System components require adequate electrical power supply to operate. Examples include: smoke detectors, beacons, HVAC, and lighting controllers. If a device operates only by AC power, any interruption, however brief, will render that device inoperative while it does not have power. Power interruptions of any length are often accompanied by voltage fluctuations which may damage Mircom Systems or other electronic equipment. After a power interruption has occurred, immediately conduct a complete system test to ensure that the system operates as intended.
- Battery Failure. If the Mircom System or any device connected to the system operates from batteries it is possible for the batteries to fail. Even if the batteries have not failed, they must be fully charged, in good condition, and installed correctly. Some Mircom Systems use replaceable batteries, which have a limited life-span. The expected battery life is variable and in part dependent on the device environment, usage and type. Ambient conditions such as high humidity, high or low temperatures, or large temperature fluctuations may reduce the expected battery life. Moreover, some Mircom Systems do not have a battery monitor that would alert the user in the event that the battery is nearing its end of life. Regular testing and replacements are vital for ensuring that the batteries function as expected, whether or not a device has a low-battery monitor.
- Physical Obstructions. Motion sensors that are part of a Mircom System must be kept clear of any obstacles which impede the sensors' ability to detect movement. Signals being communicated by a Mircom System may not reach the receiver if an item (such as metal, water, or concrete) is placed on or near the radio path. Deliberate jamming or other inadvertent radio signal interference can also negatively affect system operation.
- Wireless Devices Placement Proximity. Moreover all wireless devices must be a minimum and maximum distance away from large metal objects, such as refrigerators. You are required to consult the specific Mircom System manual and application guide for any maximum distances required between devices and suggested placement of wireless devices for optimal functioning.
- Failure to Trigger Sensors. Moreover, Mircom Systems may fail to operate as intended if motion, heat, or smoke sensors are not triggered.
- Sensors in a fire system may fail to be triggered when the fire is in a chimney, walls, roof, or on the other side of closed doors. Smoke and heat detectors may not detect smoke or heat from fires on another level of the residence or building. In this situation the control panel may not alert occupants of a fire.
- Sensors in a nurse call system may fail to be triggered when movement is occurring outside of the motion sensors' range. For example, if movement is occurring on the other side of closed doors or on another level of the residence or building the motion detector may not be triggered. In this situation the central controller may not register an alarm signal.
- Interference with Audible Notification Appliances. Audible notification appliances may be interfered with by other noise sources such as stereos, radios, televisions, air conditioners, appliances, or passing traffic. Audible notification appliances, however loud, may not be heard by a hearing-impaired person.
- Other Impairments. Alarm notification appliances such as sirens, bells, horns, or strobes may not warn or waken a sleeping occupant if there is an intervening wall or door. It is less likely that the occupants will be alerted or awakened when notification appliances are located on a different level of the residence or premise.
- Software Malfunction. Most Mircom Systems contain software. No warranties are provided as to the software components of any products or stand-alone software products within a Mircom System. For a full statement of the warranties and exclusions and limitations of liability please refer to the company's standard Terms and Conditions and Warranties.
- Telephone Lines Malfunction. Telephone service can cause system failure where telephone lines are relied upon by a Mircom System. Alarms and information coming from a Mircom System may not be transmitted if a phone line is out of service or busy for a certain period of time. Alarms and information may not be transmitted where telephone lines have been compromised by criminal tampering, local construction, storms or earthquakes.
- Component Failure. Although every effort has been made to make this Mircom System as reliable as possible, the system may fail to function as intended due to the failure of a component.
- Integrated Products. Mircom System might not function as intended if it is connected to a non-Mircom product or to a Mircom product that is deemed non-compatible with a particular Mircom System. A list of compatible products can be requested and obtained.
Mircom
25 Interchange Way
Vaughan, Ontario
L4K 5W3
905.660.4655
Fax: 905.660.4113
http://www.mircom.com
Documents / Resources
References
Download manual
Here you can download full pdf version of manual, it may contain additional safety instructions, warranty information, FCC rules, etc.
Advertisement


Need help?
Do you have a question about the TX3 Series and is the answer not in the manual?
Questions and answers