
Subscribe to Our Youtube Channel
Related Manuals for Orno Talos OR-VID-MS-1078


Summary of Contents for Orno Talos OR-VID-MS-1078
- Page 1 Operating and installation instructions Video doorphone set Talos OR-VID-MS-1078 instruction manual STOP! ARE NOT SUBJECT TO REPAIR UNDER WARRANTY!
-
Page 2: Table Of Contents
ORNO products is available at www.orno.pl. Orno-Logistic Sp. z o.o. holds no responsibility for the results of non-compliance with the provisions of the present Manual Orno Logistic Sp. z o.o. reserves the right to make changes to the Manual - the latest version of the Manual can be downloaded from www.orno.pl Any translation/ interpretation rights and copyright in relation to this Manual are reserved. -
Page 3: Characteristics Of The Set
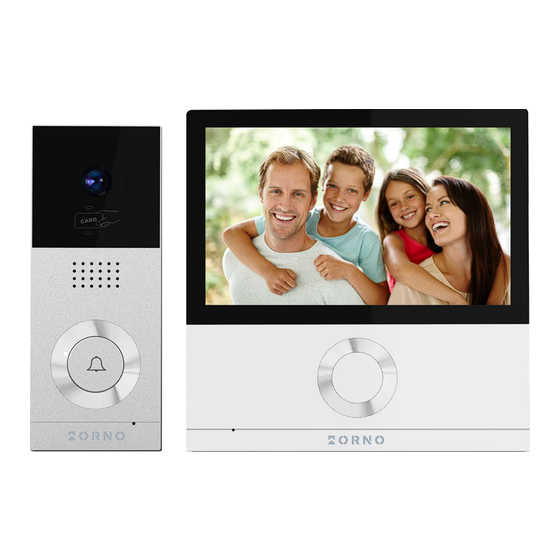
2. CHARACTERISTICS OF THE SET Videodoorphone is designed for installation in 1-family buildings. Functions: - simultaneous view and hold of a conversation with a person in front of a entrance; - direct control of an electric door strike; - possibility of gate control; - build-in RFID reader allowing acces with cards and proximity tags;... -
Page 4: Set Construction
OUTDOOR UNIT 4. SET CONSTRUCTION MONITOR 1. LCD touchscreen 2. Mounting bracket 3. Connection terminals 4. Power supply terminal 5. MicroSD card slot OUTDOOR UNIT 6. Night-time lighting 7. Camera lens 8. RFID card and proximity tags reader 9. Loudspeaker 10. -
Page 5: Installation
5. INSTALLATION MONITOR INSTALLATION fig. 3 Monitor installation 1. Screw the monitor mounting bracket to the wall with screws. 2. Attach the monitor to the bracket only after the installation is complete and the unit has been successfully connected. OUTDOOR UNIT WITH CAMERA INSTALLATION fig. -
Page 6: Wiring Diagrams
fig. 5 Outdoor unit with camera installation 1. Drill holes in the wall and insert the wall plugs. Fix the rainshield in place using screws. 2. Connect the wires according to the attached wiring diagram. 3. Place the camera in the rainshield and screw it from the bottom with a safety screw. 6. - Page 7 fig. 7 Wiring diagram The set does not include an electric door strike and automatic gate control unit! The video doorphone cables should not be routed in one cable with the cables of other installations such as bell, alarm, etc. Any power and telecommunication cables emitting strong magnetic fields (e.g. loudspeaker columns, TV set) in direct contact with the cables connecting the outdoor unit to the monitor may adversely affect the operation of the set.
-
Page 8: Proximity Card And Tags Reader
7. PROXIMITY CARD AND TAGS READER The set contains 7 proximity tags (additional proximity tags can be added in case the tags in the set are lost): 5 blue proximity tags for users, 1 yellow proximity tag for adding new users, 1 red proximity tag for deleting all saved users. The proximity tags are configured by default and do not need to be programmed during device installation. -
Page 9: Monitoring
SD card status Indicator of installed SD card. Monitor turn off Wi-Fi status Indicator of Wi-Fi signal strenght. Settings Go to the settings menu. Date and time Current date and time – press to edit. Important: Remember to set the date and time before using the device. If you do not set the date/time, problems may arise when saving images and videos. -
Page 10: Call Volume And Image Adjustment
Open door/wicket: press to release the electric door strike and open the door/wicket. Video recording: press to start recording (in AUTO mode, video is automatically recorded when motion is detected in the detection field). The length of the recording is a maximum of 80 seconds. After you start recording, the remaining time will be displayed in the upper right corner. -
Page 11: Cctv
9. CCTV When the CCTV icon is pressed, the image from the connected CCTV camera is displayed on the monitor screen. The viewing time is max. 30 seconds. During the preview, you can start recording. The CCTV monitoring function is only available if the camera is correctly connected to the set. -
Page 12: Intercom
10. INTERCOM Function available if more than 1 monitor is connected to the set. Volume control: 3-step adjustment of the call volume. End call: press to end the call and switch off the intercom. Call and conversation time: indicates the current time of the call or conversation. Connection between monitors: select which device you want to connect to. - Page 13 IMAGE Source/file number. Go to next/return to previous file. Date and time. Delete file. VIDEO Source/file number. Go to next/go back to previous video. Play video - press to play the current video file. During playback, the icon changes into a pause button. Delete file.
-
Page 14: Settings
12. SETTINGS RECORDING Door 1/Door 2 Enable this option if the outdoor unit has a code lock or RFID reader and needs constant power supply. always on Enable this option to set the autosave mode (photo/video). If an SD memory card is not Auto recording installed in the unit, automatic video recording cannot be selected. -
Page 15: Wi-Fi
WI-FI An individual ringtone can be set for each outdoor unit (6 melodies to choose). Option to enable and disable Wi-Fi network connection. Search for local networks and Wi-Fi connect to the desired network from the list. Enter the password to connect. When the Wi-Fi connection you are looking for cannot be found, you can add it by entering the network information directly into the list. -
Page 16: Storage
STORAGE Format SD card Select to format the SD memory card. The process may take about 1 minute. Files deletion Select the photos or videos you wish to delete. SD card capacity Displays the free and total capacity of the SD card. Flash capacity Displays the free and total memory capacity of the monitor. -
Page 17: Display
DISPLAY Brightness/contrast/colour saturation can be Screen adjustment adjusted (settings apply to the image displayed from external camera). The settings can be adjusted from 0-20. Return to default settings by pressing the icon in the upper right corner. Choose from different standyby modes. Enter standby mode LCD off (after 30 seconds): the screen switches off after 30 seconds if no action was performed during this time. -
Page 18: Etc
Open frame time: select the background you wish to display together with the screen carousel function. No backfiguration: the selected screen is displayed without background images. Basic image: the background is set randomly from the images stored in the internal memory. Display When selecting this function, the touchscreen is inactive for 30 seconds. -
Page 19: Sd Card
Security settings Before setting the alarm 1: Sensor selection: Security Sensor 1/Security Sensor 2 2: Activate/deactivate alarm detector 3: Confirm selection 4: Alarm log: displays a list of all alarm events 5: Auto-recording: the CCTV camera will automatically start recording for 10 seconds when a security alarm is triggered. -
Page 20: Mobile App Installation
13. MOBILE APP INSTALLATION LOGIN Note: a device can only be paired with one Tuya account. To pair the device with a new account, remove the pairing with the previous account or use the share function in the app to make the device available for a second account. 1. - Page 21 Add device Scan 2. In the app on your phone, click and then click the icon located in the upper right corner. Scan the QR code displayed on the monitor to start the process of pairing the device with your phone. 3.
-
Page 22: Cleaning And Maintenance
INVITING USERS 1. Select the tab on the bottom bar of the app, then enter Home management>My Home . Here, give the family a name (e.g. the Smiths). Add members 2. Select . On the app screen, options of sharing the invitation code will appear (e.g. text message). Invited users can add their device by entering the invitation code in Home management>Join a home - once the app is... -
Page 23: Troubleshooting
Simplified declaration of conformity Orno-Logistic Sp. z o.o. declares that the type of radio device OR-VID-MS-1078 Video doorphone set Talos is compliant with the Directive 2014/53/EU. The full text of the EU declaration of conformity is available at the following web address: www.orno.pl.
Need help?
Do you have a question about the Talos OR-VID-MS-1078 and is the answer not in the manual?
Questions and answers