
Subscribe to Our Youtube Channel
Related Manuals for Holy Stone HS175G


Summary of Contents for Holy Stone HS175G
- Page 1 HS175G User Manual V1.0 Gebrauchsanweisung Dare to fly.Soar to live. usa@holystone.com (USA) eu@holystone.com (EU) +1(833)766-4733 ca@holystone.com (CA) au@holystone.com(AU) www.holystone.com...
-
Page 2: Table Of Contents
CONTENTS Operation Guide Product Profile Package Contents Charging Flight English 01-53 Diagram of the Drone Pre-Flight Preparations Diagram of the Transmitter Pre-Flight Checklist Deutsch 54-104 Drone Functions Appendix Flight Functions Specifications Compliance Information Stabilization Functions Contact Us APP Functions Troubleshooting Drone Status Indicator... - Page 3 Reading Guidance Access tutorial Videos To ensure you're using the product safely and correctly, scan the QR code below to view our tutorial videos. Icon “ ” essential precautions. “ ” tips for operation and usage. Recommended Steps Download the HS GPS V5 App Our product offers both tutorial videos and the following resources: Simply scan the QR code below.
-
Page 4: Package Contents 07 Charging
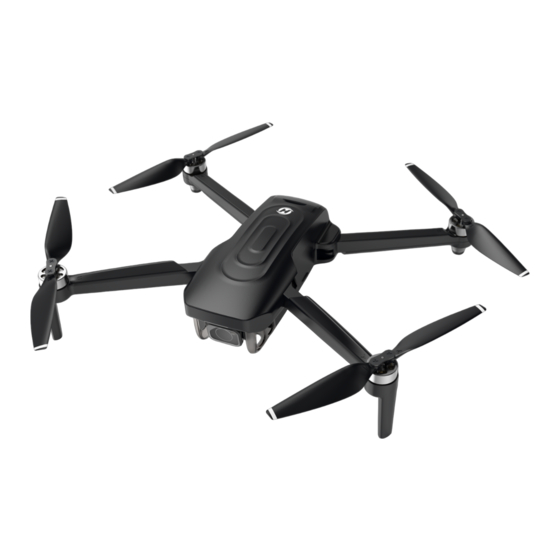
1.2 Diagram of the Drone >> Propeller A Status Lights Propeller B Camera Propeller B Propeller A Optical Flow Positioning Lens Power Switch HS175G User Manual Gebrauchsanweisung V1.0 Battery Level Lights +1(833)766-4733 usa@holystone.com (USA) eu@holystone.com (EU) TF Card Slot www.holystone.com ca@holystone.com (CA) - Page 5 PRODUCT PROFILE PRODUCT PROFILE 1.3 Diagram of the Transmitter >> The Transmitter Phone Holder Takeoff/Landing: short press Front: Top: GPS Switch: short press Left Joystick Headless Mode: long press Compass Calibration: long press Return to Home(RTH): short press Right Joystick Speed Switch: short press Power Switch: long press Take Photo: short press...
- Page 6 PRODUCT PROFILE PRODUCT PROFILE 1.3 Diagram of the Transmitter >> Joystick Mode MODE 1 : To enter MODE 1, turn on the transmitter while holding the button. (Please do not release the button until the transmitter is powered on.) MODE 2 : (The default setting, i.e., left joystick as the throttle joystick.) Ascend Forward...
- Page 7 PRODUCT PROFILE OPERATION GUIDE 1.3 Diagram of the Transmitter >> 2.1 Charging >> LCD Screen USB Adapter (5V/2A) Power Bank Flight Speed RTH Indicator Takeoff/Landing Indicator · Before charging, please read the instructions in the "Battery Safety" section of the Optical Flow Positioning Photo/Record Indicator GPS mode Indicator...
- Page 8 OPERATION GUIDE OPERATION GUIDE 2.1 Charging >> 2.2 Pre-Flight Preparations >> Charging of the Drone Battery: TF Card Arms Remove the battery from the drone and connect it to a USB charging cable. To store your photos and videos, insert a All arms of the drone are folded before Plug the USB charging cable into a USB charging port on a power bank or a USB adapter the drone is packaged at the factory.
-
Page 9: Installation
OPERATION GUIDE OPERATION GUIDE 2.2 Pre-Flight Preparations >> 2.2 Pre-Flight Preparations >> Propellers Drone Battery Installation: Removal: Installation: Removal: *Before installing the battery, please check if it has a HEAD detachable insulation pad/band. If yes, remove it. The drone will not fly unless the correct For propeller removal, use a screw- propeller is installed on the correct driver (provided) to rotate the screws motor shaft. Each propeller is labeled counter-clockwise and remove the ... -
Page 10: Pre-Flight Checklist
OPERATION GUIDE OPERATION GUIDE 2.2 Pre-Flight Preparations >> 2.3 Pre-Flight Checklist >> Phone Holder Make sure the transmitter, the Make sure that the camera Make sure that there is nothing mobile phone and the drone is clean. obstructing the motors. battery are fully charged. -
Page 11: Flight
OPERATION GUIDE OPERATION GUIDE 2.4 Flight >> Pairing Turning on the Transmitter: Press and hold the power switch ( ) for 3 · All of the operations shown in this manual are demonstrated using MODE 2. seconds to turn it on; the transmitter will ·... - Page 12 OPERATION GUIDE OPERATION GUIDE 2.4 Flight >> Wi-Fi Connection · Connecting your phone to the drone's Wi-Fi may take some time. Please remain Make sure the pairing has finished before going to the Wi-Fi settings on your phone. patient and wait for the connection to be established successfully. ·...
- Page 13 OPERATION GUIDE OPERATION GUIDE 2.4 Flight >> Compass Calibration STEP 3: STEP 1: Point the head of the drone upward, and spin ×3 Long press the button to enter the com- the drone three times. The transmitter produces pass calibration. The transmitter produces a a short beep, which means that you have suc- short beep, indicating that the calibration cessfully performed a compass calibration.
- Page 14 OPERATION GUIDE OPERATION GUIDE 2.4 Flight >> GPS Signal Search After calibrating the compass, put the drone on a flat surface. Make sure there are no external sources of signal interference around. Please don't use the GPS mode when you are indoors. The drone will automatically perform a search for GPS signals.
- Page 15 OPERATION GUIDE OPERATION GUIDE 2.4 Flight >> 2.4 Flight >> Gyro-Calibration Unlocking the Motors Make sure to place the drone on a level surface before calibrating the gyro. Simul- Short press the button. The motors will rotate, and the drone is unlocked. taneously push the left joystick and the right joystick to the bottom right corner to calibrate the gyro.
-
Page 16: Drone Functions Appendix
OPERATION GUIDE DRONE FUNCTIONS 2.4 Flight >> Takeoff/Landing 遥控器更换、 When operating the drone, it's important to periodically adjust the orientation and distance between the transmitter and the drone to ensure that the drone always 德同 Remember to unlock the motors before takeoff. remains within the optimal communication range. - Page 17 DRONE FUNCTIONS DRONE FUNCTIONS 3.1 Flight Functions >> 3.1 Flight Functions >> Camera Angle Adjustment Take Photo/Record Video The control tilt range is -90 ° to 0 ° . Use the dial ( ) to control the tilt of the camera.
-
Page 18: Flight Functions
DRONE FUNCTIONS DRONE FUNCTIONS 3.1 Flight Functions >> Headless Mode Activating: Press and hold the button. The The Headless Mode is a great training tool for beginner pilots. It is also useful when the transmitter will produce a prolonged beep, and drone is too far from the pilot (which makes it difficult to tell its orientation). -
Page 19: Camera Mode
DRONE FUNCTIONS DRONE FUNCTIONS 3.1 Flight Functions >> 3.1 Flight Functions >> Speed Switch Emergency Stop This Emergency Stop function should only be used in case of emergency to avoid This drone offers two speed modes: damages or injuries. Keep in mind that the fall may damage the drone. Press and Camera mode and Sport mode. - Page 20 DRONE FUNCTIONS DRONE FUNCTIONS 3.1 Flight Functions >> Return to Home(RTH) 3. The connection between the transmitter and the drone is lost for more than 15 seconds. 4. The compass receives no interference. The Return to Home function brings the drone back to the recorded Home Point. This Once the Failsafe RTH is activated, the drone will start to to fly back to the pre-recorded function can only be triggered when the drone is in GPS mode.
-
Page 21: Stabilization Functions 47 Contact Us
DRONE FUNCTIONS DRONE FUNCTIONS 3.1 Flight Functions >> 3.2 Stabilization Functions >> Altitude-Hold Function Return to Home(RTH) Low Voltage RTH : When the flight battery is too low or there is not enough power to return home, the user should land the drone as soon as possible to avoid damage to the drone or other hazards. - Page 22 DRONE FUNCTIONS DRONE FUNCTIONS 3.2 Stabilization Functions >> Optical Flow Positioning Optical Flow Module The Optical Flow Positioning System The Optical Flow Positioning System is consists of a camera module, which typically used in an indoor environ- acquires the position information of the ment when the GPS signal is weak or drone through visual images to ensure unavailable.
-
Page 23: App Functions 48 Troubleshooting
DRONE FUNCTIONS DRONE FUNCTIONS 3.3 APP Functions >> App Interface Homepage Tap this icon to return to the main menu. Status bar: Displays the current status of the drone. GPS Signal Displays the current GPS signal strength. GPS Mode Drone Battery Level Real-time display of the current battery level of the drone. - Page 24 DRONE FUNCTIONS DRONE FUNCTIONS 3.3 APP Functions >> App Interface Flight Distance Horizontal distance from the Home Point. Pair the mobile phone with a pair of VR glasses (not included) first. Then use this function to watch 3D live feed in real-time. Flight Height Vertical distance from the Home Point.
-
Page 25: App Functions
DRONE FUNCTIONS DRONE FUNCTIONS 3.3 APP Functions >> 3.4 Drone Status Indicator >> Beginner Mode Indicator Status Meanings It's recommended that beginner pilots first familiarize themselves with the drone by using beginner mode. In Beginner mode, which is the default operating mode, the Unsuccessful pairing after pow- following settings apply: [Red] Slow Flashing... -
Page 26: Drone Battery
APPENDIX 4.1 Specifications >> 4.1 Specifications >> DRONE: TRANSMITTER: Max Flight Distance: 3281 ft/1000 m Model: HS175G Weight: 249g/8.8oz Operating Frequency: 2452-2474MHz (outdoor and unobstructed) Max Flight Time: 30 minutes Max Flight Height: 394 ft/120m Battery Type: 3.7V 1800mAh Lithium-ion Polymer battery (in a windless environment) Operating Temperature Range: 32°... -
Page 27: Troubleshooting
APPENDIX APPENDIX 4.2 Contact Us >> 4.3 Troubleshooting >> Issues Possible Causes Suggested Solutions Please do not hesitate to contact us if you need further support. (1)Ensure you' r e operating in an area with strong GPS reception. Weak GPS signal. (2)For indoor operations, short press the button to exit GPS mode. -
Page 28: Compliance Information
APPENDIX APPENDIX 4.4 Compliance Information >> 4.4 Compliance Information >> FCC Notice: RF Exposure: This device complies with part 15 of the FCC Rules. Operation is subject to the following two The equipment complies with FCC radiation exposure limits set forth for an uncontrolled conditions: environment. - Page 29 Caution MTOM Statement: HS175G is a quadrotor drone. The MTOM of HS175G is 249g, including the propellers, the 1. The max operating of the EUT is 40°C, and shouldn’t be lower than 0°C. Flight Battery, TF card, which is compliant with C0 requirements.
- Page 30 2. HS175G Flight Battery (approx. 85.5 g) List of Safe Guards Below is the list of the mechanical safeguards and operation safeguards for HS175G. 1. Emergency Stop function can be performed to stop the motors in case of an emergency. Refer to the Emergency Stop section for details.
Need help?
Do you have a question about the HS175G and is the answer not in the manual?
Questions and answers
What is the maximum carry weight for packages or bait