
Subscribe to Our Youtube Channel
Related Manuals for Holy Stone HS550


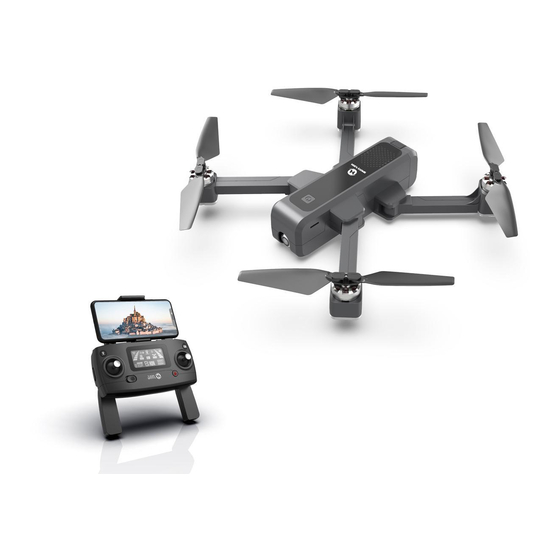
Summary of Contents for Holy Stone HS550
- Page 1 Instructions For Use Gebrauchsanweisung V 2.0 HS550 eu@holystone.com (EU) usa@holystone.com (USA) jp@holystone.com (JP) ca@holystone.com (CA) +1(855) 888-6699 www.holystone.com...
-
Page 2: Table Of Contents
Contents 1.0 Disclaimer&Warning ................2.0 Safety Guidelines .................. 3.0 Maintenance ................... 4.0 Package Contents .................. 5.0 Drone’s Details ..................6.0 Transmitter Details 6.1 Transmitter Functions ..............6.2 Mode Switch ................... 7.0 Installation 7.1 Drone Battery ................. 7.2 Transmitter Battery................ 7.3 Propellers ..................7.4 Phone Holder................... - Page 3 11.0 APP Operation Instruction 11.1 Operation Interface ..............11.2 Setting Parameter ..............11.3 Follow Me ..................11.4 TapFly .................... 11.5 Point of Interest ................11.6 Take Photo/ Video ..............12.0 Drone Status Indicator ..............13.0 Specifications ................... 14.0 Trouble Shooting ................15.0 Contact Us ..................
-
Page 4: Disclaimer&Warning
Any personal injury property damage, legal disputes and all other adverse events caused by the violation of the safety instructions or due to any other factor, WILL NOT be Holy Stone’s responsibility. 2.0 SAFETY GUIDELINES 2.1 Check Before Use:... - Page 5 ④ Please do a thorough check of the product before each use. Inspect the integrity of the parts, any signs of cracks and wear of the propeller, battery power and effectiveness of the indicator, etc. If after doing a complete check any issues are found, please refrain from using the product until the issue has been resolved.
- Page 6 2.3 Operation Requirements: ① Please don’t use this product to follow any moving vehicles . ② During the flight, only turn off the motor in case of an emergency. ③ Please flight the drone back to you as soon as possible when the battery is running low. ④...
-
Page 7: Maintenance
⑨ Don't attempt to disassemble or modify the battery in any way. ⑩ Don't use the battery if it gives off an odor, generates heat, becomes discolored or deformed,or appears abnormal in any way. If the battery is in use or being charged, remove it from the device or charger immediately and discontinue use. -
Page 8: Package Contents
×1 ×1 ×1 Drone Transmitter Drone Battery ×1 ×4 ×1 USB Charging Propeller Charger Cable Instructions For Use Gebrauchsanweisung V 2.0 HS550 usa@holystone.com (USA) eu@holystone.com (EU) ca@holystone.com (CA) jp@holystone.com (JP) ×1 ×1 +1(855) 888-6699 www.holystone.com Instructions Screwdriver For Use -05-... -
Page 9: Drone's Details
5.0 DRONE’S DETAILS Propeller A Propeller B Propeller B Power Switch Propeller A HD Camera Ultrasonic Sensor Vision Positioning Lens Lights Battery -06-... -
Page 10: Transmitter Details
6.0 TRANSMITTER DETAILS 6.1 Transmitter Functions Antenna Return to Home Photo/Video Right Joystick Left Joystick Power Switch Lock/Unlock LCD Screen Folded Handle - - - - - - - - - - - - - - - - - - - - - - - - - - - - - - - - - - - - - - - - - - - - - - - - - - - - - - - - - - - Gimbal Trimmer Long-press: One Key Takeoff/Landing... - Page 11 GPS Mode Switch Slide the GPS Mode Switch button up at the right side to position “ON”, and you can hear two beeps. Check the icon “ ” on the LCD screen to confirm GPS is on. Slide the GPS Mode Switch button down at the right side to position “OFF”, and you can hear one beep.
- Page 12 LCD Screen Functions Return to Home (RTH) icon Signal Strength Transmitter Drone Battery Level Battery Level Photo/ Video Distance Against High/ Low Home Point Speed Mode Satellite Amount Transmitter Home Point Throttle Mode GPS Mode Altitude against - - - - - - - - - - - - - - - - - - - - - - - - - - - - - - - - - - - - - - - - - - - - - - - - - - - - - - - - - - - 10.2 Low Battery Warning Pic.
-
Page 13: Mode Switch
6.2 Mode Switch 6.2.1 MODE 2 (Left hand throttle MODE 2 will be default setting) Left Joystick Right Joystick Forward Ascend Descend Down Backward Down Left Left Right Right Turn Left Turn Right Fly to Left Fly to Right - - - - - - - - - - - - - - - - - - - - - - - - - - - - - - - - - - - - - - - - - - - - - - - - - - - - - - - - - - - 6.2.2 MODE 1 ①... -
Page 14: Installation
7.0 INSTALLATION 7.1 Drone Battery Installation: Push the battery into the battery compartment at the rear of the drone. Make sure that you hear a click sound indicating the battery is firmly installed. Attention: The battery should be installed firmly, failure to do so may affect the flight safety of your drone. -
Page 15: Transmitter Battery
7.2 Transmitter Battery Step 1: Unfold the hand sticks and open the battery cover (Pic. 3). Pic. 3 Step 2: Install 2*AA batteries into the battery compartment according to the given polarity (Pic. 4). Pic. 4 Step 3: Close the battery compartment (Pic. 5). Pic. -
Page 16: Propellers
7.3 Propellers Installation HEAD Correct the each propeller ---The icon is printed on the back of the propeller--- to its corresponding motor shaft, either position A/B, then lock it with screws by rotating clockwise. Tips: Always pay close attention to the icon printed on the back of the propeller, if you want to insert any propeller to make sure they are fitted correctly, otherwise the drone will not take off. -
Page 17: Phone Holder
7.4 Phone Holder 1. Pull out the mobile phone holder upwards completely (Pic. 8). Pic. 8 2. Tilt the holder 30 degrees towards you and then you will hear a click sound (Pic. 9). Pic. 9 3. Rotate and fix the support board in place (Pic. -
Page 18: Charging
8.0 CHARGING ● Before charging, please check the contents of the “ Use of Battery” section of the “ Safety Guidelines” carefully! Charging Indicator USB Adapter (5V/0.5-2.0A) Charger Power Bank Spare Battery Spare USB Cable (Not Included) (Not Included) Computer USB Port ①... -
Page 19: Operation Guide
ATTENTION: This product is only equipped with a SINGLE battery, you can choose to purchase another one to enjoy a longer flight. --When two batteries are being charged with one USB charging cable, the two batteries will be charged alternatively, that is the second battery can only be charged after the first one being fully charged. -
Page 20: Paring
All of the operations shown in this manual are demonstrated using MODE 2. 9.2 Pairing ① Hold the ” ” button and slide the power switch to the right to power on the transmitter, then it makes 2 beep sounds, and the indicator light “ ”... -
Page 21: Initialization Detection
9.3 Initialization Detection After signal connection, the drone enters into initialization detection procedure with front and rear lights flashing red, green and yellow alternatively. Make sure that the drone is set on a flat and still surface for the initialization detection. The drone initializa- tion detection takes about seconds. -
Page 22: Compass Calibration
9.4 Calibrating the Compass 1.Compass calibration should be performed after successful drone initialization detection. 2. Drone compass calibration should be done for every flight. That is to say, if the drone is restarted, compass calibration should be done again. After successful drone initialization detection, the drone front and rear lights flash yellow alternatively. -
Page 23: Calibrate The Gyro
9.5 Calibrating the Gyro ( ) Push both of the joysticks down to the bottom left. The Green LED light will flash. When the calibration completes, the front and rear lights of the drone change from flashing to solid on. The gyroscope calibration has been done by factory default. -
Page 24: Using The Application
9.6 Using the Application (Pull up the phone holder and insert the phone.) Connect your smart phone to the Wi-Fi of the Drone created by drone and check the drone’s status in the ”Ophelia GPS” App. ① Your smartphone will launch a search of the available Wi-Fi networks: ②... -
Page 25: Unlocking
9.7 Unlocking 9.7.1 Unlocking the drone: After the Compass Calibration completes, you can unlock the drone to fly it. Short-press the red button “ ” . The motors rotate and the drone is unlocked. 9.7.2 Locking the drone: Pic. 12 Pic. -
Page 26: One Key Takeoff/ Landing
9.8 One Key Takeoff/ Landing ② ① Landing Take-off ① After unlocking the drone, short-press the “ ” button, the drone will automati- cally take off and hover at 5 feet altitude. ② When the drone is flying, short-press the “ ”... -
Page 27: Functions Details
10.0 FUNCTION DETAILS 10.1 Optimal Transmission Zone Optimal Transmission Zone To obtain a satisfied flight experience, please make sure that your drone is flying ahead of the transmitter and no obstacles between the drone and the transmitter. - - - - - - - - - - - - - - - - - - - - - - - - - - - - - - - - - - - - - - - - - - - - - - - - - - - - - - - - - - - 10.2 Camera Angle Adjustment 90°... - Page 28 10.3 Vision System Made up by camera ① and ultrasonic sensor ②, the Vision System locates at front bottom of your drone. It is a positioning system that is combined by image sensor and ultrasonic sensor. Your drone acquires its location and perceives obstacles through using the camera sensor to detect the ground texture and visible features.
- Page 29 ● Keep sensors clean at all times. ● The vision system is only effective when the drone is within the altitude range of 3 meters. ● Make sure that the light is bright enough and the surfaces is with clear textures so that the vision system can acquire the movement information through recogniz- ing the ground textures.
- Page 30 6. Fly over an area where light changes dramatically and rapidly. 7. Fly over surfaces extremely dark (lux<10) or extremely bright (lux>10,000). 8. Fly over material surfaces that is good at absorbing ultrasonic waves (like thick carpet). 9. Fly over surfaces without clear textures. 10.
-
Page 31: Return To Home
10.4 Return to Home (RTH) The Return to Home function brings the drone back to the last recorded Home Point. The Home Point is the location from which the drone first takes off or where the GPS receives a signal from 7 or more satellites for the first time during flight. The current position of the drone will be recorded as the Home Point. - Page 32 10.4.3 Low Voltage RTH ① When the rear drone lights flash slowly, the “ ” symbol is displayed on the screen of the transmitter, and the transmitter sends “Di Di Di...”. At this point, the First Low Voltage RTH will be triggered. The drone will return automatically with the following two conditions: the drone can only fly within a safe range of 164 feet high and 328 feet far.
-
Page 33: App Operation Instruction
11.0 APP OPERATION INSTRUCTION 11.1 Operation Interface 180° Screen Hide Photos 3D VR GPS Signal Rotation On/ Off RTH Home Drone Transmitter Setting Altitude Point Distance Battery Level Battery Level Transmitter Signal Photo/ Video Shutter Return Signal Strength Strength Switch Button Follow-me Point of... -
Page 34: Setting Parameter
11.2 Setting Parameters Click the “ ” icon to enter the setting interface (as shown in the figure above), you can set a limited flight range: 1. Maximum flight altitude: 50~490 feet/ 15~150 m. (The default flight altitude is 490 feet.) 2. -
Page 35: Follow Me
11.3 Follow Me When the Follow Me function is enabled, the drone will follow the GPS in your smart phone to follow you wherever you go. 1. Ensure the drone's flight range is within 15~95 feet. 2. Click the“ ” icon on the app interface, and click “ YES ” in the prompt box to enter the Follow Me function —... -
Page 36: Tapfly
11.4 TapFly It is recommended to enlarge the map if you want to use TapFly. 1. Click the“ ” icon on the app interface, and click “ YES ” in the prompt box to enter the TapFly function. MODE 1: Click the“ ”... -
Page 37: Point Of Interest
11.5 Point of Interest 1. Click the“ ” icon on the app interface, and click “ YES ” in the prompt box to enter the Point of Interest function. 2. The drone will record it’s flight position the moment you enter this function as the point of interest. -
Page 38: Take Photo/ Video
11.6 Take Photo/ Video 1. Click the" " icon to switch between photo and video mode. 2. When the shutter button is " ", click once to take a photo. 3. When the shutter button is " ", click once to start recording, and click again to stop recording. -
Page 39: Drone Status Indicator
12.0 DRONE STATUS INDICATOR Indicator Status Indicator Status Meanings Front and rear lights alternate flashing The drone is not connected to the transmitter. yellow. Red, green and yellow lights flashing Drone is currently in Initialization Detection and alternate. status. Front light turns solid red, rear light No GPS signal or weak GPS signal. -
Page 40: Specifications
13.0 SPECIFICATIONS DRONE Model: HS 550 Weight: 640g / 22.58oz Flight Time: 22 minutes Operating Temperature Range: 32° to 104°F Dimensions: 190*130*75mm (folded) 450*450*75mm (unfolded) CAMERA Camera frequency: 5 GHz Video/ Photo Resolution: 2K (2048×1152p) FPV Distance: 1640~2624 feet (outdoor and unobstructed) Photo: JPEG Video: AVI MAX Supported TF Cards: 32 GB... - Page 41 DRONE BATTERY Capacity: 2800 mAh Voltage: 7.4 V Battery Type: Li-Po Energy: 20.72 Wh Charging power: 15.2 W Charging Temperature Range: 41° to 104°F (5° to 40°C) Charging Time: 4~8 hours TRANSMITTER Operating Frequency: 2.4 GHz MAX Transmission Distance: 5250 feet (outdoor and unobstructed) Battery: 2×1.5V AA batteries (Not included)
-
Page 42: Trouble Shooting
14.0 TROUBLE SHOOTING Problem Solution When the drone is powered on, The drone is in the gyroscope the indicator light keeps flashing calibration state. Please place the rapidly. drone on an flat and level surface. Place the drone on a flat, level The drone cannot hover after surface and repeat the gyro takeoff and tilts to one side. -
Page 43: Contact Us
15.0 CONTACT US Please do not hesitate to contact us if you need further support. usa@holystone.com (America) ca@holystone.com (Canada) eu@holystone.com (Europe) jp@holystone.com (Japan) +1(855) 888-6699 -40-... -
Page 44: General Information
16.0 GENERAL INFORMATION FCC Notice: This device complies with Part 15 of the FCC Rules. Operation is subject to the following two conditions: (1) This device may not cause harmful interference. (2) This device must accept any interference received, including interference that may cause undesired operation. - Page 45 WARNING: Changes or modifications not expressly approved by the party responsible for compliance could void the user's authority to operate the equipment. RF Exposure The equipment complies with FCC radiation exposure limits set forth for an uncontrolled environment. This device should be installed and operated with minimum distance 20cm between the radiator &...
- Page 46 CAN NMB-3 (B) RF Exposure Radiation Exposure Statement: This equipment complies with IC radiation exposure limits set forth for an uncontrolled environment. This equipment should be installed and operated with minimum distance 20cm between the radiator & your body. Déclaration d'exposition aux radiations: Cet équipement est conforme aux limites d'exposition aux rayonnements IC établies pour un environnement non contrôlé.
- Page 47 BATTERY WARNING: 1. Failure to follow all the instructions may result in serious injury, irreparable damage to the battery and may cause a fire, smoke or explosion. 2. Always check the battery’s condition before charging or using it. 3. Replace the battery if it has been dropped, or in case of odor, overheating, discolouration, deformation or leakage.
- Page 48 We, Xiamen Huoshiquan Import & Export CO., LTD hereby, declare that the essential requirements compliance with the Directive 2014/53/EU, the RoHS Directive 2011/65/EU and Safety Directive 2009/48/EC have been fully fulfilled on our product with indication below: Product Name: REMOTE CONTROL MODEL/RADIO CONTROLLED Model/Mark : HS550/HOLYSTONE -45-...
- Page 49 The Statement of compliance is available at the following address: http://www.holystone.com/Download/CE/HS550_EU_DOC.pdf This product can be used across EU member states. MANUFACTURER INFORMATION Manufactured by Xiamen Huoshiquan Import & Export CO., LTD Room 703,No. 813-2 Xiahe Road, Siming District, XIAMEN, China +1(855) 888-6699 FAA REGISTRATION: PLEASE FOLLOW ALL FEDERAL, STATE AND LOCAL FAA LAWS.
Need help?
Do you have a question about the HS550 and is the answer not in the manual?
Questions and answers