Table of Contents
Advertisement
Quick Links
Advertisement
Table of Contents

Related Manuals for SPT WA-P841E


Summary of Contents for SPT WA-P841E
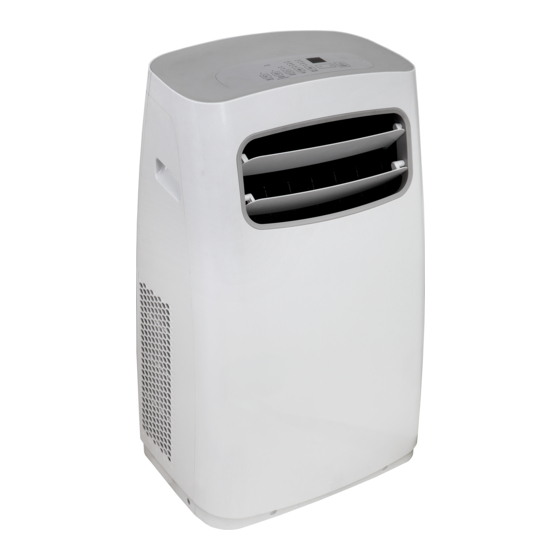
- Page 1 Portable Air Conditioner Instruction Manual WA-P841E: 14,000BTU (cooling only) Thank you for purchasing our Portable Air Conditioner. Before using your air conditioner, please read this instruction manual carefully and keep it for future reference. READ AND SAVE THESE INSTRUCTIONS!
-
Page 2: Table Of Contents
Contents P a r t s I d e n t i f i c a t i o n - - - - - - - - - - - - - - - - - - - - - S a f e t y P r e c a u t i o n s - - - - - - - - - - - - - - - - - - - - - C a u t i o n s... -
Page 3: Parts Identification
Parts Identification control panel upper air filter (behind the grille) handle (both sides) horizontal louver upper air intake blade drain outlet air outlet lower air filter lower air intake power plug socket power cord outlet Caster power cord buckle bottom tray drain outlet f r o n t r e a r... -
Page 4: Safety Precautions
Safety Precautions This symbol indicates that ignoring instructions may cause death or serious injury. WARNING: To prevent death or injury to the user or other people and property damage, the following instructions must be followed. Incorrect operation due to ignoring of instructions may cause death, harm or damage. -Installation must be performed according to the installation -DO NOT install your air conditioner in a wet room such as instructions. -
Page 5: Cautions
Cautions Cautions -This appliance can be used by children aged from 8 years and above and person with reduced physical, sensory or mental capabilities or lack of experience and knowledge if they have been given supervision or instruction concerning use of the appliance in a safe way and understand the hazards involved. Children shall not play the appliance. Cleaning and user maintenance shall not be made by children without supervision. -
Page 6: Installation
Installation Choosing The Right Location Recommend Installation 50cm 19.7inch Your installation location should meet the following requirements: NOTE: -Make sure that you install your unit on an even surface to minimize All the illustrations in the manual are for explanation noise and vibration. - Page 7 Installation Tools Needed Window Installation Kit -Medium Philips screwdriver; -Tape measure or ruler; -Knife or scissors; -Saw (optional, to shorten window adaptor for narrow windows) Step One: Preparing the Exhaust Hose assembly Accessories Press the exhaust hose into the window slider adaptor and unit adaptor, clamp automatically by elastic buckles of the adaptors.
- Page 8 Installation Note: Once the Exhaust Hose assembly and Adjustable Window Slider are prepared, choose from one of the following two installation methods. Type 1: Hung Window Installation Foam seal B (Adhesive type-shorter) Insert the window slider adaptor Window slider B Window slider A (if required) into the hole of the window slider.
- Page 9 Installation Foam seal C (Non-adhesive type) Security Bracket 2 Screws Cut the non-adhesive foam If desired, install the security seal C strip to match the bracket with 2 screws as shown. window height. Insert the foam seal between the glass and the window frame to prevent air and insects from getting into the room.
-
Page 10: Operation
Operation (3s activate ion) Swing button(optional) Timer button Mode button (Applicable to the models with Used to initiate the AUTO ON Selects the appropriate operating mode. Each auto swing feature only) start time and AUTO OFF stop time you press the button, a mode is selected Used to initiate the Auto swing time program, in conjuction with in a sequence that goes from AUTO, COOL,... - Page 11 Operation LED display AUTO operation Shows the set temperature in °C or °F and the Auto-timersettings. -When you set the air conditioner in AUTO mode, it will automatically select cooling While on DRY and FAN modes, it shows the room temperature. or fan only operation depending on what temperature you have selected and the Shows Error codes and protection code: room temperature.
-
Page 12: Auto Restart
Operation Other features -When the water level of the bottom tray reaches FOLLOW ME/TEMP SENSING feature a predetermined level, the unit beeps 8 times, NOTE:This feature can be activated from the remote control ONLY. The remote control the digital display area shows "P1" . At this time servesas a remote thermostat allowing for the precise temperature control at its location. -
Page 13: M A I N T E N A N C
Maintenance Clean the Unit WARNING: Clean the unit using a damp, lint-free cloth and mild detergent. Dry the -Always unplug the unit before cleaning or servicing. unit with a dry, lint-free cloth. -DO NOT use flammable liquids or chemicals to clean the unit. -DO NOT wash the unit under running water. -
Page 14: Troubleshooting
Trouble Shooting Please check the machine according to the following form before asking for maintenance: Problem Possible Cause Troubleshooting The Bottom Tray is full. Turn off the unit, drain the water P1 Error Code from the Bottom Tray Unit does not turn and restart the unit. -
Page 15: D E S I G N A N D C O M P L I A N C E N O T E
Design and Compliance Notes Design Notice Exhaust hose installation The exhaust hose and adaptor must be installed or In order to ensure the optimal performance of our products, the design specifications of the unit and remote control are subject to change without prior notice. removed in accordance with the usage mode. -
Page 16: Using The Remote Controller
USING THE REMOTE CONTROLLER NOTE: Buttons design is based on typical model and might be slightly different from the actual one you purchased, the actual shape shall prevail. Remote Contr oller Specifica tions All the functions described are accomplished by the unit, if the unit is not equipped with a certain feature, there will be no corresponding action. - Page 17 Function Buttons Before you begin using your new air conditioner, make sure to familiarize yourself with the remote control. The following is a brief introduction to the remote control. For detailed instructions on operation of the air conditioner, refer to the Instruction Manual. SHORT CUT ON/OFF Sets and activates your...
-
Page 18: Special Note
Handling the Remote Controller NOT SURE WHAT A FUNCTION DOES? Refer to the Operation Instructions section of this manual for a detailed description on how to use your air conditioner. SPECIAL NOTE Button designs on your unit may differ slightly from the example shown. - Page 19 Remote LCD Scr een Indicator s Transmission Indicator Lights up when remote sends signal to unit ON/OFF display MODE display Displays the current Appears when the unit is tur ned on, and disappears when it is turned off mode, including: AUTO TIMER OFF display TIMER ON display...
-
Page 20: How To Use The Basic Functions
How To Use The Basic Functions The operating temperature range for the unit is 17°C-30°C COOL OPERATION (62°F-86°F). You can increase or decrease the set temperature 1. Press the MODE button to select COOL in 1°C(1°F) increments 2. Set your desired temperature using the Temp Up/Down button. -
Page 21: Dry Operation
How To Use The Basic Functions ON/OFF SHORT ON/OFF SHORT TIMER MODE TIMER MODE TEMP TEMP TIMER TIMER SLEEP SWING SLEEP SWING DRY OPERATION FAN OPERATION 1. Press the MODE button to select DRY 1. Press the MODE button to select FAN mode. mode. - Page 22 Setting the Timer Your air conditioning unit has two timer-related functions: TIMER ON: Set the amount of time after which the unit will automatically turn on. TIMER OFF: Set the amount of time after which the unit will automatically turn off. TIMER ON function: Sets amount of time for unit to turn on, such as when you will return home.
- Page 23 Setting combined timers: TIMER ON and TIMER OFF at the same Keep in mind that the time periods you set for both functions refer to hours after the current time. For example, say that the current time is 1:00 PM, and you want the unit to turn on automatically at 7:00 PM (which is 6 hours from current time); operate for 2 hours, then automatically turn off at 9:00 PM (which is 8 hours from current time).
- Page 24 Example: Setting the unit to turn on after 6 hours, operate for 2 hours, then turn off (see the figure below). Your remote display Timer on Timer is set To turn ON 6 hours from current time Timer off Timer is set to turn OFF 8 hours from current time Unit turns Unit turns...
- Page 25 How To Use T he Advanced Functions SLEEP Function The SLEEP function is used to conserve energy while you sleep. When activated, unit will increase set temperature by 1°C/1°F after 30 minutes; and by another 1°C/1°F after additional 30 minutes. New temperature will be maintained for 7 hours then unit returns to originally set temperature.
-
Page 26: W A R R A N T Y
Your Guarantee If this product is found to be faulty as a result of faulty materials or workmanship within one year from date of purchase, it will be repaired free of charge. This guarantee is subject to the following terms: ·...
Need help?
Do you have a question about the WA-P841E and is the answer not in the manual?
Questions and answers