
Related Manuals for SPT WA-8070E


Summary of Contents for SPT WA-8070E
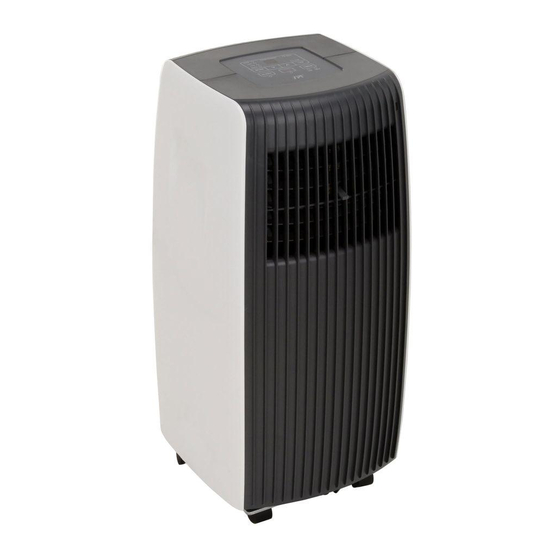
- Page 1 PORTABLE AIR CONDITIONER WA-8070E: 8,000 BTU WA-1070E: 10,000 BTU Read and retain these instructions for future reference...
-
Page 2: Table Of Contents
Read this Manual Inside you will find many helpful hints on how to use and maintain your air conditioner properly. Just a little preventive care on your part can save you a great deal of time and money over the life of your air conditioner. -
Page 3: Social Remark
For the correct collection and treatment of this product, take them to the collection point for reuse of electrical and electronic equipment. Contact your local authority for the appropriate collection point in your neighborhood. SPECIFICATIONS · Model no. WA-8070E WA-1070E 8,000 BTU/hr 10,000 BTU/hr Cooling capacity 900W 1125W Power consumption Air volume (max. -
Page 4: Safety Precautions
SAFETY PRECAUTIONS Safety rules To prevent injury to the user or other people and property damage, the following instructions must be followed. Incorrect operation due to ignoring of instructions may cause harm or damage. Your air conditioner should be used in such a way that it is protected from moisture, e.g. condensation, splashed water, etc. -
Page 5: Parts Identification
PARTS IDENTIFICATION Check all accessories are included in the package. Refer to the installation instructions for usage. Note: all illustrations in this manual are for explanation purposes only. The actual unit and parts may be slightly different. The actual shape shall prevail. Front 1. -
Page 6: Control Panel
AIR CONDITIONER FEATURES Before you begin, thoroughly familiarize yourself with the control panel and remote controller and the functions. The unit can be controlled by either the control panel or remote controller. CONTROL PANEL 1. MODE select button Press to select the operating mode. Each press of the button will cycle through the sequence: AUTO, COOL, DRY and FAN. -
Page 7: Operating Instructions
OPERATING INSTRUCTIONS COOL mode Press the MODE button until the COOL indicator light illuminates. Press UP ( ) or DOWN ( ) buttons to set your desired room temperature. The temperature can be set within a range of 17-30° C / 62-88° F. Press the FAN button to select HIGH or LOW speed. -
Page 8: Installation Instructions
INSTALLATION INSTRUCTIONS Location The air conditioner should be placed on a firm foundation to minimize noise and vibration. For safe and secure positioning, place the unit on a smooth, level floor strong enough to support the unit. The unit has casters to aid placement, but it should only be rolled on smooth and flat surfaces. -
Page 9: Window Kit Installation
Installation in a double-hung sash window 1. Trim foam seal (adhesive type) to the proper length and attach to window stool. (Fig.4) 2. Adjust the length of the slider kit according to the Fig.4 width of window. Place slider kit on top of foam seal. -
Page 10: Exhaust Hose Installation
Exhaust hose installation: Install or remove the exhaust according to usage mode: Fig.10 COOL or AUTO mode Install FAN or DRY mode Remove 1. Extend the end of exhaust hose by couple inches and attach Adaptor B to hose. (Fig.10) Fig.11 2. -
Page 11: Care And Maintenance
Do not use gasoline, thinner or other chemicals to clean the unit Do not wash the unit directly under a tap or use a hose. May cause electrical danger. If the power cord is damaged, contact Sunpentown. Air Filter Clean the air filter at least once every two weeks to prevent inferior fan operation due to dust. -
Page 12: Troubleshooting Tips
Error Codes: E1 – Room temperature sensor error. Unplug the unit and plug it back in. If error repeats, contact Sunpentown Customer Service. E2 – Evaporator temperature sensor error. Unplug the unit and plug it back in. If error repeats, contact Sunpentown Customer Service. -
Page 13: Remote Controller
REMOTE CONTOLLER Handling the remote controller Use the remote within a distance of 26 ft from the appliance, pointing it towards the receiver. Reception is confirmed by a beep. CAUTION The air conditioner will not operate if curtains, doors or other obstacles are blocking the signals from the remote to the unit’s receiver. -
Page 14: Function Buttons
Function buttons 1. TEMP DOWN button Press to decrease set temperature by 1° C (2° F) incr ements to 17°C (62° F) 2. TEMP UP button Press to increase set temperature by 1° C (2° F) incr ements to 30°C (88° F) 3. -
Page 15: Lcd Indicators
LCD indicator MODE display Displays the selected mode: AUTO, COOL, DRY or FAN. Transmission Indicator Indication that remote is transmitting signal to the AC unit. Temp / Timer display Displays set temperature (17-30° C / 62-88° F) or Tim er setting (0-24h). -
Page 16: Using The Buttons
Using the buttons AUTO operation With the AC unit plugged in: 1. Press the MODE button to select Auto. 2. Press the TEMP button to set desired temperature, between 17-30° C / 62-88° F. Each press is an increment of 1°... - Page 17 TIMER operation To set Auto-on timer: 1. Press the TIMER ON button and remote will display TIMER ON. The last Auto-on setting and the signal “h” will also be displayed. 2. Press the TIMER ON button again to set desired Auto-on timer.
- Page 18 COMBINED TIMER OFF → TIMER ON (On → Stop → Start operation) This feature is useful when you want to stop the unit after you go to bed and start it again in the morning. To stop the unit 2 hours later and restart it 10 hours later: 1.
-
Page 19: Your Guarantee
This guarantee is subject to the following terms: Sunpentown must be notified of the fault. Proof of purchase must be presented to Sunpentown’s nominated representative. The warranty will be void if the product if modified, misused or repaired by an unauthorized person.
Need help?
Do you have a question about the WA-8070E and is the answer not in the manual?
Questions and answers
Red light is showing power but unit is not turning on and no error code is showing. I have drained the water from both the lower and middle spout