
Related Manuals for Crivit 345674 2004


Summary of Contents for Crivit 345674 2004
- Page 1 ALUMINIUM WALKING POLES TREKINGOVÉ HOLE Návod k použití ALUMINIUM WALKING POLES Instructions for use ALUMINIUM-TREKKINGSTÖCKE Gebrauchsanweisung IAN 345674_2004 DE/AT/CH...
-
Page 2: Table Of Contents
Obsah/Table of contents Použití/oblast uplatnění ..........4 Technická data ............4 Seznam dílů ............... 5 Bezpečnostní pokyny .......... 5 - 6 Délka hole – zjištění správné velikosti ..... 6 Nastavení délky hole ..........7 Chůze po rovném povrchu ........7 Chůze napříč... - Page 3 Inhaltsverzeichnis Verwendung/Einsatzgebiet ........24 Technische Daten ........... 24 Teileliste ..............25 Sicherheitshinweise ........25 - 26 Stocklänge – die richtige Größe ermitteln ..26 Stocklänge einstellen ..........27 Laufen auf ebenem Untergrund ......27 Laufen auf Querungen .......... 28 Auf-/Abstieg ............28 Anlegen der Handschlaufe ........
-
Page 4: Použití/Oblast Uplatnění
Srdečně blahopřejeme! Svým nákupem jste se rozhodli pro kvalitní výrobek. Před prvním použitím se prosím seznamte s tímto výrobkem. Pozorně si přečtete následující návod k použití. Používejte tento výrobek pouze tak, jak je popsáno, a pro uvedené účely. Uschovejte si tento návod k použití... -
Page 5: Seznam Dílů
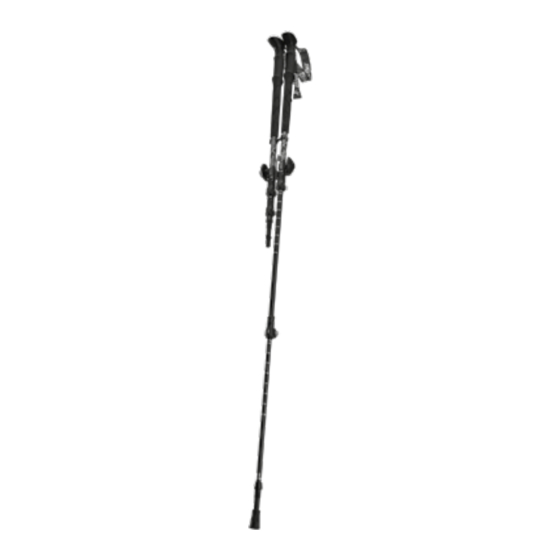
Seznam dílů (1) Přestavování poutek (2) Poutka na ruce (3) Ergonomicky tvarované držadlo (4) Kombinované uchycení (5) Přestavování výšky (6) Trekingová hůl (7) Talíř (8) Špička s dutým výbrusem (9) Botička na asfalt (10) Ochranná krytka Bezpečnostní pokyny • Neprovádějte opravy, které ohrožují bezpečnost! •... -
Page 6: Délka Hole - Zjištění Správné Velikosti
• Jakmile zjistíte trhlinku v segmentech hůlky nebo nedokonalou funkci výrobku, výrobek již nepouží- vejte a zlikvidujte ho do odpadu. • Vyhněte se pokud možno provozu veřejné silniční dopravy k minimalizaci rizika úrazu. • Výrobek není vhodný pro sjezdové lyžování. •... -
Page 7: Nastavení Délky Hole
Nastavení délky hole (obr. B) Otevřete obě upínací páčky rychlouzávěrů a vytahujte segmenty hůlky na vhodnou míru. Údaj o délce hole najdete vždy na středním a dolním segmentu hole. Pokud chcete nastavit délku hole na 120 cm, zafixujte střední a 135 cm dolní... -
Page 8: Chůze Napříč Svahem
• Chůze napříč svahem (obr. E) Zde je nutné horní hůlku zkrátit a dolní hůlku pro- dloužit tak, aby obě poskytovaly oporu. • Výstup/sestup (obr. F/G) Do kopce musí být hůlky natolik zkráceny, aby představovaly příjemnou oporu. Z kopce by měly být hůlky natolik prodlouženy, abyste při opření... -
Page 9: Nastavení Poutek Na Ruce
Nastavení poutek na ruce (obr. I-L) Velikost poutek lze nastavit pomocí tlačítka. K ote- vření mechanizmu záklopky stiskněte palcem tlačítko přestavení poutka (obr. I). Poutko je teď odblokováno a Vy máte možnost individuálně nastavit délku poutka. Zatáhněte za ote- vřený spodní konec poutka, abyste ho tak zmenšili. Zatáhněte opačným směrem, pokud chcete poutko zvětšit (obr. -
Page 10: Užitečné Pokyny Pro Používání
Užitečné pokyny pro používání • Při studeném počasí noste rukavice. • Při delších túrách byste měli zajistit, abyste s sebou měli dostatek nápojů (příp. popruh nebo batoh s nápoji). • Noste oděv odpovídající vývoji počasí. Kombinované uchycení pro bo- tičku na asfalt & talíř Na kombinované... -
Page 11: Zahřátí A Strečink
Zahřátí a strečink Před trekkingem byste měli vydatně provádět zahří- vací cviky a strečink (viz obr. M-P). • obr. M: Přední stehenní svalstvo Přitahujte své chodidlo směrem k hýždím. • obr. N: Zadní bércové svalstvo Přitlačujte zadní patu k zemí a naklánějte tělo rovnoměrně... -
Page 12: Čištění A Péče
Čištění a péče Pro čištění výrobku můžete použít hadřík nasáklý vlažnou nebo mýdlovou vodou. Nikdy nečistěte výrobek agresivními čisticími prostředky nebo pro- středky s obsahem rozpouštědel. Tyto by mohly napadnout umělé hmoty a značení a natrvalo je poškodit. Ukládání a transport Výrobek nevystavujte trvale přímému slunečnímu záření... -
Page 13: Pokyny K Záruce A Průběhu Služby
Pokyny k záruce a průběhu služby Produkt byl vyrobený s velkou pečlivostí a byl průběžně kontrolovaný ve výrobní procesu. Na tento produkt obdržíte tříroční záruku ode dne zakoupení. Uschovejte si pokladní stvrzenku. Záruka se vztahuje jen na vady materiálu a chyby z výroby, nevztahuje se na závady způsobené... -
Page 14: Use/Field Of Application
Congratulations! You have chosen to purchase a high-quality product. Familiarise yourself with the product before using it for the first time. Read the following instructions for use carefully. Use the product only as described and only for the given areas of application. Store these instructions for use carefully. -
Page 15: Parts List
Parts list (1) Strap adjustment system (2) Hand strap (3) Ergonomically designed handle (4) Combination lock (5) Height adjustment system (6) Trekking pole (7) Basket (8) Hollow ground tip (9) Asphalt pad (10) Protective cap Safety instructions • Do not carry out any repairs that may endanger safety! •... -
Page 16: Pole Length - Determining The Correct Size
• Whenever you find a crack in the pole segments or that the product is not functioning perfectly, discontinue use and dispose of the product. • If possible avoid road traffic to minimise accident risk. • The product is not suitable for alpine skiing. •... -
Page 17: Adjusting The Pole Length
Adjusting the pole length (fig. B) Open both clamping levers on the quick-release locks and extend the pole segments to the appropriate size. Pole length is indicated on both centre and lower segments of the pole. If you wish to set the pole length to 135 cm a length of 120cm, adjust 130 cm... -
Page 18: Hiking On Traverses
• Hiking on traverses (fig. E) For this the upper pole must be shortened and the lower pole lengthened so that both can offer a support. • Hiking uphill/downhill (figs. F/G) When going uphill the poles must be shortened so that they give comfortable support. -
Page 19: Adjusting The Hand Strap
Adjusting the hand strap (figs. I-L) The size of the hand strap can be adjusted using the push button. To open the locking mechanism press the push button of the strap adjustment system (fig. I) with your thumb. The strap is now unlocked and you can adjust the strap length to suit you. -
Page 20: Useful Information Regarding Use
Useful information regarding • Wear gloves in cold weather. • On longer hikes you should have enough fluids (perhaps a hydration belt or hydration pack) with you. • Wear clothing suitable for the weather. Combination mount for asphalt pad and basket You can keep the asphalt pad and the trekking pole basket on the combination mount. -
Page 21: Warming Up And Stretching
Warming up and stretching Before hiking you should perform plenty of warming and stretching exercises (see figs. M-P). • Fig. M: Front upper leg muscles Pull your foot upwards to the buttocks. • Fig. N: Rear lower leg muscles Press the heel of your back foot to the ground and bend your body forward evenly. -
Page 22: Cleaning And Care
Cleaning and care To clean the product you can use a cloth soaked in lukewarm or soapy water. Never use solvents or abrasive detergents to clean the product. These might corrode the plastic materials and mark- ings and cause permanent damage. Storage and transport Do not expose the product to sustained direct sunlight or high temperatures since exposing your... -
Page 23: Notes On The Guarantee And Service Handling
Notes on the guarantee and service handling The product was produced with great care and under constant supervision. You receive a three-year warranty for this product from the date of purchase. Please retain your receipt. The warranty applies only to material and workman- ship and does not apply to misuse or improper han- dling. -
Page 24: Verwendung/Einsatzgebiet
Herzlichen Glückwunsch! Mit Ihrem Kauf haben Sie sich für einen hochwer- tigen Artikel entschieden. Machen Sie sich vor der ersten Verwendung mit dem Artikel vertraut. Lesen Sie hierzu aufmerksam die nachfolgende Gebrauchsanweisung. Benutzen Sie den Artikel nur wie beschrieben und für die angegebenen Einsatzbereiche. -
Page 25: Teileliste
Teileliste (1) Schlaufen-Verstellsystem (2) Handschlaufe (3) Ergonomisch geformter Griff (4) Kombinationshalterung (5) Höhen-Verstellsystem (6) Trekkingstock (7) Teller (8) Hohlschliffspitze (9) Asphaltpad (10) Schutzkappe Sicherheitshinweise • Keine Reparaturen durchführen, die die Sicherheit gefährden! • Es wird empfohlen, einen Herzfrequenzmesser zu verwenden. •... -
Page 26: Stocklänge - Die Richtige Größe Ermitteln
• Überprüfen Sie vor jeder Benutzung, ob sich Beschädigungen am Artikel befinden. • Sobald Sie einen Riss in den Stocksegmenten oder eine nicht einwandfreie Funktion des Artikels feststellen, verwenden Sie diesen nicht mehr und entsorgen Sie den Artikel. • Meiden Sie, wenn möglich, öffentlichen Straßen- verkehr, um das Unfallrisiko zu minimieren. -
Page 27: Stocklänge Einstellen
Stocklänge einstellen (Abb. B) Öffnen Sie beide Klemmhe- bel der Schnellverschlüsse und ziehen Sie das untere Ende des Stockes auf das passende Maß. Eine Angabe der Stocklänge finden Sie jeweils auf dem mittleren und unteren Stocksegment. Wenn 135 cm Sie die Stocklänge auf eine 130 cm Länge von 120 cm einstellen 125 cm... -
Page 28: Laufen Auf Querungen
• Laufen auf Querungen (Abb. E) Hierbei muss der obere Stock verkürzt und der untere Stock verlängert werden, sodass beide eine Unterstützung bieten können. • Auf-/Abstieg (Abb. F/G) Bergauf müssen die Stöcke so verkürzt werden, dass sie eine angenehme Stütze darstellen. Bergab sollten die Stöcke so weit verlängert werden, dass Sie beim Aufstützen eine bequeme, aufrechte Körperhaltung haben. -
Page 29: Einstellen Der Handschlaufe
Einstellen der Handschlaufe (Abb. I-L) Die Größe der Handschlaufe kann mithilfe der Drucktaste eingestellt werden. Zum Öffnen des Verriegelungsmechanismus drücken Sie mit dem Daumen auf die Drucktaste des Schlaufen-Verstellsys- tems (Abb. I). Die Schlaufe ist nun entriegelt und Sie können die Schlaufenlänge individuell einstellen. -
Page 30: Nützliche Hinweise Zur Benutzung
Nützliche Hinweise zur Benutzung • Tragen Sie bei kaltem Wetter Handschuhe. • Bei längeren Touren sollten Sie sicherstellen, aus- reichend Getränke (evtl. Trinkgürtel oder Trinkrucksack) dabei zu haben. • Tragen Sie dem Wetter entsprechende Kleidung. Kombinationshalterung für Asphaltpad & Teller An der Kombinationshalterung können Sie den Asphaltpad und den Trekkingstock-Teller aufbewah- ren. -
Page 31: Aufwärmen Und Stretching
Aufwärmen und Stretching Vor dem Trekking sollten Sie ausgiebig Aufwärm- und Stretchübungen machen (siehe Abb. M-P). • Abb. M: Vordere Oberschenkel- muskulatur Ziehen Sie Ihren Fuß in Richtung Gesäß. • Abb. N: Hintere Unterschenkel- muskulatur Drücken Sie Ihre hintere Ferse auf den Boden und neigen Sie den Körper gleichmäßig nach vorne. -
Page 32: Reinigung Und Pflege
Reinigung und Pflege Zum Reinigen des Artikels können Sie ein mit lau- warmem Wasser oder Seifenwasser getränktes Tuch verwenden. Reinigen Sie den Artikel niemals mit lösungsmittelhaltigen oder starken Reinigungsmitteln. Diese könnten die Kunststoffmaterialien und Markie- rungen angreifen und auf Dauer beschädigen. Lagerung und Transport Setzen Sie den Artikel nicht dauerhaft direkter Sonnenbestrahlung oder erhöhter Wärmezufuhr aus,... -
Page 33: Hinweise Zur Garantie Und Serviceabwicklung
Hinweise zur Garantie und Serviceabwicklung Der Artikel wurde mit großer Sorgfalt und unter ständiger Kontrolle produziert. Sie erhalten auf die- sen Artikel drei Jahre Garantie ab Kaufdatum. Bitte bewahren Sie den Kassenbon auf. Die Garantie gilt nur für Material- und Fabrikations- fehler und entfällt bei missbräuchlicher oder unsach- gemäßer Behandlung. - Page 36 DELTA-SPORT HANDELSKONTOR GMBH Wragekamp 6 • DE-22397 Hamburg GERMANY 11/2020 Delta-Sport-Nr.:TS-7161, TS-7162, TS-7163 IAN 345674_2004...
Need help?
Do you have a question about the 345674 2004 and is the answer not in the manual?
Questions and answers