
Subscribe to Our Youtube Channel
Related Manuals for Armstrong Design Envelope Tango Everflow 4332


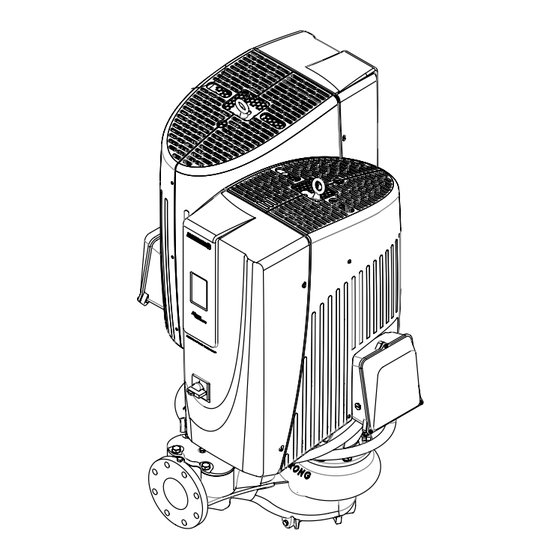
Summary of Contents for Armstrong Design Envelope Tango Everflow 4332
- Page 1 Design Envelope Tango 4332 dualArm 4302 & 4382 Vertical In-line pumping unit with depm ivs and de ivs drive Installation and operating instructions File No: 102.82iec Date: august 12, 2024 Supersedes: new Date: new...
-
Page 2: Table Of Contents
contents introduction precautions 1.1.1 uncrating 1.1.2 handling tango 4332 and 4362 units 1.1.3 handling design envelope 4302 and 4382 units 1. 2 mechanical installation 1.2.1 location 1.2.2 noise levels 1.2.2.1 de ivs pumps 1.2.2.2 tango pumps 1.2.3 storage 1.2.4 installation 1.2.5 pump piping –... - Page 3 5 .7 quadratic curve control with 3.0 networking controls minimum & maximum flow protection modbus register map – version 1 – for firmware v1.16 and older 5 .8 parallel sensorless pump control (pspc) BACnet objects – version 1 – 5.8.1 embedded parallel sensorless pump control for multiple pumps for firmware v1.16 and older...
-
Page 4: Introduction
If clarification is needed on any aged during lifting and installation. Remove the coupling point please contact Armstrong quoting the equipment serial guards and insert lifting straps through each pump/motor number. -
Page 5: Noise Levels
Tango Everflow and instal l at io n & Design Envelope dualARM oper ating instruct io ns 1. 2 . 2 noise levels 1. 2 . 2 .1 de ivs pumps with induction motors, Typical Pumping Unit Sound Pressure Level Decibels, A-Weighted, at 1 m (3 ft.) from unit. -
Page 6: Storage
Armstrong Flo-Trex valve may lated from the piping by flexible connectors and the base be used in place of check valve and isolation valve on pump isolated from the building structure on an inertia base. -
Page 7: Tango Valve Operating Instructions
Tango Everflow and instal l at io n & Design Envelope dualARM oper ating instruct io ns important note: Do not run the pump for any length of time under very low The pumping unit is accurately aligned at the factory prior to flow conditions or with the discharge valve closed. -
Page 8: Dualarm Valve Operating Instructions
i nsta ll a ti on & Tango Everflow and Design Envelope dualARM o pera ting i nstruction s 1. 2 .7 dualarm valve oper ating tions. The locking handle (3) should be secured with the set screw (11) in the vertical position with the center pin of the instructions locking arm (4) trapped by the locking handle (3). - Page 9 Tango Everflow and insta l l a t io n & Design Envelope dualARM op er atin g instr u ct io n s suction valve 3 Rotate valve to center position so that the center pin of the locking arm (4) is located in the recess on the locking Manual operation handle (3).
- Page 10 i nsta ll a ti on & Tango Everflow and Design Envelope dualARM o pera ting i nstruction s fig. 1. 4 valve illustr ation (8") fig. 1.8 pipe mounted supported at ceiling Pipe hanger (typ.) Hangers support the weight see specification for of the filled piping, pumps size and type...
- Page 11 Tango Everflow and instal l at io n & Design Envelope dualARM oper ating instruct io ns fig. 1.11 floor saddle support fig. 1.14 tapped collection well on design envelope 4302 and 4332 Flo-Trex valve Design Envelope 4302 and 4332 seal leaks or condensate drain hole.
-
Page 12: Electrical Setup
i nstal la ti on & Tango Everflow and Design Envelope dualARM o p era t i n g i n stru ction s 2 .1. 2 depm ivs units fig. 1.16 avoid sol ar loading Remove the bolts from each side of the front red shroud. For outdoor installations, ensure DEPC and controls are... -
Page 13: Precautions
(mains voltage directly con- rating may be required (contact Armstrong) nected). This is the preferred method of starting and stop- To avoid the inverter unit getting overheated, the ping Design Envelope pumps. - Page 14 i nsta ll a ti on & Tango Everflow and Design Envelope dualARM o pera ting i nstruction s fig 2 . 2 . 4 . 2: b1 size enclosure derating curves. Derating of fig 2 . 2 . 4 .5: d size enclosure 380-480v derating curves. full continu ous output current by Tamb Max Derating of full continuous output current by and Switching Frequency...
-
Page 15: Electrical Installation
Tango Everflow and instal l at io n & Design Envelope dualARM oper ating instruct io ns electrical installation fig. 2 . 2 Mains and grounding connections for a5 units (20 0 -2 40V - 1.5hp 1ph/5hp and below 3ph, 2 .3 .1 supply voltage 380 -480V/5 25- 6 0 0V - 10hp and below) -
Page 16: Relay Connections
i nsta ll a ti on & Tango Everflow and Design Envelope dualARM o pera ting i nstruction s fig . 2 .3c Mains and grounding connections for d1 and d2 fig. 2 .5 rel ay connection: terminals for a5 , b1 units ( 38 0 -48 0v –... -
Page 17: Connection Tightening Torques
Tango Everflow and in sta l l a t io n & Design Envelope dualARM o pera t ing instr uct io n s 2 .3 . 4 connection tightening torques 2 .3 . 4 .1 torques set tings (1.1- 90kW drives) Tightening of Terminals Power [kW] Torque [Nm]... -
Page 18: Electrical And Control Connections
i nsta l l a t i on & Tango Everflow and Design Envelope dualARM op era t i ng i nstr uct ion s 2 .3 .5 electrical and control connections fig . 2 . 8 Diagram showing all electrical connections *Note: Terminal 37 is not available on Design Envelope pumps 3-Phase Power input (1-ph... -
Page 19: Control Terminals
Supply +24V DC Digital Input Start Digital Input Pump Operating Mode Tango Everflow and instal l at io n & Design Envelope dualARM oper ating instruct io ns Common Digital Input Low Water Interlock Digital Input No Operation Digital Input No Operation Digital Input No Operation... -
Page 20: Web Server Configuration
i nsta ll a ti on & Tango Everflow and Design Envelope dualARM o pera ting i nstruction s webserver configur ation Pump in the left side-menu Select For Digital Inputs (A, B) that have been wired: For Digital Functions (E, F) that have been wired: 4 Select On/Off, then 1 Select Enabled, then 5 Select Update... -
Page 21: Controller Board
Tango Everflow and instal l at io n & Design Envelope dualARM oper ating instruct io ns 2. 4 design envelope pump 2 . 4 . 2 ethernet and wifi connectivity controller wiring For BACNet tcp/ip connection to building automation system, connect connect r j-45 cable to this port per fig. -
Page 22: Networking Options
i nsta ll a ti on & Tango Everflow and Design Envelope dualARM o pera ting i nstruction s 2 . 4 .5 networking options fig . 2 .11 rs-485 3 .0 networking controls For connection to the building automation system (ba s), the pump needs to be properly configured to the network. -
Page 23: Modbus Register Map - Version 1 - For Firmware V1.16 And Older
Tango Everflow and i n sta l l a t i o n & Design Envelope dualARM o per at i n g i n str uct i o n s 3 .1 modbus register map – version 1 – for firmware v1.16 and older function code change... - Page 24 9 0 9 characters Divide the number by 100 to get the major. Firmware Version uint16 00.00 minor version of the dep c . Hardware Version uint16 The Pump Control Module hardware version. Modbus Version uint16 Version of the Armstrong Modbus version...
-
Page 25: Bacnet Objects - Version 1 - For Firmware V1.16 And Older
Tango Everflow and install a tio n & Design Envelope dualARM oper ating instr uctio n s 3 . 2 BACnet objects – version 1 – for firmware v1.16 and older object id object name read/ write comments Status av: 1 0 0 Actual Speed Read In RPM... -
Page 26: Modbus Register Map - Version 2 - For Firmware V1.17 And Newer
i nsta ll a ti on & Tango Everflow and Design Envelope dualARM o pera ting i nstruction s object id object name read/ write comments av:501 Standard Mode – Design Head Read Value for standard active mode. Unit as configured in Pump Control Module av:502 Standard Mode –... - Page 27 Tango Everflow and install a tio n & Design Envelope dualARM oper ating instr uctio n s function code change start modbus # of data description during unit notes read write address register register s t ype oper ation 0×03 0×0 6 0.01 V, Analog In 2 uint32...
- Page 28 00.00 minor version of the depc. Hardware Version uint16 - The Pump Control Module hardware version. Version of the Armstrong Modbus registers bms Modbus Version uint16 - used. Patch version of the depc. To be appended to Firmware Patch Version...
-
Page 29: Bacnet Objects - Version 2 - For Firmware V1.17 And Newer
Tango Everflow and instal l at io n & Design Envelope dualARM oper ating instruct io ns 3 . 4 BACnet objects – version 2 – for firmware v1.17 and newer object id object name read/ write comments Status av: 1 0 0 Actual Speed Read In RPM... - Page 30 20 Control Setpoint Read/Write constant flow) information av:9 0 0 BMS BACnet Version Read Version of the Armstrong BACnet points used. ai:0 Analog In 1 Read As configured in Pump Control Module ai: 1 Analog In 2 Read As configured in Pump Control Module...
-
Page 31: Operation
Is the area around the pump clean? Check rotation arrow prior to operating the unit. The rotation of all Armstrong 4 20 0H & 4 28 0 Vertical In-Line units is clockwise when viewed from behind warr ant y the motor (nde). -
Page 32: Touch Screen
i nsta ll a ti on & Tango Everflow and Design Envelope dualARM o pera ting i nstruction s 4 .3 touch screen 4 .3 .1 login Default Password 1234 1234 For buildings that are commissioned in multiple stages, or where the design flow changes each time, the Auto Flow Balancing function can be run at the beginning of each stage. -
Page 33: About
Tango Everflow and insta l l a t io n & Design Envelope dualARM op er atin g instr u ct io n s 4 .3 .3 about The physical design, software, & user interface are protected by patents & trademarks Click on Reset to reset Trip counters... -
Page 34: General Settings
i nsta ll a ti on & Tango Everflow and Design Envelope dualARM o pera ting i nstruction s 4 .3 . 4 gener al settings save save save... -
Page 35: Manual/Auto Mode
Tango Everflow and instal l at io n & Design Envelope dualARM oper ating instruct io ns 4 .3 .5 manual /auto mode... -
Page 36: Pump Control
i nsta ll a ti on & Tango Everflow and Design Envelope dualARM o pera ting i nstruction s 4 .3 .6 pump control Activate Energy Performance Bundle... - Page 37 Tango Everflow and i n sta l l a t i o n & Design Envelope dualARM o per at i n g i n str uct i o n s Single...
-
Page 38: Alarms & Warnings
One or more of the parameters to control the vfd are not correct. Check the settings The control card has specified on the control card. If the an invalid VFD parameter. alarm persists after cycling power to the pump, contact an Armstrong Technical Service representative. -
Page 39: Trend-Graph
Tango Everflow and instal l at io n & Design Envelope dualARM oper ating instruct io ns 4 .3 .8 trend-gr aph There are 3 parameters that can be trended on the touch screen interface: • Power • Flow • Head Which allows users to see a quick history of key performance data. -
Page 40: Touch Screen Calibration
i nsta ll a ti on & Tango Everflow and Design Envelope dualARM o pera ting i nstruction s 4 .3 .10 touch screen calibr ation If you are having issues with the touch screen, including: • Being unable to access items to the edge of the screen •... -
Page 41: Data Logging
Tango Everflow and instal l at io n & Design Envelope dualARM oper ating instruct io ns 4 .3 .11 data logging Data logs can be used for energy performance analyses or to troubleshoot system issues. The data logs can be used with a building automation system (ba s) or for each standalone pump. -
Page 42: Web Interface
To access the control modes: Press settings Pump Armstrong Strongly recommends to use Google Chrome browser to access depc web interface. Other browsers might be used but Google Chrome will guarantee the best operation. 4 . 4 .1 connecting via ethernet Press settings ... - Page 43 To modify relay settings: enable Relay functions and select desired settings To access the control modes: Press settings Pump To enable Armstrong Connect: Settings Communication, and click on Armstrong Connect to enable To select Version 1 or 2 of bms settings, Click on Remote mode and select Version 1 or 2.
-
Page 44: Switching Frequency
i nsta ll a ti on & Tango Everflow and Design Envelope dualARM o pera ting i nstruction s 4 .5 design envelope flow readout 4 . 4 .3 switching frequency toler ance The ivs drive controls have an adjustable carrier frequency, or frequency at which the IGBTs are switched. -
Page 45: Control Modes
Tango Everflow and instal l at io n & Design Envelope dualARM oper ating instruct io ns 5 .0 control modes 5 . 4 quadr atic curve control Quadratic Pressure Control is where the controller is set to 5 .1 constant flow control the speed according to a control curve between max and min flow. -
Page 46: Quadratic Curve Control With Minimum & Maximum Flow Protection
Tango and dualArm units have Wiring bridge supplied by others. Parallel Sensorless Pump Control (pspc) pre-programmed in the controls at Armstrong factories. For all other models (ex- cept twin pumps), pspc can be enabled aftermarket; please contact your local Armstrong factory for details. -
Page 47: Modifying Motor Ramp Up And Down Time
Tango Everflow and instal l at io n & Design Envelope dualARM oper ating instruct io ns For 2 pump parallel operation: From the Webserver, choose Settings -> Pump, set control mode to Parallel with the following parameter values: Ensure that both terminating resistor switches are set to Enabled (towards the en label for the canbus port). -
Page 48: Three Different Control Modes Can Be Accessed
i nsta ll a ti on & Tango Everflow and Design Envelope dualARM o pera ting i nstruction s 5 .8.3 three different control modes can 5 .8.5 standby pumps be accessed Scroll down to Operational Mode and input the Maximum Operating Pump Count. -
Page 49: Constant Pressure Control
Tango Everflow and insta l l a t io n & Design Envelope dualARM op er atin g instr u ct io n s 5 .13 sensored control dP sensors can be added to a single pump or a parallel pumping system through either the lcd Screen on the Pump or the Webserver. -
Page 50: Bypass Valve Control
i nsta ll a ti on & Tango Everflow and Design Envelope dualARM o pera ting i nstruction s 5 .14 bypass valve control The bypass valve control is used to protect flow sensitive equip- ment (such as chillers). If the flow is less than Setpoint 1, the depc analog output sends 20mA to fully open the valve. - Page 51 Tango Everflow and instal l at io n & Design Envelope dualARM oper ating instruct io ns Additional Pump Optional 499±1% Ω resistor for voltage control on each pump. Relay 2 Relay +24V External +24V +24V Control...
-
Page 52: Maintenance
(See Armstrong files 43 . 85 and 43 . 86 for seal • Keep unit clean environmental instructions). • Provide the motor with correctly sized overload protec- warning tion. - Page 53 Tango Everflow and instal l at io n & Design Envelope dualARM oper ating instruct io ns caution If motor is replaced: Loosen set screws (7) on motor shaft collar (5) and remove from old motor shaft. To position Do not use oil, Vaseline or other petroleum or silicon the collar (5) correctly on the new motor shaft, tempo- based products for seal elastomer lubrication.
-
Page 54: Mechanical Seal Replacement Instructions For 4382 And 4362 Close Coupled Vertical In-Line Pump
i nsta ll a ti on & Tango Everflow and Design Envelope dualARM o pera ting i nstruction s 6.3 . 2 mechanical seal replacement 8 Lubricate the inside of the seal rotating assembly (The ‘rubber’ bellows) with a small amount of temporary rub- instructions for 4382 and 4362 ber lubricant emulsion and slide onto the shaft sleeve with close coupled vertical in-line pump... -
Page 55: Warnings And Alarms
One or more of the parameters to control the vsd are not correct. Check the settings on the control card. If the alarm persists after cycling power to the pump, contact an Armstrong Technical Service representative. vsd startup An error occurred during the startup of the motor. -
Page 56: Warning Summary For Interfaces
There is a communication issue between the control card and vsd. vsd speed The speed set by the vsd is not within tolerance. If the alarm persists, contact an Armstrong Technical Service representative. vsd wiring There is an issue in wiring to the vsd. Check the wiring to the motor from the vsd. If any I/O are used on the vsd, verify that there is continuity and no shorts for the connections. -
Page 57: Fuses And Circuit Breakers
8.0 fuses and circuit breakers Fuses ensure that possible damage to the drive is limited to damage inside the unit. Armstrong recommends fuses and/or circuit breakers on the supply side as protection. note: Use of fuses on the supply side is mandatory for iec 6 0364 (ce) and nec 20 0 9 (ul) compliant installations. -
Page 58: Ce Compliance
i nsta ll a ti on & Tango Everflow and Design Envelope dualARM o pera ting i nstruction s ce compliance Table 8.1.1: 200-240 V, Enclosure Sizes A, B, and C enclosure recommended recommended circuit power recommended maximum trip (kW) fuse size level [a] type... - Page 59 Tango Everflow and instal l at io n & Design Envelope dualARM oper ating instruct io ns Table 8.1. 2: 380 –48 0 V, Enclosure Sizes A, B, and C enclosure recommended recommended circuit power recommended maximum trip (kW) fuse size level [a] type max.
-
Page 60: Ul Compliance (61800 -5-1)
i nsta ll a ti on & Tango Everflow and Design Envelope dualARM o pera ting i nstruction s Table 8.1. 4: 5 25– 69 0 V, Enclosure Sizes A, B, and C enclosure recommended recommended circuit power recommended maximum trip (kW) fuse size level [a]... -
Page 61: Ul Compliance (508C)
Tango Everflow and i n sta l l a t i o n & Design Envelope dualARM o per at i n g i n str uct i o n s ul compliance (508c) Table 8.3 .1: Recommended Maximum Fuse, 200–240 V, Enclosure Sizes A, B, and C Power Bussmann Bussmann... - Page 62 i n sta l la t i o n & Tango Everflow and Design Envelope dualARM o p er at i n g i nstru ct ion s Table 8.3 .3: Recommended Maximum Fuse, 380–480 V, Enclosure Sizes A, B, and C Power Bussmann Bussmann...
- Page 63 Tango Everflow and i n sta l l a t i o n & Design Envelope dualARM o per at i n g i n str uct i o n s Table 8.3 .5: Recommended Maximum Fuse, 525–600 V, Enclosure Sizes A, B, and C Ferraz Ferraz Power...
-
Page 64: Pump Manager
i n sta l la t i o n & Tango Everflow and Design Envelope dualARM o p er at i n g i nstru ct ion s Table 8.3 .7: Recommended Maximum Fuse, 525–690 V, Enclosure Sizes A, B, and C Maximum Bussmann Bussmann... -
Page 65: Connectivity Kit
10.0 connectivity kit Pump Manger integration procedure This procedure describes the steps to connect an Armstrong Pump Manger router to a Design Envelope Pump with a depc controller. Each site will be required to have a factory programmed router for data transfer (included with each Design Envelope Pump order). - Page 66 t o r o n t o 23 bertrand avenue, toronto, ontario, canada, m1l 2p3 +1 416 755 2291 b u f fa lo 93 east avenue, north tonawanda, new york, usa, 14120 - 6594 +1 7 16 693 8813 d r o i t w i c h s pa pointon way, stonebridge cross business park, droitwich spa,...
Need help?
Do you have a question about the Design Envelope Tango Everflow 4332 and is the answer not in the manual?
Questions and answers