Table of Contents
Advertisement
Quick Links
User, Installation, Servicing and Conversion
Instructions
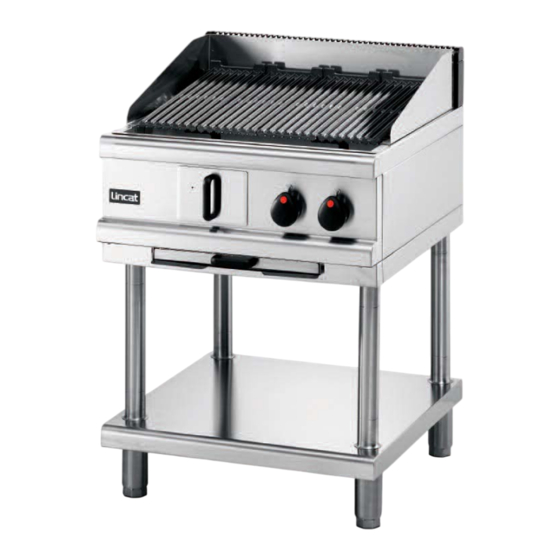
Opus 700 Gas Chargrills
OG7401, OG7402, OG7403 & OG7404
Please make a note of your product details for
future use:
Date Purchased:_________________________
Model Number:__________________________
Serial Number:__________________________
Dealer:_________________________________
_______________________________________
IS461ECN3410
Advertisement
Table of Contents

Subscribe to Our Youtube Channel
Related Manuals for Lincat Opus 700 OG7401


Summary of Contents for Lincat Opus 700 OG7401
- Page 1 User, Installation, Servicing and Conversion Instructions Opus 700 Gas Chargrills OG7401, OG7402, OG7403 & OG7404 Please make a note of your product details for future use: Date Purchased:_________________________ Model Number:__________________________ Serial Number:__________________________ Dealer:_________________________________ _______________________________________ IS461ECN3410...
-
Page 2: Customer Information
Used for the purposes for which it is intended, and with careful maintenance as outlined in this User Guide, your Lincat product will give you years of trouble free service. For use in GB & IE... -
Page 3: Table Of Contents
CONTENTS Contents Page Customer Information………………………………………………………. 2 Warnings and Precautions………………………………………………… 3 Technical Data……………………………………………………………….. 4 Commissioning………………………………………………………………. 5 Check List of Enclosures………………………………………………….. 5 Installation…………………………………………………….……………… 6-7 Conversion of Gas Types………………………………………………….. 8-10 User…………………………………………………………………………….. 11-12 Servicing ……………………………………………………………………… 13 Component Replacement ………………………………………….……… 13 Spare Parts List……………………………………………………………… 14 Fault Finding…………………………………………………………………. -
Page 4: Technical Data
TECHNICAL DATA Model OG7401 OG7402 OG7403 OG7404 Dimensions Overall Height (mm) Width (mm) 1200 1500 Depth (mm) Weight (kg) 86.5 145.5 Cooking Surface w x d (mm) 460 x 525 760 x 525 1060 x 525 1360 x 525 Cooking Grid Area (m 0.24 0.55 0.71... -
Page 5: Commissioning
Grid Scraper User Instructions SERIAL NUMBER Each appliance manufactured at Lincat has a unique identifying number found in NOTE the top right hand corner of the data plate attached at the rear of the appliance. Please record that number in the space provided should it be required for future reference. -
Page 6: Installation
INSTALLATION SITING The installer must ensure that all local regulations in force are met and that there is an unobstructed minimum distance of 1000mm from the top of the cooking grid to the extraction canopy, which must be of non-combustible material. The appliance should be installed on a level surface ensuring the unit is stable and firmly located. - Page 7 SUPPLY PRESSURES The appliance is connected directly to the gas supply where the gas supply pressure is controlled at the source of inlet in the building or via the regulator attached to the bottled gases. See Technical Data for the supply pressures. For those destination countries where the supply pressure exceeds the supply NOTE pressures given in the Technical Data above a regulator must be fitted and the...
-
Page 8: Conversion Of Gas Types
CONVERSION OF GAS TYPES CONVERSION OF GAS TYPE Burner Injector Changes Inlet Part Model Mark ∅ ∅ ∅ ∅ Pressure Number 20mbar 1.42 JE84 28-30mbar 0.95 JE43 37mbar 0.95 JE43 Valve Bypass Injector Changes Part Model Mark ∅ ∅ ∅ ∅ Number 1.10 JE136... - Page 9 Injector Removal Remove the fascia panel as detailed previously to gain access to the valves and pilot assemblies. To change the main burner injector from one gas type to another: Loosen the nut 'A' at the valve sufficiently to allow the flexible burner injector feed pipe to be rotated.
- Page 10 Pilot Assembly Step 1 Step 2 Remove the two screws 'A' from the pilot bracket. Remove the ignitor lead 'B' from the ignitor electrode. Free the thermocouple lock nut ‘C’ from the valve. Loosen the pilot feed pipe 'D' from the valve body allowing the pilot pipe to swivel.
-
Page 11: User
USER INSTRUCTION APPLIANCE USE This appliance is only for professional use and should only be used by qualified personnel. Ensure that the person responsible understands how to light, safely operate, clean and shut down the appliance and is made aware of the position and operation of the gas isolating cock in the event of an emergency. -
Page 12: Cooking Zones
• To light the gas at the corresponding burner rotate the control knob to any point between the low rate and full rate as denoted by the small and large stylized flames on the control knob. If the appliance has stood unused for any length of time it may be necessary to purge the pilot lines of air. -
Page 13: Servicing
The only end user service operation permitted is the routine cleaning and inspection of external parts of the appliance. The only maintenance operation permitted is the replacement of parts by approved and qualified representatives appointed by Lincat Ltd. Visual inspection shall determine that: •... -
Page 14: Spare Parts List
SPARE PARTS LIST Part number Part description Used on BP43 Cast Branding Grid CO113 Copper Washer CO254 Tube Nut CO52 Stud Elbow 8mm CO53 Lock Nut GP07 Insulation Board (x2) IS461 User Manual JE136 Bypass Injector Natural Gas JE137 Bypass Injector Butane/Propane Gas JE43 Burner Injector Butane/Propane Gas JE84... -
Page 15: Fault Finding
FAULT FINDING User Fault Finding Pilot not lighting Check gas supply is on Turn on the gas supply Gas supply is on but pilot not lighting Check for spark at ignitor The spark can be seen by looking at an angle through the ventilation slots, it may be necessary to remove a branding grid. -
Page 16: Service Information
Gas catering equipment should be routinely serviced to ensure a long trouble free life. It is recommended that this appliance is serviced every 6 months by a competent gas engineer. For help regarding the installation, maintenance and use of your LINCAT equipment, please call:- LINCAT SERVICE HELP DESK...
Need help?
Do you have a question about the Opus 700 OG7401 and is the answer not in the manual?
Questions and answers