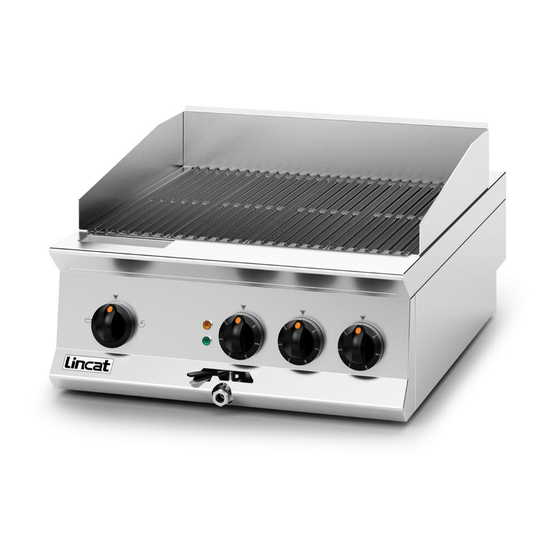
Lincat OE8405 Installation, Operating And Servicing Instructions

Lincat OE8405 Installation, Operating And Servicing Instructions

Opus 800 series electric chargrills

Advertisement

Installation, Operating and Servicing
Instructions
Opus 800 Electric Chargrills
OE8405, OE8406.
Please make a note of your product details for
future use:
Date Purchased:_________________________
Model Number:__________________________
Serial Number:__________________________
Dealer:_________________________________
_______________________________________
IS 648 ECN 4046
Page 1 of 13

Advertisement

Table of Contents
loading
Need help?

Need help?

Do you have a question about the OE8405 and is the answer not in the manual?

Questions and answers

Subscribe to Our Youtube Channel

Summary of Contents for Lincat OE8405

  • Page 1 Installation, Operating and Servicing Instructions Opus 800 Electric Chargrills OE8405, OE8406. Please make a note of your product details for future use: Date Purchased:_________________________ Model Number:__________________________ Serial Number:__________________________ Dealer:_________________________________ _______________________________________ IS 648 ECN 4046 Page 1 of 13...
  • Page 2: Table Of Contents

    WARNING! This symbol is used whenever there is a risk of personal injury. CAUTION! This symbol is used whenever there is a risk of damaging your Lincat product. NOTE: This symbol is used to provide additional information, hints and tips.
  • Page 3: Warnings And Precautions

    Ensure that the plug/socket is accessible at all times. Strip plastic coating and clean the appliance before use. During operation parts may become hot - avoid accidental contact. Disconnect this appliance before servicing, maintenance or cleaning. TECHNICAL DATA OE8405 OE8406 OE8406 Dual Supply Height (mm) Width (mm)
  • Page 4: Installation And Commissioning

    INSTALLATION AND COMMISSIONING This appliance must be earthed. An equipotential bonding terminal is provided to allow cross bonding with other equipment. If replacing the plug connect the terminals as follows: Green and Yellow wire Earth Blue wire Neutral N Brown wire Live Fig 1 IS 648 ECN 4046...
  • Page 5 Means of isolation with at least 3mm contact separation in all poles must be incorporated into the fixed wiring of this appliance. The fixed wiring insulation must be protected by insulated sleeving having a temperature rating of at least 60 Deg C. Supply cords shall be oil resistant, sheathed flexible cable not lighter than ordinary polychloroprene or equivalent elastomer sheathed cord (code 60245 IEC 57) Install this appliance on a level surface ensuring all vents are unobstructed.
  • Page 6: Operating Instructions

    OPERATING INSTRUCTIONS Only qualified or trained personnel should use this appliance. This appliance should not be operated unattended. A Splashback B Control knob C Safety cut-out reset D Drain tap E Water Flow Control knob F Green neon G Amber neon Fig 2 Preparation Before first use, wash the branding plates, dry immediately and coat with a thin film...
  • Page 7 Filling Turn water fill control knob clockwise (3 o’clock position) to ‘full flow’ to fill tank, setting to off (12 o’clock position) before the water level in the fill tank reaches the “Max Fill Level” (Fig 3). As a secondary measure, ensure the water level does not fall below the lower leg of the level gauge (Fig 3).
  • Page 8: Cleaning

    Operating Switch on the power supply at the isolating switch – the green neon will illuminate. OE8405 – The branding plates create one large cooking zone, divided into three equal areas, each independently controlled. OE8406 – The branding plates create one large cooking zone, divided into six equal areas, each independently controlled.
  • Page 9: Servicing, Maintenance And Component Replacement

    Your Lincat product has a manufacturer’s warranty. This requires you to maintain and care for your product and follow maintenance instructions. If you fail to maintain your unit or damage components Lincat may charge you for a warranty repair. Please check the website for terms and conditions.
  • Page 10 Cut out switch in lifting box Remove the branding plates, level indicator and splash back. Remove the screws securing the lifting box cover, tilt the cover forward, unhook and lift away. Remove the cables and transfer to the new switch. Remove the old switch and reassemble by reversing the above sequence.
  • Page 11: Fault Finding

    Please refer to the Service Help Desk number on the final page of this manual. SPARE PARTS LIST Part Number Description Used on BP37 Branding plate 776-024-00 4 Position switch OE8405, OE8406 CO215 Contactor EL313 Element OE8405 EL314 Element OE8406...
  • Page 12: Accessories

    ACCESSORIES Part Number Description Used on OA8917 Floor stand OE8405 OA8914 Floor stand OE8406 OA8949 Griddle plate IS 648 ECN 4046 Page 12 of 13...
  • Page 13: Service Information And Guarantee

    All available on serial plate Type number  Serial number Lincat reserve the right to carry out any work under warranty, given reasonable access to the appliance, during normal working hours, Monday to Friday, 08:30 to 17:00. GUARANTEE This unit carries a comprehensive UK mainland 2 year warranty. The guarantee is in addition to, and does not diminish your statutory or legal rights.

This manual is also suitable for:

Oe8406Opus800Oe8406 dual supply

Table of Contents