
Subscribe to Our Youtube Channel
Related Manuals for Qilive Q.6975


Summary of Contents for Qilive Q.6975
- Page 1 Top loading washing machine 6.5 Kg Q.6975 Máquina de lavar roupa de carga superior Pralka ładowana od góry Felültöltős mosógép Mașină de spălat cu încărcare superioară...
- Page 2 User manual P. 4 Manual de utilização P. 28 Instrukcja użytkownika S. 55 Használati útmutató 81 .o. Manual de utilizare P. 107...
-
Page 4: Safety Instructions
1. SAFETY INSTRUCTIONS Before using this electrical appliance, read the instructions below carefully and keep them for future reference: 1. If the supply cord is damaged, it must be replaced by the manufacturer, its service agent or similarly qualified persons in order to avoid a hazard. 2. - Page 5 way and understand the hazards involved. Cleaning and user maintenance shall not be made by children without supervision. 11. Children of less than 3 years should be kept away unless continuously supervised. Children shall not play with the appliance. 12. Pets and children may climb into the machine. Check the machine carefully before use.
- Page 6 7. To prevent damage to the product, remove all packaging and transport bolts before use. 8. This product is for home use only and is only designed for machine-washable textiles. 9. This appliance is intended to be used in household and similar applications such as: –...
- Page 7 them as detergents. Only use detergents which are suitable for machine washing. 21. Make sure that all pockets are emptied. Sharp and rigid items such as coins, jewelry, nails, screws or stones may cause serious damage to the machine. 22. Check whether the water inside the drum has been drained before opening the door.
-
Page 8: Technical Data
disposed of with other household waste. The user is required to deliver it to operators who collect used electrical and electronic equipment. Collection operators, including local collection points, shops and local authorities, create an appropriate system for collecting equipment. Appropriate collection of used electrical and electronic equipment helps avoid harmful impacts on human health and the environment, resulting from the presence of hazardous components,... - Page 9 EEIW ( 68.7 Energy efficiency class ( Washing Rinsing effectiveness (g/ 1.031 efficiency index ( kg) ( Energy consumption in kWh per Water consumption in litres cycle, based on per cycle, based on the the eco 40-60 eco 40-60 programme. programme.
-
Page 10: Installation Area
Additional information: 1) The actual energy consumption will depend on how the appliance is used. 2) The actual water consumption will depend on how the appliance is used and on the hardness of the water. 3) Product Data Sheet concerning (EU) 2019/2014 The product data sheet for your appliance can be found online. -
Page 11: Remove The Transport Bolts
3.2.1. REMOVE THE TRANSPORT BOLTS Warning! ■ You must remove the transport bolts from the backside before using the product ■ You’ll need the transport bolts again if you move the product, so make sure you keep them in a safe place. Please take the following steps to remove the bolts: Loosen 4 bolts with spanner and then remove them. -
Page 12: Levelling The Washing Machine
3.4. LEVELLING THE WASHING MACHINE Warning! ■ The lock nuts on all four feet must be screwed tightly against the housing. Check if the legs are securely attached to the housing. If not, turn them to their original positions and tighten the nuts. Loosen the lock nut and turn the foot until it is in close contact with the floor. -
Page 13: Quick Start
Trough Hose Retainer Max.100cm Min.60cm Warning! ■ When installing drain hose, fix it properly with a rope. ■ If drain hose is too long, do not force it into washing machine as it will cause abnormal noises. 4. USE 4.1. QUICK START Caution! ■... -
Page 14: After Washing
• Check the roller before each laundry, it must roll smoothly 4.1.2. WASHING 3.Select function or 1.Power On 2.Select Programme 4.Start default Note! • If default is selected, step 2 can be skipped. 4.1.3. AFTER WASHING All lights off. 4.2. BEFORE EACH WASHING ■... -
Page 15: Detergent Dispenser
Warning! ■ Do not wash or dry articles that have been cleaned in, washed in, soaked in, or dabbed with combustible or explosive substances like wax, oil, paint, gasoline, alcohol, kerosene, and other flammable materials. ■ Washing single clothes items may easily create big eccentricity and cause alarm due to unbalance. -
Page 16: Detergent Recommendation
4.4. DETERGENT RECOMMENDATION Recommended washing Type of laundry and Wash cycles Washing temp detergent textile Heavy-duty detergent White laundry with bleaching Cotton, ECO 40-60, made from boil- 20/40/60 agents and optical proof cotton or brighteners linen Colour detergent Coloured laundry without bleaching Cotton, ECO 40-60, Cold/20/40... -
Page 17: Product Description
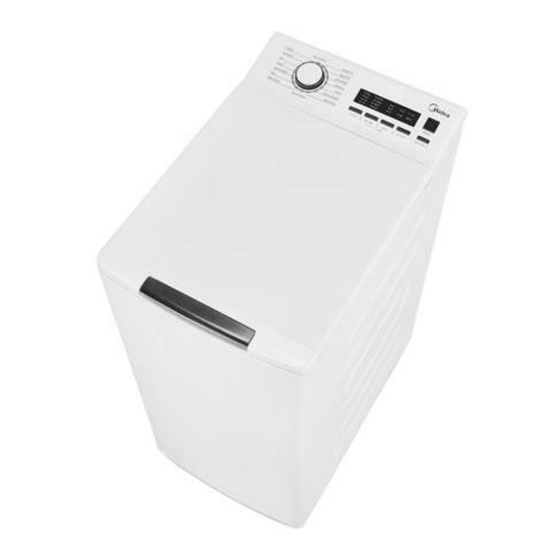
5. PRODUCT DESCRIPTION 5.1. FRONT VIEW The product diagram is for reference only and may differ from the actual product. Power supply cord Detergent dispenser Control panel Drum Drain hose Service filter Door 5.2. ACCESSORIES Transport hole plug Owner’s manual Supply hose (cold water) Acoustic sponge (Optional) -
Page 18: Control Panel
5.3. CONTROL PANEL Power: Product is on/off Start/Pause: Press the button to start or pause the washing cycle. Option: This allows you to select an additional function and will light when selected. Programmes: Available according to the laundry type. Display: The display shows the settings, options, and status messages for your washer. - Page 19 6. PROGRAMMES Washing Programmes Table Programme Load(kg) Programme Time Cotton 2:40 Quick 15’ 0:15 Rapid 45’ 0:45 ECO 40-60 3:23 Steam 3.25 1:48 20°C 3.25 1:01 Rinse & Spin 0:20 Spin Only 0:12 Drum Clean 1:18 Baby Care 2:01 Sportswear 3.25 0:47 Jeans...
- Page 20 ■ Concerning to EN 60456:2016/prA2019 With (EU)2019/2014, (EU)2019/2023, The EU energy efficiency class is: C Energy test program: ECO 40-60. Other as the default. Half load for 6.5Kg machine:3.25Kg. Quarter load for 6.5Kg machine:1.5Kg. The highest temperature reached by the laundry in the wash cycle for at least 5 minutes.
- Page 21 Programmes Specially set in this machine to clean the drum and tube. It applies 90 °C high temperature sterilization to make the clothes washing more green. When this programme is performed, the clothes or Drum Clean other washing cannot be added. When proper amount of chlorine bleaching agent is put in, the barrel cleaning effect will be better.
-
Page 22: Spin Speed
Note! ■ For the maximum spin speed, program time, and other details of the ECO 40-60 program, please refer to the content on the Product Fiche page. ■ The table shows which cycle offers which options for adjustment. If an adjustment is not possible for a cycle TEMP When needed, the washing temperature can be adjusted by pressing the... -
Page 23: Child Lock
CHILD LOCK This function is meant to keep children from misusing the controls. Press [Spin] and [Delay] simultaneously for 3 sec until Spin Delay the buzzer beep. The child lock indicator switches on. Caution! ■ The Child Lock deactivates the function of all buttons except the On/Off button and the Child lock button! ■... -
Page 24: Maintenance And Cleaning
7. MAINTENANCE AND CLEANING Warning! ■ Always unplug the appliance and close the water tap before cleaning and maintenance. 7.1. CLEANING THE CABINET Proper maintenance on the washing machine can extend its working life. The surface can be cleaned with diluted non-abrasive neutral detergents when necessary. -
Page 25: Clean The Detergent Dispenser
7.4. CLEAN THE DETERGENT DISPENSER Pull out the dispenser drawer Clean the dispenser drawer Insert the dispenser with press the A under water drawer Press down the arrow location on softener cover inside the dispenser drawer. Lift the clip up and take out softener cover and wash all grooves with water. Restore the softener cover and push the drawer onto position. -
Page 26: Troubleshooting
8. TROUBLESHOOTING The start of the appliance does not work or it stops during operation. First try to find a solution to the problem, If not, contact the service centre. Description Reason Solution Restart after the door is Washing machine Door is not closed closed cannot start up... -
Page 27: Customer Service
Description Reason Solution temp. speed Delay Water overflow Restart the washer Please try again first, call Others Others up service line if there are still troubles Light flash Light off 8.1. CUSTOMER SERVICE Spare part for your appliance are available for a minimum of 10 years. In case of questions please contact our customer service WARNING: ■... -
Page 28: Instruções De Segurança
1. INSTRUÇÕES DE SEGURANÇA Antes de utilizar este aparelho eletrodoméstico, leia atentamente as instruções a seguir e guarde-as para referência futura: 1. Se o cabo de alimentação ficar danificado, deve ser substituído pelo fabricante, pelo agente de serviço ou por pessoal igualmente qualificado, de modo a evitar perigos. - Page 29 10. Este aparelho pode ser utilizado por crianças a partir de 8 anos ou mais e pessoas com capacidades físicas, sensoriais ou mentais reduzidas ou reduzida experiência e conhecimento, se tiverem recebido supervisão ou instrução sobre a utilização do aparelho de forma segura e compreenderem os perigos envolvidos.
- Page 30 2. Esta máquina não é encastrável. 3. As aberturas de ventilação não devem ser obstruídas por carpetes. 4. A máquina de lavar não deve ser instalada em casas de banho ou espaços húmidos ou que contenham gases explosivos ou cáusticos. 5.
- Page 31 15. Este aparelho é pesado. Tenha cuidado durante o transporte. 16. Não feche a porta com força. Se for difícil fechar a porta, verifique se a roupa está completamente inserida no tambor e distribuída uniformemente. 17. Não utilize a máquina para lavar tapetes. 18.
- Page 32 27. Peças de borracha alveolar (espuma de látex), toucas de banho, têxteis impermeáveis, artigos com revestimento de borracha e roupa ou almofadas com resguardos de borracha alveolar não devem ser colocados na máquina. 28. Os amaciadores de roupa ou produtos semelhantes devem ser utilizados de acordo com as instruções.
-
Page 33: Informações Técnicas
2. INFORMAÇÕES TÉCNICAS 2.1. ESPECIFICAÇÕES TÉCNICAS Alimentação 220-240 V~,50 Hz Potência nominal 2100 W Corrente máx. 10 A Pressão de entrada de água padrão 0.1~1 MPa Capacidade de lavagem 6,5 kg Dimensões (L x P x A em mm) 400 x 610 x 875 Peso líquido 56 Kg 2.2. - Page 34 Capacidade nominal Temperatura máxima no Teor de humidade 62,9 Parcial interior do tecido restante 0 (%) tratado (°C) Quarto Capacidade 1200 nominal Velocidade de Classe de eficiência centrifugação de secagem por Parcial 1200 máx. (rpm) centrifugação ( Quarto 1200 Capacidade 3:23 nominal Duração do...
- Page 35 3. INSTALAÇÃO 3.1. ÁREA DE INSTALAÇÃO Aviso! ■ É importante haver estabilidade para evitar que o aparelho se desloque! ■ Certifique-se de que o aparelho não está em cima do cabo de alimentação. W≥ 20 mm Antes de instalar a máquina, deve ser selecionado um local com as seguintes características: Superfície rígida, seca e nivelada.
- Page 36 Retire os parafusos, incluindo Desaperte os 4 parafusos as peças de borracha, e Tape os orifícios com os de transporte com uma guarde-os para utilização tampões. chave inglesa. futura. 3.3. INSTALAR A ESPONJA ACÚSTICA Pode instalar as esponjas acústicas, que podem reduzir eficazmente o ruído provocado pela máquina durante o seu funcionamento.
- Page 37 Ligue a mangueira de abastecimento de água à válvula de entrada de água e a uma torneia de água fria conforme indicado. 3.5.2. MANGUEIRA DE ESCOAMENTO Aviso! ■ Não dobre nem estique a mangueira de escoamento. ■ Posicione a mangueira de escoamento corretamente, caso contrário, podem ocorrer danos devido a fugas de água.
-
Page 38: Início Rápido
4. UTILIZAÇÃO 4.1. INÍCIO RÁPIDO Atenção! ■ Antes da lavagem, certifique-se de que a máquina de lavar roupa está instalada corretamente. ■ O seu aparelho foi verificado rigorosamente antes de sair da fábrica. Para remover qualquer resíduo de água e neutralizar possíveis odores, é recomendável limpar o seu aparelho antes da primeira utilização. - Page 39 4.1.2. LAVAR 2. Selecione o 3. Selecione a função ou 1. Ligue 4. Inicie programa a predefinição Nota! • Se a predefinição estiver selecionada, o passo 2 pode ser ignorado. 4.1.3. DEPOIS DE LAVAR Todas as luzes apagam. 4.2. ANTES DE CADA LAVAGEM ■...
-
Page 40: Dispensador De Detergente
acrescentar mais uma ou duas peças para lavar, para que a centrifugação seja realizada corretamente. 4.3. DISPENSADOR DE DETERGENTE Pré-lavagem Amaciador Lavagem principal Atenção! ■ O detergente apenas deve ser adicionado na "caixa I" depois de selecionar a pré- lavagem para as máquinas com esta função. ■... - Page 41 4.4. RECOMENDAÇÃO DE DETERGENTE Detergente recomendado Temp. de Ciclos de lavagem Tipo de roupa e tecido para a lavagem lavagem Detergente para Roupa branca feita limpeza pesada Algodão, de algodão ou com agentes de ECO 40-60, 20/40/60 linho resistentes à branqueamento e Misturada água em ebulição...
-
Page 42: Descrição Do Produto
5. DESCRIÇÃO DO PRODUTO 5.1. VISTA FRONTAL O esquema do produto é apenas para referência e pode ser diferente do produto real. Cabo de alimentação Dispensador de detergente Painel de controlo Tambor Mangueira de escoamento Filtro de resíduos Porta 5.2. ACESSÓRIOS Tampões Manual do utilizador Mangueira de abastecimento... -
Page 43: Painel De Controlo
5.3. PAINEL DE CONTROLO Ligar: o produto liga/desliga Iniciar/Pausa: Prima este botão para iniciar ou colocar o ciclo de lavagem em pausa. Opção: isto permite-lhe selecionar uma função adicional e acende-se quando selecionada. Programas: Disponíveis de acordo com o tipo de roupa a lavar. Visor: O visor apresenta as definições, opções e mensagens de estado da máquina de lavar roupa. - Page 44 A. Bloqueio da porta D. Enxaguamento extra B. Bloqueio Crianças C. Pré-lavagem 6. PROGRAMAS Tabela de Programas de Lavagem Programa Carga (kg) Mostrar tempo Algodão 2:40 Rápido 15’ 0:15 Rápido 45’ 0:45 ECO 40-60 3:23 Vapor 3.25 1:48 20 °C 3.25 1:01 Passar E Centrifugar...
- Page 45 3:23 0.782 62.9%/1200 ECO 40-60 3.25 2:39 0.482 62.9%/1200 62.9%/1200 2:39 0.340 ■ Os dados acima são apenas para referência e podem variar de acordo com as diferentes condições reais de uso. ■ Os valores indicados para os programas, à exceção do programa ECO 40-60, são meramente indicativos.
- Page 46 Programas Mistura Carga mista composta por tecidos de algodão e sintéticos Roupa de Para a lavagem de vestuário desportivo. desporto Ganga Especialmente para gangas. Programa extra curto, indicado para roupa pouco suja, bem como Rápido 15’ para pequenas quantidades de roupa. Indicado para lã...
- Page 47 Velocidade de Temp. centrifugação Ciclo predef. Funções suplementares predefinida em (°C) Vapor Atraso 20 °C Atraso Passar E Atraso Centrifugar Centrifugar Atraso apenas Limpeza do Atraso tambor Roupa de bebê Atraso Roupa de Atraso desporto Ganga Atraso Lã Atraso Sintético Atraso Mistura Atraso...
- Page 48 Atraso Escolha o programa Defina o tempo Inicie Para cancelar a função de atraso, prima o botão "Atraso" antes de iniciar o programa até que o visor mostre 0 h. Se o programa já tiver começado, desligue o aparelho e volte a ligá-lo e selecione um novo programa.
- Page 49 O MEU CICLO Pode utilizar esta função para guardar e reutilizar o programa e as definições frequentemente utilizados. Depois de escolher o programa e as definições pretendidas, prima sem soltar o botão de temperatura durante 3 segundos para guardar o programa e as definições atuais. Para reutilizar o programa e as definições guardadas, selecione o programa O Meu Ciclo antes de iniciar a lavagem.
-
Page 50: Manutenção E Limpeza
7. MANUTENÇÃO E LIMPEZA Aviso! ■ Desligue sempre a máquina da corrente e feche a torneira da água antes de proceder à sua limpeza e manutenção. 7.1. LIMPAR A CARCAÇA A manutenção adequada da máquina de lavar pode prolongar a sua vida útil. A superfície pode ser limpa com detergentes neutros não abrasivos diluídos, se necessário. - Page 51 7.4. LIMPAR O DISPENSADOR DE DETERGENTE Limpe a gaveta do Insira a gaveta do Retire a gaveta do dispensador debaixo de dispensador distribuidor premindo o A água Pressione a seta para baixo no local da tampa do amaciador dentro da gaveta do dispensador.
-
Page 52: Resolução De Problemas
Atenção! ■ Quando a máquina está em funcionamento, e dependendo do programa selecionado, poderá haver água quente na bomba. Nunca retire a tampa da bomba durante um ciclo de lavagem, aguarde sempre até a máquina terminar o ciclo e estar vazia. Quando voltar a colocar a tampa, certifique-se de que está bem apertada. -
Page 53: Serviço De Apoio Ao Cliente
Descrição Razão Solução Verifique se a pressão da velocidade Atraso temp. água é demasiado baixa Problema de injeção Endireite o tubo da água da água durante a Verifique se o filtro da lavagem válvula de entrada está bloqueado temp. velocidade Atraso Verifique se a mangueira Escoamento de água... - Page 54 8.2. TRANSPORTE PASSOS IMPORTANTES A TOMAR AO MOVER A MÁQUINA ■ Desligue a máquina da tomada e feche a torneira de entrada de água. ■ Verifique se a porta e o dispensador de detergente estão devidamente fechados. ■ Retire o tubo de entrada de água e a mangueira de saída da água da instalação da sua casa.
-
Page 55: Instrukcje Bezpieczeństwa
1. INSTRUKCJE BEZPIECZEŃSTWA Przed użyciem urządzenia elektrycznego należy uważnie przeczytać poniższe wskazówki i zachować je, aby można z nich skorzystać w przyszłości. 1. Aby uniknąć zagrożenia w przypadku uszkodzenia przewodu zasilającego, musi zostać on wymieniony przez producenta, serwisanta lub osobę posiadającą podobne kwalifikacje. - Page 56 9. Zagrożenie dla bezpieczeństwa dzieci! 10. Z niniejszego urządzenia mogą korzystać dzieci od lat 8 oraz osoby o ograniczonych zdolnościach fizycznych, sensorycznych umysłowych nieposiadające doświadczenia wiedzy, jeśli pozostają pod nadzorem lub zostały poinstruowane odnośnie do korzystania z urządzenia w bezpieczny sposób i rozumieją...
- Page 57 Instalacja 1. Urządzenie jest przeznaczone wyłącznie do użytku w pomieszczeniach. 2. Urządzenie nie jest przeznaczone do zabudowy. 3. Otwory wentylacyjne nie mogą zostać zasłonięte przez wykładzinę. 4. Pralki nie należy instalować w łazienkach ani bardzo wilgotnych pomieszczeniach lub w pomieszczeniach, w których występują...
- Page 58 13. Z urządzenia należy spuścić pozostałą wodę. 14. Należy ostrożnie obchodzić się z urządzeniem. Podczas podnoszenia nigdy nie chwytać urządzenia jakiekolwiek wystające części. Podczas przenoszenia urządzenia nie należy wykorzystywać drzwi jako uchwytu. 15. Niniejsze urządzenie jest ciężkie. Podczas transportu należy zachować ostrożność. 16.
- Page 59 urządzeń, w których spalane są paliwa, w tym z urządzeń z otwartą komorą spalania. 26. Tkaniny zanieczyszczone substancjami takimi jak olej spożywczy, aceton, alkohol, benzyna, nafta, odplamiacze, terpentyna, wosk i środki do usuwania wosku należy wyprać w gorącej wodzie ze zwiększoną ilością...
-
Page 60: Dane Techniczne
sprzętu elektrycznego i elektronicznego pomaga uniknąć szkodliwego wpływu na zdrowie ludzkie i środowisko, wynikającego z obecności niebezpiecznych składników, a także z niewłaściwego przechowywania i obróbki takiego sprzętu. 2. DANE TECHNICZNE 2.1. SPECYFIKACJA TECHNICZNA Zasilanie 220–240 V~, 50 Hz Moc znamionowa 2100 W Maksymalne natężenie prądu 10 A... - Page 61 Zużycie energii w kWh na cykl na podstawie Zużycie wody w litrach programu na cykl na podstawie ECO 40-60. programu ECO 40-60. Rzeczywiste 0,574 Rzeczywiste zużycie zużycie wody zależy od sposobu energii zależy wykorzystania urządzenia od sposobu i twardości wody. wykorzystania urządzenia.
-
Page 62: Miejsce Montażu
Informacje dodatkowe: 1) Rzeczywiste zużycie energii zależy od sposobu korzystania z urządzenia. 2) Rzeczywiste zużycie wody zależy od sposobu wykorzystania urządzenia i twardości wody. 3) Arkusz danych produktu dotyczący (UE) 2019/2014. Arkusz danych produktu dotyczący tego urządzenia dostępny jest na stronie internetowej. - Page 63 3.2.1. USUWANIE ŚRUB TRANSPORTOWYCH Ostrzeżenie! ■ Śruby transportowe, znajdujące się z tyłu, należy usunąć przed rozpoczęciem użytkowania urządzenia ■ Śruby transportowe mogą się przydać, jeśli w przyszłości zajdzie potrzeba przemieszczenia urządzenia, dlatego należy je zachować i przechowywać w bezpiecznym miejscu. Aby usunąć...
-
Page 64: Poziomowanie Pralki
3.4. POZIOMOWANIE PRALKI Ostrzeżenie! ■ Nakrętki blokujące znajdujące się na czterech nóżkach muszą być mocno dokręcone do obudowy. Należy sprawdzić, czy nogi są bezpiecznie przymocowane do obudowy. Jeżeli nie są dobrze dokręcone, obrócić je we właściwe położenie i dokręcić nakrętki. Poluzować... - Page 65 Uwaga! ■ Jeżeli pralka została wyposażona w uchwyt węża odpływowego, zainstalować go w poniższy sposób. Odpływ Uchwyt węża Maks. 100 cm Min. 60 cm Ostrzeżenie! ■ Instalując wąż odpływowy, przymocować go dobrze za pomocą linki. ■ Jeżeli wąż odpływowy jest zbyt długi, nie wciskać go do pralki, ponieważ będzie to powodem powstawania niepokojących dźwięków.
- Page 66 • Wszystkie metalowe zaczepy muszą być prawidłowo zaczepione wewnątrz klapki tylnych drzwiczek. • Przed każdym praniem sprawdzić rolkę. Musi obracać się swobodnie. 4.1.2. PRANIE 3. Wybrać funkcję lub 1. Włączyć 2. Wybrać program skorzystać z ustawień 4. Uruchomić zasilanie. domyślnych Uwaga! •...
- Page 67 4. Związać ze sobą 6. Odwróć na lewą stronę 5. Małe sztuki odzieży długie paski tekstyliów odzież z tkanin ulegających umieścić w siatce do i paski, zasunąć zamki mechaceniu lub z tkanin z prania. błyskawiczne i zapiąć guziki. długim włosiem Ostrzeżenie! ■...
- Page 68 20°C ○ Oznacza: opcjonalne Oznacza: wymagane 4.4. POLECANE ŚRODKI DO PRANIA Polecane detergenty Cykle prania Temp. prania Rodzaj tkanin piorące Detergent silnie Białe tkaniny z działający ze Bawełna, bawełny lub lnu środkami bielącymi ECO 40-60, 20/40/60 odpornych na i wybielaczami Mieszane gotowanie optycznymi...
-
Page 69: Opis Produktu
5. OPIS PRODUKTU 5.1. WIDOK Z PRZODU Schemat produktu służy wyłącznie celom referencyjnym i może odbiegać od rzeczywistego produktu. Przewód zasilający Szuflada na detergenty Panel sterowania Bęben Wąż odpływowy Filtr pompy Drzwiczki 5.2. AKCESORIA Korki transportowe Instrukcja obsługi Wąż doprowadzający wodę zimną Gąbka akustyczna (opcja) -
Page 70: Panel Sterowania
5.3. PANEL STEROWANIA Zasilanie: włączanie i wyłączanie urządzenia. Start/pauza: Nacisnąć, aby uruchomić lub wstrzymać cykl prania. Opcja: umożliwia wybór dodatkowych funkcji; po wybraniu funkcji przycisk podświetli się. Programy: Dostępne w zależności od rodzaju tkanin. Wyświetlacz: na wyświetlaczu widoczne są ustawienia, opcje i komunikaty stanu pralki. - Page 71 6. PROGRAMY Tabela programów prania Program Załadunek (kg) Wyświetlany czas Bawełna 2:40 Szybki 15’ 0:15 Szybki 45' 0:45 ECO 40-60 3:23 Para 3.25 1:48 20°C 3.25 1:01 Płukanie I Wirowanie 0:20 Ety ko Wirowanie 0:12 Czyszczenie bębna 1:18 Niemowlęce 2:01 Odzież...
- Page 72 ■ W odniesieniu do normy EN 60456:2016/prA2019 z (UE) 2019/2014, (UE) 2019/2023, Klasa efektywności energetycznej w UE: C Program do testu zużycia energii: ECO 40-60 Inne jako domyślne. Połowa wsadu w przypadku pralki o ładowności 6,5 kg: 3,25 kg. Ćwierć wsadu w przypadku pralki o ładowności 6,5 kg: 1,5 kg. Najwyższa temperatura prania w cyklu prania przez co najmniej 5 minut.
- Page 73 Programy Etylko Dodatkowe wirowanie z możliwością wyboru prędkości wirowania. Wirowanie Płukanie i Dodatkowe płukanie z wirowaniem. wirowanie Specjalny program do czyszczenia bębna i węży pralki. Program nagrzewa wodę do temperatury 90°C, aby przeprowadzić proces sterylizacji ubrań i zwiększyć stopień ekologiczności prania. W Czyszczenie czasie trwania tego programu dodawanie ubrań...
- Page 74 Domyślna Domyślna prędkość Cykl Dodatkowe funkcje Temp. (°C) wirowania w obr./min Niemowlęce Opóźnienie Odzież Opóźnienie Sportowa Dżinsy Opóźnienie Wełna Opóźnienie Syntetyczne Opóźnienie Mieszane Opóźnienie Uwaga! ■ Aby uzyskać maksymalną prędkość wirowania, czas trwania programu i inne szczegóły dotyczące programu ECO 40-60, należy zapoznać się z treścią na stronie Karta produktu.
-
Page 75: Blokada Przed Dziećmi
PRANIE WSTĘPNE Funkcja dodatkowego prania przed rozpoczęciem prania głównego w celu zwiększenia skuteczności prania. Uwaga: Należy uzupełnić środek piorący w przegrodzie I. PŁUKANIE DODATKOWE Po wybraniu tej funkcji pranie zostanie poddane dodatkowemu płukaniu. BLOKADA PRZED DZIEĆMI Funkcja ma na celu powstrzymanie dzieci przed niewłaściwym użyciem elementów sterujących. -
Page 76: Konserwacja I Czyszczenie
LICZNIK UŻYTKOWANIA Za pomocą tej funkcji można dowiedzieć się, ile cykli prania wykonało urządzenie. Odłączyć urządzenie, odczekać 10 sekund i podłączyć je ponownie. Włączyć urządzenie i w ciągu 10 sekund nacisnąć i przytrzymać przyciski „Temp.” i „Funkcja” na panelu sterowania przez około 5 sekund, aż zaczną migać kontrolki z lewej. - Page 77 7.4. CZYSZCZENIE SZUFLADY NA ŚRODKI PIORĄCE Wyciągnąć szufladę na Włożyć szufladę na Oczyścić szufladę na detergenty, naciskając w środki piorące do otworu środki piorące pod wodą. miejscu oznaczonym literą A. w pralce. Nacisnąć miejsce oznaczone strzałką na pokrywie komory na płyn zmiękczający wewnątrz szuflady na środki piorące.
-
Page 78: Rozwiązywanie Problemów
3. Usunąć obce substancje. 4. Zamknąć dolną pokrywę. Ostrożnie! ■ Gdy urządzenie jest w użyciu (w zależności od wybranego programu), w pompie może znajdować się gorąca woda. Nigdy nie należy zdejmować pokrywy pompy w czasie trwania cyklu prania. Należy zawsze odczekać na zakończenie cyklu, spuszczenie wody z pralki oraz ostygnięcie urządzenia. -
Page 79: Obsługa Klienta
Modele z wyświetlaczem LED: Opis Przyczyna Rozwiązanie temp. prędkość Opóźnienie Ponownie uruchomić Drzwiczki nie są po zamknięciu drzwiczek. poprawnie zamknięte. Sprawdzić, czy w pralce zacięły się ubrania. Sprawdzić, czy ciśnienie wody jest odpowiednio temp. prędkość Opóźnienie wysokie. Problem z pobieraniem Rozprostować... - Page 80 8.2. TRANSPORT WAŻNE WSKAZÓWKI DOTYCZĄCE PRZENOSZENIA URZĄDZENIA ■ Odłączyć urządzenie i zamknąć zawór dopływowy wody. ■ Sprawdzić, czy drzwiczki i dozownik środka piorącego są prawidłowo zamknięte. ■ Odłączyć rurę dopływu wody i wąż wylotowy od instalacji domowej. ■ Poczekać na całkowite wypłynięcie wody z urządzenia (patrz „Konserwacja i czyszczenie filtra pompy odprowadzającej wodę”).
-
Page 81: Biztonsági Utasítások
1. BIZTONSÁGI UTASÍTÁSOK Az elektromos készülék használata előtt gondosan olvassa el az alábbi utasításokat, és őrizze meg a használati útmutatót későbbi felhasználásra: 1. Ha a tápkábel sérült, a balesetek elkerülése érdekében a gyártónak, az értékesítés utáni szervizszolgáltató cég képviselőjének, vagy hasonlóan képzett szakembernek kell kicserélnie. - Page 82 kizárólag felügyelet mellett, illetve abban az esetben használhatják, ha a készülék biztonságos kezeléséről tájékoztatást kaptak, és tisztában vannak az ahhoz kapcsolódó kockázatokkal. A készülék tisztítását és felhasználói karbantartását gyerekek felügyelet nélkül nem végezhetik. 11. A 3 évesnél fiatalabb gyermekek csak folyamatos felügyelet mellett tartózkodhatnak a készülék közelében.
- Page 83 vagy maró hatású gázokat tartalmazó helyiségekben tilos. 5. Az egy bemeneti szeleppel rendelkező modelleket a hidegvíz-ellátáshoz kell csatlakoztatni. A dupla bemeneti szeleppel rendelkező modelleket melegvíz- és a hidegvíz-ellátáshoz kell megfelelően csatlakoztatni. 6. A hálózati csatlakozódugasznak az üzembe helyezést követően hozzáférhetőnek kell lennie. 7.
- Page 84 16. Ne alkalmazzon túlzott erőt az ajtó bezárásakor. Ha nehezen záródik az ajtó, ellenőrizze, hogy nincs-e ruha a dobon kívül, illetve a ruhák elosztása a dobban egyenletes-e. 17. Szőnyegek mosására ne használja a készüléket. 18. A mosógép használat előtt kalibrálást igényel. 19.
- Page 85 tárgyak és gumihab betétekkel készült ruhák vagy párnák a készülékben nem száríthatók. 28. A textilöblítők vagy hasonló termékek az utasításoknak megfelelően használandók. 29. A készülék ajtaja a ciklus közben kinyitható, miután a készülék dobjából leürült a víz. Ez körülbelül 15 másodpercet vesz igénybe. 30.
-
Page 86: Műszaki Adatok
2. .MŰSZAKI ADATOK 2.1. MŰSZAKI ADATOK Tápellátás 220 - 240 V~, 50 Hz Névleges te jesítmény 2100 W Max. áramerősség 10 A Normál bemeneti víznyomás 0.1~1 MPa Mosási kapacitás 6,5 kg Méretek (szé x mé x ma mm-ben) 400 x 610 x 875 Nettó... - Page 87 Névleges kapacitás Maximális Maradék nedvesség 0 hőmérséklet a 62,9 Fél kezelt textilben (°C) Negyed Névleges 1200 kapacitás Centrifugálási Centrifugálási sebesség (ford/ Fél 1200 hatékonysági osztály ( perc) Negyed 1200 Névleges 3:23 kapacitás Program időtartama Típus Szabadon álló Fél 2:39 (óra:perc) Negyed 2:39 Levegőben...
-
Page 88: Üzembe Helyezés
3. ÜZEMBE HELYEZÉS 3.1. TELEPÍTÉSI TERÜLET Figyelmeztetés! ■ A stabilitás fontos, hogy a termék ne mozduljon el! ■ Ügyeljen rá, hogy a készülék ne a tápkábelen álljon. W≥ 20 mm A mosógép telepítéséhez olyan helyet kell választani, ami az alábbiaknak megfelel: Szilárd, száraz, vízszintes felület. - Page 89 3.2.1. A SZÁLLÍTÁSI RÖGZÍTŐCSAVAROK ELTÁVOLÍTÁSA Figyelmeztetés! ■ A termék használata előtt el kell távolítania a hátoldalról a szállítási rögzítőcsavarokat. ■ Ha a terméket szállítja, ismét szüksége lesz a szállítási rögzítőcsavarokra, ezért ügyeljen arra, hogy biztonságos helyen tartsa ezeket. A csavarok eltávolításához végezze el az alábbi lépéseket: Lazítsa meg csavarkulccsal a 4 csavart, majd vegye ki ezeket.
-
Page 90: A Mosógép Szintezése
3.4. A MOSÓGÉP SZINTEZÉSE Figyelmeztetés! ■ A négy lábon található záróanyáknak szorosan kell illeszkedniük a burkolathoz. Ellenőrizze, hogy a lábak biztonságosan illeszkednek-e a burkolathoz. Ha nem így van, forgassa ezeket eredeti helyzetükbe, és húzza meg az anyákat. Lazítsa meg a záróanyát, és forgassa a lábat addig, amíg szorosan nem érintkezik a talajjal. -
Page 91: Első Lépések
Mosókád Töm ővezető Max. 100 cm Min. 60 cm Figyelmeztetés! ■ A leeresztőtömlő csatlakoztatásakor megfelelően rögzítse a csövet zsinór segítségével. ■ Ha a leeresztőtömlő túlságosan hosszú, ne próbálja meg visszatolni a mosógépbe, mert ez rendellenes hangokat okoz. 4. HASZNÁLAT 4.1. ELSŐ LÉPÉSEK Figyelem! ■... - Page 92 • Minden fémkampót megfelelően be kell akasztani a hátsó szárny belsejében. • Minden mosás előtt ellenőrizze a görgőt, simán kell futnia. 4.1.2. MOSÁS 2. Válasszon 3. Válasszon funkciót, 1. Kapcso ja be 4. Indítsa el programot vagy hagyja alapértéken Megjegyzés! •...
- Page 93 4. Kösse össze a hosszú 6. A könnyen bolyhosodó, textilszalagokat és öveket, 5. Tegye mosózsákba a hosszú szálakból álló húzza be a cipzárakat és kisebb ruhaneműket anyagokat fordítsa ki gombolja be a gombokat Figyelmeztetés! ■ Ne mosson vagy szárítson olyan ruhaneműt, amelyet gyúlékony vagy robbanásveszélyes anyagokkal, például viasszal, olajjal, festékkel, benzinnel, alkohollal, kerozinnal, vagy más gyúlékony anyagokkal tisztítottak, mostak, ilyen anyagban áztattak, illetve ilyen anyagokkal érintkezett.
- Page 94 20 °C ○ Jelentése opcionális Jelentése kötelező 4.4. AJÁNLOTT MOSÓSZER Mosási Ruhanemű és textil Ajánlott mosószer Mosási programok hőmérséklet típusa Intenzív mosóhatású Fehér ruhanemű mosószer Pamut, ECO 40-60, 20/40/60 főzésálló pamutból fehérítőszerekkel és Kevert vagy vászonból optikai fehérítőkkel Színes mosószer Színes ruhanemű...
- Page 95 5. TERMÉKLEÍRÁS 5.1. ELÖLNÉZET A termékábra csak tájékoztatásul szolgál, a tényleges termék ettől eltérő lehet. Tápkábel Mosószer-adagoló Kezelőpanel Leeresztőtömlő Szervizszűrő Ajtó 5.2. TARTOZÉKOK Szállítási nyílásdugó Felhasználói kézikönyv Bemeneti tömlő (hideg víz) Hangszigetelő szivacs (opcionális)
- Page 96 5.3. KEZELŐPANEL Bekapcsolás: Termék be/kikapcsolva Start / szünet: A mosási program elindításához és szüneteltetéséhez nyomja meg ezt a gombot. Kiegészítő funkció: Egy kiegészítő funkció kiválasztását teszi lehetővé, és kigyullad, ha a kiválasztás megtörtént. Programok: A ruhanemű típusának megfelelően áll rendelkezésre. Kijelző: A k jelző...
- Page 97 A. Ajtózár D. Plusz öblítés B. Gyerekzár C. Előmosás 6. PROGRAMOK Mosóprogramok táblázata Program Töltet (kg) Kijelzett idő 2:40 Pamut 0:15 Gyors 15' 0:45 Gyors 45’ ECO 40-60 3:23 Gőz 3.25 1:48 3.25 1:01 20 °C Öblítés és 0:20 Centrifugálás 0:12 Csak centrifugálás 1:18...
- Page 98 3:23 0.782 62.9%/1200 ECO 40-60 3.25 2:39 0.482 62.9%/1200 62.9%/1200 2:39 0.340 ■ A fenti adatok csak tájékoztató jellegűek, és az eltérő tényleges használati körülmények függvényében változhatnak. ■ Az ECO 40-60 programoktól eltérő programokhoz megadott értékek csak tájékoztató jellegűek. ■ Az EN 60456:2016/prA2019 és az (EU)2019/2014, (EU)2019/2023 szabványok értelmében Az EU energiahatékonysági osztály: C...
- Page 99 Programok Vegyes, pamut és szintetikus anyagból készült ruhaneműket Kevert tartalmazó töltet esetén. Sportruházat Sportoláshoz viselt ruhák mosásához. Jeans Speciálisan farmerruházathoz Extra rövid program, kis mennyiségű enyhén szennyezett Gyors 15' ruhanemű mosására alkalmas. Kézzel vagy géppel mosható gyapjúhoz vagy gyapjút nagy mennyiségben tartalmazó...
- Page 100 Alapértelmezett Hőm. centrifugálási Ciklus alapbeállítás Egyéb funkciók sebesség (ford/ (°C) perc) Késleltetés Gőz Késleltetés 20 °C Öblítés és Késleltetés Centrifugálás Csak Késleltetés centrifugálás Dob tisztítás Késleltetés Babaápolás Késleltetés Sportruházat Késleltetés Jeans Késleltetés Gyapjú Késleltetés Szintetikus Késleltetés Kevert Késleltetés Megjegyzés! ■ Az ECO 40-60 program maximális centrifugálási sebessége, programideje és egyéb adatai a termékadatok oldalon találhatók.
- Page 101 Késleltetés Programválasztás Idő beállítása Indítsa el A Késleltetés funkció törléséhez a program indítása előtt nyomja meg a „Késleltetés” gombot, amíg a kijelzőn 0 óra jelenik meg. Ha a program már elindult, kapcsolja ki a készüléket, majd utána kapcsolja be és válasszon ki egy új programot. ELŐMOSÁS Extra mosási funkció...
-
Page 102: Karbantartás És Tisztítás
SAJÁT CIKLUS A funkció segítségével elmentheti és újra használhatja a gyakran használt programot és beállításokat. A kívánt program és beállítások kiválasztása után nyomja meg és tartsa lenyomva 3 másodpercig a hőmérsékletgombot az adott program és beállítások mentéséhez. A mentett program és beállítások újbóli használatához a mosás megkezdése előtt válassza ki a Saját ciklus programot. - Page 103 ■ A csökkenő vízáramlás azt jelzi, hogy a szűrőt meg kell tisztítani. Zárja el a csapot, és távolítsa el a vízbemeneti tömlőt a csapból. Kefével tisztítsa meg a szűrőt. A készülék hátsó oldaláról csavarja le a vízbemeneti tömlőt. Húzza ki a szűrőt egy hosszúcsőrű...
- Page 104 2. Nyissa ki a szűrőt jobbról balra 1. Nyissa ki a szervizajtót. forgatva 3. Távolítsa el az idegen 4. Zárja le az alsó fedél kupakját. anyagokat. Figyelem! ■ A készülék használatakor és a kiválasztott programtól függően forró víz kerülhet a szivattyúba. Soha ne távolítsa el a mosási ciklus közben a szivattyú fedelét, minden esetben várja meg, amíg a mosógép befejezte a ciklust és kiürült.
- Page 105 Leírás Megoldás Ellenőrizze, hogy a rögzítő(csavarokat) Rendellenes zaj eltávolították-e, stabil és vízszintes felületen van-e elhelyezve a készülék LED kijelző modellek: Leírás Megoldás sebesség Késle tetés hőm. Az ajtó becsukása után Az ajtó nincs bezárva indítsa újra megfelelően Ellenőrizze, hogy akadt-e be ruha Ellenőrizze, hogy nem sebesség...
- Page 106 ■ Soha ne próbálja megjavítani a meghibásodott vagy feltételezhetően meghibásodott készüléket. Veszélynek teheti ki a saját, és a készülék jövőbeli használóinak életét. A készülék javítását csak szakemberek végezhetik. ■ A nem megfelelő javítás esetén a garancia érvényét veszti, és a későbbi károk sem megállapíthatók.
-
Page 107: Instrucțiuni De Siguranță
1. INSTRUCȚIUNI DE SIGURANȚĂ Înainte de a utiliza acest aparat electric, citiți instrucțiunile de mai jos și păstrați-le pentru utilizare ulterioară: 1. Dacă este deteriorat cablul de alimentare, acesta trebuie să fie înlocuit de către producător, de agentul de service sau de persoane cu calificare similară, pentru a se evita pericolele posibile. - Page 108 cunoștințele necesare, dacă sunt supravegheate sau au fost instruite cu privire la utilizarea aparatului în condiții de siguranță și înțeleg pericolele implicate. Curățarea aparatului și întreținerea permisă pentru utilizator nu trebuie să fie efectuate de către copii decât sub supraveghere. 11.
- Page 109 5. Modelele cu o singură supapă de admisie trebuie conectate la sursa de alimentare cu apă rece. Modelele cu două supape de admisie trebuie conectate corect la sursele de alimentare cu apă rece și caldă. 6. Ștecărul trebuie să fie accesibil după instalare. 7.
- Page 110 19. Înainte de a spăla pentru prima dată rufe, mașina de spălat trebuie termine un ciclu întreg de spălare fără a avea rufe în ea. 20. Nu introduceți solvenți inflamabili, explozivi sau toxici în mașină (de ex. benzină sau alcool) și nu le folosiți pe acestea ca detergent.
- Page 111 28. Produsele pentru înmuierea țesăturilor sau alte substanțe similare trebuie să fie utilizate așa cum se specifică în instrucțiunile acelor produse. 29. Ușa aparatului poate fi deschisă în timpul unui ciclu, după ce apa din cuvă a fost evacuată. Aceasta durează...
-
Page 112: Date Tehnice
2. DATE TEHNICE 2.1. SPECIFICAȚII TEHNICE Alimentare 220 - 240 V~,50 Hz Putere nominală la intrare 2100 W Curent max. 10 A Presiunea standard de intrare a apei 0.1~1 MPa Capacitate spălare 6,5 kg Dimensiuni (L x A x Î în mm) 400 x 610 x 875 Greutate netă... - Page 113 Capacitate Temperatura nominală maximă în Grad de umiditate interiorul 62,9 Jumătate reziduală 0 (%) materialelor tratate (°C) Sfert Capacitate 1200 nominală Viteza de rotație ft Clasa de eficiență a uscării Jumătate 1200 (rpm) prin centrifugare ( Sfert 1200 Capacitate 3:23 nominală...
- Page 114 3. INSTALARE 3.1. ZONA DE INSTALARE Avertizare! ■ Stabilitatea este importantă pentru a preveni deplasarea produsului! ■ Asigurați-vă că produsul nu stă pe cablul de alimentare. L≥ 20 mm Înainte de instalarea mașinii de spălat, se va alege locația cu următoarele caracteristici: Suprafață...
- Page 115 Îndepărtați șuruburile inclusiv Slăbiți cele 4 șuruburi de elementele de cauciuc și Acoperiți orificiile folosind transport cu o cheie. păstrați-le pentru o utilizare capacele aferente. ulterioară. 3.3. INSTALAREA BURETELUI ACUSTIC Puteți instala bureți acustici, care pot reduce în mod eficient zgomotul cauzat de mașină...
- Page 116 Conectați furtunul de alimentare cu apă la supapa de admisie a apei și un robinet de apă rece conform indicațiilor. 3.5.2. FURTUN DE SCURGERE Avertizare! ■ Nu îndoiți și nu întindeți furtunul de scurgere. ■ Poziționați furtunul de scurgere în mod corespunzător, în caz contrar scurgerile de apă...
- Page 117 ■ Aparatul dvs. a fost verificat amănunțit înainte de a părăsi fabrica. Pentru a elimina orice cantitate de apă reziduală și a neutraliza posibilele mirosuri, este recomandat să curățați aparatul înainte de prima utilizare. Pentru aceasta, porniți programul Bumbac la 90°C fără rufe sau detergent. 4.1.1.
- Page 118 4.1.3. DUPĂ SPĂLARE Toate luminile sunt stinse. 4.2. ÎNAINTE DE FIECARE SPĂLARE ■ Temperatura ambientală a mașinii de spălat trebuie să fie de 5-40°C. Dacă este utilizată sub 0°C, supapa de admisie și sistemul de evacuare pot fi deteriorate. Dacă mașina este instalată...
- Page 119 4.3. DOZATORUL DE DETERGENT Prespălare Balsam Spălare principa ă Avertisment! ■ Detergentul trebuie adăugat numai în „cazul I” după selectarea pre-spălării pentru mașinile cu această funcție. ■ Nu depășiți marcajul de nivel "MAX" atunci când adăugați detergentul, aditivii sau balsamul. Program Program Bumbac...
- Page 120 Temp. de Detergent recomandat Cicluri de spălare Tip de rufe și textile spălare Detergent pentru Rufe colorate din rufe colorate sau de material sintetic Sintetice Rece/20/40 putere medie fără sau țesături ușor înălbitori optici de întreținut Detergent de putere Materiale delicate, Sintetice 20/40 medie...
-
Page 121: Descrierea Produsului
5. DESCRIEREA PRODUSULUI 5.1. VEDERE DIN FAȚĂ Ilustrația produsului are doar rol de referință și poate diferi de produsul actual. Cablul de alimentare Dozatorul de detergent Panou de control Tambur Furtun de scurgere Filtru de service Ușă 5.2. ACCESORII Orificii mufe pentru transport Manual de utilizare Furtun de alimentare (apă... -
Page 122: Panou De Control
5.3. PANOU DE CONTROL Alimentare: Produsul este pornit/oprit Start/Pauză: Apăsați butonul pentru a porni sau întrerupe ciclul de spălare. Opțiune: Acest lucru vă permite să selectați o funcție suplimentară și se va aprinde când este selectată. Programe: Dispon bile în funcție de tipul de rufe. Display-ul: Afișajul afișează... - Page 123 6. PROGRAME Tabelul Programelor de spălare Program Încărcătură (kg) Durată afișaj Bumbac 2:40 Rapid 15’ 0:15 Rapid 45' 0:45 ECO 40-60 3:23 Abur 3.25 1:48 20°C 3.25 1:01 Clătire & Stoarcere 0:20 Numai Stoarcere 0:12 Curățare cuvă 1:18 Articole bebeluși 2:01 Articole sportive 3.25...
- Page 124 ■ referitor la EN 60456:2016/prA2019 Cu (UE)2019/2014, (UE)2019/2023, Clasa de eficiență energetică UE este: D Program de testare a energiei: ECO 40-60 Alte specificații ca cele prestabilite. Jumătate de încărcătură pentru o mașină de 6,5 kg: 3,25 kg. Un sfert de încărcătură pentru o mașină de 6,5 kg: 1,5 kg, Cea mai ridicată...
- Page 125 Programe Clătire & Clătire suplimentară cu stoarcere. Stoarcere Setat special în această mașină pentru curățarea tamburului și a conductei. Acesta permite sterilizarea la o temperatură ridicată de 90°C pentru o spălare mai ecologică. Când acest program este Curățare rulat, nu pot fi adăugate rufe sau alte articole. cuvă...
- Page 126 Viteză de Temp. stoarcere Ciclu implicită Funcții suplimentare implicită în (°C) Lână Întârziere Sintetice Întârziere Amestecate Întârziere Notă! ■ Pentru viteza maximă de stoarcere, durata programului și alte detalii ale programului ECO 40-60, consultați conținutul paginii Fișa produsului. ■ Tabelul indică ce opțiuni oferă fiecare ciclu pentru reglaj. Dacă reglajul nu este posibil pentru un ciclu TEMP Temp.
- Page 127 CLĂTIRE SUPLIMENTARĂ Rufele vor fi clătite suplimentar după selectarea acestei funcții. BLOCAREA PENTRU COPII Această funcție este destinată evitării utilizării necorespunzătoare a comenzilor de către copii. Apăsați simultan [Stoarcere] și [Întârziere] timp de Stoarcere Întârziere 3 secunde până la semnalul sonor. Indicatorul de Blocare acces copii se aprinde.
- Page 128 3456, atunci lumina 1 clipește de 3 ori, lumina 2 clipește de 4 ori, lumina 3 clipește de 5 ori și lumina 4 clipește de 6 ori. Pentru a utiliza din nou aparatul în mod normal, repetați pasul 1 de mai sus. 7.
- Page 129 7.4. CURĂȚAREA DOZATORULUI DE DETERGENT Trageți sertarul dozatorului Curățați sertarul Introduceți sertarul apăsând butonul A dozatorului sub apă dozatorului Apăsați în jos locația săgeții de pe capacul balsamului din interiorul sertarului distribuitorului. Ridicați clema în sus și scoateți capacul de înmuiere și spălați toate canelurile cu apă.
- Page 130 de spălare, așteptați întotdeauna până când aparatul a terminat ciclul și este gol. Când remontați capacul, asigurați-vă că este strâns înapoi în siguranță. 8. DEPANARE Pornirea aparatului nu oprește funcționarea sau nu se oprește între timp. Încercați mai întâi să găsiți o soluție la problemă, dacă nu, contactați centrul de service. Descriere Motiv Soluție...
- Page 131 Descriere Motiv Soluție temp. viteză Întârziere Verificați dacă furtunul de Evacuare apă lentă evacuare este blocat temp. viteză Întârziere Revărsare de apă Reporniți mașina de spălat Vă rugăm să încercați din nou mai întâi, sunați la Altele Altele linia de service dacă mai sunt probleme.
- Page 132 600147865/600147867/600147869 MFE65-JT1211/F01-EU(NC)-J1...
Need help?
Do you have a question about the Q.6975 and is the answer not in the manual?
Questions and answers