Table of Contents
Advertisement
Available languages
Available languages
Advertisement
Table of Contents

Subscribe to Our Youtube Channel
Related Manuals for Qilive Q.6864


Summary of Contents for Qilive Q.6864
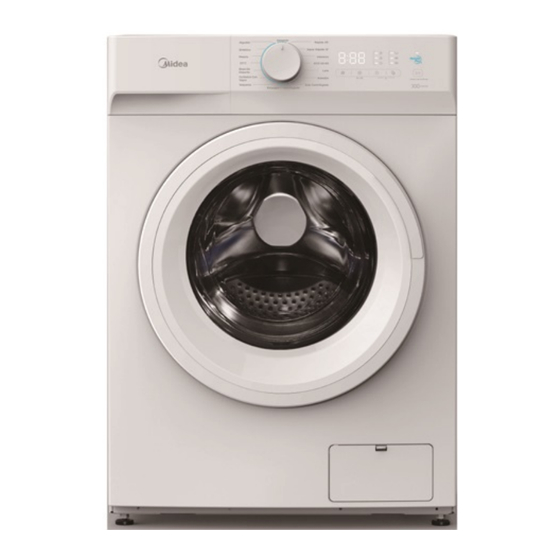
- Page 1 Front washing machine 7kg Q.6864 Lavadora de carga frontal 7kg...
- Page 2 User manual P. 4 Manual de instrucciones P. 29...
- Page 4 1. SAFETY INSTRUCTIONS Before using this electrical appliance, read the instructions below carefully and keep them for future reference: 1. If the supply cord is damaged, it must be replaced by the manufacturer, its service agent or similarly qualified persons in order to avoid a hazard. 2.
- Page 5 supervision. 11. Children of less than 3 years should be kept away unless continuously supervised. Children shall not play with the appliance. 12. Pets and children may climb into the machine. Check the machine carefully before use. 13. The glass door may get very hot during use. Keep children and pets away from the machine during use.
- Page 6 packaging and transport bolts before use. 8. This product is for home use only and is only designed for machine-washable textiles. 9. This appliance is intended to be used in household and similar applications such as: – staff kitchen areas in shops, offices and other working environments;...
- Page 7 rigid items such as coins, jewelry, nails, screws or stones may cause serious damage to the machine. 22. Check whether the water inside the drum has been drained before opening the door. Do not open the door if there is any water visible. 23.
- Page 8 equipment”. This marking means that this equipment, at the end of its useful life, cannot be disposed of with other household waste. The user is required to deliver it to operators who collect used electrical and electronic equipment. Collection operators, including local collection points, shops and local authorities, create an appropriate system for collecting equipment.
- Page 9 Height Rated capacity ( Width Dimensions in cm (kg) Depth EEIW ( 51.5 Energy efficiency class ( Washing Rinsing effectiveness 1.031 efficiency index ( (g/kg) ( Energy consumption in kWh per Water consumption in litres cycle, based on per cycle, based on the the eco 40-60 eco 40-60 programme.
- Page 10 This product has been designed to release silver ions during the washing cycle Additional information: Weblink to the supplier’s website, where the information in point 9 of Annex II to Commission Regulation (EU) 2019/2023 ( ) can be found: ) for the eco 40-60 programme. ) changes to these items shall not be considered relevant for the purposes of paragraph 4 of Article 4 of Regulation (EU) 2017/1369.
- Page 11 Adjust the Cycle temperature Adjust spin speed in rpm Additional functions in °C Wash cycles 1400 Cotton 1400 Synthetic 1200 20°C 1000 Sportswear 1000 Steam care Jeans Rinse & Spin 1000 Spin Only 1000 Bulky 1000 Wool ECO 40-60 Intensive Quick 15' Rapid 45'...
- Page 12 Programme Load(kg) Display Time Cotton 3:49 Synthetic 3:28 1:30 20°C 1:11 Sportswear 0:57 Steam care 1:58 Jeans 1:56 Rinse & Spin 0:30 Spin Only 0:12 Bulky 1:48 Wool 1:07 ECO 40-60 3:38 Intensive 3:48 Quick 15' 0:15 Rapid 45' 0:45...
- Page 13 Washing Programmes Table Residual Nominal Highest moisture capacity Cycle Energy Water washing in % Programme Washing/ duration consumption consumption temperature /spin Drying in in h: min in kWh/cycle in L/cycle °C speed in Cotton 3:49 1.05 Synthetic 3:28 0.715 1:30 0.713 20°C 1:11...
- Page 14 Loading the household washing machine up to the capacity indicated for the respective programmes will contribute to energy and water savings. Noise and remaining moisture content are influenced by the spinning speed: the higher the spinning speed in the spinning phase, the higher the noise and the lower the remaining moisture content.
- Page 15 A. Display B. Child lock Wash time C. Door lock Delay time D. Pre wash Speed E. Extra rinse Error F. Extra wash G. Delay Temp. 3.5. DETERGENT DISPENSER Pre-wash detergent Main wash detergent Softener Note: Detergent only needs to be added in “compartment I”...
- Page 16 Note! ■ When using powdered detergent, it is recommended to add some water to the detergent box to prevent the inlet of the detergent box from becoming blocked and overflowing when the machine is filling with water. ■ For optimal washing results and to reduce water and energy consumption, choose a suitable type of detergent for the selected washing temperature.
- Page 17 4.1. INSTALLATION AREA Warning! ■ The product must be placed in a stable location to prevent it from moving during use. ■ Ensure that the appliance is not standing on the power cord. Before installing the machine, follow the steps below to select a suitable location: Choose a rigid, dry, and level surface.
- Page 18 4.3. LEVELLING THE WASHING MACHINE Warning! ■ The lock nuts on all four feet must be screwed tightly against the housing. Check if the legs are securely attached to the housing. If not, turn them to their original positions and tighten the nuts. Loosen the lock nut and turn the foot until it is in close contact with the floor.
- Page 19 4.4.2. DRAIN HOSE Warning! ■ Do not bend or stretch the drain hose. ■ Position the drain hose properly, otherwise damage may be caused due to water leakage. There are two ways to position the end of the drain hose: Place it directly into the water trough.
- Page 20 5. USE 5.1. QUICK START Caution! ■ Before washing, make sure the washing machine is properly installed. ■ Before washing for the first time, the washing machine should be run for a full cycle without clothes as follows. Calibration It is recommended to calibrate the washing machine before first use. Empty the washing machine.
- Page 21 Knot long strips, zip or Check the label Empty the pockets button Put small clothes into a Turn easy-pilling and Separate clothes with wash bag long-pile fabric inside out different textures Warning! ■ When washing single items of clothing, it may cause the washing machine to become unbalanced.
- Page 22 Programme Option Prewash Extra Rinse Extra Wash Cotton ○ ○ ○ Synthetic ○ ○ ○ ○ ○ ○ 20 °C ○ Sportswear ○ ○ ○ Steam care ○ ○ Jeans ○ ○ Rinse & Spin ○ Spin Only Bulky ○ ○...
- Page 23 Press this button to regulate the temperature: Cold, 20°C, 30°C, 40°C, 60°C, 90°C 5.1.2.4. DELAY Setting the Delay function: Select a programme. Press the delay button to set the time (the delay time is 0 - 24 h). Press the start/pause button to commence the delay operation. Select the Set the time Start...
- Page 24 Unlock the door lock. Reload the clothes, close the door and press [Start/Pause] again. Press [Start/Pause] Reload the Start for 3 seconds clothes Caution! Do not use the reload function when the water level is over the edge of the inner tub or the temperature is high.
- Page 25 6.1. CLEANING THE HOUSING Regular maintenance can extend the working life of the appliance. The surface of the appliance can be cleaned with diluted, non-abrasive neutral detergents when necessary. If there is any water overflow, use a wet cloth to wipe it off immediately. Do not allow the housing to come into contact with sharp items.
- Page 26 Note! ■ You can pull the filter out of the pipe for cleaning. ■ Reconnect and turn on the tap. 6.4.3. CLEANING THE DETERGENT DISPENSER Press the button on the softener cover inside the dispenser drawer in position A (see arrow in figure 1). Lift the clip and remove the softener cover.
- Page 27 Emergency drain hose Pull out the emergency Replace the emergency drain hose with a Open the service door drain hose after the water 90-degree turn and has drained remove the cover cap Open the filter by turning Replace the filter and Remove foreign matter it counter-clockwise close the service door...
- Page 28 Error Display Cause Solution Restart after the door is closed Door is not closed properly Check if the clothes are stuck Check if the water pressure is too low Water inlet problem while Straighten the water pipe washing Check if inlet valve filter is blocked Check if the drain hose is Draining takes too long...
- Page 29 1. INSTRUCCIONES DE SEGURIDAD Antes de usar este aparato, lea atentamente las instrucciones siguientes y consérvelas para consultarlas en el futuro. 1. Si el cable de alimentación está dañado, deberá cambiarlo el fabricante, su agente de servicio técnico o una persona con una cualificación similar, con el fin de evitar peligros.
- Page 30 sensoriales o mentales, o sin la experiencia y los conocimientos necesarios, si están supervisados o han recibido instrucciones en relación con el uso seguro del aparato y comprenden los riesgos que ello implica. Las tareas de limpieza y mantenimiento a cargo del usuario no podrán ser realizadas por niños sin supervisión.
- Page 31 3. Los orificios de ventilación no deben quedar obstruidos por una alfombra. 4. No debe instalarse la lavadora en cuartos de baño o lugares húmedos, ni en habitaciones en las que haya explosivos o gases cáusticos. 5. Los modelos con una única válvula de entrada de agua se deben conectar al suministro de agua fría.
- Page 32 sobresalga. No utilice la puerta de la lavadora como asa para mover el aparato. 15. Este aparato es pesado. Transpórtelo con cuidado. 16. No cierre la puerta de la lavadora con demasiada fuerza. Si le resulta difícil cerrar la puerta, compruebe que la ropa esté...
- Page 33 aparatos que consuman combustibles (incluyendo llamas abiertas). 27. Los artículos que se hayan ensuciado con sustancias como aceite de cocina, acetona, alcohol, gasolina, queroseno, quitamanchas, trementina, ceras y productos para eliminar cera deben lavarse con agua caliente y una cantidad adicional de detergente antes de secarse en el aparato.
- Page 34 debe entregarlo a los operadores de recogida de los aparatos eléctricos y electrónicos usados. Los operadores de recogida, que incluyen los puntos de recogida locales, las tiendas y las administraciones locales, crean un sistema adecuado para la recogida del aparato. Una recogida adecuada de los aparatos eléctricos y electrónicos usados ayuda a evitar los impactos nocivos para la salud de las personas y el medio ambiente que...
- Page 35 Índice de Eficacia de aclarado eficiencia de 1.031 (g/kg) ( lavado ( Consumo de energía en kWh Consumo de agua en por ciclo, basado litros por ciclo, basado en en el programa el programa Eco 40-60. Eco 40-60. El 0.444 El consumo de agua real consumo de dependerá...
- Page 36 Información adicional: Enlace a la página web del proveedor, en la que se encuentra la información del punto 9 del Anexo II del Reglamento de la Comisión (UE) 2019/2023 ( ) para el programa Eco 40-60. ) los cambios en estos puntos no deben considerarse relevantes para los fines del párrafo 4 del artículo 4 del Reglamento (UE) 2017/1369.
- Page 37 Ajuste de la Ciclo temperatura Ajuste se la velocidad en rpm Funciones adicionales en ºC Ciclos de lavado 1400 Algodón 1400 Sintético 1200 Mezcla 20°C 1000 Ropa De Deporte Cuidados Con 1000 Vapor Vaqueros Enjuague y 1000 Centrifugado Solo 1000 Centrifugado Edredón 1000...
-
Page 38: Table Of Contents
Tabla de programas de lavado Capaci- Humedad residual Temperatura nominal Duración Consumo de en % Consumo de máxima de Programa del ciclo energía en /velocidad agua en l/ciclo lavado en lavado / en h:min kWh/ciclo de centrif- °C secado ugado en en kg Algodón 3:49... - Page 39 y la velocidad de centrifugado a la que se ha conseguido. El programa ECO 40-60 puede limpiar ropa de algodón con un grado de suciedad normal, apta para el lavado a máquina a 40 °C o 60 °C, junta en el mismo ciclo. Este programa se utiliza para evaluar el cumplimiento de la regulación (UE) 2019/2023.
-
Page 40: Algodón 7,0 3:49
A. Pantalla B. Bloqueo para niños Tiempo de lavado C. Bloqueo de la puerta Tiempo de retardo D. Prelavado Velocidad E. Aclarado adicional Error F. Lavado adicional G. Retardo Temp. 3.5. DISPENSADOR DE DETERGENTE Detergente para prelavado Detergente para el lavado principal Suavizante Nota: Solo es necesario añadir detergente en el «compartimento I»... -
Page 41: Lana
¡Nota! ■ Si utiliza detergente en polvo, le recomendamos que añada un poco de agua en el compartimento de detergente para evitar que la entrada de dicho compartimento se obstruya y se desborde cuando la lavadora se esté llenando de agua. - Page 42 4.1. ÁREA DE INSTALACIÓN ¡Advertencia! ■ El producto debe colocarse en un lugar estable para evitar que se mueva durante el funcionamiento. ■ Asegúrese de que el aparato no esté colocado encima del cable de alimentación. Antes de instalar la lavadora, siga los pasos que se indican a continuación para seleccionar una ubicación adecuada: Escoja una superficie rígida, seca y nivelada.
- Page 43 4.3. NIVELAR LA LAVADORA ¡Advertencia! ■ Las tuercas de bloqueo de los cuatro pies deben estar enroscados firmemente contra la carcasa. Compruebe que las patas estén sujetas de forma segura a la carcasa. Si no lo estuvieran, póngalas en su posición original y apriete las tuercas. Afloje la tuerca de bloqueo y gire el pie hasta que esté...
- Page 44 Conecte el otro extremo del tubo de entrada a la válvula de entrada en parte posterior de la lavadora y apriete el tubo firmemente girándolo en sentido horario. Válvula de entrada Manguera de de agua entrada de agua 4.4.2. MANGUERA DE DESAGÜE ¡Advertencia! ■...
- Page 45 5.1. GUÍA DE INICIO RÁPIDO ¡Precaución! ■ Antes de lavar, asegúrese de que la lavadora esté instalada correctamente. ■ Antes de utilizar la lavadora por primera vez, ejecute un ciclo de lavado completo sin que haya ropa dentro. Calibración Se recomienda calibrar la lavadora antes del primer uso. Vacíe la lavadora.
- Page 46 menor o igual que 0 °C, debe trasladarse a un área con una temperatura ambiente más alta para asegurar que la manguera de entrada de agua y la manguera de evacuación no estén congeladas antes del uso. ■ Compruebe las etiquetas de la ropa y el detergente antes de lavar. Use detergente que no forme espuma o que produzca poca espuma, adecuado para lavadoras.
-
Page 47: Intensivo 7,0 3:48
Programa Opción Prelavado Aclarado adicional Lavado adicional Algodón ○ ○ ○ Sintético ○ ○ ○ Mezcla ○ ○ ○ 20 °C ○ Ropa De ○ ○ Deporte Cuidados ○ ○ ○ Con Vapor Vaqueros ○ ○ Enjuague y ○ Centrifugado Solo Centrifugado Edredón... -
Page 48: Rápido 45
Velocidad Velocidad Programa predeterminada Programa predeterminada (rpm) (rpm) 1400 1400 Algodón 1400 Solo Centrifugado 1000 Sintético 1200 Edredón 1000 Mezcla Lana 20 °C 1000 Eco 40-60 ─ Ropa De Intensivo Deporte Cuidados Súper Rápido 15’ 1000 Con Vapor Vaqueros Rápido 45’ Enjuague y 1000 Centrifugado... - Page 49 Mantener pulsados los botones Seleccionar el Iniciar [Demora] y [Func.] durante 3 programa segundos hasta que se oiga un pitido. ¡Precaución! ■ El «Bloqueo para niños» solo se puede desbloquear manteniendo pulsados los dos botones. Con el «Bloqueo para niños» se bloquean todos los botones, excepto el botón de encendido y el botón del «Bloqueo para niños».
- Page 50 5.1.3. DESPUÉS DEL LAVADO Se emitirá un pitido y en la pantalla aparecerá «End». 6. MANTENIMIENTO Y LIMPIEZA ¡Advertencia! ■ Antes de realizar tareas de mantenimiento, desenchufe la lavadora y cierre el grifo. 6.1. LIMPIEZA DE LA CARCASA El mantenimiento regular puede alargar la vida útil del aparato.
- Page 51 6.4. LIMPIEZA DEL FILTRO DE ENTRADA ¡Nota! ■ El filtro de entrada debe limpiarse si el flujo de agua se reduce. ■ Limpie la entrada del filtro cada 3 meses para asegurar un funcionamiento óptimo del aparato. 6.4.1. LIMPIEZA DEL FILTRO EN EL GRIFO Cierre el grifo.
- Page 52 ¡Nota! ■ No use alcohol, disolventes ni productos químicos para limpiar la lavadora. ■ Limpie el dispensador de detergente cada 3 meses para asegurar un funcionamiento óptimo del aparato. 6.4.4. LIMPIEZA DEL FILTRO DE LA BOMBA DE DESAGÜE ¡Advertencia! ■ ¡Tenga cuidado con el agua caliente! ■...
- Page 53 6.5. RESOLUCIÓN DE PROBLEMAS El aparato no se pone en marcha o se para durante el funcionamiento. Intente encontrar una solución al problema. Si esto no fuese posible, póngase en contacto con el servicio de atención al cliente. Descripción Causa Solución Vuelva a ponerla en marcha después de...
- Page 56 600147706 MFG70-JU1415BP/C14E-EU(NA)
Need help?
Do you have a question about the Q.6864 and is the answer not in the manual?
Questions and answers