Table of Contents
Advertisement
Quick Links
UV Fluorescence SO
© Teledyne API (TAPI)
9970 Carroll Canyon Road
San Diego, California
92131-1106
USA
Part Number 092910100C DCN8656
User Manual
Models N100, N100H
Analyzers
2
Toll-free Phone: +1 800-324-5190
Phone: +1 858-657-9800
Fax: +1 858-657-9816
Email:
api-sales@teledyne.com
Website:
http://www.teledyne-api.com
14 February 2023
Advertisement
Table of Contents
Troubleshooting

Related Manuals for TELEDYNE API N100


Summary of Contents for TELEDYNE API N100
- Page 1 User Manual Models N100, N100H UV Fluorescence SO Analyzers © Teledyne API (TAPI) Toll-free Phone: +1 800-324-5190 9970 Carroll Canyon Road Phone: +1 858-657-9800 San Diego, California Fax: +1 858-657-9816 92131-1106 Email: api-sales@teledyne.com Website: http://www.teledyne-api.com Part Number 092910100C DCN8656 14 February 2023...
-
Page 3: Notice Of Copyright
NOTICE OF COPYRIGHT © 2021-22 Teledyne API (TAPI). All rights reserved. TRADEMARKS All trademarks, registered trademarks, brand names or product names appearing in this document are the property of their respective owners and are used herein for identification purposes only. -
Page 4: Safety Messages
Technician Symbol: All operations marked with this symbol are to be performed by qualified maintenance personnel only. Electrical Ground: This symbol inside the instrument marks the central safety grounding point for the instrument. Teledyne API N100, N100H SO Analyzers 092910100C DCN8656... - Page 5 Note that the safety of a system that may incorporate this product is the end user’s responsibility. For Technical Assistance regarding the use and maintenance of this instrument or any other Teledyne API product, contact Teledyne API’s Technical Support Department: Telephone: 800-324-5190 Email: api-techsupport@teledyne.com...
-
Page 6: Consignes De Sécurité
être effectuées uniquement par du personnel de maintenance qualifié. Mise à la terre : Ce symbole à l’intérieur de l’instrument détermine le point central de la mise à la terre sécuritaire de l’instrument. Teledyne API N100, N100H SO Analyzers 092910100C DCN8656... - Page 7 Échantillonnage de gaz combustibles Risque d’explosion et d’incendie Techniques de manutention, Blessure corporelle soulevage et de transport inappropriées Notez que la sécurité d’un système qui peut incorporer ce produit est la responsabilité de l’utilisateur final. 092910100C DCN8656 Teledyne API N100, N100H SO Analyzers...
-
Page 8: Warranty
PRODUCT RETURN All units or components returned to Teledyne API should be properly packed for handling and returned freight prepaid to the nearest designated Service Center. After the repair, the equipment will be returned, freight prepaid. -
Page 9: About This Manual
Provides information about that which could either affect accuracy of instrument readings or cause loss of data. Provides information pertinent to the proper care, Note operation or maintenance of the instrument or its parts. 092910100C DCN8656 Teledyne API N100, N100H SO Analyzers... -
Page 10: Table Of Contents
N100 Connections w/Ambient Zero/Ambient Span (Z/S) Valves Option ....34 N100 Connections w/Ambient Zero/Pressurized Span Valves Option....35 N100 Connections w/Zero Scrubber & Internal Zero Span (IZS) Option ....36 Pneumatic Flow Diagrams ....................38 Pneumatic Flow for Basic Configuration ............... 39 Pneumatic Flow for N100 Zero/Span Valves Option .......... - Page 11 Replacing the 47 mm Sample Particulate Filter Option ............96 Changing the DFU Sample Filter Option ................97 Changing/Removing the IZS Permeation Tube (N100 option) ..........97 Changing the External Zero Air Scrubber Option ..............98 Servicing Critical Flow Orifices .................... 99...
- Page 12 PMT Optical Filter ....................149 Optical Lenses ........................150 Measurement Interferences ....................151 Direct Interference ....................151 UV Absorption by Ozone ..................151 Dilution ......................... 151 Third Body Quenching ..................151 Light Pollution ...................... 152 Teledyne API N100, N100H SO Analyzers 092910100C DCN8656...
-
Page 13: List Of Figures
Figure 2-8. N100 Basic Connections from Gas Dilution Calibrator ............. 32 Figure 2-9. N100H Basic Connections from Gas Dilution Calibrator ............32 Figure 2-10. N100 Basic Connections from Bottled Span Gas (N100H: add external pump to Exhaust) .. 33 Figure 2-11. Gas Line Connections with Z/S Valves Option ............... 34 Figure 2-12. - Page 14 Figure 5-21. DC Pump Flow Meter (DC Pump Control Board Bottom) ............ 126 Figure 5-22. IZS Option Board Connectors ....................126 Figure 5-23. Mainboard Connectors ......................127 Figure 5-24. N100 Sensor Module ......................128 Figure 5-25. N100H Sensor Module ......................129 Figure 5-26. Sensor Module Mounting Screws ..................130 Figure 5-27.
- Page 15 Table 2-4. Digital Input/Output Pin Assignments ..................28 Table 2-5. JP1 Configurations for Serial Communication ................29 Table 2-6. N100 Zero/Span and Sample/Cal Valve Operating States ............41 Table 2-7. Valve Operating States for Ambient Zero/Pressurized Span Option ......... 42 Table 2-8.
- Page 16 This page intentionally left blank. Teledyne API N100, N100H SO Analyzers 092910100C DCN8656...
-
Page 17: Introduction, Specifications, Approvals, & Compliance
SO present in the sample gas. The N100 model is typically used in monitoring ambient air quality, while the N100H model has applications in continuous emission monitoring systems in industrial settings. -
Page 18: Specifications
Humidity Range 0-95% RH non-condensing Environmental Conditions Installation Category (Over voltage Category) II Pollution Degree 2 Intended for Indoor Use Only at Altitudes ≤ 2000m All specifications are based on constant conditions. Teledyne API N100, N100H SO Analyzers 092910100C DCN8656... -
Page 19: Epa Designation
As defined by the USEPA Defined as twice the zero noise level by the USEPA EPA DESIGNATION Teledyne API’s Model N100 Fluorescent SO Analyzer is officially designated as US EPA Federal Equivalent Method Number EQSA-0495-100 for sulfur dioxide measurement. The official List of Designated Reference and Equivalent Methods is published in the U.S. -
Page 20: Compliance And Certifications
COMPLIANCE AND CERTIFICATIONS This product is CE compliant and adheres to the Low Voltage and ElectroMagnetic Compatibility directives. For any other certifications, please refer to this product’s specifications sheet on our website. Teledyne API N100, N100H SO Analyzers 092910100C DCN8656... -
Page 21: Getting Started
Do not operate this instrument without first removing dust plugs from SAMPLE and EXHAUST ports on the rear panel. Note Teledyne API recommends that you store shipping containers and materials for future use if/when the instrument should be returned to the factory for repair and/or calibration service. See... -
Page 22: Ventilation Clearance
AREA MINIMUM REQUIRED CLEARANCE 10 cm / 4 in Back of the instrument 2.5 cm / 1 in Sides of the instrument 2.5 cm / 1 in Above and below the instrument Teledyne API N100, N100H SO Analyzers 092910100C DCN8656... -
Page 23: Instrument Layout
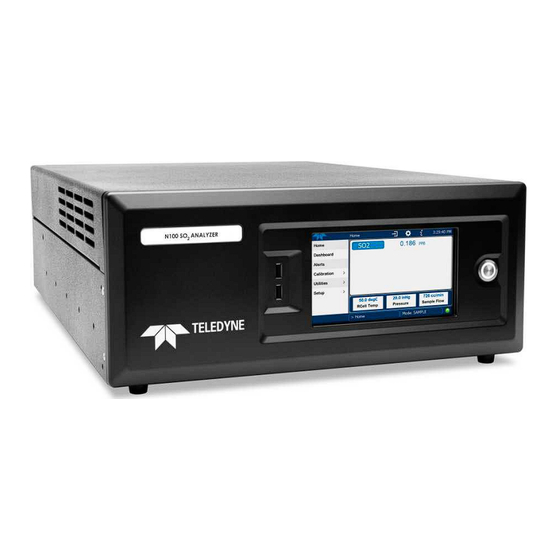
The front panel (Figure 2-1) includes two USB ports for peripheral device connections, which can be used with mouse and keyboard as alternatives to the touchscreen interface, or with flash drive for uploads/downloads (devices not included). Figure 2-1. Front Panel Layout 092910100C DCN8656 Teledyne API N100, N100H SO Analyzers... -
Page 24: Rear Panel
REAR PANEL Figure 2-2 shows the layout of the rear panel. Figure 2-2. Rear Panel Layout, Base Unit (options include additional pneumatic port fixtures) Teledyne API N100, N100H SO Analyzers 092910100C DCN8656... -
Page 25: Table 2-2. Rear Panel Description
On units with zero/span valve option installed, attach a gas line to the source of zero air ZERO AIR here. In the N100 only, if a permeation oven, also known as internal zero/span valve (IZS), (with valve option) option is installed attach the zero air scrubber here. -
Page 26: Internal Chassis
INTERNAL CHASSIS This Section shows the internal chassis configuration for each model including options. Figure 2-3. N100 Internal Chassis Layout Teledyne API N100, N100H SO Analyzers 092910100C DCN8656... -
Page 27: Figure 2-4. N100H Internal Chassis Layout
Figure 2-4. N100H Internal Chassis Layout 092910100C DCN8656 Teledyne API N100, N100H SO Analyzers... -
Page 28: Connections And Startup
Ensure that there is enough space to easily disconnect this instrument from the power source if necessary. Teledyne API recommends that you store shipping containers and materials for future use if/when the instrument should be returned to the factory for repair and/or calibration service. -
Page 29: Connection Analog Outputs Option
Setup>Analog Outputs menu. Ground Ground Isolated Current Outputs I Out + I Out - I Out + User definable through the Setup>Analog Outputs menu. I Out - I Out + I Out - 092910100C DCN8656 Teledyne API N100, N100H SO Analyzers... -
Page 30: Connecting The Digital I/O Expansion Board Option
Utilities>Diagnostics>Digital Outputs menu Ground Digital Input1 = Remote Zero Cal Digital Input2 = Remote Span Cal (Digital Input3 not used) View status in Utilities>Diagnostics>Digital Inputs menu Ground Teledyne API N100, N100H SO Analyzers 092910100C DCN8656... -
Page 31: Connecting Communications Interfaces
2-3, 5-6, 9-12 232Rx 232Tx View/edit the Communications parameters in the Setup>Comm>COM menu. Baud rate: 115200 bits per second (baud) • Data Bits: 8 data bits with 1 stop bit • • Parity: None 092910100C DCN8656 Teledyne API N100, N100H SO Analyzers... -
Page 32: Pneumatic Connections
) is a toxic gas. Obtain a Safety Data Sheet (SDS) for this material, and rigorously follow the safety guidelines described there. Vent the exhaust from the analyzer’s internal pump (in N100) to outside the immediate area or shelter surrounding the instrument. -
Page 33: Critical Tubing, Pressure, Venting And Exhaust Requirements
Venting (to prevent back diffusion and pressure effects): • Run tubing outside the enclosure or at least away from immediate area surrounding the instrument. Exhaust Outlet: • Run tubing outside the enclosure. 092910100C DCN8656 Teledyne API N100, N100H SO Analyzers... -
Page 34: Basic Connections From Calibrator
≥ span gas concentration Calibrator MODEL T701 Zero Gas SAMPLE Chassis Generator EXHAUST vented outside immediate area Figure 2-8. N100 Basic Connections from Gas Dilution Calibrator Source of SAMPLE Gas VENT here Removed during MODEL T700 MODEL 701 if sample gas is... -
Page 35: Figure 2-10. N100 Basic Connections From Bottled Span Gas (N100H: Add External Pump To Exhaust)
EXHAUST vented outside immediate area Figure 2-10. N100 Basic Connections from Bottled Span Gas (N100H: add external pump to Exhaust) For the analyzer’s basic configuration, in addition to tubing, pressure, venting, and exhaust requirements set out in Section 2.3.2.1, make the following pneumatic connections:... -
Page 36: N100 Connections W/Ambient Zero/Ambient Span (Z/S) Valves Option
ALIBRATION OURCES SPAN GAS Attach a gas line from the source of calibration gas (e.g. a Teledyne API's T700 Dynamic Dilution Calibrator) to the SPAN1 inlet. ZERO AIR Zero air is supplied by the zero air generator such as a Teledyne API's T701. -
Page 37: N100 Connections W/Ambient Zero/Pressurized Span Valves Option
Chassis SPAN1 SPAN2/VENT ZERO AIR Zero Air Scrubber Figure 2-12. N100 Gas Line Connection w/Ambient Zero/Pressurized Span Valves Option In addition to tubing, pressure, venting, and exhaust requirements set out in Section 2.3.2.1, attach the following pneumatic lines: AMPLE OURCE Attach a sample inlet line to the SAMPLE inlet fitting. -
Page 38: N100 Connections W/Zero Scrubber & Internal Zero Span (Izs) Option
ZERO AIR External Zero Air Scrubbe Figure 2-13. N100 Gas Line Connection w/Zero Scrubber and IZS Option The internal span gas generator utilizes an SO permeation tube as a span gas source (see the “Internal Span Gas Generation” at the end of this section). The accuracy of these devices is only about ±5%. -
Page 39: Figure 2-14. N100 Pneumatic Connections For Precision Calibration When Izs Generator Present
External Zero is not already vented. Air Scrubbe PUMP Figure 2-14. N100 Pneumatic Connections for Precision Calibration when IZS Generator Present In addition to tubing, pressure, venting, and exhaust requirements set out in Section 2.3.2.1, attach the following pneumatic lines: AMPLE... -
Page 40: Pneumatic Flow Diagrams
PNEUMATIC FLOW DIAGRAMS This Section shows the basic pneumatic flow diagram followed by flow diagrams with options. Tables showing the valve operating states follow each of the flow diagrams with valve options. Teledyne API N100, N100H SO Analyzers 092910100C DCN8656... -
Page 41: Pneumatic Flow For Basic Configuration
HYDROCARBON Particulate SCRUBBER SAMPLE (Kicker) gas inlet Filter EXHAUST gas outlet PUMP LAMP REACTION CELL FLOW SENSOR SAMPLE PRESSURE FLOW PRESSURE SENSOR SENSOR PCA Figure 2-15. N100 Pneumatic Flow Path, Basic Configuration 092910100C DCN8656 Teledyne API N100, N100H SO Analyzers... -
Page 42: Figure 2-16. N100H Pneumatic Flow Path
Figure 2-16. N100H Pneumatic Flow Path Teledyne API N100, N100H SO Analyzers 092910100C DCN8656... -
Page 43: Pneumatic Flow For N100 Zero/Span Valves Option
SENSOR CONTROL ASSY SAMPLE PRESSURE SENSOR FLOW / PRESSURE SENSOR PCA Figure 2-17. N100 Pneumatic Flow with Zero/Span Valves Option Table 2-6. N100 Zero/Span and Sample/Cal Valve Operating States MODE VALVE STATE VALVE PORT STATUS Sample/Cal Open to SAMPLE inlet NO ... -
Page 44: N100 Pneumatic Flow For Ambient Zero/Pressurized Span Option
N100 P NEUMATIC LOW FOR MBIENT RESSURIZED PTION Figure 2-18. N100 Pneumatics with Ambient Zero/Pressurized Span Valves Option Table 2-7. Valve Operating States for Ambient Zero/Pressurized Span Option VALVE PORT MODE VALVE STATE STATUS Sample/Cal Open to SAMPLE inlet NO COM... -
Page 45: Pneumatic Flow For N100 Internal Zero/Span (Izs) Gas Generator Option
SAMPLE PRESSURE SENSOR FLOW / PRESSURE CRITICAL FLOW SENSOR PCA ORIFICE ZERO AIR INLET Figure 2-19. N100 Pneumatics with IZS Option Table 2-8. IZS Valve Option Operating States VALVE PORT MODE VALVE STATE STATUS Sample/Cal Open to SAMPLE inlet NO COM... -
Page 46: Pneumatic Flow With O2 Sensor Option
For applications that include hydrocarbons, the scrubber is offered as an option (Figure 2-21). Figure 2-22 shows the pneumatic flow for the N100H with the hydrocarbon scrubber option. Teledyne API N100, N100H SO Analyzers 092910100C DCN8656... -
Page 47: Startup, Functional Checks And Calibration
When the instrument is first started (Section 2.3.4.1), check its functionality (Section 2.3.4.3) and run an initial calibration (Section 2.3.4.4). Section 2.4 introduces the menu system, and Section 2.5 provides setup/customization instructions. 092910100C DCN8656 Teledyne API N100, N100H SO Analyzers... -
Page 48: Startup
(Figure 2-24). Figure 2-23. Status Screens at Startup Upon any startup, this instrument should warm up for approximately one hour before reliable measurements can be taken. Figure 2-24. Home Page Example Teledyne API N100, N100H SO Analyzers 092910100C DCN8656... -
Page 49: Alerts: Warnings And Other Messages
Active Alerts page, a history of all alerts remains in the Utilities>Alerts Log page. Figure 2-25. Viewing Active Alerts Page If alerts of warning conditions persist after the warm up period or after being cleared, investigate their cause using the troubleshooting guidelines in Section 5.7. 092910100C DCN8656 Teledyne API N100, N100H SO Analyzers... -
Page 50: Functional Checks
The method for performing a calibration differs slightly depending on whether or not any of the available internal zero air or valve options are installed. Follow the appropriate calibration instructions presented in Section 4. Teledyne API N100, N100H SO Analyzers 092910100C DCN8656... -
Page 51: Menu Overview
Time settings*; and check for firmware updates when Section 2.5.9 connected to a network that is connected to the Internet. Time Zone change requires special procedures (Section 5.5). Comm View and configure network and serial communications. Section 2.5.10 092910100C DCN8656 Teledyne API N100, N100H SO Analyzers... -
Page 52: Home Page
Figure 2-27 presents an orientation to the main display screen; Figure 2-28 shows that pressing the gas name or its concentration value or a meter below displays a live plot of their respective readings. Section 2.5.6 provides configuration instructions. Figure 2-27. User Interface Orientation Teledyne API N100, N100H SO Analyzers 092910100C DCN8656... -
Page 53: Figure 2-28. Concentration And Stability Graph (Top) And Meter Graph (Bottom)
Figure 2-28. Concentration and Stability Graph (top) and Meter Graph (bottom) 092910100C DCN8656 Teledyne API N100, N100H SO Analyzers... -
Page 54: Dashboard
(Section 2.5.3 provides configuration instructions). If there is a graphing icon in the upper right corner of a parameter, pressing that parameter displays a live plot of its readings as in Figure 2-29. Figure 2-29. Dashboard Page Teledyne API N100, N100H SO Analyzers 092910100C DCN8656... -
Page 55: Table 2-10. Common Dashboard Parameters
The calculation uses the last 25 data points. The current output of the UV reference detector divided by the UV Lamp reading stored in the CPU’s memory from the last time a UV Lamp calibration was performed. 092910100C DCN8656 Teledyne API N100, N100H SO Analyzers... -
Page 56: Alerts
To clear Alerts from the Active Alerts page, either check individual boxes to choose specific Alerts, or check the Select All box to choose all Alerts, then press the Clear Selected button. Teledyne API N100, N100H SO Analyzers 092910100C DCN8656... -
Page 57: Calibration
Figure 2-32. Utilities>Alerts Log of Active and Past Alerts and Events CALIBRATION The Calibration menu is used for multipoint calibrations and for external calibration with valve options installed. Calibration procedures are presented in Section 4. 092910100C DCN8656 Teledyne API N100, N100H SO Analyzers... -
Page 58: Utilities
(DAS). Once the setups are complete, the saved configurations can be downloaded to a USB drive through the Utilities>USB Utilities menu and uploaded to other instruments of the same model (Section 2.6). Teledyne API N100, N100H SO Analyzers 092910100C DCN8656... -
Page 59: Setup>Data Logging (Data Acquisition System, Das)
Sections 2.5.1.1 and 2.5.1.2 providing additional details. To transfer captured instrument data to a flash drive see Section 2.5.1.3. Figure 2-33. Datalog Configuration, New Log Page Figure 2-34. Datalog Configuration, Existing Log 092910100C DCN8656 Teledyne API N100, N100H SO Analyzers... -
Page 60: Figure 2-35. Creating A New Data Log
Figure 2-35. Creating a New Data Log The parameters available in the list of Log Tags include the names of Events configured in the Events page (Section 2.5.2). Teledyne API N100, N100H SO Analyzers 092910100C DCN8656... -
Page 61: Configuring Trigger Types: Periodic
Figure 2-36. Datalog Periodic Trigger Configuration ONFIGURING RIGGER YPES ONDITIONAL Conditional Trigger tracks/records data for user-selected parameters that meet specified conditions. Figure 2-37. Datalog - Conditional Trigger Configuration 092910100C DCN8656 Teledyne API N100, N100H SO Analyzers... -
Page 62: Downloading Das (Data Acquisition System) Data
Home>Setup>Events menu (Figure 2-39). Press ADD to create a new Event (refer to Figure 2-40 for details), or select an existing Event to either Edit or Delete it (Figure 2-42). Teledyne API N100, N100H SO Analyzers 092910100C DCN8656... -
Page 63: Figure 2-40. Event Configuration
Event state. Non-latching allows the entry in the Active Alerts screen and the internal Event state to continuously update based on the Event criteria, requiring no user interaction to clear the Alert or Event state). 092910100C DCN8656 Teledyne API N100, N100H SO Analyzers... -
Page 64: Editing Or Deleting Events
Events can also be used to create customized triggers for data logging functions. The name entered in the Name field of the Events Configuration page will appear in the list of Log Tags of the Datalog Configuration page. The Data Logger is presented in Section 2.5.1. Teledyne API N100, N100H SO Analyzers 092910100C DCN8656... -
Page 65: Setup>Dashboard
SETUP>DASHBOARD Figure 2-43. Dashboard Display and Configuration SETUP>AUTOCAL (WITH VALVE OPTION) Auto Cal is available with installed valve options (see Section 4.2.2.2). 092910100C DCN8656 Teledyne API N100, N100H SO Analyzers... -
Page 66: Setup>Vars
NOTE that if you change the analyzer’s Modbus Units to “DYNAMIC” it is recommended that you confirm your data logger settings since some data loggers have settings to convert PPB units to PPM. Teledyne API N100, N100H SO Analyzers 092910100C DCN8656... -
Page 67: Setup>Homescreen
Setup>Homescreen menu or from Home page using the configuration icon (Figure 2-44). Figure 2-44. Homescreen Configuration An orientation to the Homescreen was presented in Section 2.4.1, including Figure 2-27 and Figure 2-28. 092910100C DCN8656 Teledyne API N100, N100H SO Analyzers... -
Page 68: Setup>Digital Outputs (Option)
For testing, go to the Utilities>Diagnostics>Digital Outputs menu to change the state (ON/OFF) of individual digital outputs. Figure 2-45. Digital Outputs Setup Teledyne API N100, N100H SO Analyzers 092910100C DCN8656... -
Page 69: Setup>Analog Outputs (Option)
Map the user-configurable Analog Outputs (either four Voltage or three Current) to any of a wide variety of “Signals” present in the instrument and customize their respective configurations. Figure 2-46. Analog Output Configuration for Voltage Output, Example 092910100C DCN8656 Teledyne API N100, N100H SO Analyzers... -
Page 70: Figure 2-47. Analog Output Configuration For Current Output, Example
(Table 2-13). For Current output, press the +100 button several times to get the setting • close to 4mA. 6. Press the Accept button when adjustment reached. Teledyne API N100, N100H SO Analyzers 092910100C DCN8656... -
Page 71: Figure 2-48. Analog Output Calibration, Voltage Or Current
Each range is usable from -5% to +5% of the rated span. For manual calibration adjustments, see Section 2.5.8.1 for voltage and Section 2.5.8.2 for current. Figure 2-48. Analog Output Calibration, Voltage or Current 092910100C DCN8656 Teledyne API N100, N100H SO Analyzers... -
Page 72: Manual Calibration Of Voltage Range Analog Outputs
100, 10 or 1 count increments, the adjustments here would need several presses of the +100 button to arrive at a realistic starting point for 4mA. CAUTION! Do not exceed 60 V peak voltage between current loop outputs and instrument ground. Teledyne API N100, N100H SO Analyzers 092910100C DCN8656... -
Page 73: Setup>Instrument
Internet, follow the instructions on this Remote Update page to check for and activate software/firmware updates. (Also refer to Section 5.3). SETUP>COMM (COMMUNICATIONS) This menu is for specifying the various communications configurations. 092910100C DCN8656 Teledyne API N100, N100H SO Analyzers... -
Page 74: Com
(DHCP). Most users will want to configure the instrument with a static IP address: click the Static radio button to manually assign a static IP address (consult your network administrator, and see Table 2-16 for information). Teledyne API N100, N100H SO Analyzers 092910100C DCN8656... -
Page 75: Transferring Configuration To Other Instruments
Once an instrument is configured, the same configuration can be copied to other instruments of the same Model. This encompasses essentially anything the user can configure and does not apply to instrument-specific settings such as those that are configured at the factory for calibration. 092910100C DCN8656 Teledyne API N100, N100H SO Analyzers... -
Page 76: Figure 2-52. Configuration Transfer
7. When the Status field indicates that the USB drive has been detected, press the “Upload Configuration to Instrument” Start button. 8. When the Status field indicates that the upload is complete, remove the flash drive. Teledyne API N100, N100H SO Analyzers 092910100C DCN8656... -
Page 77: Communications And Remote Operation
HESSEN Hessen protocol is supported through serial communications. The Hessen protocol is not strictly defined; therefore, while Teledyne API’s application is completely compatible with the protocol itself, it may be different from implementations by other companies. Configure the COM2 port for Hessen protocol through the Setup>Comm>COM2 menu: select COM2 Protocol and press Edit to select HESSEN, then press Accept. -
Page 78: Table 3-1. Teledyne Api's Hessen Protocol Response Modes
ESSEN ROTOCOL ESPONSE Set the response mode, referring to Table 3-1 for descriptions. Table 3-1. Teledyne API's Hessen Protocol Response Modes MODE ID MODE DESCRIPTION This is the default setting. Reponses from the instrument are encoded as the traditional command format. Style and format of responses depend on exact coding of the initiating command. -
Page 79: Ethernet
For MODBUS communications configuration, see 3.1.1. NUMAVIEW™ REMOTE For remote operation and data capture through an Ethernet connection, please refer to the NumaView™ Remote Software User Guide, PN 08492, available on our website. 092910100C DCN8656 Teledyne API N100, N100H SO Analyzers... -
Page 80: Calibration
Data recording device should be capable of bi-polar operation so that negative readings can be recorded. For electronic documentation, the internal data acquisition system (DAS) can be used by configuring the Data Logger through the Setup>Data Logging menu; Section 2.5.1). Teledyne API N100, N100H SO Analyzers 092910100C DCN8656... -
Page 81: Zero Air
If calibrator and zero air source are not available, then use a bottle of SO balanced air. Teledyne API offers an IZS option (N100 only) operating with permeation devices. The accuracy of these devices is about ±5%. Whereas this may be sufficient for quick, daily calibration checks, we strongly recommend using certified SO span gases for accurate calibration. -
Page 82: Span Gas For Multipoint Calibration
(dilution ratio of 222, in the mid-range of the system’s capabilities). PHYSICAL RANGE MEASUREMENTS The entire measurement range of the N100 is 0 – 20,000 ppb and the N100H is 0 – 5,000 ppm, but many applications use only a small part of the analyzer’s full measurement range, which then becomes a data resolution challenge where the reported measurement may be barely perceptible. -
Page 83: Interferents
Nitrogen oxide (NO) also fluoresces in a spectral range near to SO For critical applications where high levels of NO are expected, an optional optical filter is available in the N100 that improves the rejection of NO (contact Technical Support for more information). PERMEATION TUBE OPTIONS Teledyne API offers an optional internal span gas generator that utilizes a permeation tube as a span gas source. -
Page 84: Calibration Procedures
Sample port, and check the reading after the Stability falls below 1.0 PPB (N100) or 1.0 PPM (N100H) per user selection (viewable either in the gas graph or in the Dashboard). Otherwise, follow the steps presented in Sections 4.2.1.1 and 4.2.1.2. -
Page 85: Figure 4-1. Setup For Manual Calibration Without Z/S Valve Option
(Remove 3-way during Valve calibration) Needle valve to control flow in excess of 1000 cc Calibrated Chassis SAMPLE (At htaret EXHAUST concentration) Figure 4-1. Setup for Manual Calibration without Z/S Valve Option 092910100C DCN8656 Teledyne API N100, N100H SO Analyzers... -
Page 86: Zero Calibration Check And Actual Calibration
In the Cal Result window, press OK. 3. Press the Stop button and return to Home screen. 4. In the Dashboard, check and record the Slope(s) and the Offset(s). (See Table Section 4.3, Calibration Quality Analysis, expected/acceptable values). Teledyne API N100, N100H SO Analyzers 092910100C DCN8656... -
Page 87: Calibration And Check Procedures With Valve Option Installed
Figure 4-3. Setup for Manual Calibration Check with Valve Options Navigate to the Calibration>Zero menu for Zero cal and to the Calibration>Span menu for Span cal (see Figure 4-4) and follow the instructions in Sections 4.2.1.1 and 4.2.1.2 092910100C DCN8656 Teledyne API N100, N100H SO Analyzers... -
Page 88: Remote Contact Closure And Cal/ Cal Checks With Zero/Span Valve
The instrument will stay in the selected mode for as long as the contacts remain • closed. If contact closures are being used in conjunction with the analyzer’s AutoCal (see Section 4.2.2.2) feature and the AutoCal attribute “Calibrate” is enabled (selection box is Teledyne API N100, N100H SO Analyzers 092910100C DCN8656... -
Page 89: Automatic Cal/Cal Check (Autocal) With Zero/Span Valve
Table 4-1 and Table 4-2 show how to set up the operating states of each calibration or check, and Table 4-3 shows how to program the execution of each. Figure 4-5. Auto Cal Page 092910100C DCN8656 Teledyne API N100, N100H SO Analyzers... -
Page 90: Table 4-1. Auto Cal States
Calibrate Check Zero Low High Calibrate For each sequence, there are four parameters that control operational details: Date, Time (both in the Start field), Interval, and Duration, as presented in Table 4-3. Teledyne API N100, N100H SO Analyzers 092910100C DCN8656... -
Page 91: Calibration Quality Analysis
Otherwise, refer to the troubleshooting Section 5.7.6. Table 4-4. Calibration Data Quality Evaluation FUNCTION MINIMUM VALUE OPTIMUM VALUE MAXIMUM VALUE Slope 0.700 1.000 1.300 Offset 0.0 mV 250.0 mV 092910100C DCN8656 Teledyne API N100, N100H SO Analyzers... -
Page 92: Maintenance And Service
OFFSET and SLOPE and alter the instrument’s calibration. Alternatively, use the Auto Cal feature described in Section 4.2.2.2 with the CALIBRATE attribute set to OFF (not enabled). Teledyne API N100, N100H SO Analyzers 092910100C DCN8656... -
Page 93: Table 5-1. Maintenance Schedule
Replace As necessary orifice & sintered filters Desiccant bags Replace Any time PMT housing is opened for maintenance These Items are required to maintain full warranty; all other items are strongly recommended. 092910100C DCN8656 Teledyne API N100, N100H SO Analyzers... -
Page 94: Predictive Diagnostics
Degradation of IZS permeation tube day to day. SO2 Conc (Concentration) (Standard configuration at span): Drift of instrument response; UV Lamp output is excessively Decreasing over time Stable for low. constant concentration Teledyne API N100, N100H SO Analyzers 092910100C DCN8656... -
Page 95: Operational Health Checks
The report is generated every 24 hours to a Web services “cloud” where it is available for viewing by Teledyne API technical support personnel. To download the report for your own viewing on a computer or to send to others, insert a flash drive into a front panel USB port and press the Download button, which is enabled when the instrument detects the flash drive. -
Page 96: Manual Reload/Update Procedures
6. When complete, as indicated in the Status field, press the Done button, which replaces the Cancel button, and remove the flash drive. 7. Power off and restart the instrument to complete the new firmware installation. Teledyne API N100, N100H SO Analyzers 092910100C DCN8656... -
Page 97: Time Zone Changes
6. After the Time Zone is implemented first (Steps 1 through 5), then other changes to the date and/or time can be made, and recycling the power is not necessary. Figure 5-4. Time Zone Change Requirements 092910100C DCN8656 Teledyne API N100, N100H SO Analyzers... -
Page 98: Hardware Maintenance Procedures
3. Carefully remove the retaining ring, PTFE o-ring, glass window and filter element. 4. Replace the filter, being careful that the element is fully seated and centered in the bottom of the holder. Teledyne API N100, N100H SO Analyzers 092910100C DCN8656... -
Page 99: Changing The Dfu Sample Filter Option
7. Conduct zero and span calibrations and allow time to stabilize. CHANGING/REMOVING THE IZS PERMEATION TUBE (N100 OPTION) 1. Turn off the analyzer, unplug the power cord and remove the cover. 2. Locate the IZS oven inside the analyzer. -
Page 100: Changing The External Zero Air Scrubber Option
10. Adjust the scrubber cartridge such that it does not protrude above or below the analyzer in case the instrument is mounted in a rack. If necessary, squeeze the clips for a tighter grip on the cartridge. Teledyne API N100, N100H SO Analyzers 092910100C DCN8656... -
Page 101: Servicing Critical Flow Orifices
To clean or replace a critical flow orifice: 1. Turn off power to the instrument and vacuum pump. 2. Locate the critical flow orifice on the exhaust manifold. 3. Disconnect the pneumatic line. 4. Unscrew the NPT fitting. 092910100C DCN8656 Teledyne API N100, N100H SO Analyzers... -
Page 102: Figure 5-7. Critical Flow Orifice And Vacuum Manifold Assembly
9. Reinstall the NPT fitting with fresh Teflon tape and connect all tubing 10. Power up the analyzer and allow it to warm up for 60 minutes. 11. Perform a leak check. Teledyne API N100, N100H SO Analyzers 092910100C DCN8656... -
Page 103: Checking For Light Leaks After Maintenance Or Repair
6. If, during this procedure, the black PMT housing end plate for the Sensor Assembly is removed, ensure to replace the 5 desiccant bags inside the housing. 7. Carefully replace the analyzer cover. If tubing was changed, carry out a pneumatic leak check (Section 5.6.7). 092910100C DCN8656 Teledyne API N100, N100H SO Analyzers... -
Page 104: Checking For Pneumatic Leaks
Once the fittings have been wetted with soap solution, do not reapply vacuum as it will draw soap solution into the instrument and contaminate it. • Do not exceed 15 psi pressure. Teledyne API N100, N100H SO Analyzers 092910100C DCN8656... -
Page 105: Performing Flow Checks/Calibrations
Ensure that the inlet to the flow meter is at atmospheric pressure. • 3. The sample flow measured with the external flow meter should be within ± 10% of the analyzer’s Flow specification (Table 1-1). 092910100C DCN8656 Teledyne API N100, N100H SO Analyzers... -
Page 106: Checking The Hydrocarbon Scrubber/Kicker (Option In N100H)
15 psia and a leak checking fixture such as the one illustrated in Figure 5-9. Vacuum/Pressure Needle Valve Gauge Regulator TO SCRUBBER FROM PUMP or PRESSURIZED AIR SOURCE Shut-Off Valve Figure 5-9. Simple Leak Check Fixture Teledyne API N100, N100H SO Analyzers 092910100C DCN8656... -
Page 107: Service And Troubleshooting
9. Wait 5 minutes. If the gauge pressure drops >1 psi within 5 minutes, then the hydrocarbon scrubber has an internal leak and must be replaced. Contact Teledyne API’s Technical Support. SERVICE AND TROUBLESHOOTING This Section contains methods to identify the source of performance problems with the analyzer and procedures to service the instrument. -
Page 108: Fault Diagnosis With Alerts
Note that if more than two or three warning Alerts occur at the same time, it is often an indication that some fundamental sub-system has failed rather than an indication of the specific failures referenced by the warnings. Teledyne API N100, N100H SO Analyzers 092910100C DCN8656... -
Page 109: Table 5-3. Warning Alerts, Fault Conditions And Possible Causes
If sample pressure is > 35 in-hg: level decreasing at 1 in-Hg per 1000 ft of altitude • Blocked vent line on pressurized (with no flow – pump disconnected) sample/zero/span gas supply • Bad pressure sensor/circuitry 092910100C DCN8656 Teledyne API N100, N100H SO Analyzers... -
Page 110: Fault Diagnosis With Dashboard Functions
It decreases about 1 in-Hg per 1000 ft gain in altitude. A variety of factors such as air conditioning systems, passing storms, and air temperature, can also cause changes in the absolute atmospheric pressure. Teledyne API N100, N100H SO Analyzers 092910100C DCN8656... -
Page 111: Using The Diagnostic Signal I/O Functions
POSSIBLE OUT-OF-RANGE CAUSE(S) FUNCTION VALUES Faults that cause high stability values are: pneumatic leak; low or very unstable ≤1 ppb, N100; ≤1 ppm, Stability UV lamp output; light leak; faulty HVPS; defective preamp board; aging N100H with Zero Air detectors; PMT recently exposed to room light; dirty/contaminated reaction cell. -
Page 112: Fault Diagnosis With Leds
Figure 5-11 shows the layout for the mainboard, and Figure 5-12 through Figure 5-14 show the board layouts for the PMT Bench Module, the Lamp Driver, and the Pump Control, respectively. Figure 5-11. Mainboard Teledyne API N100, N100H SO Analyzers 092910100C DCN8656... -
Page 113: Figure 5-12. Pmt Bench Module Board - Test Points And Indicator Leds
Figure 5-12. PMT Bench Module Board – Test Points and Indicator LEDs Figure 5-13. Lamp Driver Board – Test Points and Indicator LEDs 092910100C DCN8656 Teledyne API N100, N100H SO Analyzers... -
Page 114: Flow Problems
Use an independent, external, volumetric flow meter to perform a flow check as described in Section 5.6.7.3. Refer to the pneumatic flow diagrams in Section 2.3.3 as needed for reference. Teledyne API N100, N100H SO Analyzers 092910100C DCN8656... -
Page 115: Sample Flow Is Zero Or Low
Rx Cell pressure is below 10 in-Hg-A. • The analyzer will calculate a sample flow up to about 14 in-Hg-A RCEL pressure but a good pump should always provide less than 10 in-Hg-A. 092910100C DCN8656 Teledyne API N100, N100H SO Analyzers... -
Page 116: High Flow
Although measuring the actual flow is the best method, in most cases, this fault can also be diagnosed by evaluating the sample pressure value. Teledyne API N100, N100H SO Analyzers 092910100C DCN8656... -
Page 117: Calibration Problems
2. Confirm the lack of response by supplying SO span gas of about 80% of the range value to the analyzer. 3. Check the sample flow for proper value. 4. Check for disconnected cables to the sensor module. 092910100C DCN8656 Teledyne API N100, N100H SO Analyzers... -
Page 118: Unstable Zero And Span
1. Confirm that there is a good source of zero air. If the IZS option is installed, compare the zero reading from the IZS zero air source to a zero air source using SO -free air. Teledyne API N100, N100H SO Analyzers 092910100C DCN8656... -
Page 119: Non-Linear Response
The following Section provides an itemized list of the most common dynamic problems with recommended troubleshooting checks and corrective actions. 092910100C DCN8656 Teledyne API N100, N100H SO Analyzers... -
Page 120: Excessive Noise
This Section describes how to determine if a certain component or subsystem is actually the cause of the problem being investigated. Teledyne API N100, N100H SO Analyzers 092910100C DCN8656... -
Page 121: Ac Main Power
If the fuse is blown, replace it with a fuse of the correct specifications as instructed in Section 5.7.9.1. • If the fuse is not blown, or if the replacement fuse blows, then call Technical Support (Section 5.9). 092910100C DCN8656 Teledyne API N100, N100H SO Analyzers... -
Page 122: Photomultiplier Tube (Pmt) Sensor Module
Dashboard to display HVPS, Section 2.5.3). 8. Divide the displayed HVPS voltage by 10 and test the pairs of connector points as shown in the figure below, which uses 700 V as an example. Teledyne API N100, N100H SO Analyzers 092910100C DCN8656... -
Page 123: Internal Span Gas (Izs) Generator And Valve Options
50°C ±1°C. Check the IZS Temp in the Dashboard or the IZS Temp Raw signal in the Utilities>Diagnostics>Analog Inputs menu. At 50° C, the temperature signal from the IZS thermistor should be around 2500 mV. 092910100C DCN8656 Teledyne API N100, N100H SO Analyzers... -
Page 124: Service Procedures
Regular maintenance procedures are discussed in Section 5.5 Note and are not listed here). Also, there may be more detailed service notes for some of the below procedures. Contact Teledyne API's Technical Support Department. WARNING – ELECTRICAL SHOCK HAZARD Unless the procedure being performed requires the instrument... -
Page 125: Module Replacement
6. If you received a complete replacement module with circuit board and mounting bracket attached, simply reverse the above steps to install. For connector information, refer to the illustrations that follow. 092910100C DCN8656 Teledyne API N100, N100H SO Analyzers... -
Page 126: Figure 5-17. Pmt Bench Module Board Connectors
60 minutes. The following illustrations provide connector information for module boards: Figure 5-17. PMT Bench Module Board Connectors Figure 5-18. UV Detector Board Connector Teledyne API N100, N100H SO Analyzers 092910100C DCN8656... -
Page 127: Figure 5-19. Lamp Driver Board Connectors
Figure 5-19. Lamp Driver Board Connectors Figure 5-20. DC Pump Control Board Connectors 092910100C DCN8656 Teledyne API N100, N100H SO Analyzers... -
Page 128: Figure 5-21. Dc Pump Flow Meter (Dc Pump Control Board Bottom)
Figure 5-21. DC Pump Flow Meter (DC Pump Control Board Bottom) Figure 5-22. IZS Option Board Connectors Other connectors on the Mainboard are shown next in Figure 5-23. Teledyne API N100, N100H SO Analyzers 092910100C DCN8656... -
Page 129: Sensor Module Repair And Cleaning
Do not look at the UV lamp while the unit is operating. UV light can cause eye damage. Always use safety glasses made from UV blocking material when working with the UV Lamp Assembly. (Generic plastic glasses are not adequate). 092910100C DCN8656 Teledyne API N100, N100H SO Analyzers... -
Page 130: Figure 5-24. N100 Sensor Module
IMPACT ON READINGS OR DATA Important The sample chamber should only be opened or • cleaned on instructions from the Teledyne API Technical Support Department. Be careful not to leave thumbprints on the interior • of the sample chamber. The various oils that make... -
Page 131: Figure 5-25. N100H Sensor Module
Reaction cell thermistor wiring (yellow) • Reaction cell heater wiring (red) • • UV detector wiring • PMT wiring 5. Remove the three sensor module mounting screws to lift the module straight up. 092910100C DCN8656 Teledyne API N100, N100H SO Analyzers... -
Page 132: Figure 5-26. Sensor Module Mounting Screws
Mounting Screw Housing Sample Mounting Chamber Mounting Screw Screw Figure 5-26. Sensor Module Mounting Screws Follow the above steps in reverse order to reinstall the sensor module. Teledyne API N100, N100H SO Analyzers 092910100C DCN8656... -
Page 133: Figure 5-27. Hex Screw Between Lens Housing And Sample Chamber
2. Remove the sample chamber from the PMT lens and filter housing by unscrewing the 4 hex screws that fasten the chamber to the housing. 3. Remove the four lens cover screws. Figure 5-28. UV Lens Housing / Filter Housing 092910100C DCN8656 Teledyne API N100, N100H SO Analyzers... -
Page 134: Figure 5-29. Pmt Uv Filter Housing Disassembled
PMT lens is especially important. UV F EPLACING THE ILTER To replace the UV filter/lens: 1. Turn off the instrument’s power and remove the power cord from the instrument. Teledyne API N100, N100H SO Analyzers 092910100C DCN8656... -
Page 135: Figure 5-30. Disassembling The Uv Filter/Lens Assembly
50% in the first 90 days, and then a slower rate, until the end of useful life of the lamp. Periodically running the UV lamp calibration routine (Utilities>Diagnostics 092910100C DCN8656 Teledyne API N100, N100H SO Analyzers... -
Page 136: Figure 5-31. Lamp Assembly
Do not look at the UV lamp while the unit is operating. UV light can cause eye damage. Always use safety glasses made from UV blocking material when working with the UV Lamp Assembly. (Generic plastic glasses are not adequate). Figure 5-31. Lamp Assembly Teledyne API N100, N100H SO Analyzers 092910100C DCN8656... -
Page 137: Figure 5-32. Uv Lamp Adjustment
200 mV). 4. Finger-tighten the thumbscrew. 5. In the Utilities>Diagnostics>Lamp Cal menu press the Calibrate button to set this new value as the benchmark for use in calculating the concentration. 092910100C DCN8656 Teledyne API N100, N100H SO Analyzers... -
Page 138: Replacing The Uv Lamp
CAUTION – GENERAL SAFETY HAZARD DO NOT over tighten the thumbscrew, as over-tightening can cause breakage to the lamp and consequently release mercury into the area. 11. Calibrate the lamp (Utilities>Diagnostics menu). Teledyne API N100, N100H SO Analyzers 092910100C DCN8656... -
Page 139: Replacing The Pmt, Hvps Or Tec
This is necessary only if the repair being performed involves removing the • PMT cold block. Figure 5-33. Sensor Assembly 6. Remove the two connectors on the PMT housing end plate facing towards the front panel. 092910100C DCN8656 Teledyne API N100, N100H SO Analyzers... - Page 140 19. Reinsert the TEC subassembly in reverse order. Ensure that the O-ring is seated properly and the assembly is tightened • evenly. Teledyne API N100, N100H SO Analyzers 092910100C DCN8656...
-
Page 141: Pmt Sensor Hardware Calibration ("Factory Cal")
5. Use the Up/Down buttons to make adjustments, allowing time for values to respond and for the concentration to stabilize. (Typically, the value for the PMT Reading in the N100 model should be about the same as the target concentration; for example, 100 ppb sampled gas should give 100 mV PMT response). -
Page 142: Frequently Asked Questions
Figure 5-34. HVPS Adjust Menu FREQUENTLY ASKED QUESTIONS The following list was compiled from the Teledyne API's Technical Support Department’s ten most commonly asked questions relating to the analyzer. QUESTION ANSWER Why does the ENTR button Sometimes the ENTR button will disappear if you select a setting that is... -
Page 143: Technical Assistance
Teledyne API Technical Support 9970 Carroll Canyon Road San Diego, California 92131-1106 USA Toll-free Phone: 800-324-5190 Phone: +1 858-657-9800 Fax: +1 858-657-9816 Email: api-techsupport@teledyne.com Website: http://www.teledyne-api.com/ 092910100C DCN8656 Teledyne API N100, N100H SO Analyzers... -
Page 144: Principles Of Operation
UV light (Ia) and not its peak intensity because the intensity of UV light is not constant in every part of the sample chamber. Some of the photons are absorbed by the SO as the light travels through the sample gas. Teledyne API N100, N100H SO Analyzers 092910100C DCN8656... -
Page 145: Figure 6-1. Uv Absorption
(hν). The wavelength of this fluoresced light is also in the ultraviolet band but at a longer (lower energy) wavelength centered at 330nm. → (Equation 6-3) 092910100C DCN8656 Teledyne API N100, N100H SO Analyzers... - Page 146 A special hydrocarbon scrubber removes the most common interfering gases from the sample gas. • And finally, the design of the sample chamber reduces the effects of stray light via its optical geometry and spectral filtering. Teledyne API N100, N100H SO Analyzers 092910100C DCN8656...
-
Page 147: The Uv Light Path
PMT are perpendicular to each other and the inside surfaces of the ® sample chamber are coated with a layer of black Teflon that absorbs stray light. Figure 6-2. N100 UV Light Path 092910100C DCN8656 Teledyne API N100, N100H SO Analyzers... -
Page 148: Uv Source Lamp
Light is emitted through a 20 mm x 5 mm portal. Vacuum Jacket Light Output Portal Zinc-Vapor Plasma Arc Dual Bore Figure 6-4. Source UV Lamp Construction Teledyne API N100, N100H SO Analyzers 092910100C DCN8656... -
Page 149: The Reference Detector
UV lamp at 330nm is so bright, nearly five orders of magnitude brighter than that resulting from the SO * decay, it would drown out the SO * fluorescence. 092910100C DCN8656 Teledyne API N100, N100H SO Analyzers... -
Page 150: Figure 6-5. Excitation Lamp Uv Spectrum Before/After Filtration
To solve this problem, the light emitted by the excitation UV lamp passes through a band pass filter that screens out photons with wavelengths outside the spectrum required to excite SO into SO * (refer to Figure 6-5). Teledyne API N100, N100H SO Analyzers 092910100C DCN8656... -
Page 151: Pmt Optical Filter
SO * (refer to Figure 6-6) including reflected UV form the source lamp and other stray light. PMT OPTICAL FILTER BANDWIDTH * FLUORESCENT SPECTRUM WAVELENGTH (nm) Figure 6-6. PMT Optical Filter Bandwidth 092910100C DCN8656 Teledyne API N100, N100H SO Analyzers... -
Page 152: Optical Lenses
SO * being measured by the PMT, eliminating a possible source of measurement offset. Teledyne API N100, N100H SO Analyzers 092910100C DCN8656... -
Page 153: Measurement Interferences
The most significant interferents in this regard are nitrogen oxide (NO), carbon dioxide ), water vapor (H O) and molecular oxygen (O ). In ambient applications the quenching effect of these gases is negligible. For stack applications where the 092910100C DCN8656 Teledyne API N100, N100H SO Analyzers... -
Page 154: Light Pollution
PMT offset (refer to Section 6.1.6) and the PMT output while measuring zero gas (calibration gas devoid of SO ) is recorded as OFFSET. This OFFSET value is used during the calculation of the SO concentration. Teledyne API N100, N100H SO Analyzers 092910100C DCN8656... -
Page 155: Pneumatic Operation
CRITICAL FLOW EXHAUST TO OUTER LAYER OF KICKER ORIFICE FLOW FLOW SENSOR CONTROL ASSY SAMPLE PRESSURE SENSOR FLOW / PRESSURE SENSOR PCA Figure 6-8. Gas Flow and Location of Critical Flow Orifice 092910100C DCN8656 Teledyne API N100, N100H SO Analyzers... -
Page 156: Flow Rate Control
The actual flow rate of gas through the orifice (volume of gas per unit of time), depends on the size and shape of the aperture in the orifice. The larger the hole, the more gas Teledyne API N100, N100H SO Analyzers... -
Page 157: Sample Particulate Filter
When the instrument is turned on after having been off for more than 30 minutes, it takes a certain amount of time for the gradient to become large enough for the scrubber to adequately remove hydrocarbons from the sample air. 092910100C DCN8656 Teledyne API N100, N100H SO Analyzers... -
Page 158: Pneumatic Sensors
(N100) AMPLE A thermal-mass flow sensor is used in the N100 to measure the sample flow through the analyzer. This sensor is also mounted on the pneumatic pressure/flow sensor board upstream of the sample chamber. The flow rate is monitored by the CRT which issues an Alert if the flow rate is too high or too low. -
Page 159: Modules
ON state when source power is restored. SOFTWARE OPERATION The analyzer’s software developed by Teledyne API interprets user commands via the various interfaces, performs procedures and tasks, stores data in the various memory devices and calculates the concentration of the sample gas. -
Page 160: Calibration - Slope And Offset
Large amounts of data can be stored and retrieved for analysis. The DAS is configured and managed through the Data Logging menu (Section 2.5.1). Teledyne API N100, N100H SO Analyzers 092910100C DCN8656... -
Page 161: Glossary
Disk On Module, a 44-pin IDE flash drive with up to 128MB storage capacity for instrument’s firmware, configuration settings and data Disk Operating System DRAM Dynamic Random Access Memory DR-DOS Digital Research DOS 092910100C DCN8656 Teledyne API N100, N100H SO Analyzers... - Page 162 Programmable Logic Device Phase Lock Loop Photo Multiplier Tube, a vacuum tube of electrodes that multiply electrons collected and charged to create a detectable current signal P/N (or PN) Part Number Teledyne API N100, N100H SO Analyzers 092910100C DCN8656...
- Page 163 Universal Serial Bus: a standard connection method to establish communication between peripheral devices and a host controller, such as a mouse and/or keyboard and a personal computer or laptop VARS Variables, the variable settings of the instrument Voltage-to-Frequency Zero / Span 092910100C DCN8656 Teledyne API N100, N100H SO Analyzers...
-
Page 164: Appendix A - Modbus Registers
PMT Detector Reading in mV AI_UVLAMP_RAW UV Lamp Intensity Reading in mV AI_UVLAMP UV Lamp ratio in % AI_PMT_DARK PMT Dark reading in mV AI_PMT_LIGHT PMT light reading in mV" SO2_SLOPE1 SO2 Slope for range 1 Teledyne API N100, N100H SO Analyzers 092910100C DCN8656... - Page 165 5V Measured in mV AI_PUMP_FLOW Pump flow in CCM AI_IZS_BLOCK_TEMP IZS temperature in degrees C AI_VACUUM_PRESS Vacuum pressure in In.Hg-A AI_UVLAMP_RAW UV lamp intensity reading in mV Holding Registers SO2_TARGET_SPAN_CONC_1 Target zero1 SO2_TARGET_SPAN_CONC_2 Target span1 092910100C DCN8656 Teledyne API N100, N100H SO Analyzers...
-
Page 166: Appendix B - N100 Interconnects
APPENDIX B - N100 Interconnects REVISION HISTORY CHASSIS GROUND FRONT PANEL ZONE DESCRIPTION DATE APPROVED INITIAL RELEASE, PROTOTYPE 8/9/2019 REMOVED MOLY CONV 8/24/2021 084260000 PCA, MAINBOARD, 089090000 FOR SOM304 TEC POWER ASSY, FAN, 24VDC 092070000 PCA, SENSOR, TEC FAN 087960100, CBL, 24" CANBUS SOX &... - Page 167 APPENDIX B - N100H Interconnects REVISION HISTORY CHASSIS GROUND FRONT PANEL ZONE DESCRIPTION DATE APPROVED INITIAL RELEASE, PROTOTYPE 8/9/2019 084260000 PCA, MAINBOARD, 089090000 FOR SOM304 TEC POWER ASSY, FAN, 24VDC 092070000 PCA, SENSOR, TEC FAN SOX & NOX, N-SERIES 087960200, CBL, 12" CANBUS J21 J22 J23 J6 089490000 PCA, UV DET,...
Need help?
Do you have a question about the N100 and is the answer not in the manual?
Questions and answers