Table of Contents
Advertisement
Quick Links
Advertisement
Table of Contents

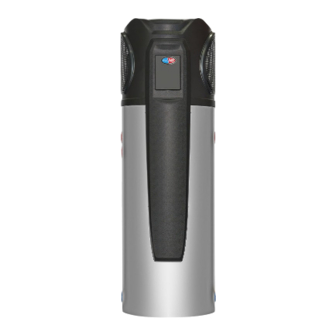
Summary of Contents for evoheat EVO270-E
-
Page 2: Table Of Contents
Page 1 EVO270-E Manual Contents 1. Introduction ..............................2 2. Dimensions ..............................2 3. Quick Start Guide ............................3 4. Safety Instructions ............................4 5. Installation ..............................5 5.1 System Installation ..........................5 5.2 Handing & Transportation ........................5 5.3 Location of Installation .......................... 5 5.4 Airflow Clearances .......................... -
Page 3: Introduction
EvoHeat unit. Instructions in this manual must always be followed. Failure to comply with these recommendations will invalidate the warranty. Should you have any questions or require technical support, call the EvoHeat office on 1300 859 933 to speak to our team. -
Page 4: Quick Start Guide
Page 3 EVO270-E Manual 3. Q uick Start Guide DO NOT DRILL Do not drill any fixings or attachments into the outer casing of the tank. Drilling into the outer casing of the tank may damage the heating coil and WILL VOID WARRANTY. -
Page 5: Safety Instructions
In the event of the unit malfunctioning, shut off the • cabling, circuit breakers, and protections are suitable. power supply and contact your supplier or EvoHeat. • Avoid leaks in plumbing and drainage fittings. Do not drill any fixings or attachments into the outer •... -
Page 6: Installation
EVO270-E Manual 5. Installation 5.1 System Installation Upon receiving the unit, check the packaging for any obvious signs of damage. Inform EvoHeat immediately if there is any evidence of rough handling. Do not drill any fixings or attachments into the outer The P&T valve attached with the unit must be installed. -
Page 7: Airflow Clearances
≥1000 ≥1000 If the installation location does not comply with these suggested clearances, contact EvoHeat’s Technical Support to discuss possible solutions. Non-compliant installations risk voiding the warranty; ensure adherence to AS/NZS 3500.4 5.5 Cable Connection 5.6 Filling the Tank... -
Page 8: Operation
200 minutes, the electric heater activates to assist. Prioritises energy efficiency by utilising only the heat pump. The electric heater is ECO HEATING never engaged, promoting lower energy use. EvoHeat recommend using this mode MODE as standard. -
Page 9: Operating Functions
Page 8 EVO270-E Manual 6.2 Operating Functions EvoHeat have developed a YouTube Channel with video walkthroughs of the different controller functions. Scan the QR code or head to our channel to view the videos we have available https://www.youtube.com/@evoheatpumps 6.2.1 Locking the Controller To both lock and unlock the controller, press and hold the button for 5 seconds. -
Page 10: Setting & Checking The Target Temperature
Page 9 EVO270-E Manual 6.2.4 Setting & Checking the Target Temperature In the standby or running interface, press once to check the target temperature of the outlet water. Press again to change the target temperature. After making changes to the desired temperature, press... -
Page 11: System Date & Time
Page 10 EVO270-E Manual 6.2.7 System Date & Time In the standby or running interface, press once, the hour digit will flash indicating it is being altered. Press the to change the hour setting, then press to confirm. Repeat this to change the minute value. -
Page 12: Vacation Mode
Page 11 EVO270-E Manual To cancel a timer once it has been set, hold down the CLOCK button for 2 seconds until the timer display begins flashing (as you would set the timer). Press the POWER button while the timer is flashing to cancel it. The yellow timing periods will disappear when the timer has been cancelled. -
Page 13: Sanitech System
Sanitech to run during the day, for example, at a specific time to maximise solar energy use. If you would like to change this function, contact EvoHeat’s service department for guidance. Incorrectly attempting to adjust these settings yourself could significantly disrupt the unit’s operation. -
Page 14: Troubleshooting
Page 13 EVO270-E Manual 7. Troubleshooting 7.1 Troubleshooting Q & A Why does the compressor not run immediately when I start up the unit? After the unit is powered on, following a shutdown, there is a built-in delay of 3 minutes before the compressor •... -
Page 15: Error Codes
Page 14 EVO270-E Manual 7.2 Error Codes Error Reason Elimination Methods Bottom Water Temperature Sensor Failure (open or Inspect or replace the bottom water short circuit) temperature sensor. Top Tank Water Temperature Sensor Failure (open or Inspect or replace the top tank water short circuit) temperature sensor. -
Page 16: Appendix
Page 15 EVO270-E Manual 8. Appendix 8.1 Wiring Diagram info@evoheat.com.au 1300 859 933 www.evoheat.com.au... -
Page 17: Use Of The P&T Valve
In the event of a thermal cut-out, consider it a potential safety hazard. It's crucial to have the unit serviced by a qualified technician before attempting a reset. Contact EvoHeat for service in such cases. Remove the screws and open the cover... -
Page 18: Maintenance
• THREE-YEAR SERVICE It is a warranty requirement that a three (3) year service must be conducted on the EVO270-E. Just as a car needs regular servicing, your heat pump also requires a three-year service to maintain efficiency and ensure long-term performance. -
Page 19: Warranty
When a unit is installed by an unqualified person. When failure occurs due to improper or incorrect installation. g) Where failure occurs due to failure of any other equipment connected in relation with the EvoHeat unit (e.g. power supply, water pump etc.).


Need help?
Do you have a question about the EVO270-E and is the answer not in the manual?
Questions and answers