Table of Contents
Advertisement
Quick Links
Advertisement
Table of Contents

Related Manuals for evoheat EVO ULTRA Series


Summary of Contents for evoheat EVO ULTRA Series
-
Page 2: Table Of Contents
6.3 Possible Failures & Solutions ......................13 7. Appendix ..............................14 7.1 Parameter List ........................... 14 7.2 Cable Specifications .......................... 14 7.3 Wiring Diagrams..........................15 7.4 Automatic Water Filling Valve......................18 8. Maintenance ............................19 9. Warranty ..............................20 info@evoheat.com.au 1300 859 933 www.evoheat.com.au... -
Page 3: Introduction
EvoHeat unit. Instructions in this manual must always be followed. Failure to comply with these recommendations will invalidate the warranty. Should you have any questions or require technical support, call the EvoHeat office on 1300 859 933 to speak to our team. -
Page 4: Unit Dimensions
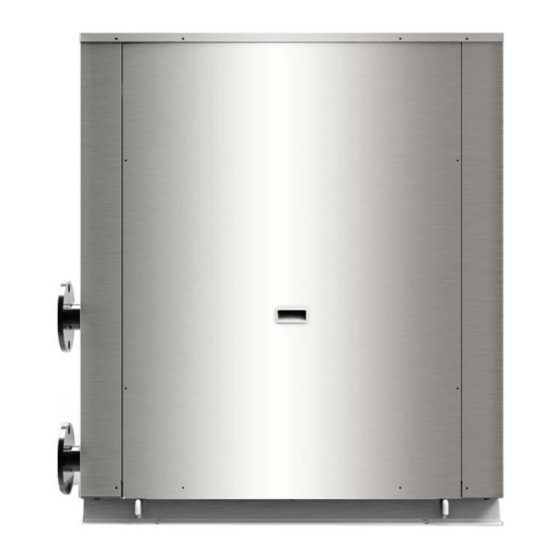
Page 3 Evo Ultra Manual 2. Unit Dimensions Unit: mm A (L) B (W) C (H) Evo Ultra 32 1030 1000 Evo Ultra 64 1172 1365 Evo Ultra 129 1600 1130 1500 1080 1050 1000 info@evoheat.com.au 1300 859 933 www.evoheat.com.au... -
Page 5: Safety Instructions
Do not install the unit near flammable gas or spray flammable substances near it. • Ensure the heat pump is installed on a strong and stable platform. • • If the supply cord is damaged, it must be replaced. Use genuine standard spare parts only. • info@evoheat.com.au 1300 859 933 www.evoheat.com.au... -
Page 6: Installation
Thermometer and water pressure gauge should be equipped at the units water inlet and outlet port for checking. User side water should be tap water and the hardness should be less than 20. If not, install an electric hydro treater at the tap water side info@evoheat.com.au 1300 859 933 www.evoheat.com.au... -
Page 7: Electrical Connection
Adjust the valved on the water loop to make sure that the hot (cool) water supply to each door is good and meets the requirements of heating (or cooling). • Review whether the outlet water temperature is stable. • The parameters of the controller are set by the factory, the user cannot change these themselves. info@evoheat.com.au 1300 859 933 www.evoheat.com.au... -
Page 8: Operation
& rapid heating by pressing Example: Switch from Cooling mode to Economic Heating Note: The operation of mode is invalid if the unit you purchase is heating only or cooling only. info@evoheat.com.au 1300 859 933 www.evoheat.com.au... -
Page 9: System State Checking
DOWN to select Timer, then press to enter the timer setting interface. The process of setting a timer is much the same as adjusting the Clock settings. To cancel and return to the previous menu, press the ON/OFF button. info@evoheat.com.au 1300 859 933 www.evoheat.com.au... - Page 10 The temperature timer will adjust the temperature as desired for your set Timer periods. Example: If Timer 3 was set for 1pm – 5pm on a Monday, the unit would operate to the set temperature during the timeframe on the Monday. info@evoheat.com.au 1300 859 933 www.evoheat.com.au...
-
Page 11: Keyboard Lock
. Note: If the unit is in alarm state, the keyboard lock is automatically removed. 5.2.9 Malfunction Display If a fault occurs, there will be a malfunction code showing on the controller screen. Refer to the Malfunction Table (9.9) to find out the failure cause and solutions. info@evoheat.com.au 1300 859 933 www.evoheat.com.au... -
Page 12: Troubleshooting
The ambient temp. is low Check each protection point of the System protection The protection system is failure system Check the wire connection Communication failure between wire Communication Failure between remote wire controller controller and mainboard and main board info@evoheat.com.au 1300 859 933 www.evoheat.com.au... -
Page 13: Bhb10 Fault Table
System 2 exhaust high temp. Compressor exhaust temp. too P282 Check through the refrigerant system protection high INDICATOR DISPLAY Fault Indicator System 1 1 Flashes 1 OFF System 2 2 Flash 1 OFF Ambient Temp. 3 Flash 1 OFF info@evoheat.com.au 1300 859 933 www.evoheat.com.au... -
Page 14: Possible Failures & Solutions
Reset the desired water temperature temp Clean the water filter and discharge the air in Lack of water in the system Low water flow protection water loop Failure on flow switch Replace the flow switch info@evoheat.com.au 1300 859 933 www.evoheat.com.au... -
Page 15: Appendix
The above max. current is the carrying capacity at ambient temperature 25C; If the unit is installed outdoors, use a UV resistant cable. The above specification is for reference only. For specific wire and breaker models please check the corresponding factory standard and actual installation requirement info@evoheat.com.au 1300 859 933 www.evoheat.com.au... -
Page 16: Wiring Diagrams
Page 15 Evo Ultra Manual 7.3 Wiring Diagrams info@evoheat.com.au 1300 859 933 www.evoheat.com.au... - Page 17 Page 16 Evo Ultra Manual info@evoheat.com.au 1300 859 933 www.evoheat.com.au...
- Page 18 Page 17 Evo Ultra Manual info@evoheat.com.au 1300 859 933 www.evoheat.com.au...
-
Page 19: Automatic Water Filling Valve
The screw cap (C) must be tweaked after adjusting the filled-water pressure. P re ssure Rel ea se Val ve Wat er O ut 1/4 ' 1/2 ' Wat er In info@evoheat.com.au 1300 859 933 www.evoheat.com.au... -
Page 20: Maintenance
Evo Ultra Manual 8. Maintenance It is recommended that you get your EvoHeat unit serviced once a year by your local certified air conditioning or refrigeration technician. If your unit is located in a coastal area, more frequent maintenance may be necessary. During the service,... -
Page 21: Warranty
REGISTER YOUR WARRANTY EvoHeat highly recommend customers complete their warranty details online to ensure efficient warranty claim processing. To register your warranty, scan our QR Code or head to our website and fill in the Warranty Registration Form: https://evoheat.com.au/warranty-registration/...
Need help?
Do you have a question about the EVO ULTRA Series and is the answer not in the manual?
Questions and answers