Advertisement
Advertisement
Table of Contents

Related Manuals for Creative Play NET TUNNEL CH123


Summary of Contents for Creative Play NET TUNNEL CH123
- Page 1 NET TUNNEL Installation Instructions REF: CH123 - NET TUNNEL pg 1 of 9...
-
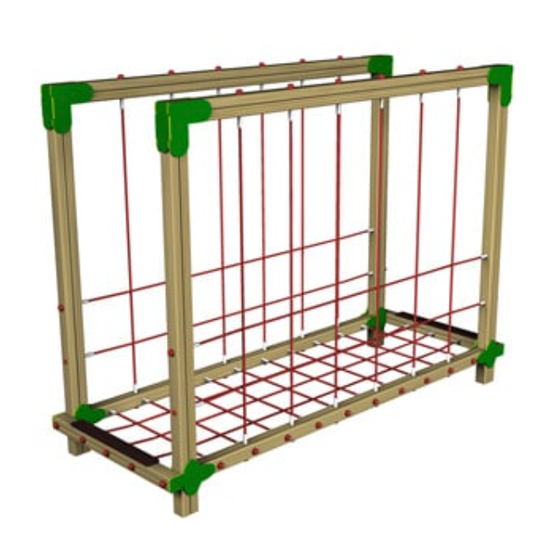
Page 2: Parts Required
Parts required (PRE-ASSEMBLED SIDE SECTION) (PRE-ASSEMBLED TOP SECTION) QTY x 4 (PRE-ASSEMBLED STEP SECTION) (120mm x 90mm) (PRE-ASSEMBLED CENTER ROPE) (PRE-ASSEMBLED SIDE ROPE) pg 2 of 9 REF: CH123 - NET TUNNEL... - Page 3 Parts required (M12 x 220 square cup hex bolt) (FM80 ‘BRASS SCREW’) (M12 NYLOC) (end caps) pg 3 of 9 REF: CH123 - NET TUNNEL...
-
Page 4: Foundation Details
Foundation details GROUND LEVEL SOIL TIMBER SUPPORT POST CONCRETE pg 4 of 9 REF: CH123 - NET TUNNEL... -
Page 5: Surfacing Details
Surfacing details = MINIMUM SPACE = SURFACING AREA pg 5 of 9 REF: CH123 - NET TUNNEL... - Page 6 Assembly instructions Attach the STEPS to the Timber (NT1) Using M12 CUP SQUARE BOLTS / NYLOCS / END CAPS Attach the SIDE SECTION to the Timber (NT1) Using BRASS SCREWS NOTES: INSTALL AFTER ATTACH THE SIDE SECTION pg 6 of 9 REF: CH123 - NET TUNNEL...
- Page 7 Assembly instructions Attach the TOP SECTIONS to the Timber (NT1) Using BRASS SCREWS Attach the NET BOTTOM Using NYLOCS / END CAPS pg 7 of 9 REF: CH123 - NET TUNNEL...
- Page 8 Assembly instructions Attach the NET SIDES Using NYLOCS / END CAPS pg 8 of 9 REF: CH123 - NET TUNNEL...
-
Page 9: Additional Dimensions
Additional dimensions pg 9 of 9 REF: CH123 - NET TUNNEL...
Need help?
Do you have a question about the NET TUNNEL CH123 and is the answer not in the manual?
Questions and answers