Page 1
Commander 2s: Digital Installation Guide support.wallbox.com/en/knowledge-base/c2s-dig 29 November 2022 1. Technical Specifications General Specifications
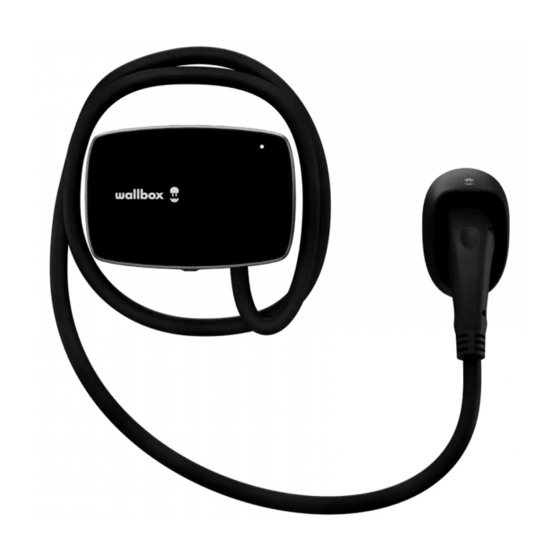
 Colour White/Black Cable Length 5 m (7 m optional) Charging Mode (IEC 61851-1) Mode 3 Dimensions without cable 221x152x115 mm Weight without cable 2.4 kg Operating Temperature -25 ºC to 40 ºC (50ºC with derating)
Cable Section up to 5 x 10 mm² Rated Frequency 50 Hz / 60 Hz Configurable Current from 6 A to the rated current Protection Rating IP54 / IK10 Overvoltage Category CAT III Residual Current Detection DC 6mA External RCCB is required per local regulations. Type A or Type B Protection against electric shock.
Page 3
Electric Drill 8 mm bits Pencil Phillips Screwdriver Torx T9 Spirit Level Measuring Tape Utility Knife Cutting Pliers ø8 x 40 mm wall anchors ø6 x 50 mm screws ø5 x 40 mm screws ø3 x 6 mm screws 1-exit M25 grommet Protective cap Opening tool 4.
5. Lower Connection Both lower and rear connections are possible when installing Commander 2. Pay attention to the instructions below if you intend to install the product using the bottom hole. For the rear connection, refer to section 6. Fix the charger to the wall by inserting the screws and the protective caps. Once the charger is fixed to the wall, make an incision on the grommet and pass the supply cable through it.
Fix the charger on the wall using the appropriate screws. Visit the EMS Installation Guide to discover which features are supported by Commander 2. 7. Electrical Wiring 8. Plug Holder Place the plug holder on the wall and mark the fixing points. Then, drill holes correspondingly with the fixing points and insert the anchors.
Fix the device to the wall by tightening the screws. 9. Connection There are two connection options when it comes to Commander 2. The charger can be connected through Ethernet or using the 4G dongle. Ethernet connection To connect the charger with the ethernet cable, remove the knock-out next to the power supply input and insert the 3-exit M25 grommet.
Page 7
4G Connectivity The 4G connectivity is an optional feature that requires an extra accessory. Refer to the Mobile Connectivity Installation Guide available at https://support.wallbox.com. Contact your sales agent for more details.
Page 8
10. Closing the Charger Attach the open end of the communications cable to the connector on the cover. Position the current selector to the appropriate setting according to the electrical installation. Positions 0, 8, and 9 are reserved for Power Sharing. Position the top clip points of the cover on the charger body.
Page 9
Recommended tightening torque 0.7 Nm +/- 10% 11. Registering the Charger Find the Serial Number (SN) and the UID of your charger. Download the myWallbox App and register. Then add your charger by introducing the information requested. Updated on 02/02/2023 Was this article helpful? Yes No...
Need help?
Do you have a question about the Commander 2s and is the answer not in the manual?
Questions and answers