Wallbox Pulsar Manual
Dynamic power sharing
Hide thumbs
Also See for Pulsar:
- User manual ,
- Installation manual (112 pages) ,
- Service manual (17 pages)
Advertisement
Quick Links
Advertisement

Related Manuals for Wallbox Pulsar


Summary of Contents for Wallbox Pulsar
- Page 1 DYNAMIC POWER SHARING Manual...
-
Page 2: Important Notes
Important Notes Install the charger following the instructions listed in the charger’s Installation Guide. Only energy meters delivered by Wallbox are compatible. Installation must be performed by qualified personnel only, according to local regulations. - Page 3 Notas importantes 1. Install the charger following the instructions listed in the charger’s Installation Guide. 2. Only energy meters delivered by Wallbox are compatible. 3. Installation must be performed by qualified personnel only, according to local regulations. Remarques importantes 1. Install the charger following the instructions listed in the charger’s Installation Guide.
- Page 4 Make sure to update your charger with the latest software version before installing the meter. Ensure the charger is powered off before connecting the meter. A Standard of Business myWallbox license is needed. For more information, refer to your charger’s guide on Wallbox Academy. https://support.wallbox.com/...
- Page 5 5. Ensure the charger is powered off before connecting the meter. 6. A Standard of Business myWallbox license is needed. 7. For more information, refer to your charger’s guide on Wallbox Academy. Remarques importantes 4. Make sure to update your charger with the latest software version before installing the meter.
-
Page 6: Summary Of Characteristics
Summary of Characteristics 1. Quantity of Primary chargers (All models except Pulsar and Quasar) 2. Quantity of Secondary Chargers 1-24 (All chargers) 3. Quantity of Energy Meters 4. Communication protocol between chargers 5. Communication protocol between Primary charger and Modbus RTU... - Page 7 Summary of Characteristics 1. Quantity of Primary chargers (Any model except Pulsar) 2. Quantity of Secondary Chargers 1-24 3. Quantity of Energy Meters 4. Communication protocol between chargers. 5. Communication protocol between Primary charger and Power Meter Modbus RTU Summary of Characteristics 1.
- Page 8 Summary of Characteristics 6. Maximum Total length 250m of charging network 7. Maximum lenght between 500m Primary charger and Energy Meter 8. Terminating Chargers 9. Configurable maximum phase Charging current network MCB Installation mains 10. Configurable installation switch rated maximum current current...
- Page 9 Summary of Characteristics 6. Maximum Total length of charging network 250 m 7. Maximum lenght between Primary charger and Energy Mete 500 m 8. Terminating Chargers 9. Configurable maximum phase current Charging Network MCB 10. Configurable installation maximum current Installation mains switch rated current Summary of Characteristics 6.
- Page 10 Materials and Tools Devices Copper C Copper SB Pulsar Commander (Secondary only) Commander 2 Pulsar Plus Tools Philips Cutting Pliers Torx T9 Torx T20 Screwdriver Pulsar Plus Copper SB Commander 2 Wire Primary Meter Connecting Strippers Cable Cable (STP Class 5E...
- Page 11 Materiales y herramientas A. Destornillador Philips E. Pelacables B. Alicates de corte F. Cable recomendado (STP clase 5E, longitud C. Torx T9 máxima 500 m) D. Torx T20 G. Cable recomendado (UTP CAT 5E, longitud máxima 250 m) Matériaux et outils A.
-
Page 12: Existing Installation
Existing Installation Non-Power Sharing Power off and carefully open all the connected chargers. Perform the steps listed in the section “Installation of charging network” of this manual. Follow the instructions for opening the charger in the charger’s installation guide... - Page 13 Existing Installation Non-Power Sharing 1. Power off and carefully open all the connected chargers. 2. Perform the steps listed in the section “Installation of charging network” of this manual. Follow the instructions for opening the charger in the charger’s installation guide Existing Installation Non-Power Sharing 1.
-
Page 14: Power Sharing
Existing Installation Power Sharing Power off and carefully open only the primary charger. Follow the instructions for opening the charger in the charger’s installation guide. Perform the steps listed in the Cabling network section of this manual. For more details, refer to the Power Sharing Smart Manual. - Page 15 Existing Installation Power Sharing 1. Power off and carefully open all the connected chargers. Follow the instructions for opening the charger in the charger’s installation guide 2. Perform the steps listed in the section “Installation of charging network” of this manual. 3.
-
Page 16: New Installation
New Installation Positioning the chargers The Primary charger communicates with the Secondary chargers through a cabling system that connects the chargers in a chain: one charger is connected to the next one. Chargers at the beginning and end of the chain must be configured as Terminating (T) chargers Chargers between the terminating chargers must be configured as non-... - Page 17 New Installation Positioning the chargers 1. The Primary charger communicates with the Secondary chargers through a cabling system that connects the chargers in a chain: one charger is connected to the next one. 2. Chargers at the beginning and end of the chain must be configured as Terminating (T) chargers 3 Chargers between the terminating chargers must be configured as non-terminating (NT) chargers 4.
- Page 18 Factory Setting Copper Family Pulsar & Commander 2 Commander Pulsar Plus Only for Pulsar and Commander. A specific Part Number must be specified when ordering the unit. NT option is Indicated with a -P- in the Part Number WBXX-X-X-X-P-XXX-X...
- Page 19 1. Defined by the position of a switch on the control board 2. Pre-defined Factory Setting 3. Only for Pulsar and Commander. A specific Part Number must be specified when ordering the unit. Indicated with a -P- in the Part Number WBXX-X-X-X-P-XXX-X New Installation 1.
- Page 20 Placement Install the energy meter after the main switch and before the division in sub- circuits. Follow the manufacturer’s instructions to install the energy meter. Install the Primary charger according to the Installation Guide and connect it to the energy meter. Connect the secondary chargers as described in the Installation section of this manual.
- Page 21 Colocación 1. Install the energy meter after the main switch and before the division in sub-circuits. Follow the manufacturer’s instructions to install the energy meter. 2. Install the Primary charger according to the Installation Guide and connect it to the energy meter. 3.
- Page 22 Placement Place the energy meter according to the diagram in the following page. Grid Utility Meter Main Switch Wallbox Meter Fuse Box Communication RCDs+MCBs Building Wallbox Charging Installation Loads Master...
- Page 23 Colocación 1. Place the energy meter according to the diagram in the following page. A. Grid E. Wallbox Meter I. Wallbox Primary B. Utility Meter F. Communication J. Car C. Main Switch G. RCDs + MCBs D. Fuse Box H. Building Loads Positionnement 1.
- Page 24 Connection with Energy Meter Commander 2 RS485 Temco SPM1-100-AC Carlo Gavazzi EM340 / EM112 / EM330...
- Page 25 Connection with Energy Meter Commander 12 V Carlo Gavazzi EM340 / EM112 / EM330 Temco SPM1-100-AC...
- Page 26 Connection with Energy Meter Copper SB Rev. A Carlo Gavazzi EM340 / EM112 / EM330 Temco SPM1-100-AC...
- Page 27 Connection with Energy Meter Copper SB Rev. B RS485 Carlo Gavazzi EM340 / EM112 / EM330 Temco SPM1-100-AC...
- Page 28 Connection with Energy Meter Pulsar Plus RS485 Carlo Gavazzi EM340 / EM112 / EM330 Temco SPM1-100-AC...
- Page 29 Connection with Energy Meter Copper C Carlo Gavazzi EM340 / EM112 / EM330 Temco SPM1-100-AC...
-
Page 30: Energy Meter
Energy Meter For Carlo Gavazzi meters, please follow the meter’s manual included in the box. EM 340 EM 112 EM 330 10 11 12 3 4 5 6 7 8 10 11 13 14 15 EM 112 1-Phase < 100 A EM 330 3-Phase >... - Page 31 Energy Meter 1. Para contadores Carlo Gavazzi, sigue las instrucciones del manual del contador incluido en la caja. EM 112 1-Phase < 100 A EM 330 3-Phase > 65 A EM 340 3 -Phase < 65 A Energy Meter 1. Dans le cas des compteurs Carlo Gavazzi, veuillez suivre le manuel du compteur inclus dans la boîte. EM 112 1-Phase <...
- Page 32 Energy Meter EM 340 10 11 12 EM 340 Wallbox D- (RS485B) D+ (RS485A)
- Page 33 Energy Meter EM 112 3 4 5 6 7 8 EM 112 Wallbox D- (RS485B) D+ (RS485A)
- Page 34 Energy Meter EM 330 EM 330 Wallbox D- (RS485B) 10 11 13 14 15 D+ (RS485A) EM 330 requires the following current transformers based on the amperage limit and the characteristics of the cabling system. 5. Number of 2. Amperage limit 3.
- Page 35 Energy Meter 1. EM 330 requires the following current 2. Amperage Limit transformers based on the amperage limit and the 3. Transformer characteristics of the cabling system. 4. Hole diameter 5. Number of Transformers Energy Meter 1. EM 330 requires the following current 2.
- Page 36 Temco SPM1-100-AC Used for 1-Phase installation. Up to 100A. Clip the power meter to the mains power cable. Neutral cable must not be drawn through the clamp.
- Page 37 Temco SPM1-100-AC 1. Used for 1-Phase installation. Up to 100A. 2. Clip the power meter to the mains power cable. 3. Neutral cable must not be drawn through the clamp. Temco SPM1-100-AC 1. Used for 1-Phase installation. Up to 100A. 2.
- Page 38 Temco SPM1-100-AC CURRENT DIRECTION CABLE 12 V RS485 + RS485 -...
-
Page 39: Electrical Wiring
Electrical Wiring SPM1-100-AC Voltage + Wallbox Voltage - RS485 - D- (RS485B) RS485 + D+ (RS485A) Power Power +... - Page 40 Cabling Network Copper, Commander 2 and Pulsar Plus have two slots for input and output cabling so the conjunction is done inside the charger. CAN-L CAN-L CAN-H CAN-H CAN-L CAN-H CAN-H CAN-H CAN-L CAN-L CAN-L CAN-L CAN-H CAN-H T Connection...
- Page 41 Cabling Network 1. Copper, Commander 2 and Pulsar Plus have two slots for input and output cabling so the conjunction is done inside the charger. Cabling Network 1. Copper, Commander 2 and Pulsar Plus have two slots for input and output cabling so the conjunction is done inside the charger.
- Page 42 Connection between chargers Commander 2 CAN-L CAN-H CAN-L CAN-H T Connection NT Connection...
- Page 43 Connection between chargers Copper SB Rev. B CAN-L CAN-L CAN-H CAN-H T Connection NT Connection...
- Page 44 Connection between chargers Pulsar Plus CAN-L CAN-L CAN-H CAN-H T Connection NT Connection...
- Page 45 Connection between chargers Copper C / Copper SB Rev. A CAN-H CAN-H CAN-L CAN-L T Connection NT Connection...
- Page 46 Connection between chargers Commander CAN-L CAN-H T Connection...
- Page 47 Secondary only con- nection Pulsar CAN-H CAN-L T Connection...
- Page 48 24 secondary chargers. Configure the rotary switch for each charger to configure its role. Position Configuration Secondary Primary Any other: Stand alone. Check the chargers Installation guide Charger Primary Secondary Pulsar Pulsar Plus Commander Commander 2 Copper Copper SB...
- Page 49 Configuración 1. Each Dynamic power sharing network consists of one primary charger and up to 24 secondary chargers. 2. Configure the rotary switch for each charger to configure its role. 3. Any other: Stand alone. Check the chargers Installation guide Configuration 1.
-
Page 50: Network Configuration
Configure the dynamic power sharing functionality only on the Primary charger after powering up the system. The Primary charger can be configured from the Wallbox app or touchscreen interface for Commander family chargers. A Standard or Business account is needed to configure this functionality. - Page 51 Network Configuration 1. Configure the dynamic power sharing functionality only on the Primary charger after powering up the system. 2. The Primary charger can be configured from the Wallbox app or touchscreen interface for Commander family chargers. 3. A standard or business account is needed to configure this functionality. For more information see the corresponding charger’s User Guide.
- Page 52 Primary Charger Configuration Number of Chargers: Input the number of chargers including the Primary charger Maximum current per phase: It is the maximum current that can be supplied to the charging network. This value is usually the rated current of the Minimum current per charger: From 6 A to 10 A.
- Page 53 Primary Charger Configuration 1. Number of Chargers: Input the number of chargers including the Primary charger 2. Maximum current per phase: It is the maximum current that can be supplied to the charging network This value is usually the rated current of the MCB. 3.
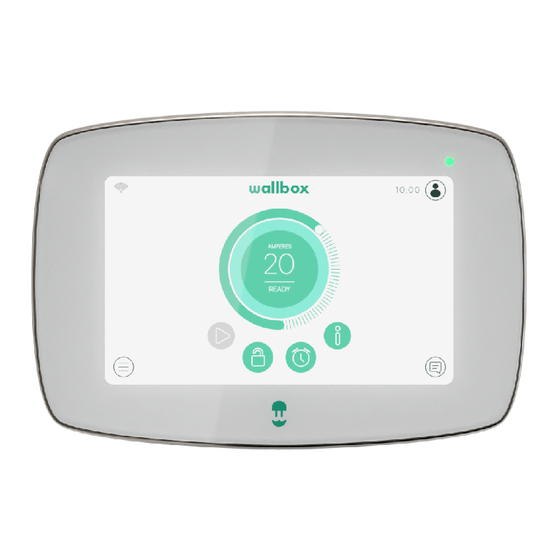
- Page 54 Configuration Touchscreen Interface Commander: In the configuration menu • Settings • System • Dynamic Power Sharing Commander 2: In the configuration menu • Settings • Dynamic Power Sharing...
- Page 55 Configuration Touchscreen Interface 1. Commander: In the configuration menu 2. Commander 2: In the configuration menu • Settings • Settings • System • Dynamic Power Sharing • Dynamic Power Sharing Configuration Touchscreen Interface 1. Commander: In the configuration menu 2. Commander 2: In the configuration menu •...
- Page 56 Configuration Wallbox App All the primary chargers can be configured through the Wallbox App Once connected and synchronized with the charger, access through • Configurations Menu • Dynamic Power Sharing...
- Page 57 Configuration Wallbox App 1. All the primary chargers can be configured through the Wallbox App 2. Once connected and synchronized with the charger, access through • Configurations Menu • Dynamic Power Sharing Configuration Wallbox App 1. All the primary chargers can be configured through the Wallbox App 2.
- Page 58 Sverige +49 69 96759775 +31 20 808 0847 +46 852503203 España Norge United Kingdom +34 932 20 95 75 +47 51 74 20 00 +44 20 3318 3779 France Österreich +33 1 76 46 09 15 +43 720882116 www.wallbox.com service@wallbox.com...
- Page 60 support.wallbox.com...
Need help?
Do you have a question about the Pulsar and is the answer not in the manual?
Questions and answers