Table of Contents
Advertisement
Quick Links
Advertisement
Table of Contents

Related Manuals for Wood Stone ONEREV WS-RV-7880


Summary of Contents for Wood Stone ONEREV WS-RV-7880
- Page 1 Installation & Operation Manual ONEREV Rotating Oven Gas-Fired ONEREV WS-RV-7880 WOOD STONE CORPORATION Toll Free 800.988.8103 1801 W. Bakerview Rd. Tel 360.650.1111 Bellingham, WA 98226 USA Fax 360.650.1166 www.woodstone-corp.com DOC NO M0357.02 REVISED OCTOBER 2024...
-
Page 2: Table Of Contents
Control Panels � � � � � � � � � � � � � � � � � � � � � � � �17 Limited Warranty � � � � � � � � � � � � � � � � � � � � � �32 WOOD STONE CORPORATION info@woodstone-corp.com M0357.02 OCTOBER 2024... -
Page 3: The Onerev Oven
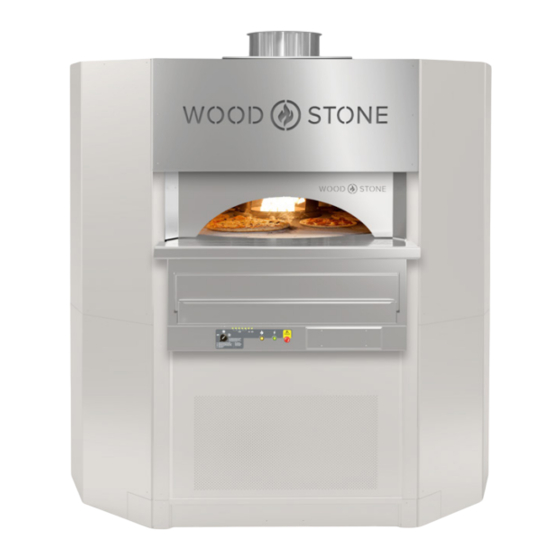
THE ONEREV OVEN OneRev Oven Installation & Operation Manual INSTALLATION & OPERATION MANUAL FOR THE WOOD STONE ONEREV OVEN RADIANT FLAME ROTATING OVEN WS-RV-7880 GAS-FIRED MODEL ADDITIONAL COPIES AVAILABLE UPON REQUEST WOOD STONE CORPORATION info@woodstone-corp.com M0357.02 OCTOBER 2024 800.988.8103 TOLL FREE E-MAIL woodstone-corp.com... -
Page 4: Cautions & Warnings
This product must be installed by a licensed plumber or gas fitter when installed within the Commonwealth of Massachusetts. SAVE THE INSTRUCTIONS Wood Stone’s OneRev ovens have been tested and approved by Intertek Testing Services, and are ETL Listed to ANSI Z83.11:2016, (R2021) CSA1.8:2016 (R2021), CSA 2.17 : 2017 Ed. 4 and to NSF/ANSI Standard 4 - 2022. -
Page 5: Specifications
75 1/2 Removable THE INFORMATION CONTAINED IN THIS DRAWING IS THE SOLE PROPERTY OF WOOD STONE CORPORATION. ANY REPRODUCTION OR USE IN PART OR AS A WHOLE WITHOUT EXPRESS WRITTEN PERMISSION OF WOOD STONE CORP. IS PROHIBITED. for Service AIR INTAKE:... -
Page 6: Unloading & Moving The Oven
DO NOT TURN THE OVEN ON ITS SIDE!. Moving a Wood Stone oven can present interesting challenges to even the most experienced riggers� Make sure to secure the proper equipment and make safety your first priority� Please don’t hesitate to call the factory for technical support�... -
Page 7: Leveling The Oven
(underneath the seismic pockets)� Secure the Oven: Once the shims are in place, evenly raise the leveling bolts until the oven’s weight is securely resting on the shims� WOOD STONE CORPORATION info@woodstone-corp.com M0357.02 OCTOBER 2024 800.988.8103... -
Page 8: Lowering The Deck
BATTING INNER BOLT NOTE Leave levers in place in the vertical position so that they may be used for future service or transportation if needed� WOOD STONE CORPORATION info@woodstone-corp.com M0357.02 OCTOBER 2024 800.988.8103 TOLL FREE E-MAIL woodstone-corp.com... -
Page 9: Installation Clearances
1. The Wood Stone OneRev oven must have a minimum 1 inch clearance to combustibles from all sides, and a 12 inch clearance to combustibles from the top (see figures below)� Any construction above and/or 6 inches to either side of the door, must be non-combustible�... - Page 10 Area which MUST be left accessible for operation and servicing of the oven� Area which MUST be left UNOBSTRUCTED to allow proper intake ventilation for the gas burners� WOOD STONE CORPORATION info@woodstone-corp.com M0357.02 OCTOBER 2024 800.988.8103...
-
Page 11: Venting
3 months or as necessary. All combustion products and cooking vapors from the Wood Stone OneRev oven vent through a 12-inch ID flue collar located on the top of the oven. Submit your venting plans to your local authorities before proceeding with your installation, as there may be additional requirements in your area. -
Page 12: Exhaust Fan
Instructions are included in the manual� Please contact Wood Stone if you have any questions� NOTE Wood Stone recommends you submit your venting plans in advance to your local authority for approval� The hood must be installed in accordance with the Hood Manufacturer’s instructions, NFPA 96, and any additional relevant local codes� All installations are subject to the approval of the local authority having jurisdiction�... -
Page 13: General Hood Installation
& duct manufacturer's instructions, and applicable local & national codes. 1. To mount a Wood Stone hood, determine the center line of the hood and place it on the oven in line with the center line of the oven “A”�... -
Page 14: Gas Code Limitations
DO NOT USE A FLAME to test for leaks! The Burner Manifold pressures have been adjusted and tested at the factory� Please contact the Wood Stone Service Department before attempting any adjustments to the gas system� If Gas delivery pressure is in excess of 14" W�C� (1/2 psi), a suitable regulator must be provided (by others)�... -
Page 15: Utility Connections
Junction Box on the terminal strip, labelled Fan Line and Fan Load� The Junction box is located to the rear of the oven on the right or left side, depending upon model configuration� If using an exhaust fan not provided by Wood Stone, please contact Wood Stone to verify its suitability and if it will work with the interlock�... -
Page 16: Setting Exhaust Fan Speed
AIRFLOW MEASUREMENT If an airflow measurement is required, this is best measured at the fan outlet by a qualified air balancer or properly equipped HVAC technician� Please contact Wood Stone if there are any questions� For Hood installations set the airflow in accordance with the specifications on the hood data plate. -
Page 17: Control Panels
CONTROL PANELS OneRev Oven Installation & Operation Manual CONTROL PANELS–FRONT PANEL Left side Right side Controls (covered) Controls Deck Underfloor Burner Center Burner Side Burner Indicator Lights (1–5) Indicator Light Indicator Light Left side Controls Function Switch Heating Main Power Emergency Stop Button Indicator Light... -
Page 18: Daily Oven Operation
IMPORTANT: If at any time you feel that the burners are not operating properly, turn the oven off and call WOOD STONE for service instructions. Before servicing, disconnect the electrical supply at the breaker and turn off the gas supply at the appliance’s individual gas shutoff valve. This oven uses electronic ignition systems for the gas burners. -
Page 19: Cook Settings Guide
4 to 8.5 4.5 to 9 5 to 9.5 5.5 to 10 6 to 10.5 6.25 to 11 10.5 6.75 to 11 7.75 to 11 WOOD STONE CORPORATION info@woodstone-corp.com M0357.02 OCTOBER 2024 800.988.8103 TOLL FREE E-MAIL woodstone-corp.com 1801 W. Bakerview Rd. 360.650.1111... - Page 20 TOP HEAT and BOTTOM HEAT settings low and gradually move them up� After changing the TOP HEAT, give the oven around 15 minutes to fully adjust� If changing from a higher to a lower temperature, you can turn the function switch to ROTATION to help the oven adjust� WOOD STONE CORPORATION info@woodstone-corp.com M0357.02 OCTOBER 2024 800.988.8103...
-
Page 21: Locking Mechanism
2 min 37 sec 2 min 18 sec 2 min 4 sec 1 min 52 sec 1 min 42 sec 1 min 34 sec 1 min 30 sec WOOD STONE CORPORATION info@woodstone-corp.com M0357.02 OCTOBER 2024 800.988.8103 TOLL FREE E-MAIL woodstone-corp.com 1801 W. -
Page 22: Warranty
OVEN DECK The oven deck should be swept after the oven is heated and before beginning to cook� Wood Stone recommends using a natural fiber brush to remove debris that accumulates during cooking� Always brush toward the doorway and into the debris mantel�... -
Page 23: Sequence Of Operations
SEQUENCE OF OPERATIONS OneRev Oven Installation & Operation Manual Turn the Function Switch clockwise to "ON" position� Deck starts to rotate� Gas Power is switched ON� The Pilots for the underfloor IRs, Center and Side burners will light (as indicated by the 7 green Burner Indicator LEDs) which will ignite the burners�The Center Flame will remain at 50% until the Oven Temperature reaches 175 °F (80 °C),... -
Page 24: Electrical Diagram
ELECTRICAL DIAGRAM OneRev Oven Installation & Operation Manual INCOMING POWER CONNECTIONS WOOD STONE CORPORATION info@woodstone-corp.com M0357.02 OCTOBER 2024 800.988.8103 TOLL FREE E-MAIL woodstone-corp.com 1801 W. Bakerview Rd. 360.650.1111 An ongoing program of product improvement may Bellingham, WA 98226 USA 360.650.1166... -
Page 25: Electrical Layout
ELECTRICAL DIAGRAM (1 OF 7) OneRev Oven Installation & Operation Manual TOP LEVEL ELECTRONICS ELECTRICAL LAYOUT MOTOR B1 CENTER SERVICE PANEL M0357.02 OCTOBER 2024... -
Page 26: Valve Wiring
ELECTRICAL DIAGRAM (2 OF 7) OneRev Oven Installation & Operation Manual VALVE WIRING M0357.02 OCTOBER 2024... -
Page 27: Electrical Components
ELECTRICAL DIAGRAM (3 OF 7) OneRev Oven Installation & Operation Manual ELECTRICAL COMPONENTS - WD810 REV 906 M0357.02 OCTOBER 2024... -
Page 28: A1 - Front Panel Assembly
ELECTRICAL DIAGRAM (4 OF 7) OneRev Oven Installation & Operation Manual A1 - FRONT PANEL ASSEMBLY - WD810 REV 906 M0357.02 OCTOBER 2024... -
Page 29: A2 - Control Panel Assembly
ELECTRICAL DIAGRAM (5 OF 7) OneRev Oven Installation & Operation Manual A2 PANEL - CONTROL PANEL ASSEMBLY - WD810 REV 906 M0357.02 OCTOBER 2024... -
Page 30: A3 - Power Panel Assembly
ELECTRICAL DIAGRAM (6 OF 7) OneRev Oven Installation & Operation Manual A3 - POWER PANEL ASSEMBLY - WD810 REV 906 M0357.02 OCTOBER 2024... -
Page 31: Panel Board
ELECTRICAL DIAGRAM (7 OF 7) OneRev Oven Installation & Operation Manual PANEL BOARD M0357.02 OCTOBER 2024... -
Page 32: Limitations Of Liability
In the event of warranty claim or otherwise, the sole obligation of Wood Stone shall be the repair and/or replacement, at the option of Wood Stone, of the appliance or component or part thereof� Such repair or replacement shall be at the expense of Wood Stone with the exception of travel over 100 miles or two hours, overtime, and holiday charges which shall be at the expense of the purchaser�...
Need help?
Do you have a question about the ONEREV WS-RV-7880 and is the answer not in the manual?
Questions and answers