
Subscribe to Our Youtube Channel
Related Manuals for amiad Omega 36K


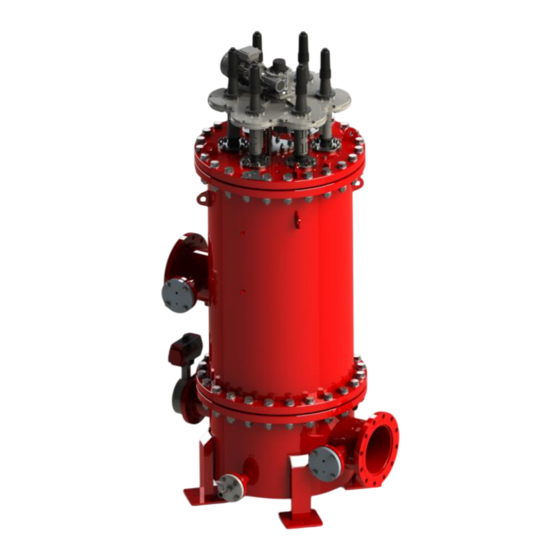
Summary of Contents for amiad Omega 36K
- Page 1 OMEGA Filters Installation & Operation Manual OMEGA 36K Model: Date: 06.2021 NOTICE: This document contains Amiad Confidential Information. Copying and distributing this document are strictly prohibited.
-
Page 2: Table Of Contents
Amiad or consult Amiad experts or its authorized representatives if you have any questions. Amiad Water Systems Ltd. D.N. Galil Elyon 1, 1233500, Israel Tel: 972 4 690 9500 | Fax: 972 4 814 1159 Email: info@amiad.com Om e ga 36 K –... -
Page 3: Safety Instructions
➢ Use the filter only for its intended use as designed by Amiad, any misuse of the filter may lead to undesired damage and may affect your warranty coverage. Please consult with Amiad prior to any non -regular use of this equipment. -
Page 4: Operation And Control
First Operation procedures exactly as described in this manual. ➢ Commissioning the filter should be done by an authorized Amiad technician, do not attempt to commission the filter unaccompanied since this may lead to undesired damage and may affect your warranty coverage. - Page 5 Maintenance Before any maintenance or non-regular operation please read the following: ➢ Servicing the filter should be done only by technicians authorized by Amiad. ➢ Disconnect the filter from the power supply and lock the Main Power Switch. ➢ Disconnect the compressed air supply, release the residual pressure and lock the Pneumatics Main Valve.
-
Page 6: Technical Specifications
Technical Specifications General 1500 m /hr (6,600 GPM) Max. Operating flow rate: Operating pressure Min. / Max. 2.0 bar/10.0 bar (30 psi/150 psi) 10 bar (150 psi) Design Pressure 60⁰C (140 Design Temperature AD-2000 Design Code 6 X Multi-layer Weavewire Screens Filtration Element: 36,000 cm (5,600 in... -
Page 7: Ga Drawing
GA Drawing Om e ga 36 K – In s ta llat io n & Op er ati on Man u a l Pag e 7 o f 57... -
Page 8: Description Of Filter Operation
Description of Filter Operation Filter Operation Amiad's Omega Series is composed of automatic filters, with multiple screens operated by a common electric driven screen cleaning mechanism. The "Omega" filter flow rate ranges up to 2,200 m³/h (9,700 gpm) and on the 10-500-micron filtration degree range. - Page 9 Push-Button (Hardware or on the HMI) to start Flush cycle regardless DP or time interval. OMEGA Models Amiad's Omega Series product line consists of the following models. Each model includes one motor and one exhaust valve, as follows: • Omega 18K with 3 filtration elements, for up to 750 m3/h (3,300 gpm) •...
- Page 10 Cross Section Drawing Drive Unit Transmission Plate Screens SLN Suction Scanner OUTLET FLUSHING INLET Flushing Valve Flushing Chamber Om e ga 36 K – In s ta llat io n & Op er ati on Man u a l Pag e 10 o f 5 7...
-
Page 11: Control System
Control System - Generic control philosophy 1. Introduction: This section is applicable for cases in which the operation and control of the Omega filter is integrated into the customer’s control system. If the filter is supplied with a control panel, please refer to the IOM provided with the control panel. The following instructions refer to hardware and software. -
Page 12: Analog Inputs
3. Digital Inputs for single unit (Push-buttons and Selectors may be presented on the HMI instead of hardware): Name Function Comments General Reset Clear faults, return to initial operation mode. Push-button on local Operation panel Start Cycle Initiate flush cycle of the system Push-button on local Operation panel Stop Cycle Stop cycle (Emergency), Stop motor + Close Flush Valve... - Page 13 Flush cycle steps of a Single Omega filter Step Output Status Description Initial stage – Scanners are in lower Position Cycle On Cycle On Indication on HMI Flush Valve Open + Indication on HMI 3 - 5 seconds (depends on valve opening time) Delay Option - Wait for flush valve Open indication (Input 9 if exist).
- Page 14 7. Status Definitions: a. Idle: System is OFF. No flow, No pressure. b. Filtering: Power is ON, Suction scanners are at either lower or upper position. The filter is ready for the next flushing cycle. Note: When a filter is NOT in flushing mode (No flushing Demand), the PLC logic should be checking the status of the Limit Switches to verify that the suction scanners are in lower or top position.
- Page 15 Fault Filter System Reaction Comments Reaction Red Light with Alarm Motor Overload 1) Next unit start flushing. notification should be Can trip during operation 2) System can continue displayed on Local Panel or in advance. Stop Flushing. running as long as and/or HMI.
- Page 16 Fault Filter System Reaction Comments Reaction Red Light with Alarm notification should be Analog Sensor Fault: displayed on Local Switch to Continuous PT or PDT sensor is Panel and/or HMI. Flushing mode. out of range or pre- Operator should set parameter is identify source and missing.
- Page 17 Single/Double Operation (for multiple systems only) In order to improve the ability of the system to deal with heavy loads of suspended solids it is essential to have the option of flushing both filters simultaneously. This option should be selected from the HMI. Multiple stroke flush cycles In most cases, one scanning stroke is enough for a proper cleaning of the filter, however, in some cases, due to hydraulic conditions and/or dirt types, a few strokes will provide better results.
-
Page 18: Parameters Setting
Parameters setting: The following parameters values should be programmable via the HMI: Parameter: Units: Range: Default: DP Set point *: 0.1 – 0.7 HDP Set point *: 0.7 – 1.0 Time in HDP before Fault: Minutes 1 – 60 Interval for flushing by time: Minutes 5 –... -
Page 19: Installation Instructions
Installation Instructions General 1. Before beginning the installation process, carefully read the safety instructions chapter of this document and make sure that all workers at the installation site are fully aware of and comply with, these and any other local safety instructions. 2. -
Page 20: Mechanical Installation
Mechanical installation 1. Locate the filter package near the location in which the filters will be installed. 2. Locate the filter at its intended operational location, level it so that the Inlet, Outlet and flushing flanges are aligned with the piping. 3. -
Page 21: Electrical Installation
Torques [N-M] for flange tightening according to gasket type and pressure rating. TORQUE FOR TORQUE FOR FLAT TORQUE FOR FLANGE SIZE O-RING RUBBER GASKETS GS-ST P/S GASKETS DN 25 - 1" 34-51 34-51 DN 40 – 1.5" 34-51 34-51 DN 50 - 2" 22-33 47-71 DN 80 - 3"... -
Page 22: Pneumatic Installation
Pneumatic installation 1. The pneumatic connection in the case of the OMEGA filters for this system refers only to the Actuators of the flushing valves. 2. Prior to the connection of the air supply to the solenoids, it is recommended to review the data sheets of the solenoid and verify the connection type for the air supply (dimension and threading) 3. - Page 23 Step Action Comments Confirm Meaning that it is possible to Turn ON the control Power. Power for the motor start the motor manually, but it should be on “Manual” at this stage. will not run automatically. Operate momentarily motor upward and verify that Switch rotation direction of the scanners are indeed moving upward motor if required.
-
Page 24: Commissioning Checklist
Commissioning Checklist: Step Action Comments Confirm Slightly open the Inlet valve (N1 in the GA drawing) and fill the filter gradually until no more air is coming out from the air release valve. Open the inlet valve completely Verify that the pressure in the filter is within the Inspect and remedy any leaking. -
Page 25: Part Schedule (Omega 36K - 046110-000003)
Part Schedule (Omega 36K – 046110-000003) ITEM CAT. NO. DESCRIPTION QTY. MATERIAL OMEGA 36K Housing C/St 770103-000236 28" Seal G-ST-P/S 700-PN10 NBR 710105-005553 OMEGA-27/36K LID C/ST 760101-000855 HEX BOLT M27 150MM C/ST DIN931 ZINC PLATED C/S 1.3.1 760103-000081 FLAT WASHER M27 DIN125 ZINC PLATED C/S 1.3.2... - Page 26 ITEM CAT. NO. DESCRIPTION QTY. MATERIAL 710103-010971 6 mm Spacer S/ST 316 710103-010972 1 mm Spacer S/ST 316 710103-010973 2 mm Spacer S/ST 316 720302-000323 ROTARY LIMIT SWITCH 5.4.1 760101-001536 Socket Head Cap Screw M6x25 DIN916 S/ST 316 760102-000142 NYLON INSERT LOCKNUT M6 S/ST316 DIN985 S/ST 316 760101-001334 EYE Bolt M10 X 17mm...
- Page 27 ITEM CAT. NO. DESCRIPTION QTY. MATERIAL 9.2.8 710101-001319 SLN Body Injected Scanner and long ribs 6 X 16 PA12 9.2.9 710101-001324 SLN Front Washer PA12 OMEGA 6 X 16 PA12 9.2.10 710101-001322 SLN Nut Delrin OMEGA 6 X 16 RPA12 710101-001354 OMEGA STOPPER RING RPA12 BLACK RPA12...
- Page 28 Parts Drawing - Overview Screen Element Transmission Gear Assembly Filter Lid Outlet Filter Housing Flushing Port Inlet Om e ga 36 K – In s ta llat io n & Op er ati on Man u a l Pag e 28 o f 5 7...
- Page 29 Parts Drawing – General 1.4.1 Om e ga 36 K – In s ta llat io n & Op er ati on Man u a l Pag e 29 o f 5 7...
- Page 30 Parts Drawing – Transmission Plate Assembly Om e ga 36 K – In s ta llat io n & Op er ati on Man u a l Pag e 30 o f 5 7...
- Page 31 Parts Drawing – Continue 5.1.2 5.1.1 7. Sealing Flange Assembly 7.11 7.10 5.10 Om e ga 36 K – In s ta llat io n & Op er ati on Man u a l Pag e 31 o f 5 7...
- Page 32 Parts Drawing – Screens & Scanners 12.2 12.1 12.2 Om e ga 36 K – In s ta llat io n & Op er ati on Man u a l Pag e 32 o f 5 7...
- Page 33 Parts Drawing – Continue 9. SLN SUCTION SCANNER 9.1.2 9.1.1 9.2 SLN Assembly SW for OMEGA 9.2.2 9.2.1 9.2.4 9.2.5 9.2.6 9.2.7 9.2.8 9.2.9 9.2.3 9.2.10 Om e ga 36 K – In s ta llat io n & Op er ati on Man u a l Pag e 33 o f 5 7...
- Page 34 Parts Drawing – Drive Unit Om e ga 36 K – In s ta llat io n & Op er ati on Man u a l Pag e 34 o f 5 7...
- Page 35 Parts Drawing – Control & Flush Valve Om e ga 36 K – In s ta llat io n & Op er ati on Man u a l Pag e 35 o f 5 7...
-
Page 36: Maintenance
Maintenance a. Materials and Tools Auxiliary materials will appear in the document by their ID. Material Description Figure Thread locking Loctite 243 Used to lock bolts to avoid openings due to ML-1 vibration. Cat. No. 780201-000031 Silicone Grease MOLYKOTE(R) PG-21 PLASTISLIP GREASE ML-2 Used for O-ring lubrication Cat. - Page 37 Tools will appear in the document by their ID. Tool / Jig Description Figure TL-1 Seal Extractor Hex Key (Allen): TL-2 4, 5, 6, 8, 10mm Hew Sockets (1/2" drive): TL-3 10, 12, 13, 14, 15, 16, 17, 18, 20, 21, 22, 27, 30, 33, 36, 41 mm Hex Long Sockets (1/2"...
- Page 38 Tool / Jig Description Figure TL-14 IRON Hammer: 1kg Eye Bolt: TL-15 M6 x3, M10 x3, M12 x3 TL-16 Seal Extractor Open End Torque Wrench: TL-17 Torque Range: 7-1350 Ft-Lb Tight-Access Offset Sockets (1/2" Square TL-18 Drive): 5/8, 7/8, M12. Lifting Device with Minimum lifting capacity of TL-19 1500 Kg...
-
Page 39: General Inspection
b. General inspection The maintenance requirements of automatic Self-Cleaning Filters are directly related to their Flushing frequency. Flushing frequency depends on water quality (Suspended Solids and Chemistry) and flow rate. Therefore, the frequency of scheduled routine maintenance activities should be determined du ring the commissioning and first few months of operation and should not surpass 6 months. - Page 40 e. Screen COP (Clean-Out-of-Place) Screens cleaning is required as part of the maintenance procedure or in case the filtration system is significantly clogged. In most cases cleaning with high pressure washer is sufficient. Wash the Screens with high pressure washer. Rinse the Screens from outside-in, and then rinse their interior surface.
- Page 41 Opening the filter and disassembling its inner components is necessary for replacing screens, periodic maintenance and repairs. The following instructions applied for Omega 36K and 27K with fixed Transmission Plate. Preparation: Initiate a manual flush cycle and stop the flushing when the scanners are at their top position.
- Page 42 Loosen the Rotary Limit Switch Assembly (5.4) electric cable from its fasteners and verify it is long enough for safe removal of the Transmission Plate (5). Note: In case the cable is not long enough, it is highly recommended to disconnect the cable from the Junction Box side and not from the Rotary Limit Switch terminals.
- Page 43 Unscrew & remove the lid’s bolts (1.3) in a balanced method according to the procedure described at section n. It is recommended to make a mark on the filter upper flange and lid, so it will be easy to bring them back to the same position.
- Page 44 13. Pull up and remove the Suction Scanner Assemblies (9). Carefully pull out the Screens (10), be careful not to damage them. Remove both Seals (10.1 + 10.1.1) from the Screens (each seal has an internal spongy ring – see illustration below).
- Page 45 g. Replacing Seals and O-Rings Replacing Screens Seals and O-rings ML-2 ML-2 Replace O-rings (8.1 +8.2). Replace Screen seals (10.1 + 10.1.1) Apply ML-2 on all O-Rings and Screen ML-2 10.1&10.1.1 seals. Scanner’s Sealing arrangement: ML-2 Unscrew Sealing Nut (7.6). Remove and replace O-Ring (7.9) by ML-2 means of Seal Extractor.
- Page 46 Suction Scanner - Inspection and Maintenance: The following instructions determine the criteria for SLN replacement. However, in Thorough Maintenance after one year of operation it is highly recommended to replace the SLN sets regardless of their mechanical condition. Tighten the SLN Nut (9.2.10) by means of a suitable wrench. 1.
- Page 47 i. Reassembling filter components Clean and inspect all internal parts before re-assembling the filter . Verify that parts (11 + 11.1) are property located. ML-2 11.1 Apply ML- 2 on both Screen Seals (10.1). Place Screen Seals on Screen (10) edges, note the orientation of the seal opening toward inside (see below illustration).
- Page 48 ML-2 ML-2 Attach Lifting Device [TL-19] to Lid. Lift the filter Lid and transmission plate assembly upright and bring it above the filter Housing. Turn the Lid until the marks are aligned. Slowly lower the Lid straight and leveled. The Scanner Shafts should go through the openings and all the Upper Clamps must be positioned properly in the Lid holes.
- Page 49 Assemble Scanner Shafts to the Cardan Joints (5.1) using Clevis Pins (5.1.1) and R-clips (5.1.2). Lift the scanner shafts and bring it into its place in the Cardan joint by means of 5 mm Pin Punch Tool (TL-13). Scanner shaft service hole Mount the drive unit (in case it was removed) on the transmission plate.
- Page 50 Rotary Limit Switch adjustment instruction, (Model: TER BASE) The following description is related to standard Amiad Rotary Limit Switch Assembly, (Model: TER BASE IP69 P/No. 720302-000323). Usually – this adjustment is done in the factory and operator does not need to deal with it. However, in case of retrofit, transmission plate replacement or limit switch assembly replacement, this adjustment is required.
- Page 51 Central Locking Screw Stop Beeping Screw #2 Top Limit Switch Adjusting Central Locking 8. Instruction to set the BLS (Bottom Limit Switch): Screw Turn the transmission plate input shaft CW until the threaded shafts are in their maximum lower position by means of 22 mm (7/8”) socket with Drive Breaker Bar (TL-4).
- Page 52 9. Turn the central shaft of the transmission plate up and down once again and verify limit switch contact in the correct positions. 10. Verify that the limit switch assembly is wired. Put back the limit switch cover, make sure the seal is properly in place.
- Page 53 m. Safety Clutch adjustment The gear box is equipped with a safety clutch (Mechanical Torque Limiter) which will slip if due to a mechanical problem, the required rotation torque it too high. The clutch is adjusted at the factory to 120 N-M. In case it is slipping during normal operation, it is possible to add torque by tightening the nut a few degrees CW.
-
Page 54: Winterization Procedure
n. Controlled Tightening/ Loosening of Lid nuts Tightening The nuts of all bolts shall be installed finger tight, followed by gradually increasing the bolt force to the required value in minimum 4 passes as described in the below table. The bolt sequence shall be in accordance with the given bolt sequence chart. -
Page 55: Troubleshooting
Troubleshooting Malfunction Possible Cause Corrective Action Close downstream valve and initiate 3-5 consecutive flush cycles. Extreme load of Switch to continuous flushing mode (if applicable) and suspended solids. gradually open downstream valve. Watch the DP, if stable – try to return to normal operation mode. -
Page 56: Amiad Limited Warranty
In no event shall Amiad be liable to the Buyer or any third party for any damages to property, or for any intangibl e or economic loss, including loss of profits, loss of customers or damage to reputation, for any damages, including indirect, special, consequen tial damages, or punitive damage arising out of or in connection with this Warranty, or arising out of or in co nnection with the product's performance or failure to perform, even if it has been advised of the possibility of such damages. - Page 57 Manufacturer Amiad Water Systems Ltd. D.N. Galil Elyon 1, 1233500, Israel. Tel: +972 4690 9500 | Fax: +972 48141159 | Email: info@amiad.com European Authorised Representative for CE Obelis s.a. Bd Général Wahis 53, 1030 Brussels, Belgium. Tel: +(32) 2732 5954 | Fax: +(32) 27326003 | Email: mail@obelis.net EC Declaration https://www.amiad.com/list-certificates/...
Need help?
Do you have a question about the Omega 36K and is the answer not in the manual?
Questions and answers