Advertisement
Quick Links
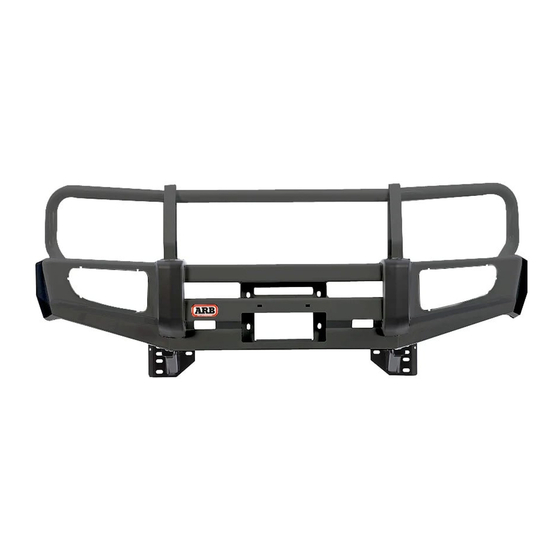
Part Number:
Product Description:
Suited to vehicle/s:
Winch install kit:
Radar install kit:
REGARDING VEHICLES EQUIPPED WITH SRS AIRBAG;
When installed in accordance with these instructions, the front protection bar does not affect operation of
the SRS airbag.
ALSO, NOTE THE FOLLOWING:
This product must be installed exactly as per these instructions using only the hardware supplied.
In the event of damage to any bull bar component, contact your nearest authorised ARB stockist.
Repairs or modifications to the impact absorption system must not be attempted.
Do not use this product for any vehicle make or model, other than those specified by ARB.
Do not remove labels from this bull bar.
This product or its fixing must not be modified in any way.
The installation of this product may require the use of specialized tools and/or techniques
It is recommended that this product is only installed by trained personnel
These instructions are correct as at the publication date. ARB Corporation Ltd. cannot be held
responsible for the impact of any changes subsequently made by the vehicle manufacturer
During installation, it is the duty of the installer to check correct operation/clearances of all
components
Work safely at all times
Unless otherwise instructed, tighten fasteners to specified torque
3450420
DELUXE
BULLBAR
JEEP GRAND CHEROKEE WK2 2014 ON (EXCLUDING SRT8)
3540050
3550110
WARNING
Advertisement

Related Manuals for ARB 3450420


Summary of Contents for ARB 3450420
- Page 1 In the event of damage to any bull bar component, contact your nearest authorised ARB stockist. Repairs or modifications to the impact absorption system must not be attempted. Do not use this product for any vehicle make or model, other than those specified by ARB. Do not remove labels from this bull bar.
-
Page 2: General Care And Maintenance
GENERAL CARE AND MAINTENANCE choosing an ARB Bar, you have bought a product that is one of the most sought after 4WD products in the world. Your bar is a properly engineered, reliable, quality accessory that represents excellent value. To keep your bar in original condition it is important to care and maintain it following these recommendations: ... - Page 3 PARTS LISTING APPLICATION. PART NO. DESCRIPTION 3759170R BRACKET ASSEM MOUNT WK2 GC RH 3759170L BRACKET ASSEM MOUNT WK2 GC LH 3759182 COMPRESSOR BRACKET 4581050 WASHER SPRING 1/2 x 3/16 x 3/16 ZP 4581046 WASHER SPRING M8 x 3/32 x 3/32 4581047 WASHER SPRING M8 x 3/32 x 3/33 BLK ZN 6151480...
- Page 4 PARTS LISTING APPLICATION PART NO. DESCRIPTION 3162470R BUFFER RH BUFFERS 3162470L BUFFER LH 6151128 NUT FLANGE M6 x 1.0 ZP 6522928 PANEL STONE SHIELD WK2 JEEP GC 6522927R PANEL UNDER WING WK2 GC RH 6522928L PANEL WING JEEP GC WK2 LH 6151262 BOLT M8 x 1.25 x 20 Gd 8.8 BZ 6151550...
- Page 5 FITTING PROCEDURE Park the vehicle on a flat surface and open the hood. Remove the 3 screws and 1 plug holding the stone shield to the cross beam and discard. Remove the 2 screws holding the stone shield to the wheel arch inner guards and discard.
- Page 6 FITTING PROCEDURE 14. Using masking tape, mark a line 75mm down from the horizontal bumper joint line as shown. Run a second piece of tape parallel to the first piece leaving a 1-2mm gap as the cut line. Note: Ensure the line is parallel to the joint line. 15.
- Page 7 FITTING PROCEDURE 20. On the lower line (marked in step 15), measure and mark a point 80mm forward of the style line as shown. 80mm 21. Repeat on the other side of the vehicle 22. Mark a line between the 2 points marked above as shown.
- Page 8 FITTING PROCEDURE 26. Attach pinch weld to each side of the vehicle as shown. 27. Remove the front crash beam and discard. Note: If fitted, retain the 2 nuts holding the suspension air compressor to the crash beam. 28. Remove and discard the centre plastic bracket.
- Page 9 FITTING PROCEDURE If the vehicle is fitted with QuadraLift suspension continue from here. If not proceed to step 33 30. Remove and retain the 2 bolts from the chassis as shown. 31. Attach the compressor bracket to the chassis and the compressor using the nuts removed earlier and the bolts removed in the step above.
- Page 10 33. On each side of the vehicle identify the wire for the indicators and the clearance lamps using the chart below. Warning: Wire colours may vary slightly and should be double checked with a multi-meter or test light. Failure to double check may result in damage to the vehicle.
- Page 11 FITTING PROCEDURE 40. Attach the mount brackets to the mount braces using M12 x 65 hex bolts, spring washers, flat washers and flange nuts through the side holes and M12 x 40 hex bolts, spring washers, flat washers and flange nuts through the bottom front hole.
- Page 12 FITTING PROCEDURE For each parking sensor: 46. Ensure both the parking sensor bracket and mating area of the bull bar are thoroughly cleaned with soap and water and completely dried off. 47. Using the priming pen supplied, prime the mating faces of both the bracket and the bar.
- Page 13 FITTING PROCEDURE 52. Fit 4 x rubber grommets to the holes on the inside of the bar. 53. Route the parking sensor loom starting at the left hand most sensor moving to the right hand side. 54. If not fitting parking sensors to the bar, fit the 6 plastic plugs to the bar into the parking sensor holes.
- Page 14 FITTING PROCEDURE 55. Beginning with the right hand side of the vehicle, assemble the impact absorber as per the exploded view diagram shown on page 13 including 2 x M6 flange nuts and 1 x M10 flange nuts hidden in the view. Please see the component list at the start of these instructions for the list of fasteners required.
- Page 15 In the case of Warn Zeon winches, a supplementary kit (Warn p/n 86695) is required. In the case of Smittybilt supplementary kit 3500580 is required. If fitting synthetic rope supplementary kit 3540060 is required. For ALL winches ARB winch install kit 3540050 is required. 59. Winch Preparation Warn / Magnum /Smittybilt winches: Undo the screws in the gearbox end of the winch.
- Page 16 FITTING PROCEDURE If fitting a Bushranger or Zeon winch continue from here. If not continue to install the winch as per fitting instructions 3787989 supplied with kit 3540050. The following pictures show the Zeon plug and plug cover. The same steps apply for fitment of Bushranger winches. 60.
- Page 17 FITTING PROCEDURE 63. Attach the socket cover to the socket. 64. Attach the control pack mount bracket to the bar as shown using M6 hex bolts, M6 spring washers and M6 flat washers and M6 flange nuts. M6 - 9 Nm. 65.
- Page 18 FITTING PROCEDURE 68. If fitting a winch and a radar sensor attach the folding license plate bracket supplied in kit 3540050 to the lower pan using M6 SS button head screws, M6 SS flat washers and M6 flange nuts. 69. If fitting a winch only attach the folding license plate bracket supplied in kit 3540050 to the upper pan using M6 SS button head screws, M6 SS flat washers and M6 flange nuts.
- Page 19 FITTING PROCEDURE 74. Attach the buffers to the bar using M6 flange nuts. M6 - 4 Nm. Warning: Do not over tighten the nuts or you risk pulling the studs from the buffers. 75. Connect the indicator / clearance lights to the looms installed earlier as well as the parking sensors, radar, fog lights and winch if fitted.
- Page 20 FITTING PROCEDURE 83. On the inner guard of each side of the vehicle, mark a line as shown just below the top edge of the bulbar, in board approximately 25mm and just above the bottom edge of the trimmed bumper bar. 84.
- Page 21 FITTING PROCEDURE ONCE BAR IS FITTED: Ensure all bolts are tensioned correctly All wiring is clear of sharp edges or moving surfaces and secured properly Piping is secured well away from sharp or moving components Check operation of winch if fitted ...
Need help?
Do you have a question about the 3450420 and is the answer not in the manual?
Questions and answers