
Subscribe to Our Youtube Channel
Related Manuals for ZEROXCLUB SW01


Summary of Contents for ZEROXCLUB SW01
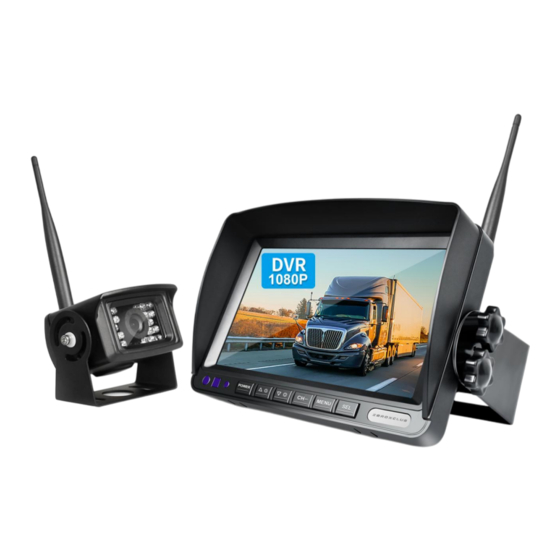
- Page 1 ZEROXCLUB INSTRUCTIONS MANUAL User Manual ZEROXCLUB HD Wireless 7" Backup Camera System Model: SW01 Any questions or suggestions please send an email to customer service via sales@uszeroxclub.com...
- Page 2 ZEROXCLUB INSTRUCTIONS MANUAL FOREWORD: Thank you for purchasing this ZEROXCLUB product. ZEROXCLUB is committed to providing high-quality products and a pleasant shopping experience. Before operating this backup system, please read these instructions carefully. Please keep this instruction manual in a safe place for future reference.
-
Page 3: Table Of Contents
ZEROXCLUB INSTRUCTIONS MANUAL CONTENTS FOREWORD: ...................I CONTENTS ..................... I 1 WHATS IN THE PACKAGE ..............1 2 INSTALL GUIDE ................... 2 2.1 Installation Safety Precautions ..........2 2.2 Make an Installation Plan ............2 2.3 Monitor Installation ..............3 2.4 Camera Installation ..............4 2.5 Powering Monitor &... -
Page 4: Whats In The Package
ZEROXCLUB INSTRUCTIONS MANUAL 1 WHATS IN THE PACKAGE Congratulations! Our ZEROXCLUB wireless backup camera system will provide many years of reliable service because our monitors, cameras, and cables are of the highest quality. Please examine the shipping box to see if there are any signs of rough handling. -
Page 5: Install Guide
ZEROXCLUB INSTRUCTIONS MANUAL 2 INSTALL GUIDE The system components are designed to be assembled without difficulty and with simple tools. 2.1 Installation Safety Precautions • Ensure the power supply circuit has circuit protection • Connect the rear camera to a 12-14V DC circuit only •... -
Page 6: Monitor Installation
ZEROXCLUB INSTRUCTIONS MANUAL 2.3 Monitor Installation The monitor is delivered with a metal U-shaped bracket. To assemble the monitor: attach the cradle using the four knob bolts. It also contains a Fan-shaped bracket, you can choose one according to your needs. -
Page 7: Camera Installation
ZEROXCLUB INSTRUCTIONS MANUAL 2.4 Camera Installation 1. Install the Rear Cameras 1. Mark camera mounting position. Screw 2. Tighten the screws on both sides of the on according to the mark. camera. Adjust the camera angle as needed.. 1.Mark camera mounting 2. -
Page 8: Powering Monitor & Camera
ZEROXCLUB INSTRUCTIONS MANUAL 2.5 Powering Monitor & Camera Recommend to test system with temporary mounting and wiring before final installation. Mount the antennas to 2. Connect the power cord or 3. Power the camera and cameras and monitor car charger to camera and... - Page 9 ZEROXCLUB INSTRUCTIONS MANUAL Camera 1:: Each display will indicate its channel order ① and signal strength in its upper left. Sunshade (Removable) ② Sunshade (Removable) Screen Protective Film: There is a screen protective film ③ Screen on the screen Protective Film It is used to remove the protective film.
-
Page 10: Monitor Buttons
ZEROXCLUB INSTRUCTIONS MANUAL 3.2 Monitor Buttons (1) POWER: Power ON/OFF Button When this button is pressed once, the monitor is switched on. The next time this button is pressed, the monitor turns off. (2)△☼: Function Increase Button There is no effect on the main interface. - Page 11 ZEROXCLUB INSTRUCTIONS MANUAL Before installing the cameras, you have to decide which cameras will be paired with which channel numbers so that the screen displays the ideal channel grouping when making channel selections. (If you need to renumber the cameras, you can re-pair them, see 4.2.1 for the pairing procedure).
-
Page 12: Sd Card Access Port
ZEROXCLUB INSTRUCTIONS MANUAL 3.3 SD Card Access Port The SD card access port is located on the top left of the monitor. the SD card is the main storage device on the monitor and the video images from the camera are captured. It contains a 32GB SD card. the SD card cover is kept separately in the package and needs to be closed and tightened by itself. - Page 13 ZEROXCLUB INSTRUCTIONS MANUAL Software Management System Panels and Sub-panels Main-panels Sub-panels Set up which cameras are assigned to which numbers,#1 Paring through #4 Picture Brightness, Contrast, Hue,Volume(invalid) Mir-flip Normal,Mirror,Flip,Mir-flip Split 1-2, Split 1-3, Split 1-4, Split 2-3, Split 2-4, Split 3-4,...
-
Page 14: Pairing Operation
ZEROXCLUB INSTRUCTIONS MANUAL to enter the menu panel. Otherwise MENU button won’t work. (2) The POWER button not working while playback of the video files. (3) Re-start recording the second file when you switch channels. (4) The content displayed on the screen is the content recorded by the system. -
Page 15: Picture Operation
ZEROXCLUB INSTRUCTIONS MANUAL 4. The screen appears “Pairing Start” and begins to count down, then please plug in the power of the camera. (Note: Do not plug the camera into the power until the pairing count-down had already started.) 5. During this time, you just keep powering the system and waiting for the countdown clock, the system will pair up automatically (within the 20s). -
Page 16: Mir-Flip Operation
ZEROXCLUB INSTRUCTIONS MANUAL 4.4 MIR-FLIP Operation Allows you to flip and mirror the video. Press MENU→ △ ☼/▽ ☼ →MIR-FLIP→SEL ( Press △ ☼/▽ ☼ button to choose the flip-style you want ) Control camera mirroring and flipping, on a per camera basis. -
Page 17: Cam-Setup Operation
ZEROXCLUB INSTRUCTIONS MANUAL 4.6 CAM-SETUP Operation You can choose from CAM 1, CAM 2, CAM 3, CAM 4, AUTOSCAN, SCANTIME. Press MENU→ △ ☼/▽ ☼ →Press SEL to confirm→ △ ☼/▽ ☼ to choose ON or OFF the CAM screen (or adjust the scan time) → SEL You can select the next one by pressing the △... -
Page 18: Play Operation
ZEROXCLUB INSTRUCTIONS MANUAL 4.8 PLAY Operation You can playback the recorded videos on the monitor, or playback on the computer by reading the memory card data on the computer. Press MENU→ △ ☼/▽ ☼ →PLAYBACK→SEL Play recorded video files on monitor, refer to Pic 3 for operation. -
Page 19: Troubleshooting
ZEROXCLUB INSTRUCTIONS MANUAL happening.) Recording can only record what is on the screen, not all cameras unless in split screen mode. (*Recording does not start until press the SEL button) NOTE: Press MENU once to return to the menu, press twice to return to the camera... - Page 20 ZEROXCLUB INSTRUCTIONS MANUAL that do to see if it works. 7. If the infrared light still is not on, please send me your Amazon order number to sales@uszeroxclub.com and we will send you a replacement camera. Camera image turns pink 1.
- Page 21 6. Check the battery if is good and use other 12V battery to try. 7. If you gone all the checking points and the screen still has no picture or words, and the buttons are not bright, the monitor is broken, please contact ZEROXCLUB email at sales@uszeroxclub.com with the picture of the issue and your Amazon order number.
- Page 22 ZEROXCLUB INSTRUCTIONS MANUAL The display screen is flickering 1. Check if the wire come loose and is not making a connection. Hook it back up to see if it works. 2. Check if the voltage is stable and keep at 12V+, if it is not stable, please change a car battery or order a 12V DC power adapter filter rectifier to solve it.
- Page 23 ZEROXCLUB INSTRUCTIONS MANUAL If the picture does not improve after adjustment, there may be a problem with the camera, please contact us with the picture and Amazon order sales@uszeroxclub.com number: Unable to pair 1. When pairing, the distance between the camera and the screen is too far.
-
Page 24: Faq
ZEROXCLUB INSTRUCTIONS MANUAL 6 FAQ How to turn on/off the Parking Guideline? A: MENU → SYSTEM → P-LINE. (Before setting, please switch the screen on which you need to show the guideline to full screen.) 6.2 Q:How to go to split screen? A: MENU →... - Page 25 ZEROXCLUB INSTRUCTIONS MANUAL Why does the monitor not respond while pressing the “MENU” button on the quad screen mode? A: The “MENU” button just works when the monitor stays on the full-screen mode and the record function is off. (Please press the “CH-”...
- Page 26 A: The night vision mode will automatically turn on in the dark environment. 6.16 Can I add more cameras? A: Yes, this system supports four cameras. And the CM-SW01 camera is compatible with this system. 6.17 Q: How can I do when the camera doesn't work? A:...
- Page 27 ZEROXCLUB INSTRUCTIONS MANUAL A: Though our cameras are waterproof, please protect it from water and high temperature. Because it will shorten its lifespan. If it is soaked in water for a long time, the water is still possible to get in. The camera will be broken once it gets water.
-
Page 28: General Information
ZEROXCLUB customer service. ● Do not disassemble or attempt to repair any part of the camera system. ● There are no user-serviceable parts inside the ZEROXCLUB Rear camera system. Contact ZEROXCLUB customer service if the part is ever compromised ●... -
Page 29: Warranty
ZEROXCLUB INSTRUCTIONS MANUAL 8 Warranty ZEROXCLUB offers a full 18 months warranty and replacement policy. We also provide lifetime technical support to ensure that you enjoy your modern backup camera for many years to come. To obtain warranty support, or if you are not satisfied in any way, or have any issues with your purchase, don't hesitate to get in touch with us first for help, we will try our best to make you satisfied.
Need help?
Do you have a question about the SW01 and is the answer not in the manual?
Questions and answers