
Subscribe to Our Youtube Channel
Related Manuals for ZEROXCLUB BY102A


Summary of Contents for ZEROXCLUB BY102A
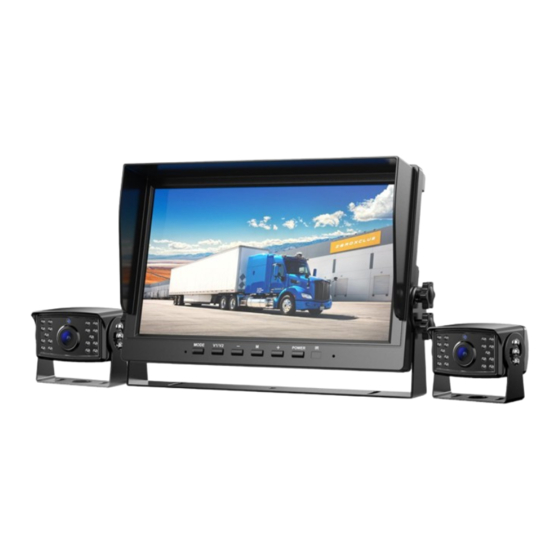
- Page 1 ZEROXCLUB Instructions Manual Installations manual & Owner’s Guide ZEROXCLUB Wired Camera System Model # BY102A Any questions or suggestions please send an email to customer service via sales@uszeroxclub.com...
- Page 2 ZEROXCLUB Instructions Manual Before Using Make sure you have the following listed items included in the packaging. If any item is damaged or missing, contact us at sales@uszeroxclub.com. It would be better if you wrote the order number from Amazon include photos of the damaged or missing part in your email, so that we can handle the problem much more quickly.
-
Page 3: Test The System
ZEROXCLUB Instructions Manual Test the System To ensure that all components are working properly, please test the system before installation. 1. When the monitor is powered, the indicator light and buttons will light to indicate that the monitor is on and ready to work. -
Page 4: Table Of Contents
ZEROXCLUB Instructions Manual Contents Before Using ..................I Test the System ................II 1.Safety Information ................. 2 1. Installation ..................2 2.1 Installation Safety Precautions ..........2 2.2 Wiring ..................2 2.3 Install the monitor ..............4 2.4 Camera Installation ..............5 2.5 Camera-Cables Installation ............6... -
Page 5: Safety Information
● Do not disassemble or attempt to repair any part of the camera system. ● There are no user-serviceable parts inside the ZEROXCLUB camera system. Contact ZEROXCLUB customer service at sales@uszeroxclub.com if the part is ever compromised ●... -
Page 6: Installation
ZEROXCLUB Instructions Manual 1. Installation 2.1 Installation Safety Precautions • Ensure the power supply circuit has circuit protection • Connect the rear camera to a 12-14V DC circuit only • Use insulated tools when working with power supply • Use correct safety equipment when working at elevated levels •... - Page 7 ZEROXCLUB Instructions Manual The wiring method when product use, as follows: (1) Connect the Yellow wire to positive power( 12-24V) NOTE: Yellow wire needs to be powered for a long time. If the Yellow wire has no power, the system will lose all the settings you made on the screen.
-
Page 8: Install The Monitor
ZEROXCLUB Instructions Manual (3) Ignore the Green trigger wire NOTE: Green Connect the wire, the parking guide lines will appear. If you don't need it, ignore this the Green wire. * Before installing it by professional person, please test it if works well, like image display, just in case and save your precious time.Please... -
Page 9: Camera Installation
ZEROXCLUB Instructions Manual 2.4 Camera Installation 2.4.1 Rear Camera The camera comes equipped with an adjustable flat mount base. You can adjust the lock-screws on the sides of the camera to adjust the lens of camera with a small Phillips screwdriver. A short 4 -pin aviation video cable is attached to the body of the camera. -
Page 10: Camera-Cables Installation
ZEROXCLUB Instructions Manual should be adjusted to a horizontal position relative to the ground in order to provide the best view of the objects behind the vehicle. ●When the preferred view for each camera is obtained, tighten the screws to prevent the camera angle from deviating due to vibration during driving. -
Page 11: Testing The System
ZEROXCLUB Instructions Manual be properly secured and stowed. ● After connecting the wires, pay attention to the insulation between the power cables to prevent the power cables from short-circuiting the battery. ●Use plastic split-shield cable covers where appropriate to protect the cables in open areas. -
Page 12: Operation
ZEROXCLUB Instructions Manual backup camera image should come on. NOTE: If there are any issues, then do not panic. Slowly check every single connection, and make sure that everything is correct. Make sure that the red/positive ends of a cable connect to red/positive on other cables, and that black/negative connects to black/negative as well. -
Page 13: Operate The Mini Remote Control
ZEROXCLUB Instructions Manual A Confirm button ①MODE A Channel Switch button. ②V₁/V₂ A Down/Decrease button. Select backward in display ③- operation. A Menu/Return button. Press to access menu or return ④M to the previous panel. A Up/Increase button. Select forward in display ⑤+... -
Page 14: Move Mode
ZEROXCLUB Instructions Manual NOTE: If the screen is recording, please stop recording firstly, otherwise it can’t enter the menu panel. (Press MODE, then the red dot on the display disappears, which means recording has stopped.) Move Mode Recording Settings Press M → Go into the Move Mode → MODE → + (Skip to next option)//-(Back to the previous option)→MODE (confirm)→+/-... - Page 15 ZEROXCLUB Instructions Manual (2) Movie Clip Time: Off/ 1min/ 2min/ 3min/ 5min/ 10min Time per recorded video file. (3) Movie Off Time: 0min/ 5sec/ 30sec/ 1min/ 3min Recordable time for the screen when the engine is off. (4) Auto Record: On/Off The screen will automatically record when it is turned on.
-
Page 16: Still Quality
ZEROXCLUB Instructions Manual During video playback, press + to speed up playback, press - to rewind. When in playback panel, press M to pop up the playback setting window, you can choose to delete file, protect file, switch back to the monitor page. -
Page 17: Clock Settings
ZEROXCLUB Instructions Manual Press M → Go into the Move Mode → MODE → + (Skip to next option)//- (Back to the previous option)→MODE (confirm)→+/- (Increase/ decrease)→M (Back previous panel) to the (1) Still Quality: Super Fine/Fine You can choose the quality of photo To Photo Playback: Same as “To Movie Playback”... -
Page 18: General Settings
ZEROXCLUB Instructions Manual Formatting the micro SD Card Press M →Go into the Media Tool→MODE→+/- →Yes/No Note: Make sure you have saved the important videos to the computer when you use this. General Settings More advanced display settings are available in the General... - Page 19 ZEROXCLUB Instructions Manual Press M → Go into the General Settings → MODE → + (Skip to next option)//-(Back to the previous option)→MODE (confirm) (1) Rotate: This will rotate the image and the text will also rotate, please careful to use this function.
-
Page 20: Language
ZEROXCLUB Instructions Manual operation is performed. (8) Reset Setup: Yes/ No If yes, all setting will be deleted (9) Contrast: Adjust the Contrast to the desired level. (10) LCD Brightness: Adjust the brightness to the desired level. (11) Saturation: Adjust the Saturation to the desired level. -
Page 21: Faq
ZEROXCLUB Instructions Manual 5.FAQ (1) How to return interface while viewing the file? A. 1.Automatically return to the playback panel after video playback ends. 2. Press the Menu button, then choose “To Preview Mode” and it will back to the monitor page. -
Page 22: Troubleshooting
ZEROXCLUB Instructions Manual (1) How to view in split screen? A.Press the V1/V2 button (8) What is the part number of the single camera? A: The rear camera is B0BG7Z3Z47, and side camera is B0BG7Z3Z47 6.Troubleshooting Check the display to ensure that it is The display will not powering. - Page 23 ZEROXCLUB Instructions Manual are awkward, you can gently straighten it, then the camera will work well. Make sure the camera system can get the power 12-24 V. You can test it with a new power supply. Could you please check the camera that if...
- Page 24 ZEROXCLUB Instructions Manual Check this product within the voltage range(12-24V) specified. If it still can't work well after try, please contact time sales@uszeroxclub.com with your Amazon order ID and the issue picture, we will help you solve it. Check the wiring firstly.
-
Page 25: Warranty
We're always there for you! 7. Warranty ZEROXCLUB offers a full 36 months warranty and replacement policy. We also provide lifetime technical support to ensure that you enjoy your modern backup camera for many years to come. To...
Need help?
Do you have a question about the BY102A and is the answer not in the manual?
Questions and answers