
Subscribe to Our Youtube Channel
Related Manuals for ZEROXCLUB B904


Summary of Contents for ZEROXCLUB B904
- Page 1 ZEROXCLUB INSTRUCTIONS MANUAL ZEROXCLUB HD Wireless 9" Backup Camera System (B904) Installation and Operation Guide...
- Page 2 ZEROXCLUB INSTRUCTIONS MANUAL FOREWORD: Thank you for purchasing this ZEROXCLUB product. ZEROXCLUB is committed to providing high-quality products and a pleasant shopping experience. Before operating this backup system, please read these instructions carefully and test it. Please keep this instruction manual in a safe place for future reference.
-
Page 3: Thanks For Purchasing
ZEROXCLUB INSTRUCTIONS MANUAL Thanks for Purchasing We are willing to provide you with an accessory to help you install or use our system easier if you need it. Please choose one from them, and then email us at sales@uszeroxclub.com with its name and your... -
Page 4: Table Of Contents
ZEROXCLUB INSTRUCTIONS MANUAL Contents FOREWORD:........................II Thanks for Purchasing....................III 1 WHATS IN THE PACKAGE....................1 2 General Information....................2 3 SYSTEM DESCRIPTION....................3 3.1 Monitor......................3 4 Installation instructions....................6 4.1 Installation Safety Precautions................6 4.2 Make an Installation Plan..................7 4.3 Monitor Installation...................7 4.4 Camera Installation................... 9 4.5 Power Monitor &... -
Page 5: Whats In The Package
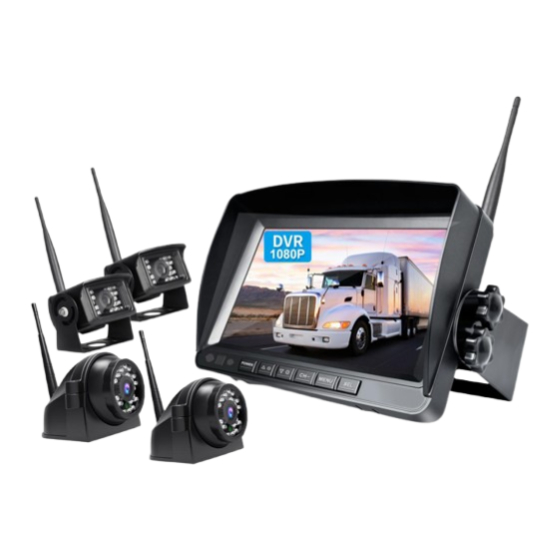
ZEROXCLUB INSTRUCTIONS MANUAL 1 WHATS IN THE PACKAGE Our ZEROXCLUB wireless backup camera system will provide many years of reliable service because our monitors, cameras, and cables are of the highest quality. Please examine the shipping box to see if there are any signs of rough handling. -
Page 6: General Information
ZEROXCLUB customer service. ● Do not disassemble or attempt to repair any part of the camera system. ● There are no user-serviceable parts inside the ZEROXCLUB Rear camera system. Contact ZEROXCLUB customer service if the part is ever compromised ●... -
Page 7: System Description
ZEROXCLUB INSTRUCTIONS MANUAL 3 SYSTEM DESCRIPTION 3.1 Monitor ① SD Card Placement ⑦ Function Increase Button ② Sunshade (Removable) ⑧ Function Decrease Button ③ Screen Protective Film ⑨ Camera/Channel Switch Button ④ Red Tag ⑩ Menu Button ⑤ Power Indicator Light ⑪... - Page 8 ZEROXCLUB INSTRUCTIONS MANUAL door is placed separately in the package and needs to be closed and tightened by yourself. 3.1.2 Red Tag There is a protective film on the screen, it is used to remove it. Please be careful to remove it.
- Page 9 ZEROXCLUB INSTRUCTIONS MANUAL channel display one by one, and then it will display two or four camera channels grouped on the screen(if you turn on a split mode). These single and multiple display options provide the user with great viewing flexibility.
-
Page 10: Installation Instructions
ZEROXCLUB INSTRUCTIONS MANUAL button to select the Brightness - if you confirm to adjust the Brightness, please press SEL button to confirm and then press the △ ☀ / ▽☀ button to adjust it; finally press SEL to confirm and exit this option, and press the △... -
Page 11: Make An Installation Plan
ZEROXCLUB INSTRUCTIONS MANUAL • Ensure correct polarity of 12V DC power supply to the camera. Red = Positive.Black=Negative. • Do not allow water to enter the LCD Display. • Excessive heat can be caused by a loose connection. 4.2 Make an Installation Plan We recommend that you make a plan before you begin the installation of your system components. - Page 12 ZEROXCLUB INSTRUCTIONS MANUAL your needs. *The sunshade is removable, you can uninstall it if you don't need it. U-shaped Bracket Installation: Put on the sunshade as Fixed the sunshade Take out all the kits the white dotted lines Place the screw retainer...
-
Page 13: Camera Installation
ZEROXCLUB INSTRUCTIONS MANUAL 4.4 Camera Installation 1. Install the Rear Cameras 1.1 Use the original bracket, and install it 1.2 Use the updated bracket, and install it to the place you want. to the place you want. 2. Install the Side Camera 2.2 Mount the bracket, and install it to... -
Page 14: System Operation
ZEROXCLUB INSTRUCTIONS MANUAL Mount the antennas to ② Connect the power cord or Power the camera ① ③ cameras and monitor car charger to camera and and monitor monitor Use Car Charger Use Power Cord Use Power Cord 5 SYSTEM OPERATION The following graphic illustrates the layout of the software management system (SMS) panels and their associated sub-panels. - Page 15 ZEROXCLUB INSTRUCTIONS MANUAL - Sub-menu items may highlight in red color. - To return from any selection press the MENU button or wait for a timeout. Software Management System Panels and Sub-panels Main-panels Sub-panels Set up which cameras are assigned to which numbers,#1...
-
Page 16: Pairing Operation
ZEROXCLUB INSTRUCTIONS MANUAL NOTE: (1) Menu main panel won’t bring up while monitoring in these situations: split-screen mode and recording mode. Please press the "CH-" button to switch it to full screen and press the "SEL" button to stop recording before using the "MENU"... -
Page 17: Picture Operation
ZEROXCLUB INSTRUCTIONS MANUAL please plug in the power of the camera. (Note:Do not plug the camera into the power until the pairing count-down had already started.) 5. During this time, you just keep powering the system and waiting for the countdown clock, the system will pair up automatically (within the 20s). -
Page 18: Mode Operation
ZEROXCLUB INSTRUCTIONS MANUAL a camera according to your needs: NORMAL: The screen remains normal (default). MIRROR: The image is flipped left and right. FLIP: The image is flipped upside down. MIR-FLIP: After the image is flipped left and right, it is flipped up and down again. -
Page 19: System Operation
ZEROXCLUB INSTRUCTIONS MANUAL If you want to see the camera from a certain numbered screen, you have to make sure it has been turned ON in this menu, so that it can display the image. Note: If AUTOSCAN is on and SCANTIME is 5 seconds, then it means each camera will display about 5 seconds before switching the display to the next camera automatically. -
Page 20: Play Operation
ZEROXCLUB INSTRUCTIONS MANUAL guide line can be individually controlled on each camera screen. (If other screens are not turned on P-LINE, they will not display the parking guide line. ) 5.8 PLAY Operation You can play back the recorded videos on the monitor, or play back on the computer by reading the memory card data on the computer. -
Page 21: Menu Faq
ZEROXCLUB INSTRUCTIONS MANUAL 6 Menu FAQ Why is it soundless? A: Due to sound holes will reduce the waterproof coefficient of the camera, so we didn't enable this feature. : Why I can’t choose “QUAD” in the ‘‘CH-’’ button? A: You should open all cameras in CAM-SETUP and make sure the quad split mode has been chosen. - Page 22 ZEROXCLUB INSTRUCTIONS MANUAL A: MENU → SYSTEM → P-LINE. (Before setting, please switch the screen on which you need to show the guideline to full screen.) What is REWRITE? A: If it turns on, it will automatically overwrite the original video record when the SD capacity is full.
-
Page 23: Troubleshooting
ZEROXCLUB INSTRUCTIONS MANUAL 6.14 Q: The monitor emits smoke after connection A: The positive and negative poles are connected in reverse and cause a short circuit. Please read the installation guide carefully before installation. 6.15 Q: Why doesn't the camera shine? A: The night vision mode will automatically turn on in the dark environment. - Page 24 ZEROXCLUB INSTRUCTIONS MANUAL Please note that when the screen is exposed, the brightness may not be adjusted. Please try to avoid this situation. If the picture does not improve after adjustment, there may be a problem with the camera, please contact us with the picture and Amazon order number: sales@uszeroxclub.com...
- Page 25 ZEROXCLUB INSTRUCTIONS MANUAL The power supply range is not between 12-24V (try other power supplies). Swap the power source from the working camera to the non working camera to see if it work. After connecting the camera, please cover the camera's sensor (like a light on the camera) with your finger and check if the camera's IR lights are on.
- Page 26 ZEROXCLUB INSTRUCTIONS MANUAL Unlock the system:Hold the MENU button a few seconds, a yellow unlock appears to the right of red lock and then press the SEL button to confirm. If the system is recording, please press SEL to exit the recording to see if the buttons can operate.
-
Page 27: Warranty
ZEROXCLUB INSTRUCTIONS MANUAL 8 Warranty ZEROXCLUB offers a full 24-month warranty and replacement service. We also offer lifetime technical support to ensure you enjoy your modern backup camera for many years to come. Please contact us for warranty support, or if you are not satisfied in any way, or have any problems with your purchase, please contact us first for assistance and we will do our best to make you happy.
Need help?
Do you have a question about the B904 and is the answer not in the manual?
Questions and answers