
Related Manuals for ZEROXCLUB BY104A


Summary of Contents for ZEROXCLUB BY104A
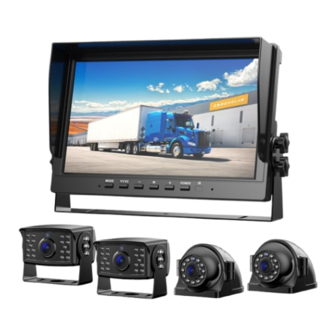
- Page 1 ZEROXCLUB Instructions Manual Installations manual & Owner’s Guide ZEROXCLUB Wired Camera System Model # BY104A Any questions or suggestions please send an email to customer service via sales@uszeroxclub.com...
- Page 2 ZEROXCLUB Instructions Manual Before Using Make sure you have the following listed items included in the packaging. If any item is damaged or missing, contact us at sales@uszeroxclub.com. It would be better if you wrote the order number from Amazon include photos of the damaged or missing part in your email, so that we can handle the problem much more quickly.
-
Page 3: Test The System
ZEROXCLUB Instructions Manual Test the System To ensure that all components are working properly, please test the system before installation. 1. When the monitor is powered, the indicator light and buttons will light to indicate that the monitor is on and ready to work. -
Page 4: Table Of Contents
ZEROXCLUB Instructions Manual Contents Before Using .................... 1 Test the System ..................2 1.Safety Information ................1 2. Installation ................... 2 2.1 Installation Safety Precautions .............2 2.2 Wiring ..................2 2.3 Install the monitor ............... 5 2.4 Install the camera ................ 6 2.4.1 Rear Camera ................ -
Page 5: Safety Information
ZEROXCLUB Instructions Manual 1.Safety Information Incorrect installation can cause personal injury or property damage. For assistance contact ZEROXCLUB customer service. NOTE: Handle all components with care. Inspect regularly for damage to components and cabling. NOTE: Do not apply excessive force to any of the components contained within this kit. -
Page 6: Installation
ZEROXCLUB Instructions Manual 2. Installation 2.1 Installation Safety Precautions Ensure the power supply circuit has circuit protection Connect the rear camera to a 12-14V DC circuit only Use insulated tools when working with power supply Use correct safety equipment when working at elevated levels ... - Page 7 ZEROXCLUB Instructions Manual Here’s a step-by-step backup camera installation guide to make things easier for you. The wiring method when product use, as follows: (1) Connect the Yellow wire to positive power( 12-24V) NOTE: Yellow wire needs to be powered for a long time. If...
- Page 8 ZEROXCLUB Instructions Manual (3) Connect Black wire to negative power/ Ground / Sheet Metal. (4) Connect Green wire(CH2 trigger) to reversing light. NOTE: Green This wire is used to trigger CH2 to display the reverse guideline. if the system as a continuous observation use, please ignore this wire and connect the camera to CH1.
-
Page 9: Install The Monitor
If you don't need it, ignore this the wire. * Before installing it by professional person, please test it if works well, like image display, just in case and save your precious time.Please contact ZEROXCLUB Customer Service sales@uszeroxclub.com if you have any questions. 2.3 Install the monitor... -
Page 10: Install The Camera
ZEROXCLUB Instructions Manual Fan-shaped Bracket Installation The angle can be adjusted as needed. A sticker is included for mounting the screen on the dashboard or windshield. 2.4 Install the camera 2.4.1 Rear Camera The camera comes equipped with an adjustable flat mount base. -
Page 11: Adjust The Camera View
ZEROXCLUB Instructions Manual The camera base detaches by removing the four housing screws using a miniature Phillips screwdriver. The base can then be screwed or bolted onto in the desired location. A short 4-pin aviation camera is attached to the camera. And you also can adjust the lens during this step. -
Page 12: Camera-Cables Installation
ZEROXCLUB Instructions Manual NOTE: One important thing to note here is that the camera should face backward and that its view is not obstructed in any way. You should also make sure that the camera sits properly, and that a simple car bump or jerk, will not loosen it in any way. -
Page 13: Testing The System
ZEROXCLUB Instructions Manual the cables in open areas. ●Secure the cables using adhesive 3M type ¼” cable clips and/or zip ties. ●You may have surplus cable length remaining in your installation. If this is the case, find a convenient place to bundle the cable with zip ties and securely hide it out of site. -
Page 14: Conclusion
ZEROXCLUB Instructions Manual Make sure that the red/positive ends of a cable connect to red/positive on other cables, and that black/negative connects to black/negative as well. Also, check the power sources to make sure that they are correctly connected, and that no fuse has blown. -
Page 15: Operate The Mini Remote Control
ZEROXCLUB Instructions Manual A Confirm button ①MODE A Channel Switch button. ②V₁/V₂ A Down/Decrease button. Select backward in display ③- operation. A Menu/Return button. Press to access menu or return ④M to the previous panel. A Up/Increase button. Select forward in display ⑤+... -
Page 16: Display Settings
ZEROXCLUB Instructions Manual 4.Display Settings Display settings allow you to adjust various aspects of your display to ensure that the display works well with your camera. NOTE: If the screen is recording, please stop recording firstly, otherwise it can’t enter the menu panel. (Press MODE, then the red dot on the display disappears, which means recording has stopped.) -
Page 17: View
ZEROXCLUB Instructions Manual Press M →Go into the Date Setting→MODE→ + / - (Increase time/ decrease time)→MODE (confirm and go to the next date/time settings)→Until last complete set NOTE: Press the M button once to return to the menu, press twice... -
Page 18: Playback
ZEROXCLUB Instructions Manual 4.3 Playback You can see the recorded files in the "Playback" section. Press M→Go into the Playback→MODE→ + / - →MODE (Press MODE to play and pause) Delete recorded files Press M→Go into the Playback→M→Delete Current/Delete All (Press M to cancel) NOTE: In this panel, the V1/V2 button is a return button. -
Page 19: System
ZEROXCLUB Instructions Manual Press MENU→Go into the Split setting→MODE→ + / - →MODE 4.5 System More advanced display settings are available in the "System" page. (1) Reversing Lines: Off/ MODE 1/2/3 The width of the reversing line will vary in different modes. -
Page 20: Faq
ZEROXCLUB Instructions Manual (5) Cyclic Record: 1 Min/3 Min NOTE: Two video duration can be selected: 1 Min/3 Min NOTE: When the SD card is full, it will overwrite the previous videos. Recording video for the certain length. (6) Timestamp: ON/Off... -
Page 21: Troubleshooting
ZEROXCLUB Instructions Manual (3) How to record video? A.Press the "MODE" button, then the red point will come that means the monitor recording. (4) Why monitor can't use the menu and switch channel? A. Please make sure that monitor doesn't stays on recording status and split screen status when you want to use other function. - Page 22 ZEROXCLUB Instructions Manual Check positive negative connections are reversed when connecting the red and black wires. Ensure the cables and connections in your backup camera are firmly connected and not damaged Check if the pins of the 13pin cable of the monitor and 4 pins cable of the camera is aligned and broken.
- Page 23 ZEROXCLUB Instructions Manual lenses, please contact us in time at sales@uszeroxclub.com with the picture of the issue and your Amazon Order ID Screen Black and Check if the connection is faulty. Check if the wires are frayed. Ensure the cables...
- Page 24 ZEROXCLUB Instructions Manual If it still can't work well after try, please contact time sales@uszeroxclub.com with your Amazon order ID and the issue picture, we will help you solve it. The screen Check the wiring firstly. If there is still no improvement, maybe the...
-
Page 25: Warranty
ZEROXCLUB Instructions Manual lines and the Green wire for try. (Under parking mode, other buttons will be locked and can't be buttons can’t used for safety.) work If it still can’t work well, please contact us in time sales@uszeroxclub.com...
Need help?
Do you have a question about the BY104A and is the answer not in the manual?
Questions and answers