
Related Manuals for Vivo DESK-SHELF3CL


Summary of Contents for Vivo DESK-SHELF3CL
- Page 1 Clamp-on Shelving Unit for Desk SKU: DESK-SHELF3CL Instruction Manual Assembly Video & Product Info www.vivo-us.com/products/desk-shelf3cl...
- Page 2 [ THIS PAGE HAS BEEN INTENTIONALLY LEFT BLANK ]...
- Page 3 If you do not understand these directions, or if you have any doubts about the safety of the installation, please contact our product support team at 309-278-5303 or help@vivo-us.com for further assistance. Check carefully to make sure there are no missing or defective parts. Improper installation may cause damage or serious injury. Do not use this product for any purpose that is not explicitly specified in this manual.
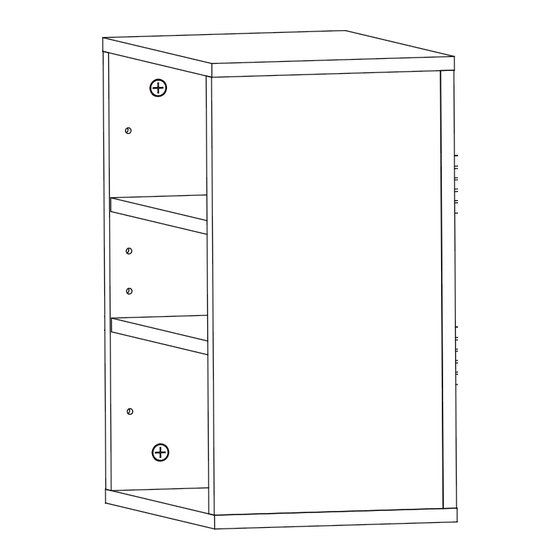
- Page 4 Package Contents A (x2) B (x2) Exterior Panel Side Panel C (x1) D (x2) Back Panel Shelf E (x1) F (x7) Clamp Sticker Included Hardware & Tools S-A (x9) S-B (x9) S-C (x7) S-D (x9) Cam Lock Screw Cam Lock Nut ST3.9x25mm Screw S-E (x5) S-F (x5)
-
Page 5: Assembly Steps
ASSEMBLY STEPS STEP 1 Thread Cam Lock Screws (S-A) into both Exterior Panels (A) using a Phillips screwdriver. FULLY THREAD CAM LOCK SCREWS STRAIGHT... - Page 6 STEP 2 Insert the Exterior Panels (A) into the Side Panels (B). Secure using Cam Lock Nuts (S-B). Installing Cam Lock Nuts Insert Cam Lock Nut with the opening facing towards the Cam Lock Screw. Turn clockwise 180 degrees using a Phillips screwdriver.
- Page 7 STEP 3 Attach Back Panel (C) to the back of shelf assembly using ST3.9x25mm Screws (S-C) and a Phillips screwdriver. Remove adhesive backing from Stickers (F) and place them over the screw holes.
- Page 8 STEP 4 Remove the protective film from the inside of Clamp (E). Attach the Clamp to the Back Panel (C) using M5x18mm Screws (S-E), M5 Washers (S-F) and a Phillips screwdriver. Clamp can be flipped 180 degrees and installed in the opposite direction to be utilized on the other side.
- Page 9 STEP 4 - Cont’d Clamp the Shelves to the desired location on the desk leg. HEIGHT ADJUSTABLE DESKS: If using a height adjustable desk, lower the frame to its lowest position before clamping the shelves.
- Page 10 STEP 5 Insert Pins (S-D) into Side Panels (B) at the desired heights for the shelves.
- Page 11 STEP 5 - Cont’d Place Shelves (D) onto the Pins (S-D).
- Page 12 LAST UPDATED: 6/26/24 REV2 v1.0 Need Help? Get In Touch Monday-Friday from 7:00am-7:00pm CST help@vivo-us.com www.vivo-us.com 309-278-5303 Chat live with an agent! FOR MORE GREAT VIVO PRODUCTS, CHECK OUT OUR WEBSITE AT: WWW.VIVO-US.COM VIVO-us @vivo_us...
Need help?
Do you have a question about the DESK-SHELF3CL and is the answer not in the manual?
Questions and answers