Table of Contents
Advertisement
Quick Links
Download this manual
See also:
User Manual
Advertisement
Table of Contents

Subscribe to Our Youtube Channel
Related Manuals for Altusen KN-2108


Summary of Contents for Altusen KN-2108
- Page 1 8/16 Port KVM Over the NET™ KN2108 / KN2116 User Manual www.altusen.com.tw...
-
Page 2: Regulatory Information
This equipment has been tested and found to comply with the limits for a Class A digital device, pursuant to Part 15 of the FCC Rules. These limits are designed to provide reasonable protection against harmful interference when the equipment is operated in a commercial environment. -
Page 3: User Notice
`as is'. Should the programs prove defective following their purchase, the buyer (and not the manufacturer, its distributor, or its dealer), assumes the entire cost of all necessary servicing, repair and any incidental or consequential damages resulting from any defect in the software. -
Page 4: Safety Instructions
If an extension cord is used with this device make sure that the total of the ampere ratings of all products used on this cord does not exceed the extension cord ampere rating. - Page 5 Never push objects of any kind into or through cabinet slots. They may touch dangerous voltage points or short out parts resulting in a risk of fire or electrical shock.
-
Page 6: Rack Mounting
Before working on the rack, make sure that the stabilizers are secured to the rack, extended to the floor, and that the full weight of the rack rests on the floor. Install front and side stabilizers on a single rack or front stabilizers for joined multiple racks before working on the rack. -
Page 7: Package Contents
Copyright © 2004-2006 ATEN ® International Co., Ltd. Manual Part No. PAPE-0206-1AXG Printing Date: 07/2006 ATEN and the ATEN logo are registered trademarks of ATEN International Co., Ltd. All rights reserved. All other brand names and trademarks are the registered property of their respective owners. -
Page 8: Table Of Contents
Product Information........ - Page 9 Powering Off and Restarting ........24...
- Page 10 The General Dialog Box ........57...
- Page 11 Activating the Browser OSD ........81...
- Page 12 Supported KVM Switches ........116...
-
Page 13: About This Manual
KN2116 with the Java Client software, and explains how to use the OSD to access and control the computers connected to the switch. Chapter 7, The Log File, shows how to use the log file utility to view all the events that take place on the KN2108 / KN2116. -
Page 14: Conventions
Indicates text that you should key in. Indicates keys you should press. For example, [Enter] means to press the Enter key. If keys need to be chorded, they appear together in the same bracket with a plus sign between them: [Ctrl+Alt]. -
Page 15: Altusen Information
Getting Help For additional help, advice, and information, ALTUSEN provides several support options. If you need to contact ALTUSEN technical support with a problem, please have the following information ready beforehand: Product model number, serial number, and date of purchase. -
Page 16: Product Information
KN2108 / KN2116 User Manual Product Information For information about all of ALTUSEN's products and how they can help you connect without limits, visit ALTUSEN on the web or contact an ALTUSEN Authorized Reseller. In the United States of America, call: 866-ALTUSEN (258-8736) -
Page 17: Chapter 1 Introduction
Since the KN2108 / KN2116 uses TCP/IP for its communications protocol, it can be accessed from any computer on the Net - whether that computer is located down the hall, down the street, or half-way around the world. - Page 18 KN2108 or KN2116 just as if they were present locally and working on the equipment directly. With the Panel Array feature, the video output of up to 8 or 16 computers can be displayed at the same time.
-
Page 19: Features
Graphical OSD and graphical toolbars for convenient, user friendly operation Panel Array Mode – view all 8 or 16 ports at the same time Windows based Log Server Remote power control for attached Power Over the NET™ devices Up to 64 user accounts –... -
Page 20: System Requirements
Remote Computers For best results, computers that remotely access the switch should have at least a P III 1 GHz processor, with their screen resolution set to 1024 x 768. Users who want to access the switch with the Windows Client must have DirectX 7.0 or higher installed. -
Page 21: Kvm Adapter Cables (Cpu Modules)
Chapter 1. Introduction KVM Adapter Cables (CPU Modules) Cat 5 (or higher) cable is required to connect the KN2108 / KN2116 to one of the KVM Adapter Cables (see Single Stage Installation Diagram, page 20). The following KVM Adapter Cables are required for use with the KN2108... -
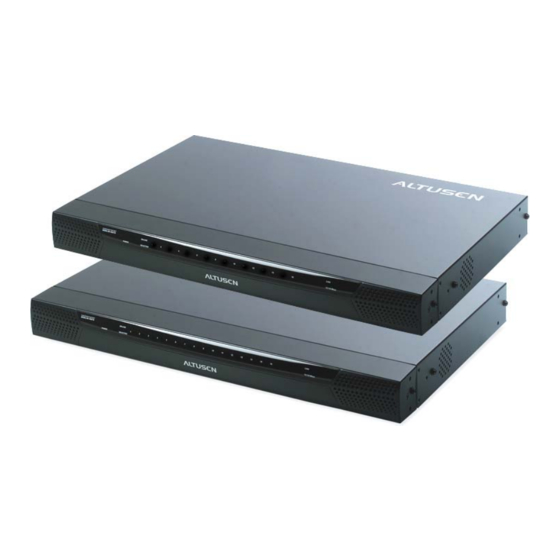
Page 22: Components
KN2108 / KN2116 User Manual Components Front View KN2108: KN2116:... - Page 23 The Port LEDs provide status information about their corresponding CPU Ports. There is one pair of LEDs for each Port. The one on the top is the On Line LED; the one on the bottom is the Selected Port LED:...
-
Page 24: Rear View
KN2108 / KN2116 User Manual Rear View KN2108: KN2116:... - Page 25 (keyboard, monitor, and mouse) plug in here. Each port is color coded and marked with an appropriate icon to indicate itself. KVM Ports The CAT 5 cables that link the KN2116 to the KVM Adapter (CPU Ports) Cables that connect to the computers plug in here.
- Page 26 KN2108 / KN2116 User Manual This Page Intentionally Left Blank...
-
Page 27: Chapter 2. Hardware Setup
(refer to the installation diagram on p. 16). A separate KVM Adapter Cable is required for each computer or device connection. The model numbers of the Adapter Modules are given in the KVM Adapter Cables (CPU Modules) section, page 5. -
Page 28: Stacking And Rack Mounting
KN2108 / KN2116 User Manual Stacking and Rack Mounting The KN2108 / KN2116 can be stacked on the desktop or rack mounted in a variety of ways. The following sections take you through the procedures for each method. Stacking The KN2108 / KN2116 can be placed on any appropriate level surface that can safely support its weight plus the weight of its attached cables. -
Page 29: Rack Mounting - Split
1. Remove the four screws at the front and rear of the unit: Phillips head hex M3 x 6 2. Separate the front and rear modules, then use the M3 x 8 Phillips head hex screws supplied with the rack mount kit to screw the rack mounting brackets into both modules:... - Page 30 KN2108 / KN2116 User Manual 3. Position the device in the rack and align the holes in the mounting brackets with the holes in the rack. 4. Screw the mounting brackets to the rack. Note: Cage nuts are provided for racks that are not prethreaded.
-
Page 31: Rack Mounting - Front
1. Remove the two screws at the front of the unit: Phillips head hex M3 x 6 2. Use the M3 x 8 Phillips head hex screws supplied with the rack mount kit to screw the rack mounting brackets into the front of the unit: Phillips head hex... - Page 32 KN2108 / KN2116 User Manual 3. Position the device in the rack and align the holes in the mounting brackets with the holes in the rack. 4. Screw the mounting brackets to the front of the rack. Note: Cage nuts are provided for racks that are not prethreaded.
-
Page 33: Rack Mounting - Rear
1. Remove the two screws at the rear of the unit: Phillips head hex M3 x 6 2. Use the M3 x 8 Phillips head hex screws supplied with the rack mount kit to screw the rack mounting brackets into the rear of the unit: Phillips head hex... - Page 34 KN2108 / KN2116 User Manual 3. Position the device in the rack and align the holes in the mounting brackets with the holes in the rack. 4. Screw the mounting brackets to the rear of the rack. Note: Cage nuts are provided for racks that are not prethreaded.
-
Page 35: Single Station Installation
Note: The distance between the console and the KN2108 / KN2116 must not exceed 20m. 2. Use Cat. 5 cable to connect any available KVM port to a KVM Adapter Cable that is appropriate for the computer you are installing (see the table on page 5 for details). -
Page 36: Single Stage Installation Diagram
KN2108 / KN2116 User Manual Single Stage Installation Diagram... -
Page 37: Kvm Adapter Installation Diagrams
Chapter 2. Hardware Setup KVM Adapter Installation Diagrams KA9120 KA9131 KA9170 KA9140 SERIAL TERMINAL KA9130... -
Page 38: Two Stage Installation
Supported KVM Switches, page 116, for a list of supported KVM switches that can be cascaded from the KN2108 / KN2116. To set up a two stage installation, refer to the diagram on page 23, and do the following: 1. Make sure that power to all the devices you will be connecting up, includ- ing all preexisting devices on the installation, have been turned off. -
Page 39: Two Stage Installation Diagram
Note: The Power On sequence requires that all Second Stage units be powered on first. After all the Second Stage units have been powered on, the First Stage unit must be powered on next. After the Second and First stage units have been powered on, the computers can be powered on. -
Page 40: Hot Plugging
If it becomes necessary to power off the KN2108 / KN2116, or if the switch loses power and needs to be restarted, wait 10 seconds before powering it back on. The computers should not be affected by this, but if any of them should fail, simply restart them. -
Page 41: Port Id Numbering
Second Stage unit links back to. For example, a Port ID of 12 - 3 refers to a computer that is connected to KVM Port 3 of a Second Stage unit that links back to KVM Port 12 of the First Stage unit. - Page 42 KN2108 / KN2116 User Manual This Page Intentionally Left Blank...
-
Page 43: Chapter 3. Administration
Administrator needs to perform is setting the unit up for user operation. The most convenient way to do this for the first time is from the local console. After the local console has been connected up and the KN2108 / KN2116... - Page 44 Configuration; Administration; and Log. Each of these pages is discussed in the sections that follow There are four buttons at the right of the title bar. The purpose of each is described (going from left to right), in the table below. Note that the same effect can be achieved by pressing a function key.
-
Page 45: The Main Page
Selecting a port and double clicking it switches you to the device on that port. A port icon in the shape of a monitor displays in front of the port number. Ports that have devices connected to them that are up and running have the port icon lit in green. -
Page 46: The List Function
KN2108 / KN2116 User Manual The List Function The List Function lets you broaden or narrow the scope of which ports the OSD displays (lists) in the Main Screen. To invoke the List Function, click the arrow at the upper right corner of the screen, or press [F3]:... - Page 47 Quick View Ports (see p. 29), and that have their attached devices Powered On. The text input box on the right allows you to key in a port name so that only port names that match what you key in show up in the List. Wildcards (? and *) are acceptable, so that more than one port can show up in the list.
-
Page 48: Port Names
This field allows the Administrator to create, modify, or delete port names. To configure a port name: 1. Click once on the port you want to edit, then either press [F2], or click again on the highlight bar. -
Page 49: Port Operation
3. When you have finished editing the port name, click anywhere outside of the input box to complete the operation. Port Operation Since port operation is the same as for the Windows and Java Clients, the procedures are discussed in Chapters 5 and 6. -
Page 50: The Configuration Page
Windows and Java Clients, their use is discussed in Chapters 5 and 6 (see pp. 59 and 81). The Log Page Clicking the Log tab brings up the contents of the log file. The log file is discussed in Chapter 7. -
Page 51: The Administration Page
Chapter 3. Administration The Administration Page Each of the administrative functions is represented by an icon at the left of the page. Clicking the icon brings up its associated dialog box. When the Administration page first comes up the General dialog box appears: General The General Page presents four items of information. -
Page 52: User Management
To delete a user profile, select it in the list box, and Click Remove. To modify a user profile, select it and Click Edit. To add a user, Click New. If you choose Edit or New, a dialog box similar to the one below appears:... - Page 53 Chapter 3. Administration Fill in the required information for a new User profile, or modify the existing information to edit a previous profile. A description of the field headings is given in the table below: Heading Description Username A minimum of 6 and a maximum of 15 characters is allowed.
- Page 54 Administration permission to define the selected User's access to the computers on a Port-by-Port basis. For each User profile, select a port and click it to cycle through the choices: Full: The user can view the remote screen and can perform operations on the remote system from his keyboard and monitor.
-
Page 55: Service Configuration
Users must specify the port number when they log in to the KN2108 / KN2116. If an invalid port number (or no port number) is specified, the KN2108 / KN2116 will not be found. -
Page 56: Log Server
You specify the MAC address and a port number for the computer that the Log Server resides on in this panel. The valid port range is 1024-60000. The default port number is 9001. -
Page 57: Network
Network The Network dialog is used to specify the KN2108 / KN2116's network environment. The box is divided into two panels: IP Address; and DNS Server. IP Address The KN2108 / KN2116 can either have its IP address assigned dynamically (DHCP), or it can be given a fixed IP address. -
Page 58: Anms
2. Fill in the IP addresses and Service Ports for the Primary and Alternate RADIUS servers. 3. Set the time in seconds that the KN2108 / KN2116 waits for a RADIUS server reply before it times out in the Timeout field. -
Page 59: Radius Server Access Rights Table
Sets the Logout Timeout. When there is no input from the user for the amount of time set with this function, the user is automatically logged out and will need to log in again. The valid Logout Timeout range is from 0-180 minutes. -
Page 60: Radius Server Access Rights Examples
CC Management Settings If you want to allow authorization for the KN2108 / KN2116 through a CC (Control Center) server, check Enable CC Management and fill in the CC Server’s IP address and the port that it listens on in the appropriate fields. -
Page 61: Security
If the exclude button is checked, all the addresses within the filter range are denied access; all other addresses are allowed access. To add a filter, click New. A dialog box similar to the ones below appears:... -
Page 62: Default Web Page Name
To filter a single IP address, key in the same address in both the From and To fields. To filter a continuous range of IP addresses, key in the start of the range in the From field; key in the end of the range in the To field. -
Page 63: Customization
Working Mode If Stealth Mode is enabled, the KN2108 / KN2116 cannot be pinged. To permit browser access to the KN2108 / KN2116, click to put a check mark in the Enable Browser checkbox. If browser access is not enabled, users will not be able to log into the unit via their browsers. -
Page 64: I/O Modules
KN2108 / KN2116 User Manual I/O Modules Upgrade: Upgrade allows you to upgrade the I/O firmware of selected ports. When you click Upgrade..., a dialog box similar to the one below appears: 1. Select the ports you want to upgrade. -
Page 65: Attributes
Attributes allows you to set attribute parameters for each of the ports. When you click Attributes..., a dialog box similar to the one below appears: The port numbers are listed in the column on the left. The port's attributes are shown to its right. The purpose of each attribute is described below:... -
Page 66: Share Mode Attribute Table
Input a value from 0 to 255 seconds. The default is 3 seconds. A setting of 0 causes the port to be released the instant there is no input. -
Page 67: Miscellaneous
Chapter 3. Administration 1. Select the desired attributes for the port, then click OK. You return to the previous screen (Setting I/O Module Attributes). To exit without saving your changes, click Cancel. 2. When you return to the previous screen, click Apply to keep your changes. -
Page 68: Date/Time
The Date/Time dialog box lets the Administrator set up the KN2108 / KN2116's time parameters: To establish the time zone that the switch is located in, drop down the Time Zone list and choose the city that most closely corresponds to where it is at. -
Page 69: Upgrading The Firmware
To upgrade the firmware, do the following: 1. Download the new firmware file to a computer that is not part of your KN2108 / KN2116 installation. 2. From that computer, open your browser and log in to the KN2108 / KN2116. - Page 70 KN2108 / KN2116 User Manual This Page Intentionally Left Blank...
-
Page 71: Chapter 4. Browser Operation
Logging In To log in from an internet browser: 1. Open the browser and specify the IP address of the KN2108 / KN2116 you want to access in the browser's URL location bar. Note: If you don't know the IP address, get it from the administrator. - Page 72 If you see this message, try logging in again being careful with the Username and Password. 2. If you are the Administrator and are logging in for the first time, use the default Username: administrator; and the default Password: password. For security purposes, we strongly recommend you remove these and give yourself a unique Username and Password (see User Management, page 36).
-
Page 73: Web Page Layout
Note: This checkbox is only enabled for users who have administration privileges. Web Page Icons The purpose of the other icons at the top of the web page are explained in the table below: Icon Function... -
Page 74: Web Page Buttons
KN2108 / KN2116 User Manual Web Page Buttons The purpose of the buttons at the left of the web page are explained in the table below: Icon Function Click this button to download the Windows Client software to remotely control the connected server (or servers via a KVM switch). -
Page 75: Chapter 5. The Windows Client
After you have successfully logged in (see Logging In, page 55), to activate the browser based Windows Client OSD do the following: 1. Click the Windows Client button (the one without the arrow) at the left of the web page. - Page 76 If the remote screen is larger than what is able to fit in the window, move the mouse pointer to the screen border that is closest to the area you want to view and the screen will scroll.
-
Page 77: The Main Page
The Main Page The OSD comes up with the Main page visible: The Main Page lists all of the KN2108 / KN2116's ports. You access the computers connected to its ports by selecting them on this page. Details regarding the meaning and operation of the main page elements are provided in the Administration chapter (see The Main Page, page 29). -
Page 78: Port Operation
KN2108 / KN2116 User Manual Port Operation Select a port on the OSD Main Screen either by moving the highlight bar to it with the Up and Down Arrow keys and pressing Enter, or by Double Clicking it. Once you select a port, its screen displays on your monitor, and your keyboard and mouse input affects the remote system. -
Page 79: The Toolbar Icons
Clicking this button cycles you through the I/O module's compensation mode choices (Short, Medium, Long) depending on the length of cable used to connect a device to the KN2108 / KN2116. The length of the line in the icon changes to indicate which choice is selected. -
Page 80: Hotkey Operation Overview
The KN2108 / KN2116 provides the following hotkey features: Auto Scanning Skip Mode Switching Note: 1. The hotkeys are: A and P for Auto Scanning; and the Arrow Keys for Skip Mode Switching. 2. In order for hotkey operations to take place, the OSD toolbar must be visible (see Port Operation, page 62). -
Page 81: Pausing Auto Scan
Auto Scan Mode because when you Resume scanning, you start from where you left off. If, on the other hand, you were to exit and then restart Auto Scan Mode, the scanning would start over from the very first computer on the installation. -
Page 82: Panel Array Mode
Panel Array Mode Clicking the OSD Toolbar's Panel icon invokes Panel Array Mode. Under this mode, the OSD divides your screen into a 2 x 4 grid of 8 panels (KN2108), or a 4 x 4 grid of 16 panels (KN2116): Each panel represents one of the KN2108 / KN2116's ports. - Page 83 Chapter 5. The Windows Client You can access a computer connected to a port by moving the mouse pointer over its panel and clicking. You switch to the computer exactly as if you had selected it from the OSD Main screen.
-
Page 84: Multiuser Operation
When a user changes to a port everyone on the same bus changes to that port, as well. -
Page 85: Windows Client Control Panel
The Windows Client Control Panel consists of an icon bar at the top, with two text bars below it (refer back to the figure on page 61). Initially, the text bars display the video resolution and IP address of the device at the remote location. -
Page 86: Hotkey Setup
The Hotkey setup utility is accessed by clicking the Keyboard icon on the Control Panel. The actions performed by the Hotkeys are listed in the left column; the currently defined keys that invoke the actions are shown in the column to the right. -
Page 87: Hotkey Actions
Ctrl key. If you substitute the F11 key, for example, pressing [F11 + 5] would appear to the remote system as [Ctrl + 5]. Note: To invoke an action, you must press and release the keys one key at a time. -
Page 88: Hotkey Configuration
1. Highlight the Action, then click Start. 2. Key in the Function keys (one at a time). The key names appear in the Key field as you press them. 3. When you have finished keying in your sequence, click Stop. -
Page 89: Video Settings
You can adjust the placement and the picture quality of the remote screen (as displayed on your local monitor) with the Video Options function. To do so, either click on the Hammer icon on the Control Panel, or use the Adjust Video hotkeys (see page 71). The following screen appears:... - Page 90 If the local and remote mouse pointers are out of sync, in most cases performing this function will bring them back into sync. Note: This function works best with a bright screen.
-
Page 91: Gamma Adjustment
Chapter 5. The Windows Client Gamma Adjustment If it is necessary to correct the gamma level for the remote video display, use the Gamma function of the Video Adjustment dialog box. Under Basic configuration, there are 7 preset levels to choose from. Drop down the list box and choose the most suitable one. -
Page 92: The Message Board
The Message Board The KN2108 / KN2116 supports multiple user logins, which can possibly give rise to access conflicts. To alleviate this problem, a message board feature has been provided, allowing users to communicate with each other. The message board functions much like an internet chat program does. When... -
Page 93: The Button Bar
If you disable Chat, however, messages that get posted to the board won't appear. Compose Panel Key in the messages that you want to post to the board in this panel. Click Send, or press [Enter] to post the message to the board. -
Page 94: User List Panel
By default, messages are posted to all users. To post a message to one individual user, select the user's name before sending your message. If a user's name is selected, and you want to post a message to all users, select All Users before sending your message. -
Page 95: The Configuration Page
Chapter 5. The Windows Client The Configuration Page The OSD Configuration page allows users to set up their own, individual, working environments. The KN2108 / KN2116 stores a separate configuration record for each user profile, and sets up the working configuration according... - Page 96 5 seconds; a setting of 0 disables the Scan function. Screen Blanker If there is no input from the console for the amount of time set with this function, the screen is blanked. Key in a value from 1 ~ 30 minutes.
-
Page 97: Chapter 6. The Java Client
After you have successfully logged in (see p. 55), to activate the browser Java Client OSD do the following: 1. Click the Java Client button (the one without the arrow) at the left of the web page. Note: 1. You must have Sun's Java 2 JRE 1.4.2 or higher installed on your computer. -
Page 98: The Java Client Control Panel
KN2108 / KN2116 User Manual When you bring up the OSD, the Main Screen comes up in the center of your monitor. This is the same OSD Main Screen that appears when the Windows Client is invoked. For an explanation of this screen see The Main Page, page 61. -
Page 99: Video Settings
Chapter 6. The Java Client Video Settings Clicking this button brings up the Video Settings dialog box: This is similar to the Windows Client Video Settings dialog box. See Video Settings, page 73. Keypad Some keyboard combinations cannot be captured and sent to the KN2108 / KN2116. In... -
Page 100: Mouse Synchronization
There are two methods available to bring the pointers into sync: 1. Click the Mouse Synchronization button; wait for the remote mouse pointer to move to the upper left corner of the screen; move your local mouse pointer directly on top of the remote pointer, and click. -
Page 101: The Button Bar
Chapter 6. The Java Client The Button Bar The buttons on the Button Bar are toggles. Their actions are described in the table below: Button Action Enable/Disable Chat. When disabled, messages posted to the board are not displayed. The button is shadowed when Chat is disabled. -
Page 102: Lock Key Leds
By default, messages are posted to all users. To post a message to one individual user, select the user's name before sending your message. If a user's name is selected, and you want to post a message to all users, select All Users before sending your message. -
Page 103: Port Operation
Chapter 6. The Java Client Port Operation Java Client port operation is the same as for the Windows Client. See page 62 for port operation details. Panel Array Mode Except for some differences in the toolbar, this is very similar to the Windows Client Panel Array Mode (see page 66 for details). - Page 104 KN2108 / KN2116 User Manual This Page Intentionally Left Blank...
-
Page 105: Chapter 7 The Log File
The KN2108 / KN2116 logs all the events that take place on it. To view the contents of the log file, click the Log icon at the left of the web page. A screen similar to the one below appears: The log file tracks a maximum of 512 events. - Page 106 KN2108 / KN2116 User Manual This Page Intentionally Left Blank...
-
Page 107: Chapter 8. The Log Server
1. From the computer that you want to use as the Log Server, open your browser and log into the KN2108 / KN2116 (see page 55). 2. Click the Log Server button at the left of the web page to start the Log Server installation program. -
Page 108: Starting Up
KN2108 / KN2116 User Manual Starting Up To bring up the Log Server, either double click the program icon, or key in the full path to the program on the command line. The first time your run it, a screen similar to the one below appears:... -
Page 109: The Menu Bar
Options Help These are discussed in the sections that follow. Note: If the Menu Bar appears to be disabled, click in the KN2108 / KN2116 List window to enable it. Configure The Configure menu contains three items: Add; Edit; and Delete. They are used to add new KN2108 / KN2116 units to the KN2108 / KN2116 List;... -
Page 110: Events
Field Explanation Address This can either be the IP address of the KN2108 / KN2116 or its DNS name (if the network administrator has assigned it a DNS name). Port The Access Port number assigned to the KN2108 / KN2116 (see Access Port, page 39). -
Page 111: Maintenance
Records are not automatically erased when their time limit (set with the Limit setting of the Edit function - see page 94), comes due. They still remain in the database even though they have exceeded their expiration time. Clicking this... -
Page 112: Options
KN2108 / KN2116 User Manual Options Network Retry allows you to set the number of seconds that the Log Server should wait before attempting to connect if its previous attempt to connect failed. When you click this item, a dialog box, similar to the one below, appears: Key in the number of seconds, then click OK to finish. -
Page 113: The Log Server Main Screen
Overview The Log Server Main Screen is divided into two main panels. The upper (List) panel lists all of the KN2108 / KN2116 units that have been selected for the Log Server to track (see Configure, page 93). The lower (Tick) panel displays the tick information for the currently selected KN2108 / KN2116 (if there are more than one, it is the highlighted one). -
Page 114: The List Panel
Recording checkbox is checked, the Log Server will still record its ticks. Address This is the IP Address or DNS name that was given to the KN2108 / KN2116 when it was added to the Log Server (see Configure, page 93). -
Page 115: Chapter 9. Ap Operation
1. Log into the KN2108 / KN2116 with your browser, and click the second Windows Client button (the one with the arrow). A screen similar to the one below appears: 2. Click Save. 3. In the dialog box that comes up, specify a location on your hard disk to save it to. -
Page 116: Starting Up
KN2108 / KN2116 User Manual Starting Up To connect to the KN2108 / KN2116, go to the location on your hard disk that you saved the Windows Client program to, and double click its icon (WinClient.exe) to bring up the Windows Client Connection Screen: Note: You must have DirectX 7.0 or higher installed on your computer. - Page 117 (Continued from previous page.) Item Description Server This area is used when you want to connect to a KN2108 / KN2116 at a remote location. You can drop down the IP list box and select an address from the list.
-
Page 118: The File Menu
The File Menu allows the operator to Create, Save, and Open user created Work files. A Work File consists of all the information specified in a Client session. This includes the Server List and Server IP list items, as well as the Hotkey settings. -
Page 119: Config
If the remote screen is larger than what is able to fit in the window, move the mouse pointer to the screen border that is closest to the area you want to view and the screen will scroll. -
Page 120: Connecting
Connecting To connect to a KN2108 / KN2116 unit: 1. If it is in the Server List, double click it; if you are using the Server IP input box, specify the IP address and Port number, then click Connect. A Login dialog box appears: 2. -
Page 121: Operation
The look and feel of the AP Windows client operation is the same as for the browser version of the Windows client. See chapter, beginning on page 59 for... -
Page 122: The Java Client
Java Client button (the one with the arrow). A screen similar to the one below appears: 2. Click Save. 3. In the dialog box that comes up specify a location on your hard disk to save it to. Starting Up To connect to the KN2108 / KN2116 do the following: 1. - Page 123 Chapter 9. AP Operation 3. Key in the IP address for the unit you want to connect to - including a forward slash followed by the login string (set by the administrator). Note: For security purposes, the login string must be specified correctly as part of the IP address.
-
Page 124: Operation
KN2108 / KN2116 main page displays on your monitor. Operation The look and feel of the AP Java client operation is the same as for the browser version of the Java client. See Chapter 6, beginning on page 81, for details. -
Page 125: Appendix
KN2108 / web pages instead of Close the browser and reopen it to log KN2116 appears to fetching the new web in with a new session. still be using the old pages. -
Page 126: The Windows Client
3. See Additional Mouse Synchronization Procedures, page 113. Part of remote window is off my 1. If Keep Screen Size is not enabled (see page 60), use the monitor. AutoSync feature (see Video Settings, page 73), to sync the local and remote monitors. -
Page 127: Sun Systems
1. Open a console and issue the following command: ffbconfig -res 1024x768x60 2. Log out 3. Log in Note: These solutions work for most common Sun VGA cards. If using them fails to resolve the problem, consult the Sun VGA card's manual. -
Page 128: The Log Server
This driver is automatically installed with Windows ME, 2000 and XP. For Windows 98 or NT, you will have to go to the Microsoft download site: http://www.microsoft.com/data/download.htm to retrieve the driver file: MDAC 2.7 RTM Refresh (2.70.9001.0) -
Page 129: Additional Mouse Synchronization Procedures
KN2108 / KN2116 with. Windows: Note: In order for the local and remote mice to synchronize, you must use the generic mouse driver supplied with the MS operating system. If you have a third party driver installed - such as one supplied by the mouse manufacturer - you must remove it. -
Page 130: Sun / Linux
KN2108 / KN2116 User Manual 3. Windows ME: Set the mouse speed to the middle position; disable mouse acceleration (click Advanced to get the dialog box for this). 4. Windows NT / Windows 98 / Windows 95: Set the mouse speed to the slowest position. -
Page 131: Specifications
Video 1 x HDB-15 Female (Blue) Mouse 1 x 6-pin Mini-DIN Female (Green) KVM Port 8 x RJ-45 Female (Black) 16 x RJ-45 Female (Black) Power 3-prong AC socket 1 x RJ-45 Female (Black) 1 x DB-9 Male (Black) Switches... -
Page 132: Osd Factory Default Settings
F (Full) For all Users on all Ports Supported KVM Switches While we recommend using the KH88 when cascading KVM switches, the following is a list of supported KVM switches that can also be used when configuring a cascaded installation. CS-88A... -
Page 133: Administrator Login Failure
4. When the Link and 10/100Mbps LEDs flash, power off the switch. 5. Remove the jumper cap from J8. 6. Close the housing and start the KN2108 / KN2116 back up. After you start back up, you can use the default Username and Password (see page 27) to log in. -
Page 134: Limited Warranty
The direct vendor also reserves the right to revise or update the device or documentation without obligation to notify any individual or entity of such revisions, or update. For further inquires please... -
Page 135: Index
Index Browser OSD, activating, 59, 81 Button Bar, 85 Access Port, 39 Adapter cable installation, 21 Administration, 27 CC Management Settings, 44 Configuration Page, 34 Changing an Attribute, 50 Customization Page, 47 Components, 6 List Function, 30 Configuration Page, 34, 79, 87... - Page 136 Java Client Keypad , 83 Overview, 1 KN2108 Front View, 6 Rear View, 8 Panel Array Mode, 66, 87, 112 KN2116 Port ID Numbering, 25 Front View, 6 Port Names, 32 Rear View, 8 Port Operation, 33, 87 KVM adapter installation, 21...
- Page 137 General, iv Rack Mounting, vi Security Page, 45 Web Page Service Configuration Page, 39 Icons, 57 Share Mode Attribute Table, 50 Web Page Buttons, 58 Single Station Installation, 19 Web Page Layout, 57 Skip Mode, 65 Windows Client, 99 Specifications, 115...
Need help?
Do you have a question about the KN-2108 and is the answer not in the manual?
Questions and answers