Table of Contents
Advertisement
Quick Links
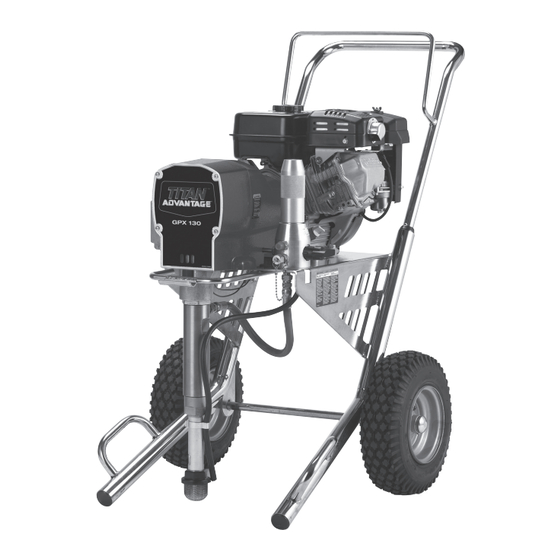
ADVANTAGE GPX 130
Model Numbers:
Bare
Complete
Bare w/5 Gal. Siphon
Complete w/5 Gal. SIphon
Gas Piston Pump
0509008
0509038
0509054
0509058
Owner's Manual
Do not use this equipment
before reading this manual!
NOTE: This manual contains important
warnings and instructions. Please
read and retain for reference.
© Titan Tool Inc. All Rights Reserved. Form No. 0528901B
0611
•
Advertisement
Table of Contents

Related Manuals for Titan ADVANTAGE GPX 130


Summary of Contents for Titan ADVANTAGE GPX 130
- Page 1 NOTE: This manual contains important Bare 0509008 warnings and instructions. Please Complete 0509038 read and retain for reference. Bare w/5 Gal. Siphon 0509054 Complete w/5 Gal. SIphon 0509058 © Titan Tool Inc. All Rights Reserved. Form No. 0528901B 0611 •...
-
Page 2: Safety Precautions
• Use lowest possible pressure to flush equipment. consultation with a plastic surgeon or reconstructive • Do not spray onto pump assembly. hand surgeon may be advisable. © Titan Tool Inc. All rights reserved. -
Page 3: Specifications
• Do not use the hose as a strength member to pull or lift the Weight ........159 lbs. (72.1 kg) equipment. Maximum hose length ....300’ (91.4 m) • Do not lift by cart handle when loading or unloading. © Titan Tool Inc. All rights reserved. -
Page 4: Table Of Contents
Safety Precautions section at the front of this you know does not contain alcohol. manual before operating this equipment. © Titan Tool Inc. All rights reserved. -
Page 5: Setup
OFF position. starts. NOTE: Make sure that the spray gun does not have a tip or tip guard installed. 12. Move the PRIME/SPRAY valve to the SPRAY position. 13. Turn on the sprayer. © Titan Tool Inc. All rights reserved. -
Page 6: Painting
10. Turn the pressure control knob fully counterclockwise to position. its lowest setting. 7. Move the PRIME/SPRAY valve down to the PRIME 11. Turn off the sprayer by moving the sprayer ON/OFF switch position. to the OFF position. © Titan Tool Inc. All rights reserved. -
Page 7: Spraying
2. Remove the gun tip and tip guard and clean with a brush using the appropriate solvent. 3. Place the siphon tube into a container of the appropriate solvent (refer to recommendations of the material © Titan Tool Inc. All rights reserved. -
Page 8: Maintenance
Failure to for recommendations. do so may lead to a static electric 4. If you have any further questions concerning your TITAN discharge, which may cause a fire. airless sprayer, call TITAN: 15. Trigger the gun into the metal waste container until the Technical Service (U.S.) ....... -
Page 9: Replacing The Filter
• Make sure to use a spark plug wrench when installing and removing the plug. Electrostatic discharge (ESD) potential could cause damage to electronic pressure control. use Titan Replacing the Filter ESD wrist strap P/N 0507958 or equivalent when working on electronic pressure control. -
Page 10: Replacing The Sprayer On/Off Switch
Board housing. Gently move the EPC housing. Tighten securely. the assembly away from 22. Take the sprayer to a Titan Authorized Service Center for the sprayer and allow the re-calibration. assembly to hang from the housing. 23. After re-calibration, pressurize the system and check for 3. -
Page 11: Replacing The Electronic Pressure Control (Epc) Assembly
EPC housing. Tighten securely. and slider housing join and pivot). 8. Take the sprayer to a Titan Authorized Service Center for 14. Insert the slider assembly into the bushing end of the re-calibration. -
Page 12: Replacing The Gears
Pump Housing Socket Screw Front Cover Screw 9. Inspect the gears for excessive wear and replace if damaged or worn. If the gear assembly is replaced, replace the two thrust balls as well. © Titan Tool Inc. All rights reserved. -
Page 13: Servicing The Clutch Assembly
Housing Hex Screw Engine Shaft damage to electronic pressure control. use Titan ESD 8. Locate the clutch hub and armature assembly on the end wrist strap P/N 0507958 or equivalent when working of the engine shaft. Note the two set screws as well as on electronic pressure control. - Page 14 Clutch Rotor Electrostatic discharge (ESD) potential could cause Socket Screw damage to electronic pressure control. use TItan Retaining Ring ESD wrist strap P/N 0507958 or equivalent when working on electronic pressure control.
-
Page 15: Servicing The Fluid Section
Install lower packing so cylinder is upright). large beveled edge will be facing up when the 37. Push the lower packing cylinder is upright. assembly into position using the © Titan Tool Inc. All rights reserved. - Page 16 54. Turn on the sprayer by following the procedure in the “Operation” section of this manual and check for leaks. NOTE: Repacking kit P/N 0509510 is available. For best results use all parts supplied in this kit. © Titan Tool Inc. All rights reserved.
-
Page 17: Troubleshooting
Turn the pressure control knob clockwise to supply power to the unit and increase the pressure setting. Faulty or loose wiring. Inspect or take to a Titan authorized service center. The gas tank is empty. Fill the gas tank. The unit will not prime. -
Page 18: Français
Il pourrait l’appareil. s’avérer nécessaire de consulter un plasticien ou un spécialiste • Ne pas pulvériser de produit sur la pompe. en chirurgie reconstructive de la main. Français © Titan Tool Inc. Tous droits réservés. - Page 19 électrique de la prise avant de travailler sur l’équipement. • N’utilisez pas le tuyau pour tirer ou soulever l’équipement. • Ne pas soulever par la poignée de chariot en chargeant ou en déchargeant. © Titan Tool Inc. Tous droits réservés. Français...
-
Page 20: Español
Use la presión más baja posible para enjuagar el equipo. consultar con un cirujano plástico o un cirujano especialista en • No rocíe el ensamblaje de la bomba. reconstrucción de las manos. Español © Titan Tool Inc. Todos los derechos reservados. - Page 21 • No utilice la manguera como elemento de fuerza para tirar del equipo o levantarlo. • No levantar por la manija del carro al cargar o descargando. © Titan Tool Inc. Todos los derechos reservados. Español...
-
Page 22: Parts Listings
0509521 Retaining ring ...........1 0509928 Grounding cable ........1 0509133 Fluid section assembly ......1 0507785 Return hose (not shown) ......1 0509542 Siphon tube ..........1 0507387 Hose, high pressure (not shown)....1 0507783 Hose clip ...........1 © Titan Tool Inc. All rights reserved. -
Page 23: Drive Assembly
Engine ............1 0509567 Drive shaft assembly ........1 0509569 Hex screw ..........4 0555902 Clutch field assembly........1 0507786 Lock washer ..........4 0507748 Cap ............1 NOTE: all electrical work should be performed by an authorized service center. © Titan Tool Inc. All rights reserved. -
Page 24: Fluid Section Assembly
NOTE: When repacking the fluid section, make sure the raised lip on the bottom of the lower packing is fully outside the packing around the piston rod after insertion of the piston rod. © Titan Tool Inc. All rights reserved. -
Page 25: Cart Assembly
Wheel ............2 0507737 Transducer ..........1 0509420 Plug, 3/8” ............1 0088162 Outlet fitting, 3/8” x 1/4” ......1 0295697 Plug, 1/4” ............1 0507793 Fitting, 1/4” ..........1 0555625 Filter housing ..........1 0507690 PRIME/SPRAY valve assembly ....1 © Titan Tool Inc. All rights reserved. -
Page 26: Prime/Spray Assembly
Siphon hose..........1 5006536 Inlet screen ..........1 0507783 Clamp ............1 0509727 Swivel elbow ..........1 0509760 Adapter .............1 0509761 Hose clamp ..........1 0509788 Clip ............1 0509789 Spring ............1 55 Gallon Siphon Set (optional, P/N 0507977) © Titan Tool Inc. All rights reserved. -
Page 27: Electrical Schematic
Electrostatic discharge (ESD) wrist strap 9870307 Grease, 6 lb. can Labels Part # Description 0290801 Logo label, front 0295840 Warning label, explosion 0295841 Warning label, injection 0295805 Shock hazard label 0509819 “No Oil” label © Titan Tool Inc. All rights reserved. -
Page 28: Limited Warranty
Warranty Titan Tool, Inc., (“Titan”) warrants that at the time of delivery to the original purchaser for use (“End User”), the equipment covered by this warranty is free from defects in material and workmanship. With the exception of any special, limited, or extended warranty published by Titan, Titan’s obligation under this warranty is limited to replacing or repairing without charge those parts which, to Titan’s...
Need help?
Do you have a question about the ADVANTAGE GPX 130 and is the answer not in the manual?
Questions and answers