Advertisement
Quick Links
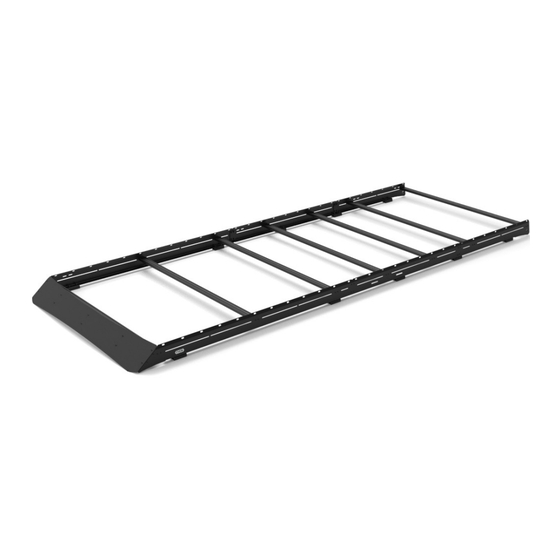
PROMASTER VAN LOW PR O ROOF R ACK - 1 59" HI GH RO OF EX T
PM0 10 3B
INSTALLATION
GUIDE
F L AT L I N E VA N C O • S U P P O R T @ F L AT L I N EVA N C O . C O M • 8 8 8 - 6 6 7- 5 5 7 6
TOOLS REQUIRED
(NOT INCLUDED)
+
RATCHET
+
7/16" WRENCH OR SOCKET
+
1/2" WRENCH OR SOCKET
+
5/32" ALLEN WRENCH
+
3/16" ALLEN WRENCH
INSTALL INFO
TIME TO INSTALL THIS PRODUCT: 1-2 HOURS
Additional help is suggested for a few of the install
steps.
BEFORE YOU START
Please inspect the product and packaging upon
delivery to ensure there are no issues and that all
parts and hardware are accounted for.
Contact us ASAP if anything is missing at:
support@flatlinevanco.com
0 1
Advertisement

Summary of Contents for FVC PM0103B
- Page 1 INSTALLATION GUIDE PROMASTER VAN LOW PR O ROOF R ACK - 1 59” HI GH RO OF EX T PM0 10 3B TOOLS REQUIRED (NOT INCLUDED) RATCHET 7/16” WRENCH OR SOCKET 1/2” WRENCH OR SOCKET 5/32” ALLEN WRENCH 3/16” ALLEN WRENCH INSTALL INFO TIME TO INSTALL THIS PRODUCT: 1-2 HOURS Additional help is suggested for a few of the install...
-
Page 2: Before You Start
BEFORE YOU START All Flatline Van Co products must be properly assembled and secured before attaching to your vehicle. Improper attachment could result in an automobile accident, and could cause serious bodily injury or death to you or to others involved. You are responsible for assembling and securing Flatline Van Co products to your vehicle, checking the mounting points and attachments prior to use, and regularly inspecting the products for wear and or damage. -
Page 3: Package Contents
PACKAGE CONTENTS REAR PASSENGER RAIL FRONT DRIVER RAIL REAR DRIVER RAIL FRONT PASSENGER RAIL PASS MID RAIL QTY: 1 QTY: 1 QTY: 1 QTY: 1 QTY: 1 DRIVER MID RAIL RAIL CONNECTING PLATES CROSSBARS FAIRING BRACKET 2 FAIRING BRACKET 3 QTY: 1 QTY: 2 QTY: 7... - Page 4 HARDWARE 1/4-20 X 0.75 1/4-20 X 0.5 BUTTON 5/16-18 5/16-18 X 1.75 FLANGED BUTTON HEAD HEX DRIVE NYLON INSERT SQUARE NECK SCREW HEAD HEX DRIVE CARRAIGE BOLT LOCKNUT QTY: 46 QTY: 6 QTY: 12 QTY: 12 1/4-20 NYLON INSERT 1/4” SCREW FLAT 1/4”...
- Page 5 TOOLS REQUIRED FOR THIS STEP: STEP | 01 LANDING PAD INSTALL 1.1 Install Anchor Stud Brackets: Insert two 5/16-18 Carriage Bolts through an Anchor Stud Bracket (FIG 1) and slide the assembly into place along one of the Anchor Studs along the rooftop of the van (FIG 2).
- Page 6 7/16” WRENCH OR SOCKET TOOLS REQUIRED FOR THIS STEP: 5/32” ALLEN WRENCH 3/16” ALLEN WRENCH STEP | 02 SIDE RAIL INSTALL 2.1 Install Side Rails: Place the Side Rails onto the protruding 5/16” Carriage Bolts and loosely secure them with 5/16” Washers and Nylock Locknuts (FIG 4+5).
- Page 7 TOOLS REQUIRED FOR THIS STEP: 3/16” ALLEN WRENCH 5/32” ALLEN WRENCH STEP | 03 CROSSBAR INSTALL 3.1 Layout Crossbar Locations: Position the crossbars in your desired locations, loosely threading in the 1/4-20 Flange Head Screws to hold in place (FIG 8+9). NOTE - Leave one crossbar aside for mounting the fairing in the next step.
- Page 8 5/32” ALLEN WRENCH TOOLS REQUIRED FOR THIS STEP: 3/16” ALLEN WRENCH STEP | 04 FAIRING ASSEMBLY 4.1 Fairing Assembly: Loosely assemble the Fairing Brackets with (2ea) 1/4-20” Button Head Screws, Lock Washers and T-Nuts as shown in FIG 10. Slide the assemblies into the crossbar (FIG 11) along the locations shown in FIG 12.
- Page 9 5/32” ALLEN WRENCH TOOLS REQUIRED FOR THIS STEP: 3/16” ALLEN WRENCH 7/16” WRENCH OR SOCKET STEP | 04 FAIRING ASSEMBLY 4.2 Secure Fairing Brackets to Crossbar: Align holes in face of Fairing to those of the Fairing Brackets to confirm correct fitment and secure to Crossbar by tightening down the 1/4-20”...
- Page 10 5/32” ALLEN WRENCH TOOLS REQUIRED FOR THIS STEP: 3/16” ALLEN WRENCH 7/16” WRENCH OR SOCKET STEP | 05 FAIRING INSTALL 5.1 Install Fairing: With help, lift the Fairing Assembly up to the front of your Roof Rack and gently lay it down on a soft surface (FIG 17).
- Page 11 3/16” ALLEN WRENCH TOOLS REQUIRED FOR THIS STEP: 5/32” ALLEN WRENCH 7/16” WRENCH OR SOCKET STEP | 06 ADJUSTMENTS AND TUNING 6.1 Secure Crosbars: Begin tightening the Crossbars into place, starting with the front-most crossbar. 6.2 Front-To-Back Adjustment: Check to make sure you are happy with your alignment to the van Front-To-Back.
- Page 12 FVC (and see) from you! Head to the products and following along and we will make it right. FVC is product page and click “Leave a company of van and outdoor with your adventures. Tag us Review.”...


Need help?
Do you have a question about the PM0103B and is the answer not in the manual?
Questions and answers