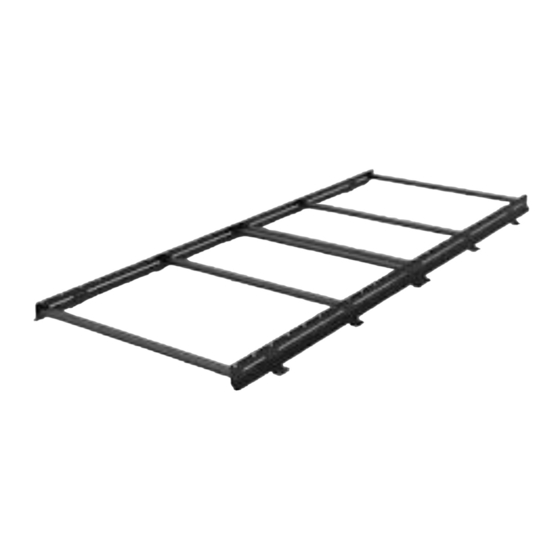
Summary of Contents for FVC Low Pro Roof Rack 144 LR
- Page 1 Installation Guide Low Pro Roof Rack 144 LR SP0110B FLATLINE VAN CO • SUPPORT@FLATLINEVANCO.COM • 888-667-5576...
- Page 2 All Flatline Van Co products must be properly assembled and secured before attaching to your vehicle. Improper attachment could result in an automobile accident, and could cause serious bodily injury or death to you or to others involved. You are responsible for assembling and securing flatline van co products to your vehicle, checking the mounting points and attachments prior to use, and regularly inspecting the products for wear and or damage.
- Page 3 THANK YOU! ARE YOU EXCITED ABOUT YOUR NEW LOW PRO ROOF RACK 144? HERE ARE A FEW TOOLS THINGS TO DO BEFORE BEGINNING THE INSTALLATION PROCESS-- • PLEASE INSPECT THE PRODUCT TO ENSURE THERE WAS NO DAMAGE INCURRED DURING SHIPPING. •...
-
Page 4: Package Contents
PACKAGE CONTENTS LEFT SIDE RAIL RIGHT SIDE RAIL CROSSBAR QTY-2 QTY-2 QTY-6 RAIL NUT 1/4-20 FLANGE HEAD SCREW 3/8-16 BUTTON HEAD SCREW 3/8 SPLIT LOCK WASHER QTY-24 QTY-24 QTY-24 QTY-24 INSTALLATION GUIDE STICKER PACK QTY-1 QTY-1 FLATLINE VAN CO • SUPPORT@FLATLINEVANCO.COM • 888-667-5576... -
Page 5: Let's Get Started
LET’S GET STARTED! RAIL NUT SLIDE HALF OF THE RAIL NUTS INTO THE PASSENGER SIDE FACTORY ROOF RAIL, AND HALF OF THEM INTO THE DRIVER SIDE RAIL. SPACE OUT THE RAIL NUTS CLOSE TO THE FINAL POSITION (GROUPS OF 2) SEE FIGURE 1 FOR ROUGH REFERENCE DIMENSIONS. - Page 6 BEGINNING WITH THE FORWARD SECTION OF THE RACK (SEE FIGURE 2 FOR LAYOUT), START LOOSELY ATTACHING THE SIDE RAILS TO THE ROOF RAILS USING THE 3/8-16 BUTTON HEAD SCREW & 3/8 SPLIT LOCK WASHER, BUT DO NOT TIGHTEN ALL THE WAY DOWN (SEE FIGURE 3 FOR DETAIL) FIGURE 2 NOTE- FRONT “FOOT”...
- Page 7 FIGURE 4 PLACE YOUR CROSSBARS IN DESIRED LOCATION, LOOSELY BOLTING THE 1/4-20 FLANGE HEAD SCREWS IN PLACE. NOTE- KEEP IN MIND THE LAYOUT OF YOUR ROOF TOP ARRAY (SOLAR PANELS, FANS, TENTS, ETC.) YOU CAN MOUNT CROSSBARS IN THE SET PAIR OF HOLES (SEE FIGURE 4), OR YOU CAN PLACE THEM IN THE SLOTS WHICH PROVIDES YOU MORE FREEDOM OF LAYOUT.
- Page 8 FIGURE 7 TIGHTEN ALL CROSSBAR BOLTS USING THE 5/32 ALLEN KEY (SEE FIGURE 7) NOTE- DO NOT OVERTIGHTEN! IF YOU ARE CONCERNED ABOUT THE BOLTS BACKING OUT, YOU CAN PUT A DAB OF BLUE LOCTITE ON THE BOLTS BEFORE TIGHTENING DOWN COMPLETELY. FIGURE 8 NOW TIGHTEN SIDE RAILS TO ROOF RAIL USING THE 7/32 ALLEN KEY (SEE FIGURE 8)
- Page 9 CUSTOMER SUPPORT If you are having any issues with your product, please reach out, and we will make it right. FVC is a company of van and outdoor enthusiasts that design and use our own products, so we want you to be as stoked on your new parts as we are! @flatlinevanco...


Need help?
Do you have a question about the Low Pro Roof Rack 144 LR and is the answer not in the manual?
Questions and answers