Advertisement
Quick Links
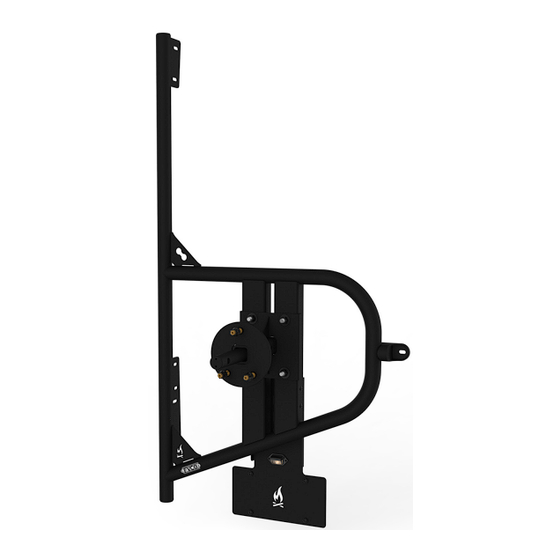
PROMASTER VAN REAR T I RE CARR IE R
PM1 10 1B
INSTALLATION
GUIDE
F L AT L I N E VA N C O • S U P P O R T @ F L AT L I N EVA N C O . C O M • 8 8 8 - 6 6 7- 5 5 7 6
TOOLS REQUIRED
+
5/32" ALLEN WRENCH
+
AUTO PANEL REMOVAL TOOL
+
7/32" ALLEN WRENCH
+
PAINTER'S TAPE
+
MARKER
+
MEASURING TAPE
+
T40 TORX
+
POWER DRILL
+
FLATHEAD SCREWDRIVER
+
3/16" DRILL BIT
+
4MM ALLEN WRENCH
+
27/64" DRILL BIT
+
6MM ALLEN WRENCH
+
DEBUR TOOL
+
5MM WRENCH/SOCKET
+
RUST PREVENTATIVE PAINT
+
MEASURING TAPE
+
3/4" WRENCH/SOCKET
+
13/16" WRENCH/SOCKET
+
9/16" WRENCH/SOCKET
INSTALL INFO
TIME TO INSTALL THIS PRODUCT: 1-2 HOURS
Additional help is suggested for a few of the install
steps.
BEFORE YOU START
Please inspect the product and packaging upon
delivery to ensure there are no issues and that all
parts and hardware are accounted for.
Contact us ASAP if anything is missing at:
support@flatlinevanco.com
(NOT INCLUDED)
0 1
Advertisement

Related Manuals for FVC PROMASTER PM1101B


Summary of Contents for FVC PROMASTER PM1101B
- Page 1 INSTALLATION GUIDE PROMASTER VAN REAR T I RE CARR IE R PM1 10 1B TOOLS REQUIRED (NOT INCLUDED) 5/32” ALLEN WRENCH AUTO PANEL REMOVAL TOOL 7/32” ALLEN WRENCH PAINTER’S TAPE MARKER MEASURING TAPE T40 TORX POWER DRILL FLATHEAD SCREWDRIVER 3/16” DRILL BIT 4MM ALLEN WRENCH 27/64”...
-
Page 2: Before You Start
BEFORE YOU START All Flatline Van Co products must be properly assembled and secured before attaching to your vehicle. Improper attachment could result in an automobile accident, and could cause serious bodily injury or death to you or to others involved. You are responsible for assembling and securing Flatline Van Co products to your vehicle, checking the mounting points and attachments prior to use, and regularly inspecting the products for wear and or damage. -
Page 3: Package Contents
PACKAGE CONTENTS LIMIT STRAP ASSEMBLY WHEEL BRACKET BACKER PLATES BOTTLE OPENER QTY: 1 QTY: 1 QTY: 2 QTY: 1 LOWER HINGE BRACKET UPPER HINGE BRACKET LOCK ROD QTY: 1 QTY: 1 QTY: 1 FRAME BRACE QTY: 1 BUSHING CAP TALL BUSHING SHORT BUSHING TIRE CARRIER QTY: 1... - Page 4 HARDWARE 1/4-20 X 0.75 FLANGED 3/8-16 X 1 FLANGED HEX 3/8-16 X 2.25 BUTTON 1/2-13 X 1.5 SQUARE NECK BUTTON HEAD HEX DRIVE HEAD SCREW HEAD HEX DRIVE SCREW CARRIAGE BOLT 3/8-16 NYLON LOCKNUT SCREW QTY: 1 QTY: 8 QTY: 4 QTY: 10 QTY: 8 M14-1.5 X 65 WHEEL STUD...
- Page 5 INSTALL TOOLS REQUIRED FOR THIS STEP: AUTO PANEL REMOVAL TOOL STEP | 01 LAYOUT AND INSTALL PREP 1.1 Door Panel Removal: Remove the Lower Panel Trim (FIG 1) using plastic panel removal tools. Be gentle to avoid breaking the factory panel clips. If clips get stuck in the door, pop them out and slide them back into place on the trim panel.
- Page 6 TOOLS REQUIRED FOR THIS STEP: MARKER POWER DRILL 3/16” DRILL BIT 27/64” DRILL BIT STEP | 02 DRILL FOR THIRD MOUNT 2.1 Marking Front Drill Location: Use the Front Drill Template to mark the outside of the rear driver door. The arrow should align with the Right Side Of The Door as shown in FIG 4+5.
- Page 7 TOOLS REQUIRED FOR THIS STEP: PAINTER’S TAPE RUST PREVENTATIVE PAINT POWER DRILL 1/4” DRILL BIT STEP | 03 PREP FOR CARRIER INSTALL 3.1 Paint Raw Edges: Debur and paint the exposed edges for rust prevention (FIG 8+9) 3.2 Side Drill Template: Drill out a clearance hole for the License Plate Relocation Bracket Wiring using a 1/4”...
- Page 8 3/4” WRENCH/SOCKET TOOLS REQUIRED FOR THIS STEP: 9/16” WRENCH/SOCKET STEP | 04 ASSEMBLE TIRE CARRIER 4.1 Assemble the Tire Carrier: Attach the Wheel Bracket to the Tire Carrier Frame using: (2) Backer Plates, (4) 1/2-13 X 1.5 Square Neck Carriage Bolts, (4) 1/2 Screw Flat Washers, And (4) 1/2-13 Nylon Insert Locknuts and a 3/4”...
- Page 9 5/32” ALLEN WRENCH TOOLS REQUIRED FOR THIS STEP: STEP | 04 ASSEMBLE TIRE CARRIER 4.3 Attach License Plate Relocation Bracket: Attach the License Plate Relocation Bracket to the Tire Carrier Frame using: (4) 1/4-20 X 0.5 Flanged Button Head Screws in the threaded locations shown in FIG 14+15 NOTE - There are multiple slots available on the License Plate Relocation Bracket to zip tie the wiring in place (FIG 15).
- Page 10 TOOLS REQUIRED FOR THIS STEP: T40 TORX MARKER SCREWDRIVER STEP | 05 INSTALL VAN MOUNTS 5.1 Bottom Hinge Alignment Marks: Begin by marking alignment points at the bottom hinge of the driver-side door (FIG 16). 5.2 Release Bottom Hinge: Remove the three factory bolts of the lower hinge using a T40 Torx (FIG 17).
- Page 11 9/16” WRENCH/SOCKET TOOLS REQUIRED FOR THIS STEP: STEP | 05 INSTALL VAN MOUNTS 5.6 Third Mount: Install the Third Mount to the drilled hole using a 3/8” Carriage Bolt, Bungee Bracket, 3/8” Flat Washer and Nylon Locknut (FIG 20-23). NOTE - Make sure that the Bungee Bracket is in the orientation as shown in FIG 23.
- Page 12 9/16” WRENCH/SOCKET TOOLS REQUIRED FOR THIS STEP: 7/32” ALLEN WRENCH STEP | 06 INSTALL TIRE CARRIER 6.1 Hinge Mounts: With assistance, raise the carrier up to the door and insert (2ea) 3/8” Flanged Hex Head Screws through the Upper (FIG 24) and Lower (FIG 25) Hinge Brackets. Loosely thread on (2ea) 3/8”...
- Page 13 FLATHEAD SCREWDIRVER TOOLS REQUIRED FOR THIS STEP: 4MM ALLEN WRENCH 5MM WRENCH/SOCKET STEP | 07 INSTALL LIMIT STRAP 7.1 Remove Factory Cap and Sticker Covers: Use a flathead screwdriver to remove the factory plastic cap along the inside of the door (FIG 27) and the stickers that cover the threaded holes of the van body (FIG 28).
- Page 14 4MM ALLEN WRENCH TOOLS REQUIRED FOR THIS STEP: 5MM WRENCH/SOCKET STEP | 07 INSTALL LIMIT STRAP 7.3 Attach Limit Strap to Bracket: Attach the Limit Strap Webbing to the Limit Strap Bracket using the longest M6 Socket Head Screw, Flat Washer and Nylon Locknut (if it isn’t attached already).
- Page 15 MEASURING TAPE TOOLS REQUIRED FOR THIS STEP: STEP | 07 INSTALL LIMIT STRAP 7.6 Layout Limit Strap Retraction Bungee: Run the Limit Strap Retraction Bungee through the sewn loop in the middle of the Limit Strap and tie off using an Figure 8 Knot (or similar) at about 14”...
- Page 16 TOOLS REQUIRED FOR THIS STEP: 6MM ALLEN WRENCH 13/16” SOCKET STEP | 08 ATTACH WHEEL LOCTITE HERE 8.1 Wheel Studs and Lug Nuts: Apply Loctite to the Wheel Studs on the short end and screw them into the threaded locations on the Wheel Bracket. Tighten with a 6MM Allen Wrench (FIG 37).
- Page 17 TOOLS REQUIRED FOR THIS STEP: FOOT PEG WRENCH LOCTITE 5/32” ALLEN WRENCH STEP | 09 FOOT PEGS & BOTTLE OPENER 9.1 Bottle Opener: Attach the Bottle Opener to the Third Mount Bracket using (2)1/4-20 x 0.75 Flanged Button Head Screws (FIG 39+40).
- Page 18 TOOLS REQUIRED FOR THIS STEP: STEP | 10 LICENSE PLATE LIGHT WIRING 10.1 License Plate Relocation Wiring: Using your preferred method, splice in the License Plate Light. Be sure to wire the new light in parallel to your Factory License Plate Light Harness.
- Page 19 FVC (and see) from you! Head to the products and following along and we will make it right. FVC is product page and click “Leave a company of van and outdoor with your adventures. Tag us Review.”...
Need help?
Do you have a question about the PROMASTER PM1101B and is the answer not in the manual?
Questions and answers