Table of Contents
Advertisement
Quick Links
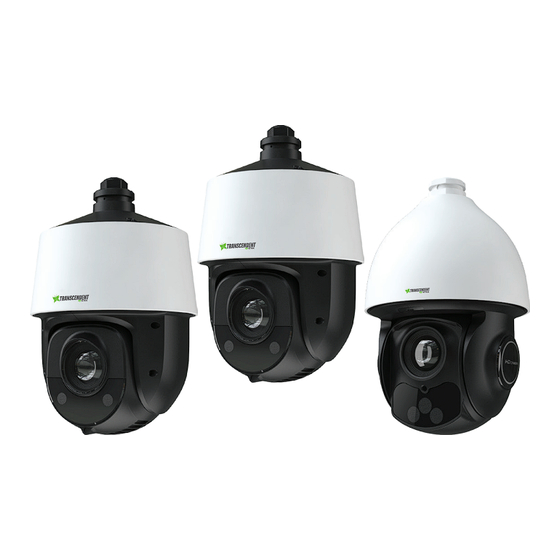
Transcendent GEN IV IP PTZ Cameras with
A.I. Facial Recognition and Auto-Tracking
PRODUCT MANUAL
KEY FEATURES
•
4 or 8 MegaPixel Progressive Scan CMOS Starlight Sensors
•
25X or 32X Optical Zoom with Real-Time Auto Zoom Tracking
•
Transcendent GEN IV Advanced Analytics
•
Real-Time Auto Zoom Tracking, powered by A.I.
•
A.I. Facial Detection with up to 95% accuracy
•
Intelligent A.I. Auto-tracking & Classification of People, Cars,
and Cycles
•
Up to 650' IR Range
•
1 Ch. Audio In + Out / 1 Ch. Alarm In + Out
•
IP66 Ingress Protection + IK10 Impact Rating
•
NDAA Compliant
•
3-Year Warranty
PLEASE NOTE:
Complete User Guide, Software, Tools, and Updates are
available online. Scan the QR Code or visit:
https://www.vitekcctv.com
VT-TPTZ25HRAN-4PNL
VT-TPTZ25HRAN-8PNL
VT-TPTZ32HRAN-8PNS
Advertisement
Table of Contents

Related Manuals for Vitek VT-TPTZ25HRAN-4PNL


Summary of Contents for Vitek VT-TPTZ25HRAN-4PNL
- Page 1 VT-TPTZ25HRAN-4PNL VT-TPTZ25HRAN-8PNL VT-TPTZ32HRAN-8PNS Transcendent GEN IV IP PTZ Cameras with A.I. Facial Recognition and Auto-Tracking PRODUCT MANUAL KEY FEATURES • 4 or 8 MegaPixel Progressive Scan CMOS Starlight Sensors • 25X or 32X Optical Zoom with Real-Time Auto Zoom Tracking •...
- Page 2 Product Manual: VT-TPTZ Series About This Manual This manual is provided for user reference only, without legal restraint. This manual is available for many models. Some functions introduced in the manual may be not available for some models. Please take the real models as the standard. This content of this manual is subject to change without prior notice, and the updates will be added into the new version of this manual.
- Page 3 Product Manual: VT-TPTZ Series Regulatory Information FCC Information 1. FCC compliance The products have be tested and found in compliance with the council FCC rules and regulations part 15 subpart B. These limits are designed to provide reasonable protection against harmful interference. This equipment generates uses and can radiate radio frequency energy and, if not installed and used in accordance with the instruction manual, may cause harmful interference to radio communication.
-
Page 4: Table Of Contents
Product Manual: VT-TPTZ Series Table of Contents Chapter 1 Introduction ......................1 Chapter 2 Network Connection ....................2 LAN ........................2 2.1.1 Access through IP-Tool ................2 2.1.2 Directly Access through IE/Edge Browser in IE Mode ......4 WAN ........................5 Chapter 3 Live View ......................... - Page 5 Product Manual: VT-TPTZ Series Central Server ..................43 5.6.3 DDNS Configuration ................43 5.6.4 SNMP ...................... 44 5.6.5 802.1X ..................... 45 5.6.6 RTSP ......................46 5.6.7 UPnP ......................47 5.6.8 E-mail ...................... 47 5.6.9 FTP ......................48 5.6.10 HTTPS ..................... 49 5.6.11 P2P (Optional) ..................
-
Page 6: Chapter 1 Introduction
Product Manual: VT-TPTZ Series Chapter 1 Introduction This series of PTZ cameras is used for video capturing. This series adopts state of the art video processing chips, integrated with the most advanced technologies (like video encoding and decoding technology) to make the image transmission more stable and smooth. Moreover, the built-in WEB server of this series improves the performance of the traditional surveillance system so that users can easily operate and monitor the PTZ. -
Page 7: Chapter 2 Network Connection
Product Manual: VT-TPTZ Series Chapter 2 Network Connection Connect IP-CAM via LAN or WAN using Internet Explorer. The details are as follows: 2.1 LAN LAN, there are two ways to access the IP- CAM: 1. Access it through IP-Tools 2. Direct access through IE browser/Edge in IE Mode. Access through IP-Tool 2.1.1 Network connection:... - Page 8 Product Manual: VT-TPTZ Series For example, the IP address of your computer is 192.168.1.4. so the IP address of the camera would be changed to 192.168.1.X. After modifying, please enter the password of the administrator and click “Modify” to modify the setting. ...
-
Page 9: Directly Access Through Ie/Edge Browser In Ie Mode
Product Manual: VT-TPTZ Series The system will prompt the above-mentioned textbox to ask you to change the default password. It is strongly recommended to change the default password for account security. If “Do not show again” is checked, the textbox will not appear next time. You can click “ok” to skip this and keep the password default. -
Page 10: Wan
Product Manual: VT-TPTZ Series Select “Properties” and then select internet protocol according to the actual situation (for example: IPv4). Next, click “Properties” to set the network of the PC. ② Open IE browser/Edge in IE mode and enter the default address of IP-CAM and confirm. ③... - Page 11 Product Manual: VT-TPTZ Series ① Make sure the camera is connected via LAN and then log into the camera via LAN and go to Config→Network →Port menu to set the port number. ② Go to Config →Network → TCP/IPv4 menu to modify the IP address. ③...
- Page 12 Product Manual: VT-TPTZ Series ④ Open IE browser/Edge in IE Mode and enter its WAN IP and http port to access. ➢ Access through PPPoE dial-up Network connection You can access the camera through PPPoE auto dial-up. Follow the steps below: ①...
-
Page 13: Chapter 3 Live View
Product Manual: VT-TPTZ Series Chapter 3 Live View After you log in, you will see the following window. The descriptions of the icon on the remote preview interface are as follows: Icon Description Icon Description Original size Color abnormal indicator Fit correct scale Abnormal clarity indicator Auto (fill the window) - Page 14 Product Manual: VT-TPTZ Series : After clicking 3D move mouse to anywhere in the live view image and left click once and camera will position that area to the center of the image, also left click and drag to have camera zoom into that area The smart alarm indicators will flash only when the camera supports these functions, and ⚫...
- Page 15 Product Manual: VT-TPTZ Series...
-
Page 16: Chapter 5 Remote Configuration
Product Manual: VT-TPTZ Series Chapter 5 Remote Configuration In the Webcam client, choose “Config” to go to the configuration interface. Note: Wherever applicable, click “Save” to save the settings. 5.1 System Configuration The “System configuration” includes four sub-menus: Basic Information, Date and Time, Local Config and SD Card. -
Page 17: Local Config
Product Manual: VT-TPTZ Series Select the time zone and DST as required. Click the “Date and Time” tab to set the time mode. 5.1.3 Local Config Go to Config→System→Local Config to set up the storage path of captured pictures and recorded videos on the local PC. - Page 18 Product Manual: VT-TPTZ Series ⚫ SD Card Management Click “Format” to format the SD card. All data will be cleared by clicking this button. Click “Eject” to stop writing data to SD card. Then the SD card can be ejected safely. Snapshot Quota: Set the capacity proportion of captured pictures on the SD card.
- Page 19 Product Manual: VT-TPTZ Series Weekly schedule Set the alarm time from Monday to Sunday for a single week. Each day is divided in one-hour increments. Green means scheduled. Blank means unscheduled. “Add”: Add the schedule for a special day. Drag the mouse to set the time on the timeline. “Erase”: Delete the schedule.
-
Page 20: Image Configuration
Product Manual: VT-TPTZ Series Set the format, resolution and quality of the image saved on the SD card and the snapshot interval and quantity and the timing snapshot here. Snapshot Quantity: The number you set here is the maximum quantity of snapshots. The actual quantity of snapshots may be less than this number. - Page 21 Product Manual: VT-TPTZ Series Please set the above parameters as needed (See Chapter 4.3 for more detail). Schedule Settings of Image Parameters: Click the “Schedule” tab as shown below. Set full time schedule for common, day, night mode and specified time schedule for day and night.
-
Page 22: Video / Audio Configuration
Product Manual: VT-TPTZ Series If the current mode of camera parameters is set to schedule, the image configuration mode will automatically switch between day and night according to the schedule. 5.2.2 Video / Audio Configuration Go to Image→Video / Audio interface as shown below. In this interface, set the resolution, frame rate, bitrate type, video quality, I-frame, Video compression and profile depending on the network conditions. -
Page 23: Osd Configuration
Product Manual: VT-TPTZ Series system is able to decode H.265. Profile: For H.264. Baseline, main and high profiles are the options. Send Snapshot: How many snapshots to generate for an event. Video encode slice split: If this function is enabled, the image can be smooth even when using a low-performance PC. -
Page 24: Ptz Configuration
Product Manual: VT-TPTZ Series 2. Click the “Draw Area” button and then drag the mouse to draw the video mask area. 3. Click the “Save” button to save the settings. 4. Return to live view to verify that the area that was drawn is shown as blocked out. To clear the video mask: Click the “Clear”... -
Page 25: Restore
Product Manual: VT-TPTZ Series ⚫ Password Setting If a password is set, you must enter the password every time you go to the menu of the PTZ by calling preset NO. 95. Go to Config→PTZ→Setting→Others. You can set a password for the PTZ menu. - Page 26 Product Manual: VT-TPTZ Series Check “Enable” check box to activate motion-based alarms. If unchecked, the camera will not trigger motion-based recording to the NVR or CMS, even if there is motion in the video. Alarm Holding Time: Refers to the interval of time between instances of detected motion. For instance, if the alarm holding time is set to 20 seconds, once the camera detects motion, it will trigger the alarm and not detect any other motion for 20 seconds.
-
Page 27: Other Alarms
Product Manual: VT-TPTZ Series Move the “Sensitivity” scroll bar to set the sensitivity. Higher sensitivity value means that motion will be triggered more easily. Select “Add” and click “Draw”. Drag the mouse to draw the motion detection area; Select “Erase” and drag the mouse to clear motion detection area. After that, click the “Save”... - Page 28 Product Manual: VT-TPTZ Series 2. Click “Enable” and set the alarm holding time. 3. Set alarm trigger options. Trigger alarm out, Email and FTP. The setup steps are the same as motion detection. Please refer to motion detection chapter for details. ⚫...
-
Page 29: Alarm Input
Product Manual: VT-TPTZ Series Note: This function is only available for some models. 5.4.3 Alarm Input Only some models support this function. If your device doesn’t support it, please skip the following instructions. To set sensor alarm (alarm in): Go to Config→Alarm→Alarm In interface as shown below. 1. -
Page 30: Alarm Server
Product Manual: VT-TPTZ Series Alarm Out Mode: You can choose alarm linkage, manual operation, day/night switch linkage and timing. Alarm Linkage: Having selected this mode, select alarm out name, alarm holding time at the “Alarm Holding Time” pull down list box and alarm type. Manual Operation: Having selected this mode, select the alarm type and click “Open”... -
Page 31: Smart Tracking
Product Manual: VT-TPTZ Series 5.4.6 Smart Tracking (Only some models support this function) Smart Tracking: When people or vehicle cross an alarm line or intrude into predefined areas, the PTZ camera can automatically track them, and the target image will be automatically zoomed in and centered on the screen until the target disappears from the screen. -
Page 32: Event Configuration
Product Manual: VT-TPTZ Series 5.5 Event Configuration For more accuracy, here are some recommendations for installation. ⚫ Cameras should be installed on stable surfaces, as vibrations can affect the accuracy of detection. ⚫ Avoid pointing the camera at reflective surfaces (like shiny floors, mirrors, glass, lake surfaces and so on). -
Page 33: Exception
Product Manual: VT-TPTZ Series 5.5.1 Exception This function can detect changes in the surveillance environment affected by the external factors. To set exception detection: Go to Config→Event→Exception interface as shown below. 1. Enable the applicable detection as desired. Scene Change Detection: Alarms will be triggered if the scene of the video has changed. Video Blur Detection: Alarms will be triggered if the video becomes blurry. -
Page 34: Line Crossing Detection
Product Manual: VT-TPTZ Series Drag the slider to set the sensitivity value or directly enter the sensitivity value in the textbox. Click “Save” to save the settings. The sensitivity value of Scene Change Detection: The higher the value is, the more sensitive the system responds to the amplitude of the scene change. - Page 35 Product Manual: VT-TPTZ Series saved to the SD card when the targets cross the alarm line. Note: To save snapshots to the local PC, please enable “Local Smart Snapshot Storage” in the local config interface first. To save snapshots to the SD card, please install an SD card first. Detection Target: Human: Select it and then alarms will be triggered if someone crosses the pre-defined alarm lines.
-
Page 36: Intrusion
Product Manual: VT-TPTZ Series 2. Set the alarm line number and direction. Up to 4 lines can be added. Multiple lines cannot be added simultaneously. Direction:A<->B, A->B and A<-B optional. This indicates in what direction the intruder/vehicle crossing over the line will trigger an alarm. A<->B: The alarm will be triggered when the intruder/vehicle crosses over the alarm line from B to A or from A to B. - Page 37 Product Manual: VT-TPTZ Series ⚫ Detection Configuration Enable intrusion detection, select the snapshot type and the detection target and set the alarm holding time and alarm trigger options. The detection setup steps are the same as line crossing detection. Please refer to the detection configuration of line crossing detection for details. ⚫...
-
Page 38: Region Entrance
Product Manual: VT-TPTZ Series the “Save” button to save the settings. After that, the camera will automatically return to this detection area after auto human /vehicle tracking. ⚫ Schedule Configuration Set the schedule of the intrusion detection. The setup steps of the schedule are the same as schedule recording setup (See Schedule Recording). -
Page 39: Region Exiting
Product Manual: VT-TPTZ Series 3. Set the schedule of the region entrance detection. The setup steps of the schedule are the same as schedule recording setup (See Schedule Recording). 5.5.5 Region Exiting Region Exiting: Alarms will be triggered if the target exits from the pre-defined areas. Go to Config→Event→Region Exiting interface as shown below. -
Page 40: Target Counting
Product Manual: VT-TPTZ Series 3. Set the schedule of the region exiting detection. The setup steps of the schedule are the same as schedule recording setup (See Schedule Recording). 5.5.6 Target Counting This function is to calculate the number of the people or vehicles crossing an alarm line through detecting, tracking and counting the shapes of the people or vehicles. -
Page 41: Face Comparison
Product Manual: VT-TPTZ Series Set the alarm line number and direction. Only one alarm line can be added. Direction:You can select A->B and A<-B. The direction of the arrow is the direction you want to detect the target entering the area. Click the “Draw Area”... - Page 42 Product Manual: VT-TPTZ Series 2. Enable the face detection function. Save Source Information: if checked, the whole picture will be saved to the SD card when detecting a face. Save Face Information: if checked, a close up picture of the captured face will be saved to the SD card when detecting a face.
- Page 43 Product Manual: VT-TPTZ Series There are four ways to add face pictures. ① Adding face pictures one by one Click to pop up an adding user box. Then click to select a face picture saved on the local PC. Please select the picture according to the specified format and size limit. After that, fill out the relevant information of the face picture and click “Entry”...
- Page 44 Product Manual: VT-TPTZ Series interface. Deduplication Period: During the set period repeated comparison results will be deleted. Similarity threshold: When the similarity of a captured face picture and a face picture added into the face database exceeds the similarity threshold, it will trigger the alarm. Alarm List: Select an alarm list.
- Page 45 Product Manual: VT-TPTZ Series After all face comparison settings are set successfully, enter the live view interface. Click to view the captured face pictures and face comparison information. Area ①: captured face pictures; area ②: face comparison area ⚫ View the comparison details. In area ②, click the compared face picture to bring up the following window.
-
Page 46: Network Configuration
Product Manual: VT-TPTZ Series Fill out the relevant information and click “Entry” to add this face picture. 5.6 Network Configuration 5.6.1 TCP/IPv4 Go to Config→Network→TCP/IP interface as shown below. There are two ways for network connection. Use IP address (take IPv4 for example)-There are two options for IP setup: obtain an IP address automatically by DHCP and use the following IP address. -
Page 47: Port
Product Manual: VT-TPTZ Series Either method of network connection can be used. If PPPoE is used to connect, the camera will get a dynamic WAN IP address. This IP address will change frequently. To be notified, the IP change notification function can be used. Click “IP Change Notification Config”... -
Page 48: Central Server
Product Manual: VT-TPTZ Series 5.6.3 Central Server This function is mainly used for connecting network video management system. 1. Check “Enable”. 2. Check the IP address and port of the transfer media server in the ECMS/NVMS. Then enable the auto report in the ECMS/NVMS when adding a new device. Next, enter the remaining information of the device in the ECMS/NVMS. -
Page 49: Snmp
Product Manual: VT-TPTZ Series Create domain name. After the domain name is successfully applied for, the domain name will be listed as below. 3. Enter the username, password, domain you apply for in the DDNS configuration interface. 4. Click “Save” to save the settings. 5.6.5 SNMP To get camera status, parameters and alarm information and remotely manage the camera, the SNMP function can be used. -
Page 50: 802.1X
Product Manual: VT-TPTZ Series 2. Check the corresponding version checkbox (Enable SNMPv1, Enable SNMPv2, Enable SNMPv3) according to the version of the SNMP software that will be used. 3. Set the values for “Read SNMP Community”, “Write SNMP Community”, “Trap Address”, “Trap Port”... -
Page 51: Rtsp
Product Manual: VT-TPTZ Series To use this function, the camera should be connected to a switch supporting 802.1x protocol. The switch can be used as an authentication system to identify the device on a local network. If the camera connected to the network interface of the switch has passed the authentication of the switch, it can be accessed via the local network. -
Page 52: Upnp
Product Manual: VT-TPTZ Series “rtsp://IP address: rtsp port/profile3?transportmode=mcast”. Audio: Having entered the main/sub stream into VLC player, the video and audio will play automatically. If “Allow anonymous login…” is checked, there is no need to enter the username and password to view the video. -
Page 53: Ftp
Product Manual: VT-TPTZ Series Sender Address: sender’s e-mail address. Username and password: sender’s username and password. Server Address: The SMTP IP address or host name. Select the secure connection type at the “Secure Connection” pull-down list according to what’s required. SMTP Port: The SMTP port. -
Page 54: Https
Product Manual: VT-TPTZ Series Server Name: The name of the FTP server. Server Address: The IP address or domain name of the FTP. Upload Path: The directory where files will be uploaded to. Port: The port of the FTP server. Use Name and Password: The username and password that are used to login to the FTP server. -
Page 55: P2P (Optional)
Product Manual: VT-TPTZ Series * If there is a signed certificate, click “Browse” to select it and then click “Install” to install it. * Click “Create a private certificate” to enter the following creation interface. Click “Create” to create a private certificate. Enter the country (only two letters available), domain (camera’s IP address/domain), validity date, password, province/state, region and so on. -
Page 56: Security Configuration
Product Manual: VT-TPTZ Series when using this function. Go to Config→Network→QoS. Video/Audio DSCP: The range is from 0 to 63. Alarm DSCP: The range is from 0 to 63. Manager DSCP: The range is from 0 to 63. Generally speaking, the larger the number is, the higher the priority is. 5.7 Security Configuration 5.7.1 User Configuration Go to Config→Security→... -
Page 57: Online Video User
Product Manual: VT-TPTZ Series password according to the requirement of the password security level (Go to Config→Security→Security Management→Password Security interface to set the security level). 4. Choose the user type. Administrator has all permissions. Normal users can only view the live video. -
Page 58: Block And Allow Lists
Product Manual: VT-TPTZ Series An administrator user can kick out all the other users (including other administrators). 5.7.3 Block and Allow Lists Go to Config→Security→Block and Allow Lists as shown below. The setup steps are as follows: Check the “Enable address filtering” check box. Select “Block/Allow the following address”, IPv4/IPv6/MAC and then enter IP address or MAC address in the address box and click “Add”. -
Page 59: Maintenance
Product Manual: VT-TPTZ Series Please set the password level and expiration time as needed. Password Level: Weak, Medium or Strong. Weak level: Numbers, special characters, upper or lower case letters can be used. You can choose one of them or any combination of them when setting the password. Medium Level: 9~15 characters, including at least two of the following categories: numbers, special characters, upper case letters, lower case letters. -
Page 60: Reboot Device
Product Manual: VT-TPTZ Series ⚫ Import & Export Settings Configuration settings of the camera can be exported from one camera into another camera. 1. Click “Browse” to select the save path for import or export information on the PC. 2. Click “Import Setting” or “Export Setting”. ⚫... - Page 61 Product Manual: VT-TPTZ Series 2. Select the main type, sub type, start and end time. 3. Click “Query” to view the operation log. 4. Click “Export” to export the operation log.
-
Page 62: Chapter 6 Playback
Product Manual: VT-TPTZ Series Chapter 6 Playback 6.1 Image Search Click Search to go to the interface as shown below. Images that are saved on the SD card can be found here. ⚫ Local Image Search Choose “Picture”—“Local”. Set time: Select date and choose the start and end time. Click to search the images. - Page 63 Product Manual: VT-TPTZ Series Click to return to the previous interface. ⚫ SD Card Image Search Choose “Picture”—“SD Card”. Set time: Select date and choose the start and end time. Choose the alarm events at the bottom of the interface. Click to search the images.
-
Page 64: Video Search
Product Manual: VT-TPTZ Series 6.2 Video Search 6.2.1 Local Video Search Click Search to go to the interface as shown below. Videos that were recorded locally to the PC can be played in this interface. Choose “Record”—“Local”. Set search time: Select the date and choose the start and end time. Click to search the images. - Page 65 Product Manual: VT-TPTZ Series Icon Description Icon Description Play button. After pausing video, Pause button click this button to continue playing. Stop button Speed down Speed up Watermark display Enable / disable audio; drag the slider to adjust the volume after enabling audio. 6.2.2 SD Card Video Search Click Search to go to the interface as shown below.
- Page 66 Product Manual: VT-TPTZ Series The timetable can be shown in 24H/12H/2H/1H format by clicking the corresponding buttons. Video clip and downloading Search the video files according to the above-mentioned steps. Select the start time by clicking on the timetable. Click to set the start time and then this button turns blue ( Select the end time by clicking on the time table.
-
Page 67: Chapter 7 Face Match Result Search
Product Manual: VT-TPTZ Series Chapter 7 Face Match Result Search Click “Face Log” tab to go to the face recognition result search interface. Set the start time and end time and click “Search” to view the face recognition result. Red time tag means no comparison result. Green time tag means there is a comparison result. Click the picture with green time tag and then the face comparison information can be viewed as shown below. -
Page 68: Chapter 8 Q & A
Product Manual: VT-TPTZ Series Chapter 8 Q & A 1. Q: I forget the password. How can I reset it? Reset the system to the factory default setting or contact the dealer. Default IP: 192.168.226.201 Username: admin Password: 123456 2. Q:The devices can’t connect through IE browser or Edge in IE Mode. Why? ①... - Page 69 Product Manual: VT-TPTZ Series Fig 4-1 Fig 4-2 ④ Then click OK to finish setup. If other plug-ins or anti-virus blocks ActiveX. Please uninstall or close them. 5. Q:Why does the device fail to play sound? The audio input device is possibly not connected. Please connect and try again. The audio function is not enabled at the corresponding channel.
-
Page 70: Appendix Preset Description
Product Manual: VT-TPTZ Series Appendix Preset Description Call NO.90 Preset Run track 1 Call NO.91 Preset Run cruise 1 Call NO.92 Preset Run cruise 2 Call NO.93 Preset Run cruise 3 Call NO.94 Preset Run cruise 4 Call Preset Call NO.95 Preset OSD menu Call NO.97 Preset Enable random scan... - Page 71 Product Manual: VT-TPTZ Series VT-TPTZ25HRAN-4PNL SPECIFICATIONS: Image Sensor 1/2.7” BSI (Backside-Illuminated) and NRI (Near-Infrared Sensing) Progressive Scan STARLIGHT CMOS Sensor Pixel Size 2.0um Effective Pixels 2884(H) × 1624(V) Resolution 4.0 MegaPixel (2560 ) Resolution @ 30fps Min. Illumination Color: 0.01 Lux @ (F1.65 AGC On) B/W: 0.002 Lux @ (F1.65 AGC On), 0 Lux w/IR...
- Page 72 95 Watt POE Mid-Span Injector, 4-Pair Compliant 10.51” (267.6mm) 8.96” (227.6mm) 8.09” (205.5mm) A 12VDC 3amp Power Supply is included. 6.81” (173.1mm) VT-TPTZ25HRAN-4PNL OPTIONAL MOUNTS: VT-TWM36 Optional 3’ (1M) Extended Wall Mount - White VT-TPT20HR-FM VT-TPT25HR-WMG VT-TPT20HR-PM VT-TPLMT-W VT-TCNMT-W VT-TPLM36...
- Page 73 Product Manual: VT-TPTZ Series VT-TPTZ25HRAN-8PNL SPECIFICATIONS: Image Sensor 1/2.8” Sony STARVIS® STARLIGHT Progressive Scan CMOS Sensor Resolution 8.0 MegaPixel (3840 × 2160) Resolution @ 30fps Min. Illumination Color: 0.01 Lux @ (F1.65 AGC On) B/W: 0.002 Lux @ (F1.65 AGC On), 0 Lux w/IR Image Setting Flip, Mirror, Saturation, Brightness, Contrast, Sharpness, AGC, (Adjusted by Client) Shutter Speed...
- Page 74 Optional Ceiling/Pedestal Semi-flush Mount for Optional Universal Transcendent Transcendent Universal Optional 3’ (1M) Extended Pole Mount for Transcendent Corner Mount Adapter VT-TPTZ25HRAN-4PNL Gasket Wall Mount for Universal Pole Mount Bracket - White IP PTZs - White Transcendent Mount Adapter - White...
- Page 75 Product Manual: VT-TPTZ Series VT-TPTZ32HRAN-8PNS SPECIFICATIONS: Image Sensor 1/2.8” Sony STARVIS® Progressive Scan Starlight CMOS Sensor Resolution 8.0 MegaPixel (3840 × 2160) Resolution @ 30fps Min. Illumination Color: 0.01 Lux @ (F1.2 AGC On) B/W: 0.002 Lux @ (F1.2 AGC On), 0 Lux w/IR Image setting Flip, Mirror, Saturation, Brightness, Contrast, Sharpness, AGC, (Adjusted by Client) Shutter Speed...
- Page 76 Product Manual: VT-TPTZ Series VT-TPTZ32HRAN-8PNS SPECIFICATIONS: Smart Auto Tracking Auto Tracking (supports tracking specified target types such as human and vehicle), Manual Tracking Basic Event Detection Motion detection, Video Tampering, Exception (Network Disconnected, IP Address Conflict, SD Card Full / Error) Trip Wire (+ Bi-Directional), Intrusion / Line Crossing / Region Entering + Exiting, Support Alarm Triggering by Smart Event Detection Specified Target Types (Human / Vehicle), Un-attended Baggage, Object Removal, Auto / Manual Smart Tracking...
- Page 77 Product Manual: VT-TPTZ Series Transcendent Network IP Keyboard Controllers for VT-TPTZ Series PTZ’s Also Available! VT-TKBD23 Transcendent VMS-Integrated Android Based Network IP Keyboard Controller with 10.1” LCD Display & 4D Vector Operation • 10.1” Capacitive Touch Screen, powered by Google Android •...
- Page 78 (3) years, or as otherwise stated above, from the date of purchase by the end user. This warranty is nontransferable and extends only to the original buyer or end user customer of a VITEK Authorized Reseller.
Need help?
Do you have a question about the VT-TPTZ25HRAN-4PNL and is the answer not in the manual?
Questions and answers