Table of Contents
Advertisement
Quick Links
Advertisement
Table of Contents

Subscribe to Our Youtube Channel
Related Manuals for Dentsply Sirona Digital Cure


Summary of Contents for Dentsply Sirona Digital Cure
- Page 1 Digital Cure Manual Curing Unit DP-0000620 Rev. 12/2022...
- Page 2 Installation and General Usage Instructions Refer to the Lucitone Digital Print Denture illustrated technical guides for detailed workflow instructions. Digital Cure Desktop stereolithography post-cure chamber...
-
Page 3: Table Of Contents
Working Environment....................15 4.2 Installation and Set Up .................... 15 Operation ......................17-20 Operating the Digital Cure ..................17 Setting the cure cycle for Lucitone Digital Appliances ......17 5.3 Setting a custom cure cycle ................. 18 5.4 Starting the cure cycle .................... 19 5.5 Collecting the printed parts ................. - Page 4 System Maintenance and Cleaning ............21-22 Test LED Module ......................21 6.2 Cleaning ......................... 22 6.3 Maintenance ........................ 22 6.4 Error Codes and troubleshooting ..............22 Warranty ....................... 23 Warranty Warranty Exceptions Repair Disposal of Unit...
- Page 5 Read and understand this manual and its safety instructions before using the Digital Cure. Failure to do so can result in serious injury or death. Warning DISCLAIMER Dentsply Sirona has made every effort to make these instructions as clear, complete, and correct as possible.
-
Page 6: Preface
Preface Congratulations on purchasing the Dentsply Sirona Digital Cure unit, hereby referred to as the Digital Cure. On behalf of the Dentsply Sirona team, we thank you for your purchase. This manual explains how to set up, use, and properly maintain the Digital Cure. -
Page 7: Warranty
INSPECTION: Buyer shall inspect the product upon receipt. The buyer shall notify Dentsply Sirona in writing of any claims of defects in material and workmanship within thirty days after the buyer discovers or should have discovered the facts upon which such a claim is based. -
Page 8: Introduction
Introduction Intended use The Digital Cure post cures 3D printed parts with a unique combination of heat and light. The final performance characteristics of cured photopolymer resin may vary according to your compliance with the instructions Inappropriate use may damage equipment and be harmful to human body. Please read the relevant safety instruction in this user manual. -
Page 9: Technical Specifications
Technical Specifications Power Supply Voltage 100-240 VAC 50/60 Hz Wattage MAX 400 W Dimensions Length: 333 mm Width: 263 mm Height: 231 mm Weight: 7.1 kg Operating Environment 18˚C ~ 28˚C Recommended Temperature 20% ~ 65% Relative Humidity 700hPa ~ 1060hPa Ambient Pressure Transportation And Storage Conditions Ambient Temperature... -
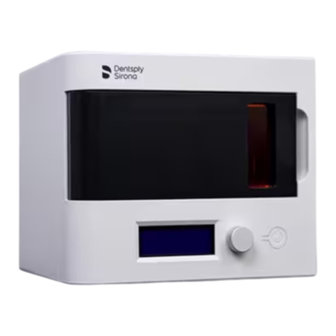
Page 10: Product Components
Product Components DOOR COLORED TURNTABLE WINDOW ON/OFF SWITCH DISPLAY INPUT KNOB Spare Parts 2007E070 Power Cord, Detachable – 120V – North America 2007E070 Power Cord, Detachable – 240V – EURO 2007E100 Power Cord, Detachable – 240V – UK 2007E90 Power Cord, Detachable – 240V – Switzerland 2007E130 Power Cord, Detachable –... -
Page 11: 2.5 Function Key Descriptions
2.5 Function Key Descriptions START/STOP BUTTON DISPLAY PANEL MENU DIAL Display Panel: Displays available/selected cycle Menu dial: Two functions: (1) Moves the cursor on the display panel (2) Deep press as enter Start/Stop Button: Two functions: (1) Start or Stop the selected process (2) Rotates the turntable while the door is opened Magnetic switch: Acts as a safety mechanism to prevent the curing unit from operating while the door is open. -
Page 12: 2.6 Signs And Symbols
2.6 Signs and symbols The signs and symbols in this user manual and on the curing unit facilitate the finding of important points and have the following meanings: WARNING: Indicates a hazard with a medium level of risk which, if not avoided, could result in death or serious injury. -
Page 13: Safety
Accumulation of cured material creates the possibility of malfunction. The Digital Cure uses heat as well as 385 nm and 450 nm light to post-cure 3D printed parts. The door includes a magnetic switch that is designed to automatically pause heating and extinguish the cure lights when the door is open. -
Page 14: Sensitive Components
• LED modules The Digital Cure uses LED modules to expose printed parts to a mix of 385 nm and 450 nm light during post-curing. Refer to section 6.1 Test LED Module and section 6.2 Cleaning for more information. -
Page 15: Emergency And Exceptional Situations
LOOK INTO THE CHAMBER DIRECTLY WITHOUT ANY PROTECTING GEARS OTHERWISE MAY INJURE OR HARM THE EYES. Emergency and exceptional situations Always consult the safety data sheet (SDS) as the primary source of information to understand safety and handling of any materials used with the Digital Cure. -
Page 16: Preparation And Setup
Working Environment In order to ensure optimum performance, please keep this unit free of debris and in a clean environment. Prepare a space to install and operate the Digital Cure and house the necessary accessories and consumables. To prepare the workspace: Ensure that the workspace meets the following requirements: •... - Page 17 POWER SOCKET 4.2.4 Turning off the machine The Digital Cure is designed to remain powered on when not in use. Flip the switch on the back of the unit to the OFF position to turn off the machine completely and conserve power.
-
Page 18: Operation
• Gently close the door Setting the cure cycle for Lucitone Digital Appliances The Digital Cure has a preset cycle (Lucitone) for Lucitone Digital Appliances. 5.2.1 To select the cure cycle for Lucitone Digital Print Appliances 1. From the main menu turn the menu dial until the arrow points to “Preset Cycles”. -
Page 19: Setting A Custom Cure Cycle
NOTICE Setting a custom cure cycle The Digital Cure can also be used for custom curing. If the material is not included within “Preset Cycles”, select “Custom Cycles”. Refer to the material specific IFU for curing cycle details. Up to 11 custom curing cycles can be programmed into the unit. -
Page 20: Starting The Cure Cycle
After the cure cycle completes, the unit will produce a series of beeping sounds until the door is opened. The Digital Cure contains a heater which heats inserted parts during post-curing. Take care when inserting and removing parts from the CAUTION Digital Cure, because the turntable may be hot. -
Page 21: Turning Off The Machine
Turning off the machine The Digital Cure is designed to remain powered on when not in use. Flip the breaker switch on the back of the unit to the OFF position to turn off the machine completely and conserve power. When moving or storing the machine,... -
Page 22: System Maintenance And Cleaning
System Cleaning and Maintenance To maintain the most efficient and long-lasting machine, ensure regular maintenance. The Digital Cure shall only be maintained in accordance with the directions included here. Unauthorized disassembly or repair procedures may damage the machine and void the warranty. -
Page 23: Cleaning
Routine maintenance of the 2 cooling fan filters will help to prolong the life of this unit. It is recommended to clean these filters, at minimum, every 2 weeks. FAN FILTERS SNAP ONTO THE REAR OF THE DIGITAL CURE FAN FILTERS Error codes and troubleshooting ERROR... -
Page 24: Warranty
Disposal of unit The unit is an electronic unit according to the “Act Governing the Sale, Return and Environmentally Sound Disposal of Electrical and Electronic Devices” (ElektroG). Unit must not be disposed of in normal domestic waste. For environmental reasons, dispose of the product according to local environmental guideline or regulations.
Need help?
Do you have a question about the Digital Cure and is the answer not in the manual?
Questions and answers