
Related Manuals for Evolis AGILIA


Summary of Contents for Evolis AGILIA
- Page 1 AGILIA User Guide Evolis © 2024. All rights reserved user-guide_agilia_ENG_20240402_B...
-
Page 2: Table Of Contents
PRODUCT PRESENTATION Unpacking Product description INSTALLATION Location Connecting the printer power supply Installing Evolis Premium Suite 2 Installation procedure Connecting to a network (option) Installing cardPresso Printing ribbon and retransfer film Manipulating the cassettes Installing the printing ribbon and retransfer film... - Page 3 Managing print settings in Evolis Premium Suite 2 Starting with cardPresso INTERACTING WITH THE PRINTER LCD touchscreen Evolis Premium Suite 2 notifications OPTIONS Dual side printing activation key Encoding options Contact encoding of smartcards Contactless encoding of smartcards (RFID) Security options...
- Page 4 Jammed cards The printing ribbon or retransfer film is cut or torn Updating the printer driver Updating the firmware Technical support Agilia - User Guide...
-
Page 5: Introduction
All the information contained in this document is subject to change without prior notice. Evolis cannot be held liable for any errors that may be found in this manual, or for any loss or damage arising accidentally or as a result of dissemination or use of this manual. -
Page 6: Symbols
This product uses consumables and accessories available on www.evolis.com > CONSUMABLES. For more information on the technical specifications of the product and all options available, go to www.evolis.com > Product page. Certifications and declaration of conformity Agilia - User Guide... - Page 7 CE, UKCA, ICES, VCCI, BIS, EAC, ROHS FCC (Evolis contact: Evolis, Rising Sun Mills, 188 Valley St., Suite 421, RI 02909 Providence, evolisnortham@evolis.com) Dimensions and weight 445x373x205 or 538x373x205 (with rear box) (H x W x D) ...
-
Page 8: Product Presentation
Power supply unit FSP type FSP150-AAAN3 Main power cable USB cable Starter cleaning kit Quick installation guide with a URL to download the printer driver License activation card for cardPresso designing software Agilia - User Guide... -
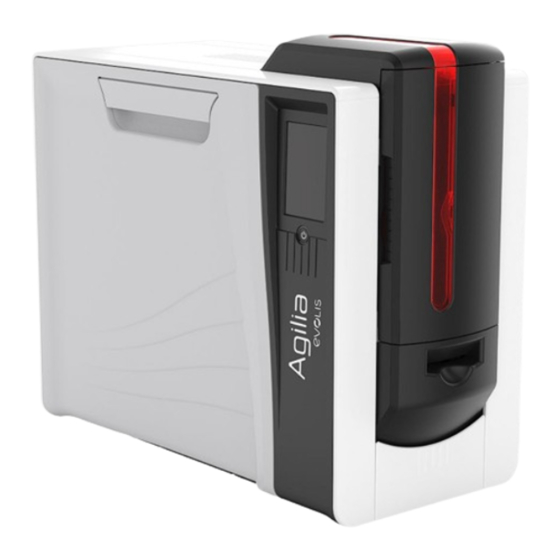
Page 9: Product Description
A. Card feeder B. Manual card feeder (insertion / ejection) C. Front output box D. Power cable connector E. Ethernet connector F. USB socket (type A) G. USB socket (type B) H. Location for the Kensington locking system Agilia - User Guide... - Page 10 Product presentation I. Rear output box N. Rear output J. Front door opening mechanism O. Location for the infra-red kit K. Power button L. LCD Touchscreen M. Card thickness selector Agilia - User Guide...
- Page 11 Product presentation P. Jam-clearing wheel Q. Dust filter R. Heating roller S. Print head T. Cassette for the printing ribbon U. Cassette for the retransfer film Agilia - User Guide...
-
Page 12: Installation
Before moving the printer, remove all cards from the card feeder. If cards are present in the card feeder when moving the printer, cards may slide inside the printer and get stuck between the dual-side printing module and the reject box (front output box) and cause a retransfer application issue. Agilia - User Guide... -
Page 13: Connecting The Printer Power Supply
Standby and hibernation settings can be configured in the Evolis Premium Suite 2 or from the LCD Touchscreen. In standard standby mode, sending a print request restarts the printer and pressing the power button (for 1 second) exits the printer from hibernation mode. -
Page 14: Installing Evolis Premium Suite 2
If the printer is not showing a Ready status, check the installation. Installing Evolis Premium Suite 2 Evolis Premium Suite 2 is an all-in-one driver software solution that makes interactions between printer and computer more intuitive. Its advanced features automate printer configuration. -
Page 15: Installation Procedure
All versions of Windows require the user to have administrator rights to install the driver. When installing Evolis Premium Suite 2 in macOS environment, an adapter may be required. Make sure to connect the adapter to the computer first and then connect the USB cable of the printer for the printer to be detected. -
Page 16: Installing Cardpresso
Installation To connect the printer, use the Network installation wizard available from the Evolis icon in the taskbar. The network administrator can configure the printer in order to comply with the constraints imposed by the corporate LAN: Printer connected in a subnet, in DHCP ... -
Page 17: Printing Ribbon And Retransfer Film
Only use Evolis High Trust® consumables. These consumables bring you printing quality and reliability, maximizing the life span of the print head. The use of consumables other than Evolis High Trust® may lead to a bad printing quality and a dysfunction of the card printer. -
Page 18: Installing The Printing Ribbon And Retransfer Film
The cassettes are color coded to facilitate and prevent mistakes during installation. The blue cassette is for the retransfer film and the orange cassette is for the printing ribbon. Remove the cassettes 1. Open the door of the printer. 2. Pull the cassettes out of their compartments. 3. Put them on a flat surface with the pins facing up. Agilia - User Guide... - Page 19 The etiquette on the side of the ribbon base must point to the arrow. 6. Put the ribbon around the pins. 7. Insert the finish (empty) roll of the film on the black spindle. Agilia - User Guide...
- Page 20 A click confirms the correct insertion. The etiquette on the side of the ribbon base must point to the arrow. 6. Put the film around the pins. 7. Insert the finish (empty) roll of the film on the black spindle. Agilia - User Guide...
- Page 21 10. Press on the upper right corner of the blue cassette to properly install it. A click confirms the correct installation. 11. Press between the tightening wheels of the orange cassette to properly install it. A click confirms the correct installation. 12. Close the door. Agilia - User Guide...
-
Page 22: Cards
Cards For optimum quality, the cards used must be ISO 7810 certified. Use only the card types recommended by Evolis. Do not touch the printable surface of the cards to preserve print quality. Do not use cards that are damaged, folded, embossed or dropped on the floor. -
Page 23: Loading Cards In The Card Feeder
When there are 20 cards or less in the card feeder, make sure to print with the card feeder door closed. The card feeder has a total capacity of 200 cards (0.76 mm – 30mil). 1. Open the card feeder. 2. Load cards. 3. Close the card feeder. Agilia - User Guide... -
Page 24: Manual Card Feeding
Manual card feeding The card input can be specified in Evolis Premium Suite 2 > Printer settings > Printing > Card > Card input / output > Card input. Manual insertion must be selected to feed one card at a time to the printer. -
Page 25: Removing Printed Cards
By default, the printed cards are ejected in the rear output box and the error cards are ejected in the front output box. The card output can be specified in Evolis Premium Suite 2 > Printer settings > Printing > Card > Card input / output > Card output. - Page 26 1. Press on the middle of the output box. 2. Pull the output box. 3. Remove the cards. 4. Close the front output box. Cards are ejected by the bezel Retrieve the ejected card from the bezel. Agilia - User Guide...
-
Page 27: Print Settings And Printing
Print settings and printing PRINT SETTINGS AND PRINTING Managing print settings in Evolis Premium Suite 2 More information about Evolis Premium Suite 2 and printer settings is available in the Evolis Knowledge Base. Contact your Evolis reseller for assistance before making changes if needed. -
Page 28: Starting With Cardpresso
Agilia is supplied with a XXS cardPresso license. Evolis printers can also be used from different applications with a Print feature to print content. Set the document size to CR80 (85.6x53.98mm with 1mm margin) when required and select the printer name before launching a print job. -
Page 29: Interacting With The Printer
When warnings are displayed with a QR code, scan the QR code with a smartphone to access explanations and solutions to the issue. If the Evolis Premium Suite 2 is installed in Supervised or Standard mode, there are two possible actions depending on the messages:... -
Page 30: Evolis Premium Suite 2 Notifications
Red: Error message issued – printing stopped Grey: Printer in hibernation mode, disconnected or communication is interrupted. Notifications can be disabled in Evolis Premium Suite 2. Click on the User Preferences icon and deactivate the Enable notifications button. Agilia - User Guide... -
Page 31: Options
Options OPTIONS The following options are compatible with Agilia: Dual-side printing activation key Encoding options Contact encoder Contactless encoder Agilia - User Guide... -
Page 32: Dual Side Printing Activation Key
Dual side printing activation key A wizard is available to activate dual side printing in Evolis Premium Suite 2 > Assistance & Maintenance > Maintenance > Installable options. 1. Open the door of the printer and remove the orange cassette. - Page 33 5. Close the door of the printer. The activation of the option starts. 6. When the activation process is complete, remove the activation key from the cassette and put the ribbon back in place. "Printing ribbon and retransfer film" on page 17 Agilia - User Guide...
-
Page 34: Encoding Options
Up to 3 encoding stations can be installed in the printer. Contact your Evolis reseller for more information about encoders or to have one or more encoders installed on a printer. Smartcards used for contact encoding must be inserted with the chip facing up. - Page 35 Printers fitted only with a smartcard contact station (without integrated encoder) are fitted with a female DB-9 connector on the back of a printer. This connector, directly connected to the contact station inside the printer, is also connected to an external coupler to encode the chip. Agilia - User Guide...
-
Page 36: Contactless Encoding Of Smartcards (Rfid)
Position the card as close as possible to the encoder’s antenna to ensure optimum encoding. Computer connection For more information on encoding a contactless smartcard or on the configuration of the card present signal, contact your Evolis reseller. A smartcard can be encoded with cardPresso software or Evolis SDK and the SDK of the encoder. -
Page 37: Security Options
A Kensington lock is used to attach the printer with a Kensington cable. Kensington cables are not provided or sold by Evolis. The user must acquire the cable by their own means. The Kensington lock is located on the connectors side of the printer. -
Page 38: Maintenance
The frequency and quality of cleaning are decisive factors enabling users to extend the print head’s useful life and to ensure excellent print quality. In addition, the use of Evolis High Trust® consumables ensures that the printer operates properly. Use of non-Evolis High Trust® consumables may affect the quality and reliability of print jobs, and even affect the printer’s operation. -
Page 39: Replacing A Printing Ribbon Or Retransfer Film
Only use Evolis High Trust® consumables. These consumables bring you printing quality and reliability, maximizing the life span of the print head. The use of consumables other than Evolis High Trust® may lead to a bad printing quality and a dysfunction of the card printer. -
Page 40: Remove The Printing Ribbon Or Retransfer Film
3. Press the 2 pressure buttons on the side of the ribbon or film rolls. Install the new printing ribbon or retransfer film "Printing ribbon and retransfer film" on page 17 Agilia - User Guide... -
Page 41: Cleaning Procedures
Mandatory cleaning cycle: When the cleaning warning is triggered. Servicing accessories: Adhesive cleaning card with 2 adhesive-free zones and cleaning swab impregnated with isopropyl alcohol. Cleaning cycles can also be launched from the Evolis Premium Suite 2 by clicking on the Cleaning icon on the Home page. - Page 42 5. Open the door of the printer, remove the cassettes and put them on a flat surface with their pins facing up. 6. Remove the printing ribbon and retransfer film from the cassettes. ( "Replacing a printing ribbon or retransfer film" on page 39 ). Agilia - User Guide...
- Page 43 Regular cleaning Advanced cleaning 2. Open the printer door and locate the print head. 3. With the same swab, rub the black dotted line of the print head (In red here). 4. Close the printer door. Agilia - User Guide...
-
Page 44: Advanced Cleaning
Servicing accessories:Adhesive cleaning card with 2 adhesive-free zones, impregnated T-card (use just after the bag is opened), and cleaning swab impregnated with isopropyl alcohol. Cleaning cycles can also be launched from the Evolis Premium Suite 2 by clicking on the Cleaning icon on the Home page. - Page 45 6. Remove the printing ribbon and retransfer film from the cassettes. ( "Replacing a printing ribbon or retransfer film" on page 39 ). 7. Take a swab, press the middle so that the cotton is impregnated with alcohol. Agilia - User Guide...
- Page 46 Regular cleaning Advanced cleaning 2. Open the printer door and locate the print head. 3. With the same swab, rub the black dotted line of the print head (In red here). 4. Close the printer door. Agilia - User Guide...
-
Page 47: Specific Cleaning
3. With one hand, rotate the print head roller using the roll bearing (in red here). 4. While rotating the roll bearing, rub the swab on the print head roller (in black here). 5. Put the cassettes back in place and close the door of the printer. Agilia - User Guide... - Page 48 2. Pull the dust filter out of its compartment. ( "Product description" on page 9 ) 3. Clear any dust from the filter with a gas duster. 4. Put the dust filter back in place. 5. Close the door of the printer. Agilia - User Guide...
-
Page 49: Help
The following information is available on the technical test card: Printer model Serial numbers (Printer and print head), Firmware version, Cleaning operations, etc. These information may be required by a reseller or technical support for assistance. Agilia - User Guide... - Page 50 6. Printing of the technical test card starts (in color or monochrome depending on the installed ribbon and on both sides or one side of the card depending on the printer feature). 7. The printed card is ejected into the output hopper. Print a technical test card from Evolis Premium Suite 2 1. Select the printer. 2. Go to Printer settings.
-
Page 51: Identifying The Installed Software Versions
Graphical test card icon 2. Printing of the graphical test card starts. Identifying the installed software versions In Evolis Premium Suite 2, go to Assistance & Maintenance > Product information > Software versions. The following information can be found there: ... -
Page 52: Troubleshooting
Make sure that the power cable is correctly connected to the printer and to a functional electrical socket. ( "Connecting the printer power supply" on page 13 ) Make sure that the printer is ON and that the power button is lit. USB cable Make sure that the USB cable connects the printer to the computer. Agilia - User Guide... - Page 53 Print head The print head may be damaged Try and print a technical test card ( "Printing test cards" on page 49 ). If the card is not printed, contact your reseller for assistance. Agilia - User Guide...
-
Page 54: Poor Printing Quality
Cards may be dirty Use new cards. Store the cards protected from dust. Cleaning The cleaning roller or the print head may be clogged Launch a regular cleaning cycle () Horizontal white lines Agilia - User Guide... - Page 55 Retransfer settings are not optimum. Go to Evolis Premium Suite 2 > Printer settings > Retransfer to adjust the temperature and speed settings. Make sure the temperature and speed settings correspond to the requirement of the selected card type.
- Page 56 If irregular characters are printed, make sure the USB cable supplied with the printer is being used. Try using another cable of the same type. Cards We recommend buying cards from an Evolis reseller. Use of non-Evolis High Trust® cards may affect print quality and may damage the print head. Agilia - User Guide...
- Page 57 Print head The print head may be dirty Launch a regular cleaning cycle. (() The print head may be damaged Contact your reseller for assistance If the problem persists, contact your reseller. Agilia - User Guide...
-
Page 58: Cards Are Not Loading In The Printer
Make sure that the cards are not stuck together. Shuffle the cards before loading them. When there are 20 cards or less in the card feeder, make sure to print with the card feeder door closed. Agilia - User Guide... - Page 59 Make sure that the thickness of the cards used matches the technical specifications available on www.evolis.com > Product page. Make sure that the cards are flat. Keep them in an horizontal position. Make sure that the cards are not stuck together. Shuffle the cards before loading them. Agilia - User Guide...
- Page 60 d. Tape the second portion to the first portion with transparent adhesive tape. e. Use the wheel on the outside of the cassette to rotate the end roll to the beginning of the next yellow panel. Agilia - User Guide...
- Page 61 If you received a notification from the driver or your reseller advising you to update your driver. The printer driver can also be updated in Evolis Premium Suite 2 > Assistance & Maintenance > Product information > Software versions. 1. Download the Driver/Premium Suite file (.exe for Windows and .pkg for macOS) on www.evolis.com...
- Page 62 > Support section > Product page. 2. Open Evolis Premium Suite 2 and click on the name of the printer. Go to Assistance & Maintenance > Software versions > Printer firmware version > Start the update wizard. 3. Follow the instructions and select the file .firm that was just downloaded.
- Page 63 If you do not know any Evolis resellers, contact us to have the contact information of the nearest Evolis reseller. When calling an Evolis reseller, make sure to be close to the computer connected to the printer and to provide the following information: ...
- Page 64 Evolis 14 avenue de la fontaine 49070 Beaucouzé France T +33 (0) 241 367 606 - F +33 (0) 241 367 612 www.evolis.com...
Need help?
Do you have a question about the AGILIA and is the answer not in the manual?
Questions and answers