Table of Contents
Advertisement
Quick Links
Advertisement
Table of Contents

Related Manuals for Evolis AGILIA


Summary of Contents for Evolis AGILIA
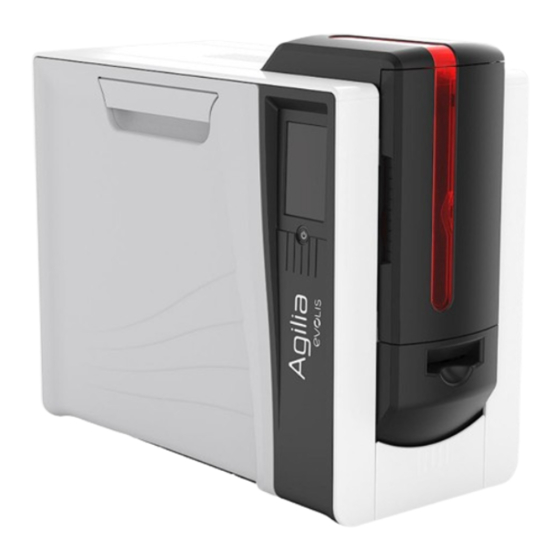
- Page 1 AGILIA SERVICE MANUAL Service-Manual_Agilia_R02_ENG_20231023-A...
-
Page 2: Table Of Contents
INTRODUCTION ..........................................6 Proprietary Notice ........................................6 Trademark Acknowledgments ..................................6 Environmental information – recycling of end-of-life products ....................6 Operator ............................................7 Mechanical Maintenance personnel: ................................7 Electrical Maintenance personnel: ................................. 7 Symbols ............................................8 Safety ............................................... 9 Safe Environment........................................9 Safe Human Interface ...................................... - Page 3 Step 8 - ENCLOSURE: FRONT RIGHT COVER - CI013150 ........................79 Step 9 - ENCLOSURE: COVER - CI012830 ..............................82 Step 10 - ENCLOSURE: LEFT COVER - CI012829 ........................... 86 Step 11 - FRONT OUTPUT TRAY - S10450 ..............................87 Step 12 –...
- Page 4 Cleaning the Cleaning Roller ..................................223 COMMUNICATION with the printer ................................225 Installing Evolis Premium Suite 2 ................................225 How to Communicate with the Printer through the Evolis Premium Suite ..............226 Updating the Firmware for Windows ..............................228 SENSORS ..........................................230 Commands for Adjusting Sensors ................................
- Page 5 Commands to move motors ..................................236 FANS ............................................237 Commands to launch fans ..................................... 237 Printer Commands ......................................238 How to Print a Test Card ....................................239 Printing a technical test card ..........................239 Printing a graphical test card ..........................239 DESCRIPTION OF THE PORTS ON THE MAIN BOARD ........................240 DESCRIPTION OF THE PORTS ON THE REMOTE CONNECTIVITY CARD ................
-
Page 6: Introduction
INTRODUCTION Liability Statement This product has been built to the high standards of EVOLIS. Please do not attempt to operate or repair this equipment without adequate training. Any use, operation, or repair in contravention of this document is at your own risk. By acceptance of this system you hereby assume all liability consequent to your use or misuse of this equipment. -
Page 7: Operator
Mechanical Maintenance personnel: Assigned to mechanical maintenance of the machine. Electrical Maintenance personnel: Assigned to electrical maintenance of the machine. EVOLIS shall not be held responsible for any non-conforming use of equipment of its manufacture. Service-Manual_Agilia_R02_ENG_20231023-A... -
Page 8: Symbols
Symbols The symbols used in this manual along with their meaning are shown below. The symbols are repeated within the chapters and/or sections and have the following meaning: Generic warning: This symbol indicates the need to read the manual carefully or the necessity of an important maneuver or maintenance operation. -
Page 9: Safety
Safety The following basic safety tips are given to ensure safe installation, operation, and maintenance of EVOLIS equipment and are not to be considered as comprehensive on matters of safety. The tests performed demonstrate the safety and reliability of heating components when used correctly. It is necessary that the operator be informed of precautionary regulations aimed at avoiding injury or damage to the equipment. -
Page 10: General Safety Regulations
General Safety Regulations The User must comply with the regulations and work in the best possible safety conditions to prevent decreasing the degree of machine safety. Therefore, it is necessary to develop a Standard Operating Procedure (S.O.P.) related to maneuvers to effect for turning on and off the equipment. This procedure, which shall be prepared around the time of installation, shall serve as a reference for the Operator and shall be written in his/her language. -
Page 11: Description Of The Printer
DESCRIPTION OF THE PRINTER A. Card feeder B. Manual card feeder (insertion / ejection) C. Front output tray D. Power cable connector E. Ethernet connector F. USB socket (type A) G. USB socket (type B) H. HDMI connector Location for the Kensington locking system J. - Page 12 O. Rear output P. Location for the infra-red kit Q. Jam-clearing wheel R. Dust filter S. Heating roller T. Print head U. Cassette for the color ribbon V. Cassette for the clear film Service-Manual_Agilia_R02_ENG_20231023-A...
-
Page 13: Image Printing Process
IMAGE PRINTING PROCESS Printing process Diameter measurement: Step and DC on Clear side • Step on Color side (DC deducted from Step) • • Clear Backward and Color Forward printing Printing speed: 50mm/s * • Peel-off speed: 100 mm/s * •... -
Page 14: Retransfer Process
Retransfer process • Clear Forward lamination Laminating speed: 25 mm/s * • Film position in retransfer position defines X image positioning • Card retransfer position is fixed • • Profiles according to the card (material / thickness) Adjustable temperature and speed parameters •... -
Page 15: Feeding & Transport Process
Feeding & Transport process Cards are inserted either via the feeder or the 2. The card is transferred to the flip over. manual feeder. 3. The card is positioned under the heating 4. The printed card is ejected. roller to be retransferred. Service-Manual_Agilia_R02_ENG_20231023-A... -
Page 16: Magnetic Position
Magnetic position Smart contact position Contactless position Service-Manual_Agilia_R02_ENG_20231023-A... -
Page 17: Exploded View
EXPLODED VIEW Drawing 1 Service-Manual_Agilia_R02_ENG_20231023-A... - Page 18 Drawing 2 Service-Manual_Agilia_R02_ENG_20231023-A...
- Page 19 Drawing 3 Service-Manual_Agilia_R02_ENG_20231023-A...
- Page 20 Drawing 4 Service-Manual_Agilia_R02_ENG_20231023-A...
- Page 21 Drawing 5 Service-Manual_Agilia_R02_ENG_20231023-A...
- Page 22 Drawing 6 Service-Manual_Agilia_R02_ENG_20231023-A...
- Page 23 Drawing 7 Service-Manual_Agilia_R02_ENG_20231023-A...
-
Page 24: Sensors - Drawings
SENSORS - DRAWINGS Service-Manual_Agilia_R02_ENG_20231023-A... - Page 25 S14 sensor will disappear. Service-Manual_Agilia_R02_ENG_20231023-A...
- Page 26 Service-Manual_Agilia_R02_ENG_20231023-A...
- Page 27 FEEDER CARD Service-Manual_Agilia_R02_ENG_20231023-A...
-
Page 28: Motors - Drawings
MOTORS - DRAWINGS Service-Manual_Agilia_R02_ENG_20231023-A... - Page 29 Service-Manual_Agilia_R02_ENG_20231023-A...
- Page 30 Service-Manual_Agilia_R02_ENG_20231023-A...
-
Page 31: Fans - Drawings
FANS - DRAWINGS Service-Manual_Agilia_R02_ENG_20231023-A... - Page 32 Service-Manual_Agilia_R02_ENG_20231023-A...
-
Page 33: Spare Parts List
SPARE PARTS LIST Part number Name Step Page S10439 CLEAR FILM CASSETTE S10440 COLOR RIBBON CASSETTE S10441 COMPLETE FEEDER S10442 COMPLETE HEATING ROLLER CP012725 DUST FILTER CI012830 ENCLOSURE: COVER SE011234 ENCLOSURE: FRONT DOOR CI013150 ENCLOSURE: FRONT RIGHT COVER CI012829 ENCLOSURE: LEFT COVER SE010856 ENCLOSURE: REAR COVER CI012690... - Page 34 Part number Name Step Page S10122 ROLLER: CLEANING S10455 S1 (HEAT ROLLER CAME SENSOR) S10455 S10 (FLIP: ROTATION SENSOR) S10455 S11 (FLIP: PRESENCE CARD SENSOR) CP011382 S12 (FRONT DOOR SENSOR) S10455 S13 (CLEAR FILM PULLING ROTATION SENSOR) CP012210 S14 (MAGNETIC SYNCHRONIZATION SENSOR) CP011382 S15 (CARD EXIT SENSOR) CP012210...
-
Page 35: Parts Replacement Recommendation
PARTS REPLACEMENT RECOMMENDATION Part number Name Advice of replacement S10442 COMPLETE HEATING ROLLER 80.000 cards S10122 ROLLER: CLEANING When the rollers start to work less effectively CP011223 NBR ROLLER 1 000 000 cards S10449 PRINT HEAD ROLLER 500.000 cards CP012602 INFERIOR HEAT ROLLER 500.000 cards CP012603... -
Page 36: Replacement Procedures
REPLACEMENT PROCEDURES These procedures describe how to replace most spare parts. In general, only dismantling is described. Unless otherwise indicated, reassembling should be carried out by reversing the steps. The replacement procedures for certain spare parts may not be presented here, due to the simplicity of dismantling. -
Page 37: Technique To Avoid Damaging Taps
TECHNIQUE TO AVOID DAMAGING TAPS Service-Manual_Agilia_R02_ENG_20231023-A... -
Page 38: Cassettes Handling
CASSETTES HANDLING Basically, good practice for cassette handling consists in making sure cassette reference posts remain in original position when storing or manipulating the cassettes. When manipulating the cassettes: Avoid touching the color and retransfer films with your fingers • Do not put the cassettes in support on their pins. -
Page 39: Locking System
LOCKING SYSTEM Unlock the printer. Unclip and remove the rear output box. 2. Open the door. 3. Remove both cassettes. Put them on a flat surface with the pins facing up. Service-Manual_Agilia_R02_ENG_20231023-A... - Page 40 4. Remove the dust filter. 5. Remove both screws from the mask. Service-Manual_Agilia_R02_ENG_20231023-A...
- Page 41 6. With a flat screwdriver gently unclip the mask. 7. Disconnect the LCD cable. Service-Manual_Agilia_R02_ENG_20231023-A...
- Page 42 8. Gently disengage the LCD mask. 9. To remove the locking system from the mask undo both springs from the connecting rods. Service-Manual_Agilia_R02_ENG_20231023-A...
- Page 43 10. Unclip the axle. 11. Unclip the latches from the mask. Service-Manual_Agilia_R02_ENG_20231023-A...
- Page 44 12. Gently disengage the locking system from the mask. 13. Check the latches move fine. Carry out the step in reverse to put back the locking system in place. Do not close the door! If the latches are not correctly adjusted, it will no longer be possible to open the door after it has been closed.
- Page 45 15. Turn the key to unlock the locking system. Check the latches. Must be flush with the mask. If the outcrop is good, the door can be closed. Carry the steps below if it is not good. 16. With a flat screwdriver gently unclip the mask. Service-Manual_Agilia_R02_ENG_20231023-A...
- Page 46 17. Disconnect the LCD cable. 18. Gently disengage the LCD mask. Service-Manual_Agilia_R02_ENG_20231023-A...
- Page 47 19. Adjust the outcrop by turning the wheel. 20. Turn the key to lock the locking system. Take the mask, reconnect it and insert it in its locations. Close Service-Manual_Agilia_R02_ENG_20231023-A...
- Page 48 21. Turn the key to unlock the locking system. Check the latches. Must be flush with the mask. If the outcrop is good, the door can be closed. Readjust the outcrop by turning the wheel until it is good. Remove the locking system (with key) Unlock the printer.
- Page 49 2. Open the door. 3. Remove both cassettes. Put them on a flat surface with the pins facing up. Service-Manual_Agilia_R02_ENG_20231023-A...
- Page 50 4. Remove the dust filter. 5. Remove both screws from the mask. Service-Manual_Agilia_R02_ENG_20231023-A...
- Page 51 6. With a flat screwdriver gently unclip the mask. 7. Disconnect the LCD cable. Service-Manual_Agilia_R02_ENG_20231023-A...
- Page 52 8. Gently disengage the LCD mask. 9. Disconnect both cables from the feeder board. Service-Manual_Agilia_R02_ENG_20231023-A...
- Page 53 10. Remove the three screws from the locking system support. 11. Remove the key. Service-Manual_Agilia_R02_ENG_20231023-A...
- Page 54 12. Gently remove the upper locking system. 13. Remove the screw from the spring plate of the lower locking system. Retrieve the spring plate. Service-Manual_Agilia_R02_ENG_20231023-A...
- Page 55 14. Remove the locking system of the reject box. Carry out the step needed. 15. Put the locking system of the reject box back. Service-Manual_Agilia_R02_ENG_20231023-A...
- Page 56 16. Put the spring plate in place. Check it is well inserting in the centering pin and between both axles before tightening the screw. Check the system works fine. 17. Put the upper locking system in place. Service-Manual_Agilia_R02_ENG_20231023-A...
- Page 57 18. Check the latch of the feeder door is under the axle of the locking system of the reject box. Put the key and check the mechanism works fine before putting back the three screws. Recheck the locking system. 19. Reconnect both cables. Do not close the door! If the latches are not correctly adjusted, it will no longer be possible to open the door after it has been closed.
- Page 58 20. Turn the key to lock the locking system. Take the mask, reconnect it and insert it in its locations. Close 21. Turn the key to unlock the locking system. Check the latches. Must be flush with the mask. If the outcrop is good, the door can be closed.
- Page 59 22. With a flat screwdriver gently unclip the mask. 23. Disconnect the LCD cable. Service-Manual_Agilia_R02_ENG_20231023-A...
- Page 60 24. Gently disengage the LCD mask. 25. Adjust the outcrop by turning the wheel. Service-Manual_Agilia_R02_ENG_20231023-A...
- Page 61 26. Turn the key to lock the locking system. Take the mask, reconnect it and insert it in its locations. Close 27. Turn the key to unlock the locking system. Check the latches. Must be flush with the mask. If the outcrop is good, the door can be closed.
-
Page 62: Tools Required
Tools required Service-Manual_Agilia_R02_ENG_20231023-A... -
Page 63: Step 1 - Dust Filter - Cp012725
Step 1 – DUST FILTER – CP012725 Open the door. 2. Remove the filter. 3. Put the new filter in place and close the door. Service-Manual_Agilia_R02_ENG_20231023-A... -
Page 64: Step 2 - Clear Film Cassette - S10439
Step 2 – CLEAR FILM CASSETTE – S10439 Open the door. 2. Remove the defective clear film cassette. Service-Manual_Agilia_R02_ENG_20231023-A... - Page 65 3. Put the cassette on a flat surface with the pins facing up. Press both pressure buttons on the side of the film. 4. Remove the film. 5. Take the new cassette, put the film back and carry out the step in reverse. Reminder: Service-Manual_Agilia_R02_ENG_20231023-A...
-
Page 66: Step 3 - Color Ribbon Cassette - S10440
Step 3 – COLOR RIBBON CASSETTE – S10440 Open the door. 2. Remove the defective color ribbon cassette. Service-Manual_Agilia_R02_ENG_20231023-A... - Page 67 3. Put the cassette on a flat surface with the pins facing up. Press both pressure buttons on the side of the color ribbon. 4. Remove the ribbon. 5. Take the new cassette, put the color ribbon back and carry out the step in reverse. Reminder: Service-Manual_Agilia_R02_ENG_20231023-A...
-
Page 68: Step 4 - Lcd (Touch Screen Lcd Display) - S10446
Step 4 – LCD (TOUCH SCREEN LCD DISPLAY) - S10446 22. Unclip and remove the rear output box. 23. Open the door. 24. Remove both cassettes. Put them on a flat surface with the pins facing up. Service-Manual_Agilia_R02_ENG_20231023-A... - Page 69 25. Remove the dust filter. 26. Remove both screws from the mask. Service-Manual_Agilia_R02_ENG_20231023-A...
- Page 70 27. With a flat screwdriver gently unclip the mask. 28. Disconnect the LCD cable. Service-Manual_Agilia_R02_ENG_20231023-A...
- Page 71 29. Gently disengage the LCD mask. 30. Take the new LCD mask and insert it in its locations. Carry out the step in reverse. Service-Manual_Agilia_R02_ENG_20231023-A...
-
Page 72: Step 5 - Enclosure: Front Door - Se011234
Step 5 – ENCLOSURE: FRONT DOOR - SE011234 Carry out step 4-1 to 4-8 (page 68). 2. With a flat screwdriver gently undo the door. Begin by A in first and then B. 3. Carry out the step in reverse. Service-Manual_Agilia_R02_ENG_20231023-A... -
Page 73: Step 6 - Enclosure: Rear Cover - Se010856
Step 6 - ENCLOSURE: REAR COVER - SE010856 Unclip and remove the rear output box. 2. Open the door. 3. Remove both cassettes. Put them on a flat surface with the pins facing up. Service-Manual_Agilia_R02_ENG_20231023-A... - Page 74 4. Unclip the rear cover. 5. Open the rear cover. Service-Manual_Agilia_R02_ENG_20231023-A...
- Page 75 6. With a flat screwdriver gently undo the cover side by side. 7. Carry out the step in reverse. Service-Manual_Agilia_R02_ENG_20231023-A...
-
Page 76: Step 7 - Enclosure: Rear Right Cover - Ci012690
Step 7 - ENCLOSURE: REAR RIGHT COVER - CI012690 Carry out step 6-1 to 6-5 (page 73). 2. Unclip the feeder cover and remove it. Service-Manual_Agilia_R02_ENG_20231023-A... - Page 77 3. Gently lift the cover to undo the side (A), lift the rear right cover (B) and detach it from the feeder (C). 4. Put the new rear side cover and check it is correctly in place. Service-Manual_Agilia_R02_ENG_20231023-A...
- Page 78 5. Clip the feeder cover. 6. Carry out step 6-5 to 6-1 (page 73).in reverse. Service-Manual_Agilia_R02_ENG_20231023-A...
-
Page 79: Step 8 - Enclosure: Front Right Cover - Ci013150
Step 8 - ENCLOSURE: FRONT RIGHT COVER - CI013150 Carry out step 4-1 to 4-7 (page 68). 2. Remove the feeder cover. Service-Manual_Agilia_R02_ENG_20231023-A... - Page 80 3. Gently lift the cover to undo the side (A), lift the front right cover (B) and detach it from the feeder (C). 4. Put the new front side cover and check it is correctly in place. Service-Manual_Agilia_R02_ENG_20231023-A...
- Page 81 5. Clip the feeder cover. 6. Carry out step 4-7 to 4-1 (page 68) in reverse. Service-Manual_Agilia_R02_ENG_20231023-A...
-
Page 82: Step 9 - Enclosure: Cover - Ci012830
Step 9 - ENCLOSURE: COVER - CI012830 Carry out step 6-1 to 6-5 (page 73). 2. Remove the dust filter. Service-Manual_Agilia_R02_ENG_20231023-A... - Page 83 3. Remove both screws from the mask. 4. With a flat screwdriver gently unclip the mask. Service-Manual_Agilia_R02_ENG_20231023-A...
- Page 84 5. Disconnect the LCD cable. 6. Unclip the feeder. Service-Manual_Agilia_R02_ENG_20231023-A...
- Page 85 7. Remove the cover. 8. Take the new cover and carry out the step in reverse. Service-Manual_Agilia_R02_ENG_20231023-A...
-
Page 86: Step 10 - Enclosure: Left Cover - Ci012829
Step 10 - ENCLOSURE: LEFT COVER - CI012829 Carry out step 9-1 to 9-7 (page 82). 2. Gently lift the left cover. 3. Take the new left cover and carry out the step in reverse. Pay attention to not pinch the cables. Service-Manual_Agilia_R02_ENG_20231023-A... -
Page 87: Step 11 - Front Output Tray - S10450
Step 11 - FRONT OUTPUT TRAY - S10450 Unclip the front output tray. 2. Remove the front output tray. 3. Remove the serial number label and stick it back on the new part. Insert and clip in place the new output tray. -
Page 88: Step 12 - Complete Feeder - S10441
Step 12 – COMPLETE FEEDER – S10441 Remove the cards from the feeder. Carry out step 4-1 to 4-8 (page 68). 2. Unclip the rear cover. Service-Manual_Agilia_R02_ENG_20231023-A... - Page 89 3. Open the rear cover. 4. Remove the feeder cover then the cover and both right covers. Service-Manual_Agilia_R02_ENG_20231023-A...
- Page 90 5. Remove both screws and disconnect the feeder cable. 6. Remove both screws, disconnect the feeder cable from the main board and both cables from the smart interface card. Service-Manual_Agilia_R02_ENG_20231023-A...
- Page 91 7. Open the front output tray (A) and gently detach the feeder from the module (B). Pay attention to the cables. 8. Take the new feeder and carry out the step in reverse. Pay attention to not pinch the cables. Service-Manual_Agilia_R02_ENG_20231023-A...
-
Page 92: Step 13 - Main Board - S10443
Step 13 – MAIN BOARD – S10443 This product is highly sensitive to electrostatic discharge (ESD), and the best way to avoid ESD discharge is to use a wrist strap, grounding mat or table. Carry out step 9-1 to 9-7 (page 82). 2. - Page 93 3. Remove the four screws from the main board. 4. Take the new main board and carry out the step in reverse. Pay attention to not pinch the cables. MANDATORY Send the four commands below: • Psn;XXXXXX • Pkn;XXXXXX • Sa;c •...
-
Page 94: Step 14 - Complete Heating Roller - S10442
Step 14 - COMPLETE HEATING ROLLER - S10442 Wait the module to cool down completely before removing it. Unclip and remove the rear output box. 2. Open the door. 3. Remove both cassettes. Put them on a flat surface with the pins facing up. Service-Manual_Agilia_R02_ENG_20231023-A... - Page 95 4. Unclip the rear cover. 5. Open the rear cover. Service-Manual_Agilia_R02_ENG_20231023-A...
- Page 96 6. Remove both gears. Pay attention to not lose the spring and the washer. 7. Gently disconnect the six heating roller cables from the main board. Remove the three screws from the heating roller. Service-Manual_Agilia_R02_ENG_20231023-A...
- Page 97 8. Pay attention. The heating roller must be in the retracted position before gently disengage it from the chassis. 9. The new heating roller must be in the retracted position before gently put it back. Pay attention to not pinch the cables. Service-Manual_Agilia_R02_ENG_20231023-A...
- Page 98 10. Check the axis is correctly inserted in the chassis. 11. Put the screws back and reconnect the heating roller cables to the main board. Service-Manual_Agilia_R02_ENG_20231023-A...
- Page 99 12. Check the presence of the spring and the washer (respect the order) before putting the gears back. 13. Close the rear cover. Put the cassettes back. Service-Manual_Agilia_R02_ENG_20231023-A...
-
Page 100: Step 15 - Print Head - S10445
Step 15 - PRINT HEAD – S10445 Unclip and remove the rear output box. 2. Open the door. 3. Remove both cassettes. Put them on a flat surface with the pins facing up. Service-Manual_Agilia_R02_ENG_20231023-A... - Page 101 4. Unclip the rear cover. 5. Open the rear cover. Service-Manual_Agilia_R02_ENG_20231023-A...
- Page 102 6. Gently disconnect the five print head cables from the main board. Avoid touching the print head directly with the fingers, as this could affect print quality or permanently damage the print head. 7. Remove the three screws from the print head. Service-Manual_Agilia_R02_ENG_20231023-A...
- Page 103 8. Pay attention. The print head must be in the retracted position before gently disengage it from the chassis. 9. The new print head must be in the retracted position before gently put it back. Service-Manual_Agilia_R02_ENG_20231023-A...
- Page 104 11. Check the axis is correctly inserted in the chassis. 12. Configuring the new print head: Power up the printer and check that it is properly connected to a computer on which the Evolis Premium Suite is installed. Under the Maintenance heading of the Evolis Premium Suite , click on Print head replacement.
-
Page 105: Step 16 - S12 (Front Door Sensor) - Cp011382
Step 16 – S12 (FRONT DOOR SENSOR) - CP011382 Carry out step 4-1 to 4-8 (page 68). 2. Remove the screw from the sensor (S12). 3. Disconnect the sensor cable. 4. Take the new sensor and carry out the step in reverse. Service-Manual_Agilia_R02_ENG_20231023-A... -
Page 106: Step 17 - S10 (Flip: Rotation Sensor) - S10455
Step 17 – S10 (FLIP: ROTATION SENSOR) – S10455 Carry out step 4-1 to 4-8 (page 68). 2. Remove the screw from the sensor S10. 3. Disconnect the sensor cable. 4. Take the new sensor and carry out the step in reverse. Service-Manual_Agilia_R02_ENG_20231023-A... -
Page 107: Step 18 - S11 (Flip: Presence Card Sensor) - S10455
Step 18 – S11 (FLIP: PRESENCE CARD SENSOR) – S10455 Carry out step 4-1 to 4-8 (page 68). 2. Press on the clip to remove the sensor S11. 3. Disconnect the sensor cable. 4. Take the new sensor and carry out the step in reverse. Service-Manual_Agilia_R02_ENG_20231023-A... -
Page 108: Step 19- S8 (Color Ribbon Brake Rotation Sensor) - S10455
Step 19- S8 (COLOR RIBBON BRAKE ROTATION SENSOR) – S10455 Carry out step 6-1 to 6-5 (page 73). 2. Remove the screw from the sensor S8. 3. Disconnect the sensor cable. 4. Take the new sensor and carry out the step in reverse. Service-Manual_Agilia_R02_ENG_20231023-A... -
Page 109: Step 20 - S4 (Ribbon: Transmitter Sensor) - S10452
Step 20 – S4 (RIBBON: TRANSMITTER SENSOR) – S10452 Carry out step 14-1 to 14-8 (page 94). 2. Gently disconnect the five print head cables from the main board. 3. Remove the three screws from the print head. Service-Manual_Agilia_R02_ENG_20231023-A... - Page 110 4. Pay attention. The print head must be in the retracted position before gently disengage it from the chassis 5. Remove the rivet (keep it or replace it). Service-Manual_Agilia_R02_ENG_20231023-A...
- Page 111 6. Gently disengage the sensor and disconnect its cable. 7. Take the new sensor and carry out the step in reverse. Pay attention to not pinch the cables. Service-Manual_Agilia_R02_ENG_20231023-A...
-
Page 112: Step 21 - S5 (Ribbon: Receiver Sensor) - S10451
Step 21 – S5 (RIBBON: RECEIVER SENSOR) – S10451 Carry out step 21-1 to 21-4 (page 112). 2. Remove the rivet (keep it or replace it). 3. Gently disengage the sensor and disconnect its cable. 4. Take the new sensor, check the led is perpendicular to the card and carry out the step in reverse. Pay attention to not pinch the cables. -
Page 113: Step 22 - S3 (Clear Film Synchronization Sensor) - Cp012210
Step 22 – S3 (CLEAR FILM SYNCHRONIZATION SENSOR) - CP012210 Carry out step 6-1 to 6-5 (page 73). 2. Remove the screw from the sensor. 3. Gently disengage the sensor and disconnect its cable. 4. Take the new sensor and carry out the step in reverse. Sensor adjustment required: send the command Sa;cl Service-Manual_Agilia_R02_ENG_20231023-A... -
Page 114: Step 23 - S6 (Clear Film Detection Sensor) - Cp012210
Step 23 – S6 (CLEAR FILM DETECTION SENSOR) – CP012210 Carry out step 6-1 to 6-5 (page 73). 2. Remove the belt from the gear. 3. Remove the E-ring. Service-Manual_Agilia_R02_ENG_20231023-A... - Page 115 4. Remove the gear. 5. Remove the screw from the sensor. Service-Manual_Agilia_R02_ENG_20231023-A...
- Page 116 6. Gently disengage the sensor and disconnect its cable. 7. Take the new sensor and carry out the step in reverse. Sensor adjustment required: send the command Sa;cl Service-Manual_Agilia_R02_ENG_20231023-A...
-
Page 117: Step 24 - S14 (Magnetic Synchronization Sensor) - Cp012210
Step 24 – S14 (MAGNETIC SYNCHRONIZATION SENSOR) – CP012210 S14 sensor will disappear. Carry out step 6-1 to 6-5 (page 73). 2. Remove the screw from the spring blade. 3. Remove the spring blade. Service-Manual_Agilia_R02_ENG_20231023-A... - Page 118 4. Remove the screw from the sensor. 5. Gently disengage the sensor and disconnect its cable. 6. Take the new sensor and carry out the step in reverse. Service-Manual_Agilia_R02_ENG_20231023-A...
- Page 119 7. Check that the spring blade is above the axes. Service-Manual_Agilia_R02_ENG_20231023-A...
-
Page 120: Step 25 - S9 (Synchronization Card Sensor) - Cp011382
Step 25 – S9 (SYNCHRONIZATION CARD SENSOR) – CP011382 Carry out step 6-1 to 6-5 (page 73). 2. Remove the screw from the sensor. 3. Gently disengage the sensor and disconnect its cable. 4. Take the new sensor and carry out the step in reverse. Sensor adjustment required: send the command Sa;p Service-Manual_Agilia_R02_ENG_20231023-A... -
Page 121: Step 26 - S15 (Card Exit Sensor) - Cp011382
Step 26 – S15 (CARD EXIT SENSOR) – CP011382 Carry out step 6-1 to 6-5 (page 73). 2. Remove the screw from the sensor. 3. Gently disengage the sensor and disconnect its cable. 4. Take the new sensor and carry out the step in reverse. Service-Manual_Agilia_R02_ENG_20231023-A... -
Page 122: Step 27 - S13 (Clear Film Pulling Rotation Sensor) - S10455
Step 27 – S13 (CLEAR FILM PULLING ROTATION SENSOR) – S10455 Carry out step 10-1 to 10-2 (page 86). 2. Undo the cables from the cable holder. 3. Unclip the fans support. Tilt it towards the inside of the printer. Service-Manual_Agilia_R02_ENG_20231023-A... - Page 123 4. Remove the rivet from the sensor. Retrieve both parts of the rivet. 5. Gently disengage the sensor and disconnect its cable. Pay attention to not damage the motor’s flag. 6. Take the new sensor and carry out the step in reverse. Pay attention to not pinch the cables. Service-Manual_Agilia_R02_ENG_20231023-A...
-
Page 124: Step 28 - J2 (Feeder Almost Empty Sensor) - Cp011452
Step 28 – J2 (FEEDER ALMOST EMPTY SENSOR) - CP011452 Carry out step 4-1 to 4-8 (page 68). 2. Remove the screw from the sensor. 3. Disconnect the sensor cable. 4. Take the new sensor and carry out the step in reverse. Sensor adjustment required: send the command Sa;f Service-Manual_Agilia_R02_ENG_20231023-A... -
Page 125: Step 29 - J3 (Feeder Empty Sensor) - S10455
Step 29 – J3 (FEEDER EMPTY SENSOR) – S10455 Carry out step 12-1 to 12-7 (page 88). 2. Open the door and slide the axis to remove it. 3. Unclip the manual card feeder from the chassis. Service-Manual_Agilia_R02_ENG_20231023-A... - Page 126 4. Gently disengage the manual card feeder from the chassis. 5. Disconnect the sensor câble from the feeder board. Easier to remove the sensor. Service-Manual_Agilia_R02_ENG_20231023-A...
- Page 127 6. Insert the screwdriver through the hole in the frame and remove the screw from the sensor. 7. Gently disengage the sensor and disconnect it. Service-Manual_Agilia_R02_ENG_20231023-A...
- Page 128 8. Take the new sensor and carry out the step in reverse. Verify the sensor is correctly put in its support. 9. Check that the flag correctly moves by pressing it. 10. Pay attention to not pinch the cables. Sensor adjustment required: send the command Sa;f Service-Manual_Agilia_R02_ENG_20231023-A...
-
Page 129: Step 30 - J4 (Feeder Manual Sensor) - Cp011382
Step 30 – J4 (FEEDER MANUAL SENSOR) – CP011382 Carry out step 12-1 to 12-7 (page 88). 2. Unclip the manual card feeder from the chassis. 3. Gently disengage the manual card feeder from the chassis. Service-Manual_Agilia_R02_ENG_20231023-A... - Page 130 4. Remove the screw from the sensor. 5. Disconnect the sensor cable. 6. Take the new sensor and carry out the step in reverse. Sensor adjustment required: send the command Sa;f Service-Manual_Agilia_R02_ENG_20231023-A...
-
Page 131: Step 31 - Opt3 (Reject Box Cover Open Sensor) - Cp012739
Step 31 – OPT3 (REJECT BOX COVER OPEN SENSOR) – CP012739 Carry out step 12-1 to 12-7 (page 88). 2. Gently disconnect all the cables. 3. Remove the three screws from the feeder card. 4. Take the new feeder card and carry out the step in reverse. Pay attention to not pinch the cables. Sensor adjustment required: send the command Sa;rb Service-Manual_Agilia_R02_ENG_20231023-A... -
Page 132: Step 32 - Opt2 (Reject Box Full Sensor) - Cp012739
Step 32 – OPT2 (REJECT BOX FULL SENSOR) – CP012739 Carry out step 12-1 to 12-7 (page 88). 2. Gently disconnect all the cables. 3. Remove the three screws from the feeder card. 4. Take the new feeder card and carry out the step in reverse. Pay attention to not pinch the cables. Sensor adjustment required: send the command Sa;rb Service-Manual_Agilia_R02_ENG_20231023-A... -
Page 133: Step 33 - Opt1 (Feeder Door Sensor) - Cp012739
Step 33 – OPT1 (FEEDER DOOR SENSOR) – CP012739 Carry out step 12-1 to 12-7 (page 88). 2. Gently disconnect all the cables. 3. Remove the three screws from the feeder card. 4. Take the new feeder card and carry out the step in reverse. Pay attention to not pinch the cables. Sensor adjustment required: send the command Sa;rb Service-Manual_Agilia_R02_ENG_20231023-A... -
Page 134: Step 34 - J6 (Feeder Motor) - Cp011427
Step 34 – J6 (FEEDER MOTOR) – CP011427 Carry out step 12-1 to 12-7 (page 88). 2. Gently disconnect the feeder motor. 3. Remove both screws from the motor. 4. Take the new motor and carry out the step in reverse. Service-Manual_Agilia_R02_ENG_20231023-A... -
Page 135: Step 35 - J7 (Manual Feeder Motor) - Cp011512
Step 35 – J7 (MANUAL FEEDER MOTOR) – CP011512 Carry out step 12-1 to 12-7 (page 88). 2. Gently disconnect all the cables. 3. Remove the three screws from the feeder card. Service-Manual_Agilia_R02_ENG_20231023-A... - Page 136 4. Remove the E-ring from the pulley. 5. Remove the pulley. Retrieve the belt. Undo the motor cable from cable holder. Service-Manual_Agilia_R02_ENG_20231023-A...
- Page 137 6. Press the clips and turn the motor at the same time. 7. Gently remove the motor. Remove the cable by passing it by the hole. 8. Take the new motor and carry out the step in reverse. Do not forget to put the belt back. Pay attention to not pinch the cables.
-
Page 138: Step 36 - M3 (Flip: Card Transport Motor) - S10098
Step 36 - M3 (FLIP: CARD TRANSPORT MOTOR) – S10098 Carry out step 12-1 to 12-7 (page 88). 2. Gently disconnect the motor from the main board (1), pass the cable through the window (2), undo it from the cable holder (3) and remove both rivets (2). 3. -
Page 139: Step 37 - M4 (Flip: Rotation Motor) - S10098
Step 37 – M4 (FLIP: ROTATION MOTOR) – S10098 Carry out step 12-1 to 12-7 (page 88). 2. Gently disconnect the motor from the main board (1), pass the cable through the window (2), undo it from the cable holder (3) and remove both rivets (2). 3. -
Page 140: Step 38 - Flip Over - S10454 / Pusher Blade - Cp010175
Step 38 – FLIP OVER – S10454 / PUSHER BLADE - CP010175 Carry out step 12-1 to 12-7 (page 88). 2. Gently disconnect the motor from the main board (1), pass the cable through the window (2), undo it from the cable holder (3) and remove both rivets (2). 3. - Page 141 4. Press on the clip to remove the sensor S11. 5. Press on both sides of the flip sensor support and turn it 90 degrees to align the windows. Remove the support. Service-Manual_Agilia_R02_ENG_20231023-A...
- Page 142 6. On the other side press on both sides of the support and turn it 90 degrees to align the windows. Hold the flip and remove the support (retrieve the Onduflex washer). 7. Gently disengage the flip over from the chassis. Service-Manual_Agilia_R02_ENG_20231023-A...
- Page 143 8. Remove the cleaning roller. 9. Place the spring on the pusher blade as indicated. Insert it into the frame and tilt it to insert it into the axle. 10. Check the position of the pusher blade and insert the white gear. Service-Manual_Agilia_R02_ENG_20231023-A...
- Page 144 11. Carry out the step in reverse. Pay attention to put the Onduflex washer in the sense shown in the picture below and to not pinch the cables. Service-Manual_Agilia_R02_ENG_20231023-A...
-
Page 145: Step 39 - Nbr Roller - Cp011223 / Gear Clip Z44-M0,5-D4 - Cp009016
Step 39 – NBR ROLLER – CP011223 / GEAR CLIP Z44-M0,5-D4 – CP009016 Carry out steps 38-1 to 38-7 (page 140). 2. Remove the gear. 3. Unclip the gears and the bearings. 4. Slide the rollers to the back and remove them. Service-Manual_Agilia_R02_ENG_20231023-A... - Page 146 5. Check the presence of the springs, the axis, and the roller (1). Place them in the correct position before inserting the NBR roller (2). Clip in the gear and the bearing. 6. Check that it is correctly positioned. 7. Repeat the steps for the other NBR roller and carry out the steps 38-7 to 38-1 (page 140) in reverse. Pay attention to not pinch the cables.
-
Page 147: Step 40 - Roller: Cleaning - S10122
Step 40 – ROLLER: CLEANING – S10122 Open the door. 2. Remove the defective color ribbon cassette. Service-Manual_Agilia_R02_ENG_20231023-A... - Page 148 3. Put the cassette on a flat surface with the pins facing up 4. Press the flip lock to release the cleaning roller. 5. Carry out these steps in reverse to install the new cleaning roller. Service-Manual_Agilia_R02_ENG_20231023-A...
-
Page 149: Step 41 - M5 (Brake Color Ribbon Motor) - S10453
Step 41 – M5 (BRAKE COLOR RIBBON MOTOR) - S10453 Carry out step 12-1 to 12-7 (page 88). 2. Remove both E-ring shown on the picture below. 3. Unclip the gear. Service-Manual_Agilia_R02_ENG_20231023-A... - Page 150 4. Remove the gear with the ball bearing (1) and then the other gear (2). 5. Disconnect the cable. Remove both screws and carry out the step in reverse to put the new motor in place. Pay attention to not pinch the cable. Service-Manual_Agilia_R02_ENG_20231023-A...
-
Page 151: Step 42 - M8 (Pull Clear Ribbon Motor) - S10453
Step 42 – M8 (PULL CLEAR RIBBON MOTOR) – S10453 Carry out step 10-1 to10-2 (page 86). 2. Remove both E-ring shown on the picture below. 3. Unclip the gear. Service-Manual_Agilia_R02_ENG_20231023-A... - Page 152 4. Remove the gear with the ball bearing (1) and then the other gear (2). 5. Unclip the fans support. Tilt it towards the inside of the printer. Service-Manual_Agilia_R02_ENG_20231023-A...
- Page 153 6. Gently disconnect the cable (1). Undo it from its cable holder (2). Remove both screws and carry out the step in reverse to put the new motor in place. Pay attention to not damage the motor flag and pinch the cable.
-
Page 154: Step 43 - R1 (Color Ribbon: Rfid Card) - S10456
Step 43 – R1 (COLOR RIBBON: RFID CARD) – S10456 Carry out step 12-1 to 12-7 (page 88). 2. Disconnect the RFID card cable. 3. Remove the rivet and the defective RFID card. 4. Take the new RFID card and the longest rivet and carry out the step in reverse. Pay attention to not pinch the cables. -
Page 155: Step 44 - R2 (Clear Film: Rfid Card) - S10456
Step 44 – R2 (CLEAR FILM: RFID CARD) – S10456 Carry out step 9-1 to 9-7 (page 82). 2. Disconnect all the cables from the main board. Service-Manual_Agilia_R02_ENG_20231023-A... - Page 156 3. Remove the four screws from the main board. 4. Remove the rivet. Service-Manual_Agilia_R02_ENG_20231023-A...
- Page 157 5. Gently disengage the RFID card. Retrieve the cable. 6. Connect the cable on the new RFID card and attach it with the shortest rivet. Carry out the step in reverse. Pay attention to not pinch the cables. Service-Manual_Agilia_R02_ENG_20231023-A...
-
Page 158: Step 45 - Remote Connectivity Card - S10457
Step 45 - REMOTE CONNECTIVITY CARD – S10457 Carry out step 12-1 to 12-7 (page 88). 2. Gently lift the left cover. 3. Remove the screws from the bottom plate. Service-Manual_Agilia_R02_ENG_20231023-A... - Page 159 4. Press on the clip and slide the module to the left. 5. Disengage the module from the bottom plate. Service-Manual_Agilia_R02_ENG_20231023-A...
- Page 160 6. Disconnect all the cables from the remote connectivity card. 7. Remove both screws from the remote connectivity card and disengage it from the chassis. Service-Manual_Agilia_R02_ENG_20231023-A...
- Page 161 8. Check the switch is at its good position: ON= DIRECT USB • • 1 = COMM VIA EMBEDDED COMPUTER 9. In first insert the new remote connectivity card in the chassis. Service-Manual_Agilia_R02_ENG_20231023-A...
- Page 162 10. Insert the card in the centering pins and carry out the steps in reverse. 11. Put the screws back and reconnect the cables. Apply TECHNIQUE TO AVOID DAMAGING TAPS. Service-Manual_Agilia_R02_ENG_20231023-A...
- Page 163 12. Put the chassis in place. 13. Slide the module until it clicks on the bottom plate. Service-Manual_Agilia_R02_ENG_20231023-A...
- Page 164 14. Put the screws back. Apply TECHNIQUE TO AVOID DAMAGING TAPS. 15. Put the left cover back. Pay attention to not pinch the cables. 16. Carry out step 12-7 to 12-1 (page 88) in reverse. Service-Manual_Agilia_R02_ENG_20231023-A...
-
Page 165: Step 46 - F5-F6-Double Fan - S10448
Step 46 – F5-F6-DOUBLE FAN – S10448 Carry out step 9-1 to 9-7 (page 82). 2. Gently lift the left cover. Service-Manual_Agilia_R02_ENG_20231023-A... - Page 166 3. Disconnect both fan cables. Undo the cables from the cable holder. 4. Unclip the fans support. Tilt it towards the inside of the printer. Service-Manual_Agilia_R02_ENG_20231023-A...
- Page 167 5. Gently disengage the fans support. Disconnect the sensor cable. 6. Undo the fans cables from the cable holder. Service-Manual_Agilia_R02_ENG_20231023-A...
- Page 168 7. Remove the rivets from the fans. 8. Take the new fan and carry out the step in reverse. Pay attention to put the fans in the good position and to not pinch the cables when putting the support back. Service-Manual_Agilia_R02_ENG_20231023-A...
-
Page 169: Step 47 - F1 (Heat Roller Fan) - S10448
Step 47 – F1 (HEAT ROLLER FAN) - S10448 Carry out Step 14-1 to 14-8 (page 94). 2. Cut the three cable ties. 3. Pass the fan cable through the hole. Service-Manual_Agilia_R02_ENG_20231023-A... - Page 170 4. Remove the screw. 5. Lift the fan to disengage it. Service-Manual_Agilia_R02_ENG_20231023-A...
- Page 171 6. Put the new fan in place. 7. Put the screw back. Service-Manual_Agilia_R02_ENG_20231023-A...
- Page 172 8. Pass the fan cable through the hole. 9. Put the first cable tie. Service-Manual_Agilia_R02_ENG_20231023-A...
- Page 173 10. Put the cables in the cable’s holder. 11. Put both cable ties. Pay attention to put the ties in the good position to avoid problems when reassembling the complete heating roller. Check that the springs are in their locations. 12.
-
Page 174: Step 48 - F2 (Print Head Fan) - S10448
Step 48 – F2 (PRINT HEAD FAN) - S10448 Avoid touching the print head directly with the fingers, as this could affect print quality or permanently damage the print head. Carry out step 15-1 to 15-8 (page 100). 2. Cut the cable tie. 3. - Page 175 4. Lift the fan to disengage it. 5. Put in place the new fan and both screws. Service-Manual_Agilia_R02_ENG_20231023-A...
- Page 176 6. Put the cable tie. Pay attention to put the ties in the good position to avoid problems when reassembling the complete heat roller. Check that the springs are in their locations. 7. Carry out step 15-8 to 15-1 (page 100) in reverse. Service-Manual_Agilia_R02_ENG_20231023-A...
-
Page 177: Step 49 - F7 (Exterior Head Fan) - S10448
Step 49 - F7 (EXTERIOR HEAD FAN) - S10448 Avoid touching the print head directly with the fingers, as this could affect print quality or permanently damage the print head. Carry out step 15-1 to 15-8 (page 100). 2. Unwrap the fan cable. Unclip the fan from its support. 3. -
Page 178: Step 50 - M2 (Print Head Motor) - S10453
Step 50 - M2 (PRINT HEAD MOTOR) - S10453 Avoid touching the print head directly with the fingers, as this could affect print quality or permanently damage the print head. Carry out step 15-1 to 15-8 (page 100). 2. Cut the cable tie. 3. - Page 179 4. Unclip the gear from the motor. 5. Remove both screws from the motor. Service-Manual_Agilia_R02_ENG_20231023-A...
- Page 180 6. Take the new motor and carry out the step in reverse. Pay attention when putting in place the cable in the cable holders and the cable tie. Check that the springs are in their locations. 7. Carry out step 15-8 to 15-1 (page 100) in reverse. Service-Manual_Agilia_R02_ENG_20231023-A...
-
Page 181: Step 51 - S7 (Print Head: Came Sensor) - S10455
Step 51 – S7 (PRINT HEAD: CAME SENSOR) – S10455 Avoid touching the print head directly with the fingers, as this could affect print quality or permanently damage the print head. Carry out step 15-1 to 15-8 (page 100). 2. Cut the cable tie. 3. - Page 182 4. Turn the cam gear until the sensor is accessible. 5. Remove the sensor screw. Gently disengage the sensor from its support. Retrieve the cable to put it on the new sensor. Service-Manual_Agilia_R02_ENG_20231023-A...
- Page 183 6. Carry out the step in reverse to put in place the new sensor. Pay attention to put the cames in the good position before insert the print head kit in the printer. 7. Check that the springs are in their locations. 8.
-
Page 184: Step 52 - M1 (Heat Roller Motor) - S10453
Step 52 - M1 (HEAT ROLLER MOTOR) - S10453 Carry out Step 14-1 to 14-8 (page 94). 2. Cut both cable ties. 3. Remove the motor gear. Service-Manual_Agilia_R02_ENG_20231023-A... - Page 185 4. Remove both screws from the motor and put the new one in place. 5. Put the cables in the cable’s holder. Service-Manual_Agilia_R02_ENG_20231023-A...
- Page 186 6. Put both cable ties. Pay attention to put the ties in the good position to avoid problems when reassembling the complete heat roller. 7. Put the motor gear back. Check that the springs are in their locations. 8. Carry out step 14-9 to 14-13 (page 94). Service-Manual_Agilia_R02_ENG_20231023-A...
-
Page 187: Step 53 - S1 (Heat Roller Came Sensor) - S10455
Step 53 – S1 (HEAT ROLLER CAME SENSOR) – S10455 Carry out Step 14-1 to 14-8 (page 94). 2. Cut both cable ties. 3. Remove both E-rings and then the cams gear. Service-Manual_Agilia_R02_ENG_20231023-A... - Page 188 4. Gently disengage the rear chassis until access the sensor. 5. Remove the screw, undo the sensor cable from its cable holder and disconnect it from the sensor. Service-Manual_Agilia_R02_ENG_20231023-A...
- Page 189 6. Take the new sensor, connect the sensor cable and put it in place. Pass the sensor cable in its cable holder. 7. Align the rear chassis with both axles and the cable holder. Service-Manual_Agilia_R02_ENG_20231023-A...
- Page 190 8. Put the E-ring back. Check the presence of the bearing and the good position of the cable holder. 9. Put the cables in the cable’s holder. Service-Manual_Agilia_R02_ENG_20231023-A...
- Page 191 10. Put both cable ties. Pay attention to put the ties in the good position to avoid problems when installing the complete heating roller in the printer. 11. Put in place the cams gear. Pay attention to put it with RC side at the exterior of the heating roller kit. Put the E-ring back.
-
Page 192: Step 54 - Print Head Roller - S10449
Step 54 - PRINT HEAD ROLLER – S10449 Avoid touching the head roller directly with the fingers, marking it or shocking it. This could affect print quality or permanently damage the head roller. Carry out step 15-1 to 15-8 (page 100). 2. - Page 193 4. Remove the screw from the print head adjustment part. 5. Gently disengage the roller. Service-Manual_Agilia_R02_ENG_20231023-A...
- Page 194 6. Take the new roller. 7. Insert the roller in the ball bearing. 8. Put the screw of the print head adjustment part back. Service-Manual_Agilia_R02_ENG_20231023-A...
- Page 195 10. On the other side put the parts shown below back. 11. Carry out step 15-9 to 15-11 (page 100). 12. Open the Evolis print center and launch a graphical test card to verify the quality of the printing. If printing is tilteded, a roller adjustment is necessary.
- Page 196 Open the door. 2. Remove both cassettes. Put them on a flat surface with the pins facing up. Print head roller Adjustment Loosen the head roller screw Service-Manual_Agilia_R02_ENG_20231023-A...
- Page 197 Switch by two notches Launch a graphical test card to verify the quality of the printing. Repeat until the problem is solved. Service-Manual_Agilia_R02_ENG_20231023-A...
-
Page 198: Step 55 - Inferior Heat Roller - Cp012602
Step 55 – INFERIOR HEAT ROLLER – CP012602 Wait the module to cool down completely before removing the component. Carry out step 14-1 to 14-8 (page 94). 2. Remove both belts. 3. Remove both gears. The biggest black gear can be very hard to remove, so be careful not to bend it. Service-Manual_Agilia_R02_ENG_20231023-A... - Page 199 4. Remove the E-ring and then the ball bearing. 5. On the other side remove the E-ring and then the ball bearing. Service-Manual_Agilia_R02_ENG_20231023-A...
- Page 200 6. Slide the roller to the back. 7. Gently disengage the roller from the chassis. 8. Take the new roller and carry out the step 14-9 to 14-13 (page 94). Service-Manual_Agilia_R02_ENG_20231023-A...
-
Page 201: Step 56 - Option Roller - Cp012603
Step 56 – OPTION ROLLER – CP012603 Carry out step 4-1 to 4-8 (page 68). Remove the cards from the feeder. 2. Unclip the rear cover. Service-Manual_Agilia_R02_ENG_20231023-A... - Page 202 3. Open the rear cover. 4. Remove the option gear. Service-Manual_Agilia_R02_ENG_20231023-A...
- Page 203 5. Retrieve first the spring, the spacer and the bearing. 6. On the other side remove first the E-ring then retrieve the washer and the bearing. Service-Manual_Agilia_R02_ENG_20231023-A...
- Page 204 7. Move the roller to the back to disengage it from the chassis. 8. Take the new roller and carry out the step in reverse. Pay attention to the order of the spring, the spacer, the washer and the bearings. Service-Manual_Agilia_R02_ENG_20231023-A...
-
Page 205: Cleaning Procedures
Evolis declines any liability where there has been a failure to carry out required maintenance on the printer. The print head is a wearing part and a sensitive printer component. Its useful life can be reduced by the presence of dust, liquids or solids in the printer’s immediate environment, on the print head or on the cards. -
Page 206: Regular Cleaning
When the cleaning cycle is over, wait 2 minutes before using the printer to let the alcohol evaporate. • Cleaning cycles can also be launched from the Home page of Evolis Premium Suite 2 by clicking on the • Cleaning icon ▶... -
Page 207: Cleaning The Cassettes
Cleaning the cassettes Press the push button twice. The cleaning wizard is displayed on the LCD touchscreen. 2. Open the feeder and remove all cards present in it. 3. Set the card thickness’ gauge on 50 mil – 1.25 mm. Close the feeder. Service-Manual_Agilia_R02_ENG_20231023-A... - Page 208 4. Open the door, remove the cassettes and put them on a flat surface with their pins facing up. 5. Remove the ribbon and the clear film from the cassettes. 6. Take a swab, press the middle so that the cotton is impregnated with alcohol. Rub all the pins of each cassette.
-
Page 209: Cleaning The Print Head
Cleaning the print head Locate the print head. Take a new swab, press the middle so that the cotton is impregnated with alcohol. Rub the black dotted line of the print head. Cleaning the printer Remove the film from the adhesive card and insert the adhesive card into the rear output slot (adhesive side up). -
Page 210: Advanced Cleaning
When the cleaning cycle is over, wait 2 minutes before using the printer to let the alcohol evaporate. • Cleaning cycles can also be launched from the Evolis Premium Suite 2 by clicking on the Cleaning icon on the Home page. -
Page 211: Cleaning The Cassettes
Cleaning the cassettes Press the push button twice. The cleaning wizard is displayed on the LCD touchscreen. 2. Open the feeder and remove all cards present in it. 3. Set the card thickness’ gauge on 50 mil – 1.25 mm. Close the feeder. Service-Manual_Agilia_R02_ENG_20231023-A... - Page 212 4. Open the door, remove the cassettes and put them on a flat surface with their pins facing up. 5. Remove the ribbon and the clear film from the cassettes. 6. Take a swab, press the middle so that the cotton is impregnated with alcohol. Rub all the pins of each cassette.
-
Page 213: Cleaning The Print Head
Cleaning the print head Locate the print head. Take a new swab, press the middle so that the cotton is impregnated with alcohol. Rub the black dotted line of the print head. Cleaning the printer Insert the T-card into the rear output slot. Cleaning starts. 2. - Page 214 3. Remove the film from the adhesive card and insert the adhesive card into the rear output slot (adhesive side up). The cleaning starts. When the cleaning is over, the used adhesive card is ejected into the output box. 4. Put the ribbon and film back on the cassettes and put the cassettes back in place. 5.
-
Page 215: Specific Cleaning
Specific cleaning Recommended cleaning cycle: Every advanced cleaning cycle. • • Servicing accessories: cleaning swab impregnated with isopropyl alcohol. Cleaning the print head roller Open the door, remove the cassettes and put them on a flat surface with their pins facing up. 2. -
Page 216: Cleaning The Dust Filter
Cleaning the dust filter • Recommended cleaning cycle: Once a year. Servicing accessories: A gas duster. • The dust filter is located on the left of the retransfer cassette (blue). • Open the door of the printer. 2. Remove the dust filter. 3. -
Page 217: Manual Cleaning
Manual Cleaning This procedure will allow you to: Avoid problems with loading/printing/magnetic encoding that may be caused by a dirty printer • Clean a printer after the replacement of spare parts or maintenance • Manual cleaning is advised in addition to advanced cleaning •... -
Page 218: Cleaning The Feeder
Cleaning the feeder Switch on the printer. 2. Open the door, remove the cassettes and put them on a flat surface with their pins facing up. 3. Remove the cards from the feeder and remove the rear out box. 4. Open the reject box. Service-Manual_Agilia_R02_ENG_20231023-A... - Page 219 7. Let the feeder open, via Evolis Premium Suite send the command Mf;+ to run the feeder roller. Take a T card and press it on the feeder roller until the roller is clean. Send the command Mf;! to stop the roller.
-
Page 220: Cleaning The Print Head Roller
Cleaning the print head roller Take a swap, press the middle so that the cotton is impregnated with alcohol. With one hand, rotate the print head roller using the l bearing (in red here).While rotating the bearing, rub the swab on the print head roller (in black here). -
Page 221: Cleaning The Option Roller
Cleaning the option roller Take a T card and cut it to be easier to manipulate. Press it on the option roller and simultaneously press the control button until the roller is clean. Cleaning the inferior heat roller Caution: the heating module may be hot. Take a T card and cut it to be easier to manipulate. -
Page 222: Clean The Flip Over Rollers
Clean the flip over rollers Tilt the flip over manually to get access to the first roller. Put a cut T card on the first roller, press gently, and simultaneously press the control button. Repeat the action for the second one. Service-Manual_Agilia_R02_ENG_20231023-A... -
Page 223: Cleaning The Cleaning Roller
Cleaning the Cleaning Roller Open the door and remove the defective color ribbon cassette. 2. Put the cassette on a flat surface with the pins facing up Service-Manual_Agilia_R02_ENG_20231023-A... - Page 224 3. Press the flip lock to release the cleaning roller. 4. Clean the cleaning rollers with an adhesive card. Service-Manual_Agilia_R02_ENG_20231023-A...
-
Page 225: Communication With The Printer
Quick installation guide with QR code to access the driver for Windows and Macintosh platforms. Installing Evolis Premium Suite 2 Evolis Premium Suite 2 is an all-in-one driver software solution that makes interactions between printer and computer more intuitive. Its advanced features automate printer configuration. It includes A supervision of printers: printer status information, remaining ribbon capacity, etc. -
Page 226: How To Communicate With The Printer Through The Evolis Premium Suite
How to Communicate with the Printer through the Evolis Premium Suite Open the Evolis Premium Suite. 2. Click on” Assistance &maintenance”. 3. Activate “Display advanced settings”. Service-Manual_Agilia_R02_ENG_20231023-A... - Page 227 4. Click on “Tools and diagnostics “. 5. Scroll down until find “Printer command “. 6. In the “Command“ field (see Printer Commands section, page ) enter the desired command, for example: Rfv. Click on “Execute command”. The “Answer “field returns the response to the command entered, for example:1.1.15. Service-Manual_Agilia_R02_ENG_20231023-A...
-
Page 228: Updating The Firmware For Windows
Updating the Firmware for Windows Open the Evolis Premium Suite. 2. Click on” Assistance &maintenance”. 3. Activate “Display advanced settings”. Service-Manual_Agilia_R02_ENG_20231023-A... - Page 229 4. Click on “Software updates “. 5. Launch the wizard and follow the steps until the firmware is updated. Service-Manual_Agilia_R02_ENG_20231023-A...
-
Page 230: Sensors
SENSORS S14 sensor will disappear. Service-Manual_Agilia_R02_ENG_20231023-A... - Page 231 FEEDER Service-Manual_Agilia_R02_ENG_20231023-A...
-
Page 232: Commands For Adjusting Sensors
Commands for Adjusting Sensors The Evolis escape commands allow the settings to be read and adjusted. R: Read P: Configure S: Sequence The first letter of all commands should be UPPER CASE The separation character is the semi-colon ; Sa;<sensor>... -
Page 233: Commands To Read The Value Of The Sensors
Commands to read the value of the sensors The Evolis escape commands allow the settings to be read and adjusted. R: Read P: Configure S: Sequence The first letter of all commands should be UPPER CASE The separation character is the semi-colon ; Rse;<sensor>... -
Page 234: Motors
MOTORS Service-Manual_Agilia_R02_ENG_20231023-A... - Page 235 Service-Manual_Agilia_R02_ENG_20231023-A...
-
Page 236: Commands To Move Motors
Commands to move motors Soon Command Motor available Run motor direction Flip card Mfc;+ Move forward Mfc;- Move backward Mfr; Run motor position Flip rotation Mfr;I Init positon Mfr;f Forward position Mfr;b Backward position Mfr;p Printing position Run stepper motor Card Mc;+ Forward... -
Page 237: Fans
FANS Commands to launch fans Command Fan Mfan;x;p Print head Mfan;+;p Start fan Mfan;!;p Stop fan Mfan;x;m Double fans (medium) Mfan;+;m Start fan Mfan;!;m Stop fan Service-Manual_Agilia_R02_ENG_20231023-A... -
Page 238: Printer Commands
Printer Commands The Evolis escape commands allow the settings to be read and adjusted. R: Read P: Configure S: Sequence The first letter of all commands should be UPPER CASE The separation character is the semi-colon ; List of the most common commands used for support... -
Page 239: How To Print A Test Card
The graphical test card is used to confirm the print quality, the absence of any potential offsets, and whether the ribbon is synchronized correctly. • The graphical test card can be printed from the Evolis Premium Suite 2 or the LCD Touchscreen. • When printing a graphical test card: Make sure there are at least one card, a color ribbon and retransfer film in the printer. -
Page 240: Description Of The Ports On The Main Board
DESCRIPTION OF THE PORTS ON THE MAIN BOARD Service-Manual_Agilia_R02_ENG_20231023-A... -
Page 241: Description Of The Ports On The Remote Connectivity Card
DESCRIPTION OF THE PORTS ON THE REMOTE CONNECTIVITY CARD Check the switch is at its good position: ON= DIRECT USB • 1 = COMM VIA EMBEDDED COMPUTER • Service-Manual_Agilia_R02_ENG_20231023-A... -
Page 242: Description Of The Ports On The Feeder Board
DESCRIPTION OF THE PORTS ON THE FEEDER BOARD Service-Manual_Agilia_R02_ENG_20231023-A... -
Page 243: Printing Adjustment
PRINTING ADJUSTMENT Corresponds to film position at retransfer X: Print Position Adjustment Offset X in 100thmm Commands used : Px / Rx Y: Print Position Adjustment Offset Y in dot600 Commands used: Py / Ry Service-Manual_Agilia_R02_ENG_20231023-A... -
Page 244: Retransfer Adjustment
Retransfer adjustment Temperature and speed parameters: Via LCD Via commands: Pepss, Repss Predefined profiles Custom profile Service-Manual_Agilia_R02_ENG_20231023-A... -
Page 245: Troubleshooting
These points should be verified, and corrective measures taken in the order given. They are classified by order of probability and complexity. These procedures require knowledge of Evolis techniques. Please read the explanations fully before beginning any task. If the procedure seems too complicated, please contact your Evolis retailer/distributor. -
Page 246: Printing Problems
Printing problems Most printing problems or printing quality problems are solved with an update of the printer driver and/or printer firmware. No Printing Check the printer driver • Make sure that there is a printer driver for the printer in the Windows configuration. •... -
Page 247: Poor Quality
Retransfer film not correctly applied Retransfer settings are not optimum. 2. Go to Evolis Premium Suite 2 > Printer settings > Retransfer to adjust the temperature and speed settings. 3. Make sure the temperature and speed settings correspond to the requirement of the selected card type. -
Page 248: Tilted Printing
Tilted printing Open the door. 2. Remove both cassettes. Put them on a flat surface with the pins facing up. Print head roller Adjustment Loosen the head roller screw Service-Manual_Agilia_R02_ENG_20231023-A... - Page 249 Switch by two notches Launch a graphical test card to verify the quality of the printing. Repeat until the problem is solved. 3. If the problem is not resolved replace the print head. Service-Manual_Agilia_R02_ENG_20231023-A...
-
Page 250: Problems Loading Cards
Problems Loading Cards Check the card thickness gage setting • Incorrect setting of the card thickness gage can lead to loading problems. We advise checking the card thickness to set the gage correctly. 2. Clean the printer • Complete cleaning (routine, advanced, manual, etc.) of the printer may resolve loading problems due to excessive amounts of dirt in various parts of the internal items. -
Page 251: Missing Printing: White Line(S) On The Prints
Missing printing: White line(s) on the prints Clean the print head (page). 2. Replace the print head. COLORED WRINKLES To prevent color wrinkles, complete printer cleaning cycle is advised. Recommended cleaning cycle: Every 1000 cards or after each technical hardware maintenance. The frequency and quality of cleaning are determining factors to prolong the life of the print head, printer, prevent printing, transport and feeding issue. -
Page 252: Clear Wrinkles
CLEAR WRINKLES Replace the clear film by a new one. 2. Test with a new cassette. Service-Manual_Agilia_R02_ENG_20231023-A... -
Page 253: Find Technical Information Online
Evolis printers under the SUPPORT section on the Evolis website at www.evolis.com. This section offers downloads of the latest versions of firmware, print drivers, and user manuals, videos about using and maintaining Evolis printers, and an FAQ* section giving answers to the most frequently asked questions. Service-Manual_Agilia_R02_ENG_20231023-A... - Page 254 Service-Manual_Agilia_R02_ENG_20231023-A...
Need help?
Do you have a question about the AGILIA and is the answer not in the manual?
Questions and answers