Table of Contents
Advertisement
European Regulatory Information
Declaration of Conformity
We, the undersigned,
Company:
Address:
Country:
Telephone number:
Fax number:
Internet:
certify and declare under our sole responsibility that the following equipment:
Product Description,
Intended use:
EU/EFTA member
states intended for use:
Manufacturer:
Brand:
Model Designators:
are tested to and conform with the following standards:
EN 55022
EN 55024
and therefore complies with the essential requirements and
provisions of the Electromagnetic Compatibility Directive
89/336/EEC.
KYE SYSTEMS Corporation
No. 492, Chung Hsin Rd., Sec. 5, San Chung, Taipei Hsien,
Taiwan
R.O.C.
886-2-2995-6645
886-2-2995-5302
http://www.geniusnet.com.tw
Information technology equipment, personal computer
peripheral input device, for home and office use
EU: Austria, Belgium, Denmark, Finland, France, German,
Greece, Ireland, Italy, Luxembourg, The Netherlands,
Portugal, Spain, Sweden, United Kingdom, EFTA:
Switzerland, Iceland, Liechtenstein, Norway
KYE SYSTEMS Corporation
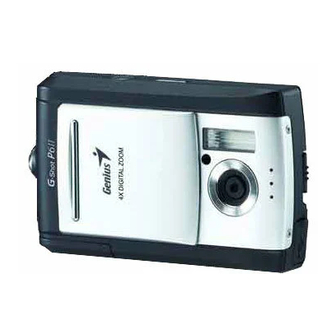
Genius
G-Shot P611
Advertisement
Table of Contents

Related Manuals for Genius G-Shot P611


Summary of Contents for Genius G-Shot P611
- Page 1 European Regulatory Information Declaration of Conformity We, the undersigned, Company: KYE SYSTEMS Corporation Address: No. 492, Chung Hsin Rd., Sec. 5, San Chung, Taipei Hsien, Taiwan Country: R.O.C. Telephone number: 886-2-2995-6645 Fax number: 886-2-2995-5302 Internet: http://www.geniusnet.com.tw certify and declare under our sole responsibility that the following equipment:...
-
Page 2: Fcc Statement
Connect the equipment into an outlet on a circuit different from that to which receiver is connected. Use of shielded cable is required to comply with Class B limits in Subpart B of Part 15 of the FCC rules. Do not make any changes or modifications to the equipment unless otherwise specified in the manual. -
Page 3: Read This First
Do not use the camera if any foreign objects have entered the camera. Turn the camera off and remove the batteries. Contact your dealer or authorized service facility. Do not continue to use the camera as this may cause a fire or an electrical shock. - Page 4 CAUTION Do not place this camera in a location affected by oil fumes or steam, such as near a cooking stove or humidifier. This may cause a fire or an electrical shock. Do not leave this camera in a location subject to extremely high temperatures, such as in a sealed vehicle or in direct sunlight.
- Page 5 English Remove the batteries if the camera will not be used for an extended period of time. The batteries may leak and cause a fire, injury or soiling of the battery compartment. If the batteries leak, clean and wipe the battery compartment carefully and install...
-
Page 6: Table Of Contents
Portrait Mode PHOTOVISTA 36-37 Normal Mode USING THE CAMERA AS Digital Zoom A PC CAMERA 37-39 Self-Timer Step 1: Installing the PC Camera Flash Driver PLAYBACK MODE 20-29 Step 2: Connecting the Camera to Viewing Images Your Computer Zoom Playback... - Page 7 English Playback Menu Step 3: Running Your Application Setup Menu Software CAMERA MENU OPTIONS 39-46 SPECIFICATIONS 46-47 Record Menu Movie Menu...
-
Page 8: Introduction
Images you have taken can be downloaded to your computer using the USB cable (USB driver required for Win 98 and Mac OS 9.0) You can enhance and retouch your images on your computer by using the provided editing software, or image editing software you may already own. -
Page 9: Package Contents
English the actual setting of your camera. Package contents Carefully unpack your camera and ensure that you have the following items: Digital camera Software CD-ROM USB cable User’s manual 2 x AAA alkaline batteries Camera strap Quick guide Camera pouch NOTE Accessories and components vary by retailer. -
Page 10: Getting To Know Your Camera
English GETTING TO KNOW YOUR CAMERA Front View Strap eyelet Lens cover Lens Self-timer LED Flash POWER Power button Shutter button Rear View 1. Focus switch Macro mode Normal mode 2. Status LED Arrow button (up) Thumbnail button MENU Menu button... -
Page 11: Lcd Monitor Icons
9. USB connector 10. Battery cover 11. Memory card cover 12. Tripod socket LCD Monitor Icons Display icons – Still Image Record Mode: 1. Possible number of shots (at the current size and quality settings) 2. Battery level Full battery power... - Page 12 Fine 1280 x 960 pixels Normal 640 x 480 pixels 8. Image size 9. Self-timer mode Display icons – Movie Mode: 1. Battery level 2. Movie mode 3. Memory card indicator Display icons –Playback Mode: 1. Frame number 2. Battery level 3.
-
Page 13: Getting Started
If you are using the new rechargeable batteries or rechargeable batteries that have not been used for an extended period of time (batteries that pass the expiry date are exceptions) might affect the number of pictures that can be taken. Therefore, to maximize their performance and lifetime, we recommend that you fully charge the batteries and discharge them for at least one complete cycle before use. - Page 14 4. Close the battery/SD card cover. NOTE Be sure to format the memory card with this camera before its initial usage. Refer to section in this manual titled “Formatting Media” for further details. To remove a memory card: Make sure the camera is turned off. Open the battery/memory card cover. Press lightly on the edge of the memory card and it will eject.
-
Page 15: Attaching The Hand Strap
NOTE If the camera goes unused for a certain period of time while the camera is powered on, the camera will switch to an idle mode, and eventually turn itself off to conserve power. Setting the Date and Time The Date/Time screen will be presented if/when: Camera is turned on for the first time. -
Page 16: Setting Image Resolution And Quality
These settings affect the number of images that can be stored in internal memory, or on an SD memory card. As you get to know the camera, it is recommended that you try each quality and resolution setting to get an appreciation for the effects that these settings will have on your images. - Page 17 Toggle the button to exit from the menu mode. The table below shows the approximate number of shots that you can take at each setting based on 14MB internal memory or using an optional memory card from 8MB to 12MB SD.
-
Page 18: Record Mode
Taking Images Your camera is equipped with a 1.5” LCD monitor to compose images. Before you start taking pictures, be sure that the lens cover is opened and the focus switch is set to the appropriate photography mode. 1. Open the lens cover. -
Page 19: Digital Zoom
4. Press the shutter button to capture a “zoomed” image. NOTE Digital zoom is only available at the resolution of 640 x 480, 1600 x 1200, 1280 x 960 , 2032 x 1520 pixels. Self-Timer The self-timer duration is ten seconds. -
Page 20: Flash
English the last three seconds. This allows you to get into the scene when taking group images. 1. Secure the camera to a tripod or place it on a stable surface. 2. Toggle the MODE button to , and press the SET button. -
Page 21: Playback Mode
3. Compose the image and press the shutter button. NOTE If you will not be using the flash, turn it off. Turning the flash OFF will result in faster camera startup and faster operation because the capacitor will not be charged needlessly. -
Page 22: Zoom Playback
* When no memory card is loaded, it plays back from internal memory. * When an SD memory card is loaded, it plays back from SD memory card. If there are no images stored in memory, the “No image” message will appear on the LCD monitor. -
Page 23: Displaying Thumbnail Images
Slide Show Display The slideshow function enables you to playback your images back automatically in sequential order as a slide show. This is a very useful and entertaining feature for reviewing recorded images and for presentations. 1. Toggle the MODE button to , and press the SET button. -
Page 24: Deleting Images
NOTE You can adjust the slideshow display interval from [3 sec], [6 sec] or [10 sec]. If you wish to exit from the [Slide Show] menu, select [Exit] on the menu setting options. Deleting Images You can easily delete still images and video clips that have not come out right. - Page 25 3. Press the SET button. 4. To delete this current image, press the button. 5. When the delete message appears, select [Yes] using the buttons and then press the SET button. If you wish to cancel the deletion, select [No].
- Page 26 The message “No image” appears on the LCD monitor. NOTE To delete images or videos stored in internal memory, do not insert a memory card into the camera. Otherwise, you will delete the images or video clips stored on the memory card.
-
Page 27: Memory Card
Memory Card This feature allows you to copy your images from the camera’s internal memory to an SD memory card. Of course, you can only do this if you have an SD memory card installed and some images in internal memory. - Page 28 English To copy still images and movies from internal memory to SD memory card, follow the steps below: 1. Be sure the camera power is off and insert the SD memory card. 2. Turn the camera on. 3. Toggle the MODE button to , and press the SET button.
-
Page 29: Setting The Dpof
Toggle the button to exit from the menu mode. This new logo will be activated on the next time you turn on the camera. Setting the DPOF DPOF is a standard for recording printing information directly on the SD memory cards and other media. -
Page 30: Movie Mode
NOTE This function can be used only on still image files that are saved on memory cards. MOVIE MODE Recording Video Clips The movie mode allows you to record video clips at a resolution of 320 x 240 pixels. -29-... -
Page 31: Viewing Video Clips
2. Move to the movie you want to see using the buttons. 3. Press the shutter button. Playback begins. The elapsed playback indicator or the elapsed time is displayed on the LCD monitor. Press the shutter button again to stop the playback. (To pause/ resume: press the button) -30-... -
Page 32: Transferring Recorded
NOTE The zoom function cannot be activated during movie playback. To play the video clip back on your computer, you may use either Windows Media Player or Apple "QuickTime Player". QuickTime basic player is available free of charge, compatible with both Mac- and Windows computers and can be download from the Apple web site at www.apple.com. - Page 33 Windows 2000/ME/XP is not necessary. 1. Insert the CD-ROM that came with the camera into your CD-ROM drive. The welcome screen appears. 2. Click "USB DRIVER". Follow the on-screen instructions to complete the installation. After the USB driver has been -32-...
-
Page 34: Computer
Step 2: Connecting the camera to your computer 1. Connect one end of the USB cable to an available USB port on your computer. 2. Connect the other end of the USB cable to the USB connector on the camera. -
Page 35: Step 3: Downloading Images And Video Clips
Select the images that you want, and then choose "Copy" from the "Edit" menu. Open the destination location (folder) and choose "Paste" from the "Edit" menu. You may also drag and drop image files from the camera to a desired location. -
Page 36: Installing Photosuite
NOTE For information on how to use PhotoSuite to edit and retouch your recorded images, please refer to its online help. For Windows 2000/XP users, make sure to install and use the PhotoSuite while logged in as a user with an Administrator account. -
Page 37: Installing Photovista
Administrator account. PhotoVista is not supported on the Mac. Windows XP users who have not installed XP Service Pack 1, be sure to link to http:java.sun. com/getjava/download.html first and download the Java Virtual Machine installation. -
Page 38: Using The Camera Asa Pc Camera
* Windows 2000, Windows Me, Windows XP Service Pack 1 or higher USING THE CAMERA AS A PC CAMERA Your camera can act as a PC camera, which allows you to videoconference with business associates, or have a real-time conversation with friends or family. -
Page 39: Step2: Connecting The Camera To Your Computer
English NOTE The USB driver that bundled inside the CD-ROM is designed in a form 2 in 1 (USB & PC camera driver). a) On Windows 98, the Windows OS will install both USB & PC camera drivers. b) On Windows 2000/ME/XP, it will only install PC camera driver. -
Page 40: Menu Options
English 3. Click the Place Call button. 4. Type the e-mail address or the network address of the computer that you are calling. 5. Click Call. The person that you are calling must also have Windows NetMeeting running and be willing accept your call to start the videoconference. -
Page 41: Record Menu
[Yes]. 2. Press the SET button. 3. Toggle the button to exit from the menu mode. OSD Menus To display the related menu options, press the MENU button. Record Menu Setting Description Option Sets the image resolution. Refer to... - Page 42 Your camera adjusts the exposure of Exposure -1.5EV~+1.5EV each scene automatically. However, if the subject is very dark, or very bright, you may override the camera’s automatic exposure determination to make the subject brighter or darker. This is called EV compensation.
- Page 43 Under some lighting conditions the image may appear in strange shades. If that occurs you may change the white balance setting by specifying a lighting condition (temperature) most appropriate for your scene.
- Page 44 English Movie Menu Setting Description Option Refer to section in this manual titled -1.5EV~+1.5EV Exposure “Exposure” in the Record Menu for further details. Auto Refer to section in this manual titled Daylight (White “WB” in the Record Menu for further...
-
Page 45: Playback Menu
English Playback Menu Setting Description Option Refer to section in this manual titled “Deleting This Image Delete Images/Formatting Media” for further details. All Images Format Exit Refer to section in this manual titled “Copying Card Copy the Contents of Internal Memory to a Memory Card”... -
Page 46: Setup Menu
Date & Time details. The camera produces a sound (beep) Beeper On Off each time you press a camera button, if this function is enabled. This option allows you to select the Language language for the menus and the text display on the LCD monitor. - Page 47 CAMERA SPECIFICATIONS Item Description Sensor Approx. 3.0 Mega pixels Image resolution 2912 x 2184 pixels (FW interpolation to 6.3 Mega pixels) 2032 x 1520 pixels 1600 x 1200 pixels 1280 x 960 pixels 640 x 480 pixels 1.5" color TFT LCD...
- Page 48 USB connector Power 2 AAA Alkaline (1.5V) or Ni-MH (1.2V) batteries Dimensions 89.5 x 56 x 24 mm (W x H x D) (exclusive of protruding features) Weight Approx. 82g (without batteries and memory card) *Design and specifications are subject to change without notice.
Need help?
Do you have a question about the G-Shot P611 and is the answer not in the manual?
Questions and answers