Table of Contents
Advertisement
Quick Links
Download this manual
See also:
Service Manual
FCC STATEMENT
This device complies with Part 15 of the FCC Rules. Operation is subject to the following two
conditions:
(1) This device may not cause harmful interference, and
(2) This device must accept any interference received, including interference that may cause
undesired operation.
Note:
This equipment has been tested and found to comply with the limits for Class B digital devices,
pursuant to Part 15 of the FCC rules. These limits are designed to provide reasonable protection
against harmful interference in a residential installation. This equipment generates uses and can
radiate radio frequency energy and, if not installed and used in accordance with the instructions,
may cause harmful interference to radio communications.
However, there is no guarantee that interference will not occur in a particular installation. If this
equipment does cause harmful interference to radio or television reception, which can be
determined by turning the equipment off and on, the user is encouraged to try to correct the
interference by one or more of the following measures:
Reorient or relocate the receiving antenna
Increase the separation between the equipment and receiver
Connect the equipment into an outlet on a circuit different from that to which the receiver is
connected
Consult the dealer or an experienced radio/TV technician for help
Use of shielded cable is required to comply with Class B limits in Subpart B of Part 15 of the
FCC rules.
Do not make any changes or modifications to the equipment unless otherwise specified in the
manual. If such changes or modifications should be made, you could be required to stop
operation of the equipment.
READ THIS FIRST
1. The bundled driver, software, design, specifications and user's manual that were packaged
with the camera are subject to change without notice.
2. The accessories that come with the camera may vary between regions.
3. For
driver
updates,
www.geniusnet.com.tw.
you
can
check
-1-
the
"Download"
English
section
of
our
website,
Advertisement
Table of Contents

Subscribe to Our Youtube Channel
Related Manuals for Genius P533


Summary of Contents for Genius P533
-
Page 1: Fcc Statement
Consult the dealer or an experienced radio/TV technician for help Use of shielded cable is required to comply with Class B limits in Subpart B of Part 15 of the FCC rules. Do not make any changes or modifications to the equipment unless otherwise specified in the manual. - Page 2 Do not use the camera if it is emitting smoke, becomes unusually hot to be touched, emitting any unusual odor or noise, or if it is in any other abnormal state. Operating the camera in any of these situations may cause a fire or an electrical shock. Stop using the camera immediately, turn the camera off, and then disconnect the power source (batteries or AC power adapter).
- Page 3 This may cause a fire or an electrical shock. Do not cover or wrap the camera or the AC power adapter with a cloth or quilt. This may cause heat to build up and distort the case and cause a fire. Always use the camera and its accessories in well-ventilated locations.
-
Page 4: Table Of Contents
Using the Digital Zoom Using the Self-timer Digital Zoom Using the Flash Preview Changing the Focus Interval/Count Changing the Exposure Compensation AE/AWB setting Setting the Image Size and Quality White Balance Photography in the Program Mode Metering Photography in the Shutter... - Page 5 Zoom Playback COMPUTER 47-50 Slideshow Display DPOF (Digital Print Order Format) Step 1: Installing the USB Driver Protect Step 2: Connecting the Camera to Your LCD Brightness Computer LCD Monitor Display (Playback Mode) Step 3: Downloading Images/Movies ERASING IMAGES 42-43...
-
Page 6: Introduction
Win 98 and Mac OS 8.6). You can enhance and retouch your images on your computer by using the provided editing software, or image editing software you may have already owned. You may share your images with your friends via e-mail, in a report, or on a website. - Page 7 Camera pouch Two Rechargeable Lithium Ion A 32MB SD memory card Batteries Rechargeable Lithium Ion Battery Rechargeable Lithium Ion Battery Charger Charger Power Cord AC Plug Adaptor for EU to US Note: Accessory and components may vary by different retailer.
-
Page 8: Getting To Know The Camera
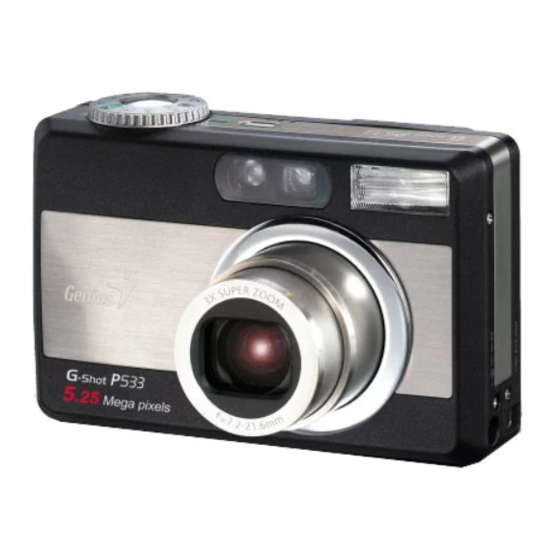
English GETTING TO KNOW THE CAMERA Front view Self-timer/AF support LED Optical viewfinder Built-in flash Shutter button Lens/lens cover POWER Power button MIC Microphone Mode dial DC IN 5V terminal USB/A/V OUT terminal... -
Page 9: Rear View
English Rear view Diopter adjustment dial Viewfinder Viewfinder LED Zoom button Speaker Arrow button (up) Menu button Focus button/macro Display button Arrow button (left) Strap attachment Exp./back light Command dial Set button Delete button Arrow button (right) Tripod socket Flash button... -
Page 10: Mode Dial
English Mode Dial Auto Sports mode Program mode Night scene mode Tv (Shutter Speed priority) Movie mode Av (Aperture priority) Set-up mode Manual mode PC mode Portrait mode Playback mode -10-... -
Page 11: Viewfinder Led Indicator
English Viewfinder LED Indicator Description Setup Mode Color State Photography Charge PC Mode Battery Mode Mode AE or AF is In standby Under locked with the mode. communication charging Shutter button to PC. (SD Green held half Memory Card down. -
Page 12: Lcd Monitor Information
English LCD Monitor Information AUTO capture mode Program/Tv/Av/Manual/Portrait/Sports/Night scene mode -12-... - Page 13 English Movie mode Playback mode (Standard) Playback mode (Detailed information) -13-...
-
Page 14: Getting Started
NOTE Use only the specified battery type (Lithium Ion). If you are not going to use the battery for an extended period of time, remove it from the camera to prevent leakage or corrosion. Never use different type of battery. -
Page 15: Inserting An Sd Memory Card
C. When the battery is put into the battery charger, the LED indicator changes from green to red, indicating the battery is being charged. D. If the LED indicator is not on when the power is connected, it indicates that the battery charger is defective. The user should turn AC power off. -
Page 16: Attaching The Strap
English NOTE If the camera is powered-on without the card, the “NO CARD” message appears on the LCD monitor. To prevent valuable data from being accidentally erased from an SD Memory Card you can slide the write-protected tab (on the side of the SD Memory Card) to “LOCK”. -
Page 17: Using The Viewfinder
Voice memo is starting to record at still image capture mode just after the photograph is taken in case of activating this function. It provides 10 seconds for recording and only can be done once. To terminate recording, press the shutter button down fully. -
Page 18: Using The Optical Zoom
The digital zoom function is only available when you set the LCD monitor and the digital zoom to ON. To capture a digitally zoomed image, perform the following steps:... -
Page 19: Using The Self-Timer
To activate the self-timer by pressing the shutter button. After selecting this mode, self-timer icon displays on LCD monitor and then LED on the front panel blinks fast for the last 3 seconds. Using the self-timer allows you to get into the scene when taking group images. -
Page 20: Using The Flash
The flash is designed to function automatically when lighting conditions warrant the use of flash. You can take an image using a suitable flash mode to your circumstances. If you change the flash mode, the camera will retain that setting even if the camera is turned off. - Page 21 English After flash fires, it takes approximately 5 seconds to 10 seconds to be ready for the next shot during solid orange indicator. The camera has FOUR flash modes: Auto, Red-Eye Reduction, Forced Flash and Flash Off. The table below will help you to choose the appropriate flash mode:...
-
Page 22: Changing The Focus
There is not a distinct point (subject range) at which Normal mode is favored over Macro mode; take in image in both optical modes and compare the results. After a Macro shot is taken DO NOT FORGET to reset the lens to the normal position. Changing the Exposure Compensation This setting allows you to intentionally lighten or darken the entire image. - Page 23 Rotate the Command dial to counter clockwise direction to decrease (darken) exposure, and rotate the Command dial to clockwise direction to increase (brighten) exposure. Compose the picture, press the shutter button down halfway, and press it down fully. Effective Subjects and Set Values Positive (+) Compensation •...
-
Page 24: Setting The Image Size And Quality
In “Exposure compensation”, the default value is “0.0EV”. The setting range is as follows: -2.0 / -1.7 / -1.3 / -1.0 /- 0.7 / -0.3 / 0 (default) / +0.3 / +0.7/ +1.0 / +1.3 / +1.7 / +2.0 Exposure Compensation cannot be set at [ ] mode. - Page 25 FULL (320 x 240) Economy (1/19) HALF (160 x 120) * The above data shows the standard testing results. The actual capacity varies according to the shooting conditions and settings. Photography in the Program Mode [P] The camera automatically adjusts the shutter speed and the aperture value according to the brightness of an object.
-
Page 26: Photography In The Shutter
Compose the picture and press the shutter button down halfway, then press it down fully NOTE If the appropriate combination cannot be set even if the aperture is adjusted to its limit, the aperture value is displayed in “red”. Photography in the Aperture-priority Mode [Av] In this mode, photographs are taken with the priority given to aperture. -
Page 27: Photography In The Full Manual
English Photography in the Full Manual Mode [M] This mode can set the aperture and shutter speed values separately before taking a photograph. Both the aperture value and shutter speed can be changed by rotating the Command dial. Set the mode dial to [M] and power on the camera. -
Page 28: Photography In Night Scene Mode
Press the shutter button down halfway, and press it down fully. Making Movies [ The movie mode allows you to record video clips at the size of 320 x 240 pixels and 160 x 120 pixels. By dialing the MODE switch to [ ] position, the camera can take moving image with “voice”... -
Page 29: Changing The Preset Conditions (In Capture Mode)
2048 x 1536 pixels [1280 x 960]: 1280 x 960 pixels [640 x 480]: 640 x 480 pixels NOTE In the [ ] mode, image size available in this setting is 320 x 240 pixels and 160 x 120 pixels. -29-... -
Page 30: Quality
[Normal]: Normal sharpness (default) [Soft]: Soft effect NOTE This function is not available in the [ ] mode Contrast Set the contrast of the image to be photographed. [Hard]: Hard contrast [Normal]: Automatic (standard) setting (default) [Soft]: Soft contrast Color Set the color of the images to be photographed. -
Page 31: Voice Memo
3 photographs. [Auto Exp.]: In this mode, the camera takes 3 consecutive pictures in the order of standard exposure, underexposure and overexposure compensation. Voice Memo Set the voice memo for still image. In case of activating... -
Page 32: Lcd Brightness
English NOTE When voice memo is set to “ON”, preview setting is also fixed to “ON”. LCD Brightness Adjust the brightness of the LCD monitor. By selecting LCD bright of menu, and press the SET button, the LCD control mode is displayed. -
Page 33: Interval/Count
Auto and mode. White Balance The camera determines the white balance by averaging the various kinds of light that actually enters the lens. You may set in advance the white balance when taking photographs under specific lighting conditions. [ Auto ] : Auto white balance (default). -
Page 34: Metering
ISO 200; during 400, the ISO will be fixed to ISO 400. In [ P ] mode, ISO setting has 100, 200, 400 and Auto . If Auto is selected, the camera will automatically set the ISO value according to the ambient brightness. -
Page 35: Playing Back Images
SET button. NOTE This operation does not care the current mode of white balance. After setting manual WB automatically white balance mode can be set to manual. PLAYING BACK IMAGES [ Playing Back Photographed Images (Single-Frame Playback) Play back photographed still images one image at a time. -
Page 36: Voice Record
You can also playback your images on a TV screen. First connect one end of the A/V cable to the A/V out terminal of the camera. Then connect the other end to the A/V input socket of the TV. Set the mode dial to (playback) and then turn the TV and camera on. -
Page 37: Thumbnail Display
English Playback of the selected movie begins. A user can control playback movie file as the following table: During During During During During During During playback pause playback 2x playback 4x reverse reverse stopping playback 2x playback 4x 2x-speed 1-frame feed... -
Page 38: Zoom Playback
The camera has 2x and 4x playback digital zoom function. While reviewing your images, you may enlarge a selected portion of an image. This magnification allows you to view fine details. Movies cannot be displayed using the zoom playback feature. -
Page 39: Slideshow Display
Slideshow Display The slideshow function enables you to playback your images automatically in sequential order as a slide show. This is a very useful and entertaining feature for reviewing recorded images and for presentation. Set the mode dial to [ ] and power on the camera. - Page 40 If “Execute” is selected and confirmed the camera will save the settings. Protect This function gives the image protection from erasing. Follow the steps below to perform the protect functions. Set the mode dial to [ ] and power on the camera.
- Page 41 LCD Monitor Display (Playback Mode) The [ ] Display button can switch the display on the LCD monitor when playing back photographed images. You can switch the display to show a list of detailed information. Set the mode dial to [ ] and power on the camera.
-
Page 42: Erasing Images
NOTE This function is not available for movie image playback. ERASING IMAGES [ The [ ] button provides to erase image file. While pressing [ ] button during monitoring mode, the latest image data and erase menu appears on the LCD monitor. -
Page 43: Erasing Selected Image
This function is available for all modes except for PC and SET-UP modes. SET-UP MODE This feature allows you to set up the default settings for using your camera in addition to image-related settings. You can select your personal preferences for the camera by this mode. -
Page 44: Card Information
Does not reset the frame number. Press the SET button to confirm the setting. NOTE If folder already exists on SD Memory Card, it assigns older number to the existing folder. Format Formatting erases all images and reformats the SD Memory Card loaded in your camera. -
Page 45: Auto Power Off
[1 Min]: If no operation is carried out for 1 minute, Auto power off is activated (default). [2 Min]: If no operation is carried out for 2 minutes, Auto power off is activated. -
Page 46: System Reset
Use the button to set the value for each item. Press the SET button to confirm the setting after all item values are set. System Reset Set all the parameter to default settings. Set the mode dial to [SET-UP] and power on the camera. -
Page 47: Video Output
The camera firmware version is displayed on the LCD monitor. To return to main menu, press the SET button. TRANSFERRING RECORDED IMAGES TO YOUR COMPUTER You can share recorded images/video clips with your family or friends via e-mail or post them on -47-... - Page 48 English the Web. Before doing this, you need to connect the camera to your computer by using the USB cable and then transfer the images/video clips. To transfer images/video clips from the camera to your computer, follow the steps below:...
- Page 49 Step 3: Downloading images/video clips When the camera is turned on and connected to your computer, it is considered as a disk drive, just like a floppy disk or CD. You can download (transfer) images/video clips by copying them from the “removable disk”...
- Page 50 English For computers running Mac OS Open the “untitled” disk window and the hard disk or the destination location. Drag and drop from the camera disk to the desired destination. NOTE Memory card users may prefer to use a memory card reader (highly recommended).
-
Page 51: Installing Photovista
For information on how to use PhotoVista to create spectacular 360 panoramic images, please refer to its online help. For Windows 2000/XP users, make sure to install and use the PhotoVista while logged in as a user with an Administrator account. PhotoVista is not supported on the Mac. -
Page 52: Camera Specifications
Fine/Standard/Economy Image resolution <Still image> 2560x1920, 2048x1536, 1280x960, 640x480 <Movie image> 320x240, 160x120 Image storage SD Memory Card (up to 512MB) Image file format DCF, DPOF, EXIF Lens f =7.2mm~21.6mm , F=2.8~4.7 Focus range 0.30m ~infinity (Macro Tele) 0.09m~infinity (Macro Wide) 0.80m~infinity (Standard) - Page 53 English Focusing Auto-focus Shutter speed 8sec~1/1500 sec Image capturing Single/Continuous/Auto exposure Digital zoom 4x (Capture mode) , 2x and 4x (Playback mode) Exposure Program/Tv/Av/Manual/Portrait/Sports/Night scene Exposure compensation -2EV~+2EV White balance Auto/Incandescent/Fluorescent 1/ Fluorescent 2/ Day light/Cloudy/Manual Flash Auto/Red-eye forced flash/ Suppressed flash/ Forced flash Flash effective range 0.5m~3.0m...
Need help?
Do you have a question about the P533 and is the answer not in the manual?
Questions and answers