Table of Contents
Advertisement
Quick Links
Download this manual
See also:
Service Manual
FCC STATEMENT
This device complies with Part 15 of the FCC Rules. Operation is subject to the following two
conditions:
(1) This device may not cause harmful interference, and
(2) This device must accept any interference received, including interference that may cause
undesired operation.
Note:
This equipment has been tested and found to comply with the limits for Class B digital devices,
pursuant to Part 15 of the FCC rules. These limits are designed to provide reasonable protection
against harmful interference in a residential installation. This equipment generates uses and can
radiate radio frequency energy and, if not installed and used in accordance with the instructions,
may cause harmful interference to radio communications.
However, there is no guarantee that interference will not occur in a particular installation. If this
equipment does cause harmful interference to radio or television reception, which can be
determined by turning the equipment off and on, the user is encouraged to try to correct the
interference by one or more of the following measures:
Reorient or relocate the receiving antenna
Increase the separation between the equipment and receiver
Connect the equipment into an outlet on a circuit different from that to which the receiver is
connected
Use of shielded cable is required to comply with Class B limits in Subpart B of Part 15 of the
FCC rules.
Do not make any changes or modifications to the equipment unless otherwise specified in the
manual. If such changes or modifications should be made, you could be required to stop
operation of the equipment.
READ THIS FIRST
1. Product design and specifications are subject to change without notice. This includes primary
product specifications, software, software drivers, and user's manual. This User Manual is a
general reference guide for the product.
2. The product and accessories that come with your camera may be different from those
described in this manual. This is due to the fact that different retailers often specify slightly
different product inclusions and accessories to suit their market requirements, customer
-1-
English
Advertisement
Table of Contents

Related Manuals for Genius P633


Summary of Contents for Genius P633
- Page 1 Connect the equipment into an outlet on a circuit different from that to which the receiver is connected Use of shielded cable is required to comply with Class B limits in Subpart B of Part 15 of the FCC rules.
- Page 2 WARNING Do not use this camera if it is emitting smoke (or an unusual odor), if it becomes unusually hot to the touch, produces a peculiar noise, or exhibits any other abnormal conditions. Operating the camera in any of these circumstances may cause a fire or an electrical shock.
- Page 3 Do not cover or wrap the camera with a cloth or quilt. This may cause heat to build up and distort the camera case and cause a fire. Always use the camera and accessories in well-ventilated locations.
-
Page 4: Table Of Contents
Setting the Focus Setup Menu (Custom) Self-timer/Photographing at Intervals TRANSFERRING RECORDED Exposure Compensation/Backlight IMAGES/MOVIES TO YOUR Correction COMPUTER 54-56 Program (Automatic Exposure) Step 1: Installing the USB Driver Photography Mode Step 2: Connecting the Camera to Your Shutter Speed Priority Computer... - Page 5 English Step 3: Downloading Images and Video CONNECTING THE Files CAMERA TO OTHER INSTALLING DEVICES Presto! Mr. Photo 56-57 CAMERA INSTALLING SPECIFICATIONS 58-59 Presto! Image Folio...
-
Page 6: Introduction
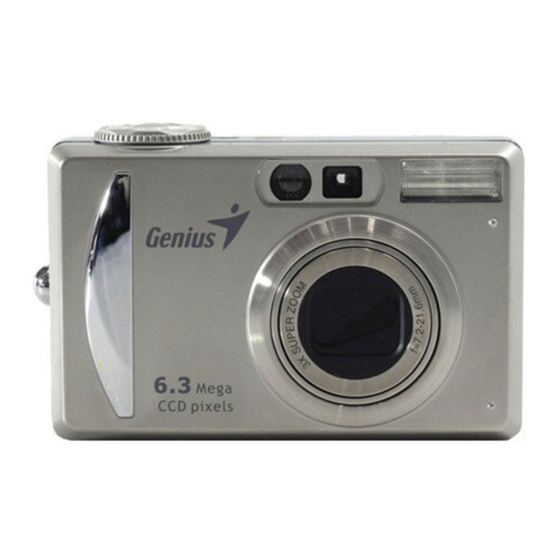
Congratulations on your purchase of the new digital camera. Capturing high-quality digital pictures is fast and easy with this state-of-the-art smart camera. Equipped with a 6.3 Mega pixel CCD, this camera is capable of capturing pictures with a resolution of up to 2816 x 2112 pixels. -
Page 7: Package Contents
Package contents Carefully unpack your package and make sure that you have the following items. In the event that any item is missing or if you find any mismatch or damage, promptly contact your dealer. Digital camera USB cable... -
Page 8: Getting To Know The Camera
DC IN 5V terminal Allows you to connect AC power adapter to the camera to operate the camera without battery, or to charge rechargeable battery. USB/A/V OUT terminal Allows you to connect a USB cable or an A/V cable to the camera. -
Page 9: Rear View
(Zoom out) button Speaker Produces camera sounds and plays recorded audio. MENU button Toggles OSD menu on and off. Turns the LCD monitor display and live view on and off. (Display) button Strap holder Camera strap attachment. Search dial Selects the next or previous picture in playback mode, or changes the shutter speed or aperture value setting in [Tv], [Av] and [M] modes. - Page 10 Allows you to choose the appropriate focus (Focus) button setting. Scrolls downwards. button Allows you to toggle the self-timer on and off, (Self-timer) button selects the desired self-timer mode or choose the interval photography. Scrolls left. button Allows you to toggle the exposure compensation (Exposure compensation / / backlight correction on and off.
-
Page 11: Mode Dial
Description The camera is automatically sets for exposure, etc. Auto photography This permits the shutter speed and aperture to be set Program (auto exposure) automatically and other factors to be set manually. Selects this when you want to photograph with shutter Shutter speed priority speed priority. -
Page 12: Viewfinder Led Indicators
English Viewfinder LED Indicator This describes the color and state of the viewfinder LED. During During During During Color State connection power off photography playback to a PC While the Battery Auto focusing camera is charging in successful. connected to progress. - Page 13 15. Metering icon Remaining battery status 16. Backlight correction Flash icon 17. Date and time NOTE Each press of the button switches one step in the sequence of Normal display (displaying the icons, etc), display OFF, LCD monitor OFF. -13-...
- Page 14 English Photography modes [ P ] [ Tv ] [ Av ] [ M ] Mode icon 11. Capture mode icon Focus icon 12. Self-timer icon Unsteady hold warning icon 13. Possible number of shots Zoom status 14. White balance icon Focus area (When the shutter button is 15.
- Page 15 Photography mode [ Mode icon Focus icon Zoom status Remaining battery status Image size Quality Self-timer icon Possible recording time/elapsed time Recording indicator Playback mode [ ]-Still Picture Playback Folder number File number Voice memo icon Protect icon Mode icon...
-
Page 16: Getting Started
NOTE Use only the specified battery type (Lithium Ion). If you are not going to use the battery for an extended period of time, remove it from the camera to prevent leakage or corrosion. Never use different type of battery. -
Page 17: Charging The Battery
C. When the battery is put into the battery charger, the LED indicator changes from green to red, indicating the battery is being charged. D. If the LED indicator is not on when the power is connected, it indicates that the battery charger is defective. The user should turn AC power off. -
Page 18: Inserting And Removing The Sd Card
Before inserting or removing the SD card, make sure that the power of the camera is off. You may also expand the memory capacity up to 512MB so that you can store additional images and video clips. -
Page 19: Formatting The Sd Card
“Auto PoFF” in the Setup Menu (Basic) for further details. After the power is turned on, it may take several seconds to charge the flash. While the flash is being charged, the viewfinder LED lights orange, and then the camera is not yet ready for photography. -
Page 20: Choosing The Language
English Formatting is an irreversible action and data cannot be recovered at a later time. An SD card having any problem cannot be properly formatted. Choosing the Language When you first turn the camera on, choose a language for displayed information on the LCD monitor. -
Page 21: Setting Image Resolution And Quality
These settings affect the number of images that can be stored in memory, or on a memory card. As you get to know the camera, it is recommended that you try each quality and resolution setting to get an appreciation for the effects that these settings will have on your images. -
Page 22: Photographs Mode
10:46 21:28 43:13 (Standard) * The data shows the standard testing results. The actual capacity varies according to the shooting conditions and settings. NOTE The memory card testing results for 512MB are based on Toshiba, Panasonic and Sandisk SD card. - Page 23 Voice memo is starting to record at still image capture mode just after the photograph is taken in case of activating this function. It provides 30 seconds for recording and only can be done once. To terminate recording, press the shutter button down fully.
-
Page 24: Using The Optical Zoom
OSD display OFF LCD monitor OFF NOTE The image in the LCD monitor darkens in strong sunlight or bright light. This is not a malfunction. Using the LCD monitor for an extended period of time will decrease the number of images you can take. -
Page 25: Using The Digital Zoom
Using a combination of 3 times optical zoom and 4.4 times digital zoom permits zoom photography of up to 13.2 times to suit the subject and the distance. The digital zoom is a compelling feature, the more an image is enlarged (zoomed), and the more pixilated (grainer) the image will appear. - Page 26 The zoom setting is automatically cancelled by either turning the camera off or the activation of the Auto Power Off function. Using the Flash Set the flash for taking photographs. The flash firing mode can be set to suit for the photographic conditions. Set the mode dial to one of the photography modes.
-
Page 27: Setting The Focus
] and [ P ], the flash will fire to suit the brightness of the subject. When the camera mode is [ Tv ], [ Av ] and [ M ], the flash will always fire. In this mode, the flash always fires. Use this mode for... - Page 28 For the modes of [ ], [ P ], [ Tv ], [ Av ], [ M ], [ ] and [ [ Black ] Auto focus...
-
Page 29: Self-Timer/Photographing At Intervals
English NOTE When [ ], [ 3M ] or [ 1M ] is set, the camera takes photographs with the focus fixed at those distances. Self-timer/Photographing at Intervals This setting allows photographs to be taken with the self-timer and allows interval photography. - Page 30 The number of photographs that can be taken will differ depending on the capacity of the memory, the image settings, and other factors.
- Page 31 Exposure can be set in 0.3 EV units. 1. Set the mode dial to one of [ P ], [ Tv ] or [ Av ] and press button.
-
Page 32: Mode
If you set a fast shutter speed, you can take photographs of moving subjects that look as if they are still. If you set a slow shutter speed, you can take photographs that give the impression that the subject is in motion. - Page 33 English photographs can be taken. 3. Compose the picture, press the shutter button down halfway, and then press it down fully. NOTE Setting the shutter speed slower than 0.5 second will result in long exposure photography and the [ ] will be displayed on the screen.
-
Page 34: Manual Photography Mode
When the camera mode is set to the [ ] or [ ], [ ] cannot be selected. 2. Compose the picture, press the shutter button down halfway, and then press it down fully. The table below will help you choose the appropriate scene mode: Scene Mode Description Selects this when you want to take a photograph that makes the person stand out and blurs the background. -
Page 35: Movie Mode
When recording video clips, flash photography is not possible. While the image is being recorded into the SD card, do not open the battery/SD card cover, nor remove the battery or SD card. Doing so might damage the SD card or destroy the data of the SD card. -
Page 36: Playback Mode
English [ ] PLAYBACK MODE Playing Back Still Images You can play back the still images on an LCD monitor. Insert the SD card into the camera and turn on the power before starting. 1. Set the mode dial to [ The last image appears on the screen. -
Page 37: Playing Back Video Clips
A press of the button opposite to the direction in which the image was rotated will return the image to the normal display. -
Page 38: Playing Back Still Images/Video Clips On
You can also playback your images on a TV screen. Before connecting to any devices, make sure to select NTSC / PAL system to match the video output system of the video equipment you are going to connect to the camera, then turn all connected devices off. It is also recommended to use the AC power adapter while transferring the recorded images and video files. -
Page 39: Recording Voice Memos
Voice memo is available in the still single image capture mode. Thumbnail Display This function allows you to view 9 thumbnail images on the LCD monitor at the same time, which can quickly search for the image that you want. -
Page 40: Zoom Playback
], [ ] icon will be displayed in a thumbnail display. Zoom Playback Images that are being play back can be enlarged and displayed in 2 levels of 2 times and 4 times enlargement. This mode also allows you to enlarge your image on the selected portion of the image to check for small details. -
Page 41: Slideshow Display
English Slideshow Display The slideshow function enables you to playback your still images automatically in order one image at a time. 1. Set the mode dial to [ 2. Press the MENU button. The playback menu is displayed. 3. Select [Slide Show] with the buttons, and press the SET button. - Page 42 NOTE Formatting the SD card undoes the protection, and erases all images. Even when multiple folders exist in the SD card, the images of all of the folders can be selected with the buttons or the search dial.
-
Page 43: Dpof Settings
You can select the images to be printed and how many prints to make with the DPOF menu in the camera and insert the memory card to the card compatible printer. When the printer starts printing, it will read the embedded information on the memory card and print the specified images. -
Page 44: Erasing Images
English NOTE The date that is printed on the photo is the date set on the camera. To print the correct date on the photo, set the date on the camera before you photograph the image. Refer to section in this manual titled “Setting the Date and Time” for further details. -
Page 45: Menu Options
To not erase, select [Cancel], and press the SET button. NOTE Even if you take photographs after erasing an image, the file number is assigned the next number of the very last one before the image was erased. Erasing selected images. - Page 46 1600x 1200 pixel (2M) 640 x 480: 640 x 480 pixel (VGA) [Video clip] 320 x 240 : 320 x 240 pixel Quality This sets the quality (compression rate) at which the photograph is taken. Fine: Low compression rate Standard: Normal Economy:...
-
Page 47: Photography Menu (Function)
English NOTE This setting cannot be set in the [ ] mode. Contrast This sets the difference between the bright and dark portions of the image that will be photographed. Hard: Increases the contrast. Normal: Set the contrast automatically. Soft: Decreases the contrast. - Page 48 This sets whether or not to use digital zoom at the time of photography. Enable digital zoom. OFF: Disable digital zoom. Preview This sets whether or not to display the photographed image on the screen immediately after the picture is taken. Displayed when images are being recorded on the SD card. -48-...
-
Page 49: Photography Menu (Ae/Awb)
Photographing at Intervals” for further details. NOTE The number of photographs that can be taken will differ depending on the capacity of the memory, the image settings, and other factors. During the interval between one photograph and another, the viewfinder LED flashes red and the camera power is automatically turned off. - Page 50 Equivalent to ISO100. 200: High-sensitive photography equivalent to ISO200. Auto: Automatic setting in the range of ISO 50 to 200 (Selection is permitted only when set to the [ P ] mode.) Manual WB This manually sets the white balance and stores it. Use of this is convenient when the white...
-
Page 51: Playback Menu
Refer to section in this manual titled “Slideshow Display” for further details. DPOF Set the number of prints and date display in DPOF format to images that you want to print. (This function is available for still images only.) You can print images easily just by inserting the SD card to a DPOF-compatible printer or a print shop. -
Page 52: Setup Menu (Basic)
4. To exit from the set-up menu, change the mode dial setting. Card Info. This allows a check of the free capacity of the SD card as well as other information. Fr. No. Reset This creates a new folder. The photographed images are recorded to the newly created folder from number 0001. -
Page 53: Setup Menu (Custom)
3 Min.: When the camera has not been operated, it turns the power off after 3 minutes. NOTE This function does not operate during a slideshow or in the [ PC ] mode and during PC connection. Setup Menu (Custom) 1. -
Page 54: Transferring Recorded
You can share recorded images/video clips with your family or friends via e-mail or post them on the Web. Before doing this, you need to connect the camera to your computer by using the USB cable and then transfer the images/video clips. -
Page 55: Step 2: Connecting The Camera To Your
3. After the USB driver installation is complete, restart your computer. Installing the USB driver on Macintosh computers Mac OS 8.6 users must install a USB driver. For Mac OS 9.0 or higher, the computer will automatically recognize the camera and load its own USB drivers. -
Page 56: Presto! Mr. Photo
Step 3: Downloading images/video clips When the camera is turned on and connected to your computer, it is considered as a disk drive, just like a floppy disk or CD. You can download (transfer) images/video clips by copying them from the “removable disk”... -
Page 57: Installing Presto! Image Folio
Follow on-screen instructions to complete the installation. NOTE For help on using Mr. Photo usage, refer to the Mr. Photo on-line help for more information. For Windows 2000/XP users, be sure to install and use the Mr. Photo in “Administrator”... -
Page 58: Connecting The Camera To Other Devices
External memory: Bundled 32MB SD card (up to 512MB) Compression format JPEG compliant Image file format DCF 1.1, EXIF 2.2, AVI, TIFF Lens f=7.2 mm - 21.6 mm (equivalent to 35 mm - 105 mm on a 35 mm camera) -58-... - Page 59 Manual/Portrait /Sports / Night scene Exposure compensation -2EV - +2EV (in 0.3EV increments) White balance Auto / Incandescent / Fluorescent 1 / Fluorescent 2 / Daylight / Cloudy / Manual Flash Auto/ Red-eye reduction / Suppressed Flash / Forced flash Flash effective range 0.6 m –3.0 m (Wide / ISO=200)
Need help?
Do you have a question about the P633 and is the answer not in the manual?
Questions and answers