Table of Contents
Advertisement
Quick Links
Download this manual
See also:
Service Manual
FCC STATEMENT
This device complies with Part 15 of the FCC Rules. Operation is subject to the following two
conditions:
1. This device may not cause harmful interference, and
2. This device must accept any interference received, including interference that may cause
undesired operation
Note:
This equipment has been tested and found to comply with the limits for Class B digital devices,
pursuant to Part 15 of the FCC rules. These limits are designed to provide reasonable protection
against harmful interference in a residential installation. This equipment generates uses and can
radiate radio frequency energy and, if not installed and used in accordance with the instructions,
may cause harmful interference to radio communications. However, there is no guarantee that
interference will not occur in a particular installation. If this equipment does cause harmful
interference to radio or television reception, which can be determined by turning the equipment
off and on, the user is encouraged to try to correct the interference by one or more of the
following measures:
Reorient or relocate the receiving antenna.
Increase the separation between the equipment and receiver.
Connect the equipment into an outlet on a circuit different from that to which
connected.
Consult the dealer or an experienced radio/TV technician for help.
Use of shielded cable is required to comply with Class B limits in Subpart B of Part 15 of the FCC
rules.
Do not make any changes or modifications to the equipment unless otherwise specified in the
manual. If such changes or modifications should be made, you could be required to stop
operation of the equipment.
READ THIS FIRST
Notice:
Product design and specifications are subject to change without notice. This includes
1.
primary product specifications, software, software drivers, and user's manual. This User
Manual is a general reference guide for the product.
The product and accessories that come with your camera may be different from those
2.
-1-
English
the
receiver is
Advertisement
Table of Contents

Related Manuals for Genius P510


Summary of Contents for Genius P510
-
Page 1: Fcc Statement
Consult the dealer or an experienced radio/TV technician for help. Use of shielded cable is required to comply with Class B limits in Subpart B of Part 15 of the FCC rules. Do not make any changes or modifications to the equipment unless otherwise specified in the manual. - Page 2 Then contact your dealer or a local authorized service facility. Do not continue to use the camera as this may cause a fire or an electrical shock. Do not place the camera in any unstable locations such as on a wobbly table or sloping surface where the camera may fall or tip over and cause injury.
- Page 3 This may cause a fire or an electrical shock. Do not cover or wrap the camera or the AC power adapter with a cloth or quilt. This may cause heat to build up and distort the case and cause a fire. Always use the camera and its accessories in well-ventilated locations.
-
Page 4: Table Of Contents
PHOTOVISTA Quality USING THE CAMERA AS A PC CAMERA 30-32 RECORD MODE 15-18 Step 1: Installing the PC Camera Driver Taking Images Step 2: Connecting the Camera to Your Portrait Mode Computer Normal Mode Step 3: Running Your Application Digital Zoom... - Page 5 English ERASE COPY TO CARD DPOF Setup Menu LCD BRIGHTNESS DATE/TIME LANGUAGE SOUND FORMAT MEDIA VIDEO MODE AUTO POWER OFF LIGHT FREQUENCY FACTORY SETUP CONNECTING THE CAMERA TO OTHER DEVICES CAMERA SPECIFICATIONS...
-
Page 6: Introduction
Images you have taken can be downloaded to your computer using the USB cable (USB driver required for Win 98 and Mac OS 8.6) You can enhance and retouch your images on your computer by using the provided editing software, or image editing software you may already own. -
Page 7: Getting To Know Your Camera
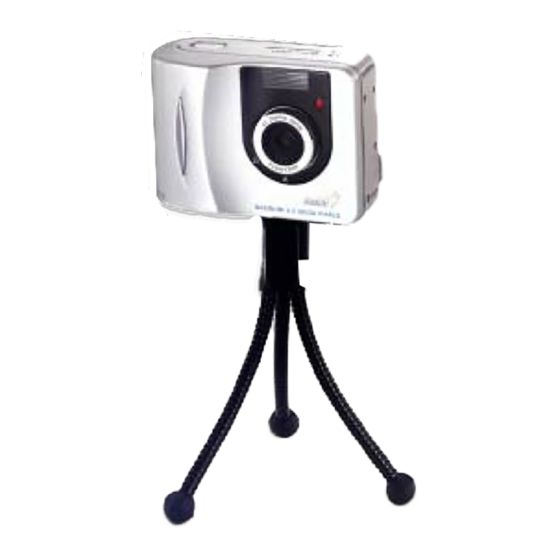
English GETTING TO KNOW YOUR CAMERA... - Page 8 Hand strap eyelet Tripod socket VIDEO OUT jack USB connector Self-timer LED LED indicator LCD monitor Arrow button (up) Quality/Resolution button Display button Arrow button (left) Self-timer button OK button ZOOM Digital zoom button Arrow button (right) Flash button Arrow button (down)
-
Page 9: Lcd Monitor Icons
English LCD Monitor Icons Display icons - Still Image Record Mode: Record mode Battery level Full battery power Medium battery power Low battery power Virtually no battery power Flash mode Auto flash Red-eye reduction Digital zoom Memory card indicator Flash off... - Page 10 Display icons - Still-Image Playback Mode: 1. Playback mode 2. Battery level 3. Frame number 4. Memory card indicator Display icons - Video (movie) Playback Mode: 1. Playback mode 2. Battery level 3. Frame number 4. Recorded movie time 5. The first frame of the movie 6.
-
Page 11: Getting Started
(+ or -). 4. Close the battery/SD card cover firmly. NOTE If you will not be using the batteries for an extended period of time, remove them from the camera to prevent leakage or corrosion. Never use manganese batteries. -
Page 12: Inserting An Sd Memory Card
English Inserting an SD memory card (optional accessory) The camera comes with 16MB of internal memory, allowing you to store images and video clips in the camera. However, you can expand the memory capacity by using the SD (Secure Digital) memory card so that you can store additional images and video clips. -
Page 13: Setting The Date And Time
These settings affect the number of images that can be stored in internal memory, or on an SD memory card. As you get to know the camera, it is recommended that you try each quality and resolution setting to get an appreciation for the effects that these settings will have on your images. - Page 14 The table below shows the approximate number of shots that you can take at each setting based on 16MB internal memory or using an optional memory card from 8MB to 512MB SD.
-
Page 15: Record Mode
The LCD monitor does not work well under direct sunlight and bright light. Portrait Mode Taking pictures by selecting the portrait mode will produce an image with a sharp subject and indistinct background. The effective range of focus is between 0.7 meters and 1.4 meters. -
Page 16: Normal Mode
The flash mode is disabled in the portrait mode. Normal Mode The normal mode, suitable for scenery shooting, is used when the distance to the subject is greater than 1.4 meters. 1. Power on the camera. Make sure the camera is in Record mode. -
Page 17: Self-Timer
The self-timer duration is ten seconds. Activate the self-timer by pressing the shutter button. The self-timer LED blinks slowly for seven seconds and then blinks rapidly for the last three seconds. This allows you to get into the scene when taking group images. - Page 18 3. Compose the image and press the shutter button. NOTE If you will not be using the flash, turn it off. Turning the flash OFF will result in faster camera startup and faster operation because the capacitor will not be charged needlessly. Turning the flash OFF when not needed, will also improve battery life.
-
Page 19: Playback Mode
If there are no images stored in memory, the "NO IMAGE" message will appear on the LCD monitor. You can also view your images on the TV screen. First connect one end of the video cable to the VIDEO OUT jack of the camera. Then connect the other end to the video input jack of the TV. -
Page 20: Displaying Thumbnail Images
4X-enlarged status, press the ZOOM button again. Displaying Thumbnail Images This function allows you to view nine thumbnail images on the LCD monitor simultaneously so that you can quickly scan for a particular image. 1. Power on the camera, and toggle the button to the mode. -
Page 21: Slide Show Display
You can adjust the slideshow display interval from 1 to 9 seconds ([1 SEC], [3 SEC], [5 SEC], [7 SEC], [9 SEC]). Deleting Images You can delete an image or video clip or all images and video clips at once by using the Erase function in the Playback menu. To delete one image or video clip: 1. -
Page 22: Setting The Dpof
NOTE To delete images or videos stored in internal memory, do not insert a memory card into the camera. Otherwise, you will delete the images or video clips stored on the memory card. Setting the DPOF DPOF is a standard for recording printing information directly on the SD memory cards and other... -
Page 23: Movie Mode
English media. Files saved in the DPOF format can be printed using compatible printers or through a laboratory printing device. 1. Press the button and move to DPOF by using the button and press the OK button. 2. You can select the desired DPOF sub-menu by using button, and press the OK button to confirm the setting. -
Page 24: Viewing Video Clips
NOTE The zoom function cannot be activated during movie playback. To play the video clip back on your computer, you may use either Windows Media Player or Apple "QuickTime Player". QuickTime basic player is available free of charge, compatible with both Mac- and Windows... -
Page 25: Transferring Recorded
English computers and can be download from the Apple web site at www.apple.com. For help using QuickTime Player usage, please refer to the QuickTime on-line help for more information. TRANSFERRING RECORDED IMAGES TO YOUR COMPUTER To transfer images/video clips from the camera to your computer, follow these steps: Step 1: Installing the USB driver (Windows 98 and Mac OS 8.6 users only) - Page 26 The USB driver on the CD-ROM is exclusively for Windows 98 computers. Installing the USB driver on computers running Windows 2000/ME/XP is not necessary. 1. Insert the CD-ROM that came with the camera into your CD-ROM drive. The welcome screen appears.
-
Page 27: Computer
Step 3: Downloading Images/Video clips When the camera is turned on and connected to your computer, it is considered as a disk drive, just like a floppy disk or CD. You can download (transfer) images/video clips by copying them from the “removable disk”... -
Page 28: Installing Photosuite
English drag and drop image files from the camera to a desired location. Macintosh- Open the “untitled” disk window and the hard disk or the destination location. Drag and drop from the camera disk to the desired destination. NOTE Memory card users may prefer to use a memory card reader (highly recommended). -
Page 29: Installing Photovista
For information on how to use PhotoVista to create spectacular 360 panoramic images, please refer to its online help. For Windows 2000/XP users, make sure to install and use the PhotoVista while logged in as a user with an Administrator account. PhotoVista is not supported on the Mac. -
Page 30: Using The Camera Asa Pc Camera
The PC-camera driver included on the CD-ROM is exclusively for Windows. The PC camera function is not supported for Mac platforms. 1. Insert the CD-ROM that came with the camera into your CD-ROM drive. The welcome screen appears. 2. Click "USB DRIVER". Follow the on-screen instructions to complete the installation. After the driver installation is completed, restart your computer. -
Page 31: Step 3: Running Your Application
English The USB driver that bundled inside the CD-ROM is designed in a form 2 in 1 (USB & PC camera driver). a) On Windows 98, the Windows OS will install both USB & PC camera drivers. b) On Windows 2000/ME/XP, it will only install PC camera driver. -
Page 32: Menu Options
Scroll through the menu options by using button. SETUP MENU Press the OK button to access the Setup Menu. For more information about Setup Menu, refer to the Setup menu section. QUICK VIEW You can view each captured image on the LCD monitor immediately after capture by enabling Quick View. -
Page 33: White Balance
(temperature) most appropriate for your scene. To set the white balance, press the OK button. Then select the appropriate white balance by using the button, and press the OK button. -
Page 34: Movie Menu
Use the playback menu to create an on-camera slide show or transfer images from internal memory to a memory card. You can also use the Playback menu to delete one or all images. To access the playback menu, press the... -
Page 35: Setup Menu
COPY TO CARD This feature allows you to copy your images from the camera's internal memory to a memory card. Of course, you can only do this if you have a memory card installed and some images in internal memory. - Page 36 After removing the batteries from the camera, the date and time may return to the default settings. If this happens, reset the date and time when using the camera. Refer to section in this manual titled "Setting the Date and Time" for further details.
-
Page 37: Video Mode
AUTO POWER OFF If there is no camera activity (no buttons are pressed) for a defined period of time while the camera is powered on, the camera will eventually turn itself off to conserve power. You can change the power saving interval by pressing the button to select the desired interval time. - Page 38 English FACTORY SETUP If you wish to restore all camera settings to their original status, select [SETUP] by using the button and then press the OK button. The FACTORY SETUP menu appears on the screen. Select [YES] by using the button and then press the OK button.
-
Page 39: Camera Specifications
Power 2 x AA Alkaline (1.5V) batteries, 2 x AA Ni-MH (1.5V) batteries, Dimensions 83.5 x 60 x 31.5 mm (W x H x D) (exclusive of protruding features) Weight Approx. 110g(without batteries and the SD memory card) *Design and specifications are subject to change without notice.
Need help?
Do you have a question about the P510 and is the answer not in the manual?
Questions and answers