Table of Contents
Advertisement
Quick Links
Advertisement
Table of Contents

Related Manuals for Prolux PLC6k


Summary of Contents for Prolux PLC6k
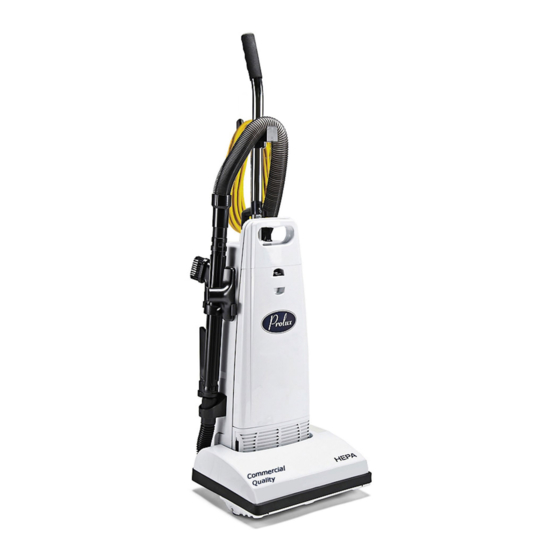
- Page 2 Warranty Information Congratulations on the purchase of your Prolux PLC6K/PLC8K Vacuum! This manual covers the Prolux PLC6K and PLC8K models. The Prolux PLC6K and PLC8K models are high-end vacuums that are attractive, powerful and designed to last for many years to come.
-
Page 3: Important Safety Instructions
This model number and serial number of your vacuum cleaner is located on the underside of the unit. Please record these numbers in the spaces provided below and keep this booklet as a permanent record of your purchase. Model Number: Serial Number: Date Purchased: IMPORTANT SAFETY INSTRUCTIONS... - Page 4 Do not touch the agitating brush when in use. Prolux vacuum cleaner dust bags are disposable and are intended to only be used once. Do not attempt to reuse them. DO NOT USE ON PEOPLE OR ANIMALS.
- Page 5 Make sure that the appliance is connected to an outlet having the same configuration as the plug. No adapter should be used with this appliance. WARNING NOTE: As a safety feature and to reduce risk of damage, injury or electric shock, this vacuum cleaner is equipped with a polarized alternating current line plug (one blade wider than the other).
-
Page 6: Feature Comparison Chart
FEATURE COMPARISON CHART Feature/Model Input Power Full Head Cord (amps) Control Indicator Light Length PLC6K 12.0 1-Speed 25 feet... - Page 7 FEATURE COMPARISON CHART Feature/Model Input Power Full Head Cord (amps) Control Indicator Light Length (LED) PLC8K 12.0 1-Speed 30 feet...
- Page 8 How To Use Friction Fit Cleaning Tools: Model PLC6K...
- Page 9 EASY ASSEMBLY INSTRUCTION Step One: Attaching the Handle 1. Remove handle screw. 2. Insert handle into top of dust cover with handle switch facing forward (Model PLC8K) 3. Align small hole on handle with screw hole in dust cover. Insert screw and tighten securely (All models).
-
Page 10: Replacing The Dustbag
Replacing the Dust Bag: *Remember: Always have a dust bag installed when operating your vacuum cleaner. Replace with a genuine dust bag when full. 1. Push down on knob at top of dust cover to open compartment. 2. Pull cardboard bag collar off holder. Remove and discard used dust bag. 3. - Page 11 Checking the Post Filter: The auxiliary post filter captures fine dust particles and purifies air exiting your vacuum cleaner. Change or clean the post filter with every third dust bag replacement, or as needed. 1. Depress handle release pedal to drop vacuum cleaner to low position. 2.
-
Page 12: Handle Adjustments
Special Features Make Your Vacuum a Peak Performer! ON/OFF Switch: Model PLC6K Vacuum Cleaners have a simple toggle switch on the dust compartment. Push down --- to start. Push down O to stop. Model PLC8K is equipped with a convenient handle slide switch to turn power ON and OFF. - Page 13 On-board Cleaning Tools: Model PLC8K Model PLC8K is equipped with state-of-the- art on-board cleaning tools including: • 2-piece telescoping wand • Extension wand • Crevice tool • Dusting brush • Upholstery tool To use: 1. Remove 2-piece telescoping wand from wand retainer. 2.
- Page 14 Connecting the Optional Hose Assembly: Simply lift the lid of the cleaning attachment opening located at the back of your vacuum cleaner and insert the hose end until it fits snugly. Connecting the Tools: Connect any of the cleaning tools to the extension wand or curved wand and twist for secure fit.
-
Page 15: Suction Control
Suction Control: To reduce suction when cleaning draperies, small rugs, etc., move the suction control slide on the back of the vacuum cleaner by increasing the opening until desired suction power is achieved. Close for normal vacuum operation. Note: Model PLC8K full-bag indicator light will not operate while suction control is in open position. - Page 16 Step Two: Changing the Headlight Bulb Model PLC6K 1. Use any standard bayonet base appliance bulb rated 120-130 V, 15 W. 2. Remove the two frame screws. 3. Carefully lift out the entire headlight assembly. 4. Remove bulb by pushing in lightly and turning counterclockwise.
-
Page 17: Replacing The Drive Belt
Replacing the Drive Belt: 1. Unplug the power cord. 2. Turn the unit over and remove the bottom plate as previously described under “Replacing Headlight Bulb Step One” on previous page. 3. Lift the rear belt cover up and back. 4. - Page 18 Changing the Agitator Brushes: Replace agitator brushes when they are worn or when the bristles do not touch a card held across the base plate. Replace all four brushes at the same time to maintain maximum cleaning performance. Remove agitator, start as described on previous page, Section 1 to 4. 1.
-
Page 19: For Best Performance
For Best Performance: 1. Keep machine and all accessories clean and in proper operating condition. 2. Change dust bags and filters as recommended to maintain optimum cleaning efficiency. 3. Always use genuine dust bags and filters. Use of other products may result in unsatisfactory cleaning or filtration performance. -
Page 20: Cleaning The Nozzle
Turn the unit over, evoke bottom plate. Check nozzle inlet tube for obstructions. When clear, reinstall bottom plate. See instruction on previous page, “Replacing the Drive Belt.” Any other servicing should be performed by an authorized Prolux Vacuum Cleaner Dealer. - Page 21 If a component fails to meet the term of the warranty due to defects in workmanship or materials, Prolux Cleaners will repair or replace the defective component free of charge, including labor according to our flat rate schedule and the Prolux Cleaners Warranty Procedures.
- Page 22 Product Category Polyethylene Steel Switches, Motors and Structural Body Electrical Parts Labor Foam Parts Paid Machine Years Years Years Years 3yr Switches 3yr or 700hrs Battery Walk Behind (whichever comes Scrubbers 14” and first) on the motor 18” 3yr Electrical Parts 12mo Pro Rated Lithium Ion Battery 1yr Switches...
- Page 23 2yr Switches 2yr or 500hrs Wet Dry Vacuums (whichever comes first) on the motor 2yr Electrical Parts 1yr Switches 2yr or 700hrs Carpet Extractors (whichever comes and Fabric Care first) on the motor 2yr Electrical Parts 2yr Switches Central Vacuums 2yr or 800hrs (whichever comes first) on the motor...
- Page 24 6. Ozone Generators: Warranty does not ozone cover plates or filters. Warranty shall commence six (6) months from the purchase date by the Prolux Cleaners distributor, or on the purchase date by the original end user. Whichever comes first. Labor Rate Prolux Cleaners will allow $50.00 per hour for warranty labor work.
- Page 25 If any operation is not covered in this flat rate schedule, Prolux Cleaners will determine a labor rate when a claim is made based on actual repair times by our own service technicians.
- Page 26 1. Contact the Prolux Cleaners warranty department with the machine information (Serial number, Date of Purchase etc.) 2. If the battery is deemed to be within the warranty period, Prolux Cleaners will arrange a date to inspect and replace (upon inspection approval) the battery with the OEM.
- Page 27 Freight damage is not covered under the Prolux Cleaners warranty policy. Replacement Parts: Prolux Cleaners will not honor any warranty claims for parts, labor, or travel if the replacement part was not purchased through Prolux Cleaners. Prolux cleaners reserves the right to review or modify the above document at any time without specific written or prior notice.
Need help?
Do you have a question about the PLC6k and is the answer not in the manual?
Questions and answers